Showing posts with label Easy. Show all posts

Kharbuja Panaka | Muskmelon Sherbat


Kharbuja Panaka is a muskmelon based beverage that is traditionally served during the festival of Ram Navami in South India.

In a hurry? Jump to Recipe

muskmelon sherbar

Night Fury completes one year on Sunday, well, at least as per the Hindu calendar. Yay!!

Sunday, the 14th is Ram Navami. And Night Fury isn’t our dragon, although Raj almost drives it as if it is, instead it is our car. When we bought it, we thought hard on what we should name it. Did you know there are websites out there that suggest names for your car based on color, type etc. They weren’t much help though. But after one hard look at the front grille of the car, and we both thought it looked like “Toothless” smiling. If you are totally lost right now, then all my references to night fury, toothless and dragons is from the movie “How to train your dragon”. It is a very good animated movie, and you should watch it.

So now there are 2 reasons to celebrate the day, one of course cause it is Ram Navami, a festival, and second it is also birthday number 1.

Ram Navami has always been a festival that invokes mixed feelings in me. As children, my mom took/dragged us to her family temple near Mangalore as Ram Navami is celebrated with a lot of grandeur there. While the festivities were nice and grand, what killed me there was the heat. April to me marks the beginning of Summer and Summer and the tropics don’t really work well together. While the tropics are always warm, Summer can literally roast you. And with Mangalore being on the coast, the humidity is very high too. So I was always sweating buckets and rushing to hydrate myself.

The good thing was that any Ram Navami celebration always has cooling drinks being served. You are bound to find either Panaka or Majjige (buttermilk) being served to keep everyone hydrated. Last year I posted the recipe for a simple Panaka. Today I'm sharing another version - Kharbuja Panaka or Muskmelon Sherbat. To make the Kharbuja Panaka, muskmelon or cantaloupe is juiced and cardamom, lime juice, pepper and jaggery are added for flavor. Chill it and serve it along with some diced muskmelon.

If you are in the mood, you can also make this Bele Holige, that is traditionally made for all festivals in South India.

Happy Ram Navami!!


muskmelon sherbar


If you made this recipe, let me know! Leave a comment here or on Facebook tag your tweet with @oneteaspoonlife on Twitter and don't forget to tag your photo #oneteaspoonoflife on Instagram. You can also email me at onetspoflife@gmail.com I'd love to see what you are upto.

If you like this recipe, do not forget to share it with your friends and family! 


You can follow One Teaspoon Of Life on FacebookTwitterInstagramPinterest and Google+ or you can subscribe to One Teaspoon Of Life and receive all the latest updated via Email


--------------------------------------------------------------------------------------------------------------------------

Kharbuja Panaka | Muskmelon Sherbat


muskmelon sherbarKharbuja Panaka is a muskmelon based beverage that is traditionally served during the festival of Ram Navami in South India.

Recipe Type:  Beverage
Cuisine:            South Indian
Prep Time:     10 minutes
Cook time:     0 minutes
Total time:     10 minutes
Yield:                Serves 2

Ingredients:


2 cups chopped Muskmelon
0.5 Lime
2 Green Cardamom
0.25 tsp Pepper, freshly crushed
2 cups Water
Jaggery to taste
Muskmelon pieces for garnish
Ice cubes as required

Method:


1. Blend the chopped muskmelon along with lime juice, 0.5 cup water, pepper and jaggery until smooth.
2. Start by adding 2-3 tsp of jaggery and increase as per the desired sweetness.
3. Peel the cardamom and crush the seeds into a fine powder.
4. Add the cardamom, remaining water and ice cubes to the blender and give it a quick whizz.
5. Serve it chilled. Top with muskmelon pieces before serving.


If you liked this, you may also like:

Traditional South Indian summer cooler
Panaka

Pudina Majjige Soda
Indian mocktail made with guava and spices
Guava Panna


Read more ...

Dalma Recipe | How to make Dalma | Oriya Dalma Recipe [Video]


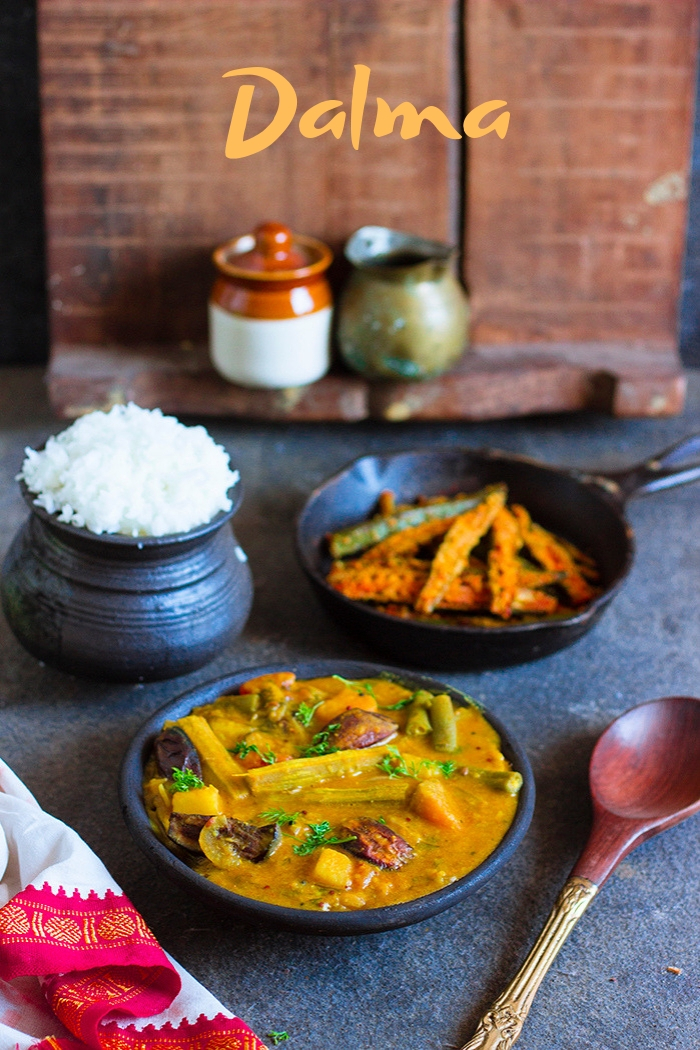
Dalma is a popular mix vegetable dal based curry from the region of Odisha in India. A variety of vegetables are simmered along with dal to give a delicious curry that is usually served with steamed white rice.

In a hurry? Jump to Video or Jump to Recipe

Oriya dalma with mix vegetables


Caution, this is not a Summer Recipe. But I still love it and can eat it anytime. 

The curiosity all started with a restaurant in Bangalore named Dalma. I would cross it and wonder what the name means. I had no clue it actually referred to this very popular classic Odia or Oriya dish. And then we met, me and Dalma, the curry, not the restaurant. The restaurant is still a mystery, never stepped in there.

Dalma was introduced to me by my neighbor who had an Oriya cook. He was fond of cooking his traditional cuisine once in a while and I loved it the first time I ate it. Unfortunately, I never took the recipe from him, but my neighbor who watched over him at times, gave this recipe to me. I have read online that there are different recipes of Dalma, some use coconut, some use onions, some use neither. I believe each region has adapted the dish to what is available locally. The coastal belt uses coconut while the interior regions do not. 

The Odia folks love Dalma so much that it is also served as a part of Chappan Bhog in Puri's Jagannath Temple.


Oriya dalma with mix vegetables

Oriya dalma with mix vegetables

Dalma is a very simple mix vegetable curry that is also very healthy. The dal is full of veggies and barely has any oil. The only oil used is that in tempering. Dalma is a hearty and wholesome curry that is usually served with Rice or Roti. If you plan to serve it with roti, add less water to keep the curry thick. Each variation of the recipe may use different vegetables, use what you can get your hands on. Vegetables that need time to cook are added in the beginning and once they are partially cooked, the faster cooking vegetables are added. The Oriya cook used to cook the dal in the same pan and while the dal was still cooking, he added in the veggies. I just sped up the process by using already cooked dal. Some folks may also use Chana Dal instead of Toor Dal or a mix of both. 

Wishing you a warm and comforting weekend with Dalma!

Oriya dalma with mix vegetables


If you made this recipe, let me know! Leave a comment here or on Facebook tag your tweet with @oneteaspoonlife on Twitter and don't forget to tag your photo @oneteaspoonoflife on Instagram. You can also email me at onetspoflife@gmail.com I'd love to see what you are upto.

If you like this recipe, do not forget to share it with your friends and family! 


You can follow One Teaspoon Of Life on FacebookTwitterInstagramPinterest and or you can subscribe to One Teaspoon Of Life and receive all the latest updated via Email


Video Recipe


--------------------------------------------------------------------------------------------------------------------------

Dalma Recipe | How to make Dalma | Oriya Dalma Recipe


Oriya dalma with mix vegetablesDalma is a popular mix vegetable dal based curry from the region of Odisha in India. A variety of vegetables are simmered along with dal to give a delicious curry that is usually served with steamed white rice.

Recipe Type:  Curry
Cuisine:            Indian
Prep Time:     15 minutes
Cook time:     45 minutes
Total time:     60 minutes
Yield:                Serves 3-4

Ingredients:


3 cups cooked Toor Dal (Pigeon Pea Lentils)
1 Drumstick, peeled and chopped
1 Raw Banana, peeled and diced
1 big Potato, peeled and diced
10-12 Beans, diced
0.5 cup diced Pumpkin
2 Brinjals, diced
1 Tomato, roughly chopped
1 Onion, sliced
2 Tbsp Mustard Oil
1 Tbsp Panch Phoran (whole spice mix)
1 Bayleaf
1 tsp Turmeric Powder
1 tsp Red Chilli Powder
1 tsp Cumin Powder
1 Tbsp chopped Coriander Leaves
Salt to taste
2-3 cups Water
Salt to taste

Method:


1. Add cooked toor dal (lentils) to a deep pan or kadhai. Add water as required and 1 tsp turmeric powder. Mix well.
2. Add in the drumsticks, raw banana, pumpkin, potato and beans.
3. Add salt to taste. Cover and cook until the vegetables are half cooked.
4. Add in the brinjal and cover and cook until the vegetables are almost cooked.
5. Add in the chopped tomato and cook until all the vegetables are cooked.
6. Adjust seasoning if required. Remove from heat and keep aside.
7. To make the tempering, heat mustard oil in a pan and add the panch phoran spice mix.
8. Once the spices splutter, add in the bay leaf and sliced onions.
9. Fry until the onions are translucent.
10. Add in red chilli powder and the cumin powder and saute for 1 minute.
11. Add the Dalma to the tempering and simmer for 5-6 minutes.
12. Add water if required.
13. Garnish with the chopped coriander leaves.
14. Serve hot with rice or roti.

If you liked this, you may also like:

How to make vegan Panchmel Dal or mixed lentil soup at www.oneteaspoonoflife.com
Pancharangi Dal

Black Chickpea Curry
Ghugni Masala
How to make gujarati undhiyo recipe at One Teaspoon Of Life. How to make vegan mix vegetable curry recipe at www.oneteaspoonoflife.com
Undhiyu


Read more ...

Dahi Sandwich Recipe | Yogurt Sandwich Recipe [Video]


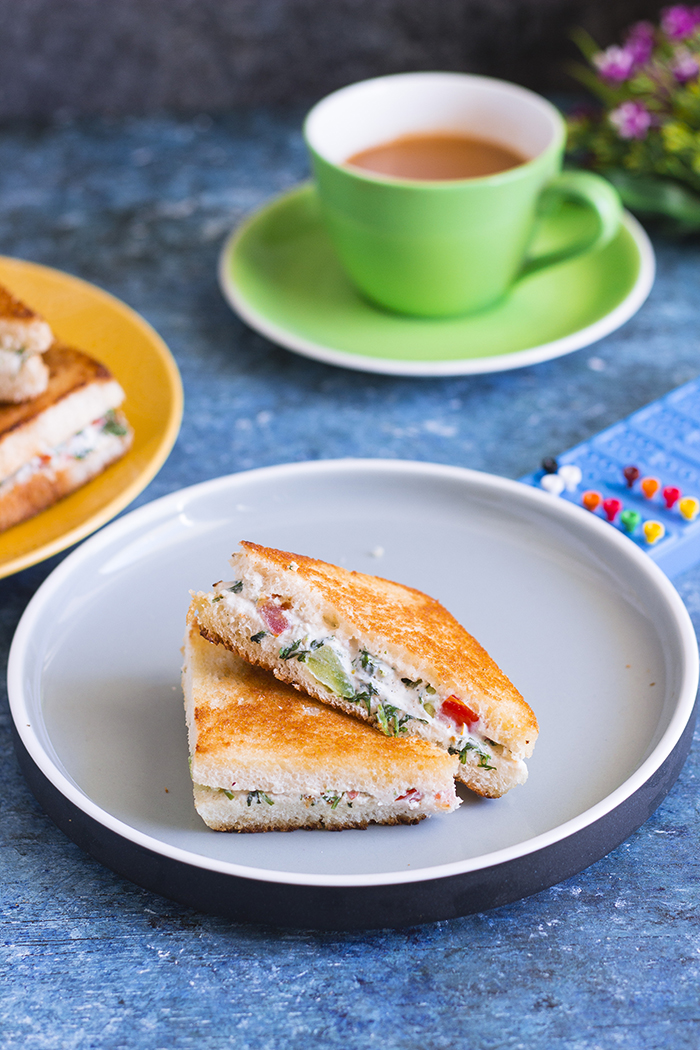
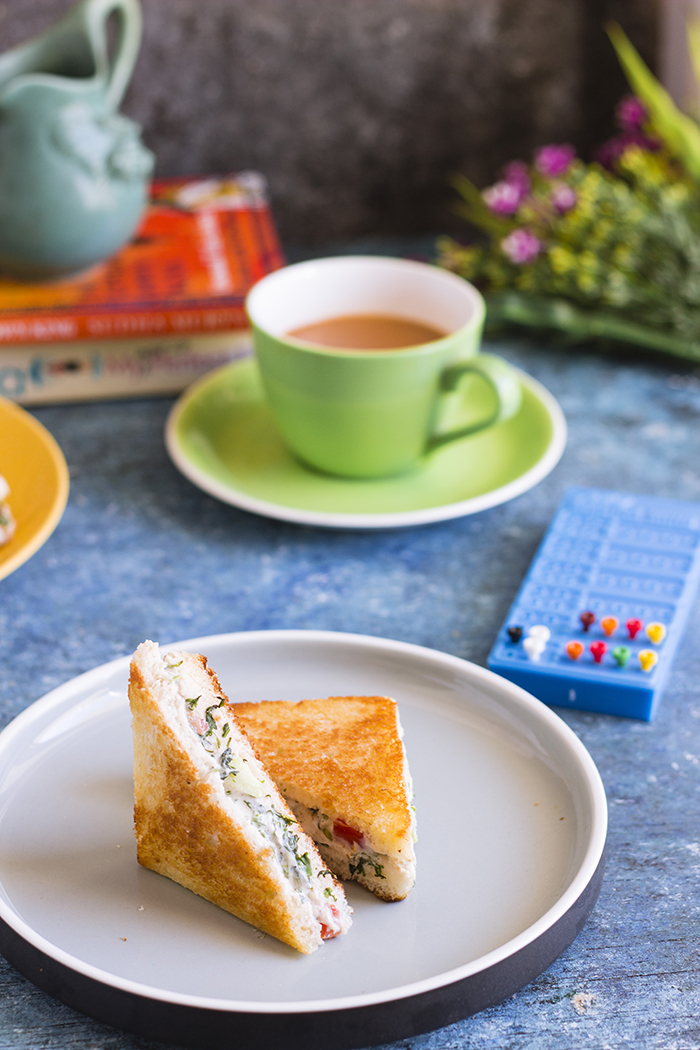
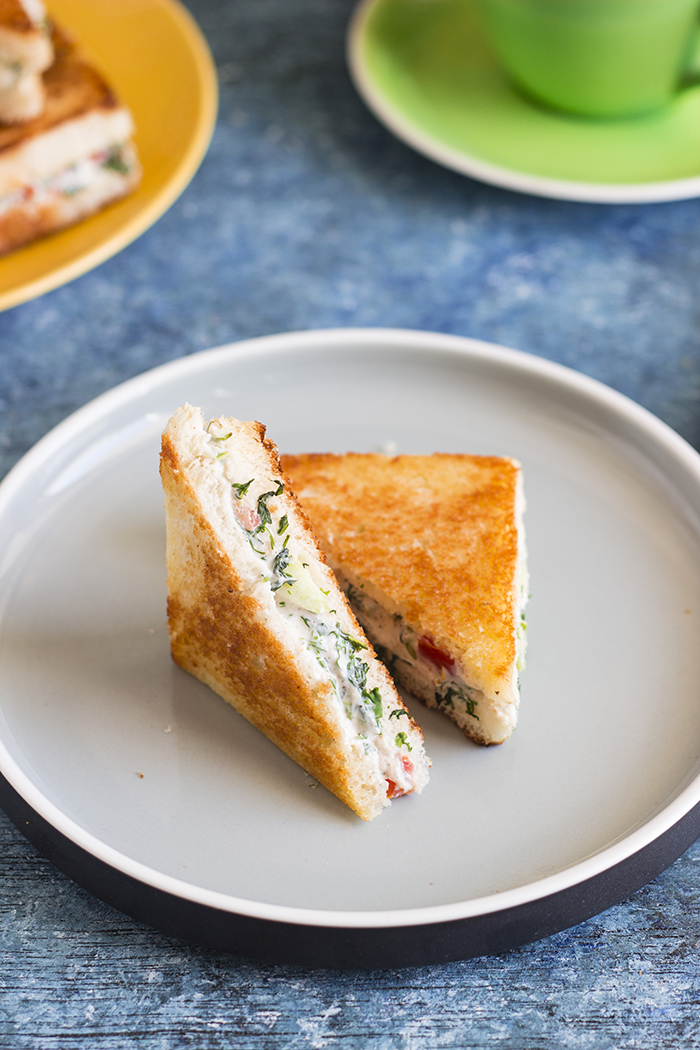
Dahi Sandwich or Yogurt Sandwich. An easy and healthy vegetarian sandwich that is made by stuffing bread with a delicious mix of hung curd (yogurt), finely chopped vegetables, and spices and toasting it off in a frying pan until golden and crispy. Perfect for breakfast or snacks.

In a hurry? Jump to Video or Jump to Recipe

dahi sandwich yogurt sandwich hung curd sandwich

Hola! to all you fun people out there. Weekend's near and I'm already in my lazy mood. And this sandwich is perfect for the mood. Today, I bring to you a fun and Summery sandwich - The Dahi Sandwich or the Yogurt Sandwich.

Say what you may, Summer is here, at least in Bangalore. And might I say I'm not loving it. It's gotten a tad too hot for my liking. I've been sending messages up in the sky for some rain and I hope I get a reply. Until then, all I can do is enjoy some Summery food in the shade with the fan on full speed.

So, Dahi Sandwich, when I first heard of it, I was so excited. I love Dahi (yogurt). It is the only thing that prevents me from becoming a vegan. Vegan yogurt is just not for me. If you love creamy sandwiches wrapped in crispy golden bread, then this one is the ONE for you.

dahi sandwich yogurt sandwich hung curd sandwich

Dahi Sandwich is super easy to make once you have the "hung curd". I will interchangeably use the words dahi, curd and yogurt, because they all are the same. And when I say yogurt, it is always the plain one and not flavored ones. Back to the "hung curd", hung curd is just curd from which the liquid has been drained out. There are several ways you can make hung curd. The traditional method is wrapping the curd in a muslin or thin cotton cloth and tying the cloth and then hanging it somewhere (preferably over the sink) and letting the liquid drain out. I choose the easy method, which is using a huge tea strainer. I add the curd to the strainer and keep it over a deep bowl in the fridge overnight. Come morning and all you curd is strained and you have the thick creamy solids. More about this in notes.

Once you have mastered making the hung curd, you can also try to make these delicious "Dahi Kebabs" that are perfect for dinner parties where you want to show your culinary skills. I only use homemade Dahi or Yogurt, you can learn how to make your own yogurt, here. It is super easy and the results are so much better than packaged yogurt.

After you have the hung curd, add in finely chopped vegetables, very little spice and then spread it on the bread and then toast the sandwich on a pan until crisp and golden. I kept the spices light, because I wanted the sandwich to be cooling. I added Chaat Masala, you can just add Garam Masala or any spice mix you like, or just stick to plain pepper. 

These Dahi Sandwiches are kid friendly and adult friendly (very). Also, between us, these are somewhat healthy, if you overlook the white bread and the butter. But I think on weekends, we can always cheat a little. So b-bye for now.

Happy Weekend folks, see you next week.

dahi sandwich yogurt sandwich hung curd sandwich


If you made this recipe, let me know! Leave a comment here or on Facebook tag your tweet with @oneteaspoonlife on Twitter and don't forget to tag your photo #oneteaspoonoflife on Instagram. You can also email me at onetspoflife@gmail.com I'd love to see what you are upto.


If you like this recipe, do not forget to share it with your friends and family! 


You can follow One Teaspoon Of Life on FacebookTwitterInstagramPinterest and Google+ or you can subscribe to One Teaspoon Of Life and receive all the latest updated via Email


Video Recipe


--------------------------------------------------------------------------------------------------------------------------

Dahi Sandwich Recipe


dahi sandwich yogurt sandwich hung curd sandwichInstant Mix Vegetable Uttappa is a quick savory South Indian pancake that is made from semolina and topped with finely chopped vegetables. It is popularly served as breakfast along with some fresh coconut chutney.

Recipe Type:  Snacks, Breakfast
Cuisine:            Indian
Prep Time:     10 minutes
Cook time:     15 minutes
Total time:     25 minutes
Yield:                5

Ingredients:


10 Bread Slices
0.75 cup hung Curd
2 Tbsp Tomato, finely chopped
2 Tbsp Capsicum, finely chopped
1 Green Chilli, finely chopped
2 Tbsp Coriander leaves, finely chopped
1 tsp Chaat Masala
Salt to taste
Butter as required

Method:


1. Mix together the hung curd (see Notes), tomato, capsicum, coriander leaves, green chilli, chaat masala and salt until combined.
2. Spread the curd mixture on a slice of bread and place another bread on top to make a sandwich.
3. Slice off the edges of the sandwich.
4. Grease a pan with butter and place the sandwich on the pan.
5. Cook on low to medium heat until the sandwich turns golden brown on one side.
6. Flip the sandwich and cook until the second side browns.
7. Cut diagonally and serve.

Notes:

1. Hung curd is made by straining thick dahi or curd or yogurt in a muslin cloth for a 4-5 hours. The same quantity of yogurt may give different people different quantities of hung curd as it depends on how much liquid the yogurt contains. Different brands may give different results too. Hence, for the sake of uniformity, this recipe uses the quantity of hung curd instead of quantity of curd or yogurt.

2. To make hung curd, take a muslin cloth and tie yogurt in it. Then suspend the cloth from a tap or rod for a few hours. Alternately, you can also use a fine strainer and leave the yogurt in it in the fridge overnight.


If you liked this, you may also like:

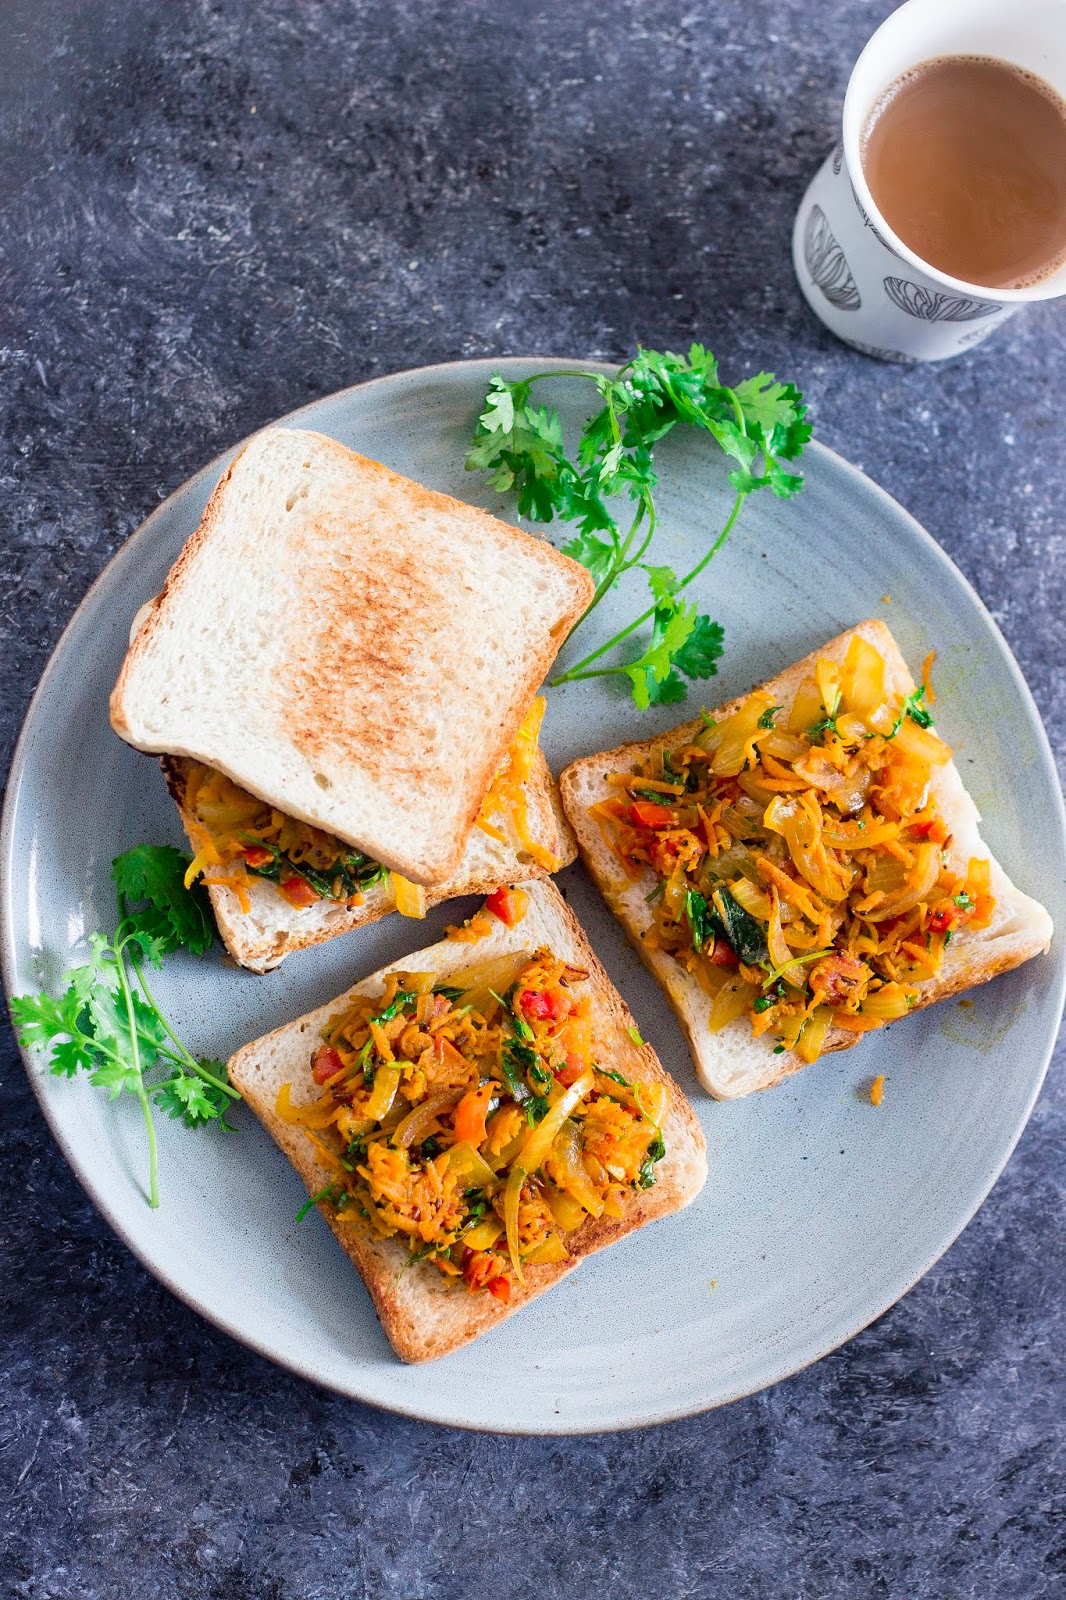
Bangalore Iyengar Bakery Style bread toast topped with an onion-carrot masala
Masala Bread Toast

Bombay sandwich, Bombay masala toast, Mumbai sandwich, Spiced potato sandwich
Mumbai Masala Toast
Masala Pav, Indian street food
Misal Pav


Read more ...

Masala Pav Recipe | How to make Masala Pav [Video]


Masala Pav is a popular street food in which Pav bread is sauteed along with a spicy masala made of tomatoes, potatoes and capsicum. This recipe can be made vegan by skipping adding butter or using vegan butter instead.

In a hurry? Jump to Video or Jump to Recipe

Masala Pav, Indian street food

So... I had this whole post ready to be published last night, and I forgot! Oops.

Yeah, I can be such a dumbo sometimes. I have no clue how I forgot something this basic. Anyhow, now I'm here and so excited to share one of my favorite recipes.

Masala Pav is another one of those popular street foods. Frankly, I'm yet to come around to a street food that isn't popular. I love that it has so much flavor and it is usually so colorful. And it is our local fast food. Over the years, I have posted so many of my favorites like Pani Puri, Masala Puri, Chana Chaat, Tomato Puri, Pav BhajiTava Pulao and just as of last week, I posted the recipe for Mumbai Masala Toast. I've also posted my version of a few dishes like this Sweet Potato Chaat and the Dahi Bread Chaat.

What is your favorite street food? And what do you like about it?

Masala Pav, Indian street food


So, lets get back to today's recipe - Masala Pav. If you are from Mumbai, you may be wondering why my Masala Pav looks like this. I'll clarify. This is the version you get in Bangalore, and it is the only one I've ever eaten and loved. So don't leave just yet, try this one and you may just love it as much as I do.

Masala Pav, first requires you to make a masala that is made from onions, tomatoes, capsicum (bell pepper) and potatoes. You can skip the potatoes if you want, but nothing could ever make me skip them. Allow all the veggies to cook down and mash them coarsely. The masala is spiced with a Pav Bhaji Masala Powder. Once the masala is cooked, shredded or diced pav is added and mixed well. Top with finely chopped onions, coriander leaves and Sev before serving.

If you don't have Pav bread easily available, you can make this with any loaf bread you have or with buns. I have added butter towards the end, you can also use only butter instead of oil. To keep this recipe vegan, just skip adding the butter.

Masala Pav makes for a good evening snack. Especially, when the evenings are cold and rainy. So what are you waiting for? Go ahead, enjoy!

Happy Weekend folks!

Masala Pav, Indian street food


If you made this recipe, let me know! Leave a comment here or on Facebook tag your tweet with @oneteaspoonlife on Twitter and don't forget to tag your photo #oneteaspoonoflife on Instagram. You can also email me at onetspoflife@gmail.com I'd love to see what you are upto.


If you like this recipe, do not forget to share it with your friends and family! 


You can follow One Teaspoon Of Life on FacebookTwitterInstagramPinterest or you can subscribe to One Teaspoon Of Life and receive all the latest updated via Email


Video Recipe


--------------------------------------------------------------------------------------------------------------------------

Masala Pav Recipe


Masala Pav, Indian street foodMasala Pav is a popular street food in India. Pav bread is sauteed along with a spicy masala made from onion, tomatoes, potatoes and capsicum. This recipe can be made vegan by replacing the butter with vegan butter or not adding butter at all. 

Recipe Type:  Snacks
Cuisine:            Indian
Prep Time:     10 minutes
Cook time:     20 minutes
Total time:     30 minutes
Yield:                Serves 4

Ingredients:


6 Pav
2 medium sized Onions, finely chopped
3 medium sized Tomatoes, finely chopped
2 medium sized Potatoes, boiled and peeled
1 green Capsicum, finely chopped
2 Tbsp Oil
1 tsp Ginger Garlic Paste
2 Tbsp Pav Bhaji Masala
1 tsp Red Chilli Powder (Optional)
Salt to taste
0.5 cup Water
2 Tbsp Butter (Optional)

To Assemble:


0.5 cup Sev
Finely chopped Onion
Finely chopped Coriander Leaves

Method:


1. Heat oil in a pan and add ginger garlic paste. Saute until fragrant.
2. Add in the finely chopped onions and saute until translucent.
3. Add the finely chopped tomatoes.
4. Add salt to taste and the pav bhaji masala. If you plan to add the red chilli powder, add it now. Mix well and cook until the tomatoes are soft.
5. Add chopped capsicum and boiled potatoes.
6. Mash the capsicum and potatoes until roughly combined with the tomato masala.
7. Add water and allow to cook on low heat for 5-6 minutes.
8. Dice the pav into bite sized pieces and add to the pan. Mix well until combined.
9. Add salt if required.
10. Add in the butter if using it. Skip this step to make the masala pav vegan.
11. To serve, top the masala pav with finely chopped onions, coriander leaves and sev.


If you liked this, you may also like:
Bangalore Iyengar Bakery Style bread toast topped with an onion-carrot masala
Masala Bread Toast

Bombay sandwich, Bombay masala toast, Mumbai sandwich, Spiced potato sandwich
Mumbai Masala Toast
Spicy Maharashtrian Misal Pav
Misal Pav


Read more ...

Mumbai Masala Toast Recipe | Bombay Sandwich Recipe [Video]


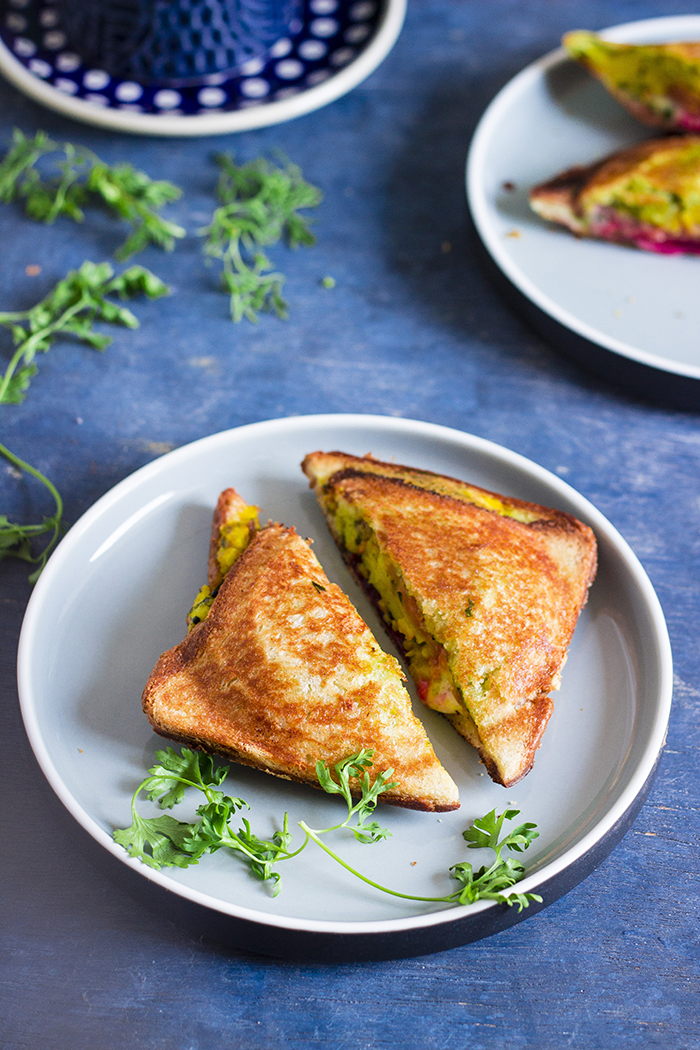
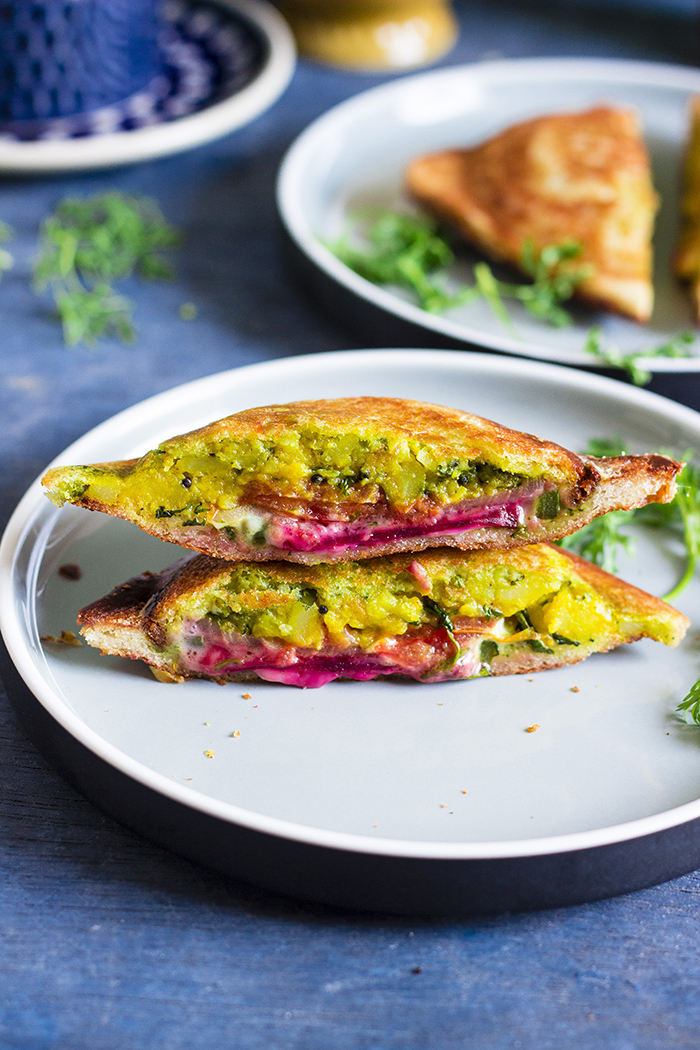
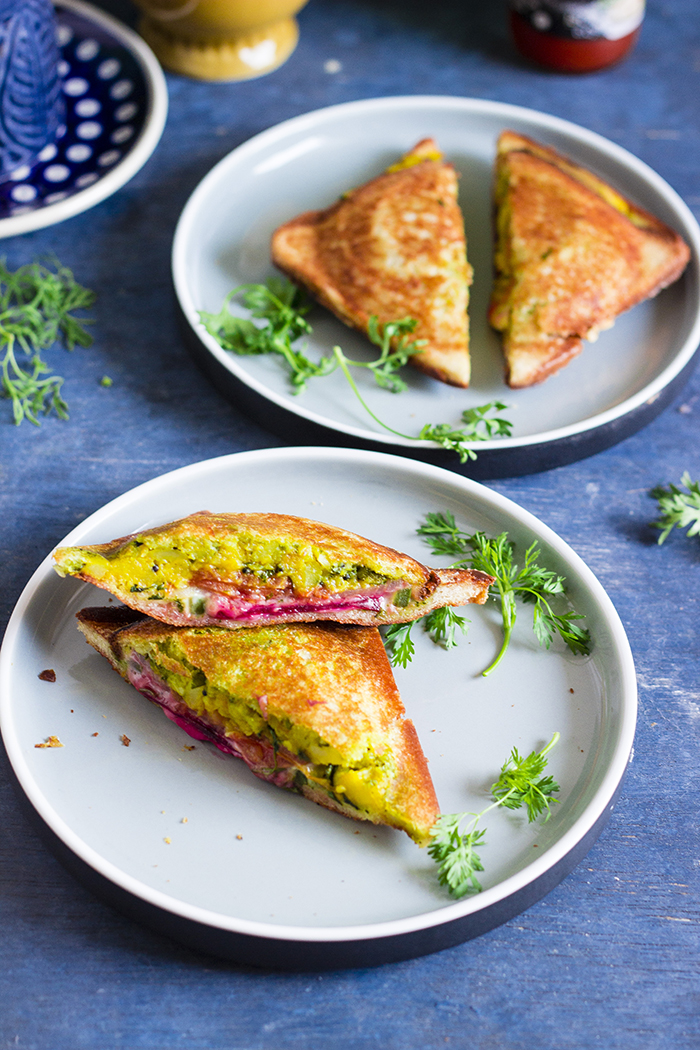
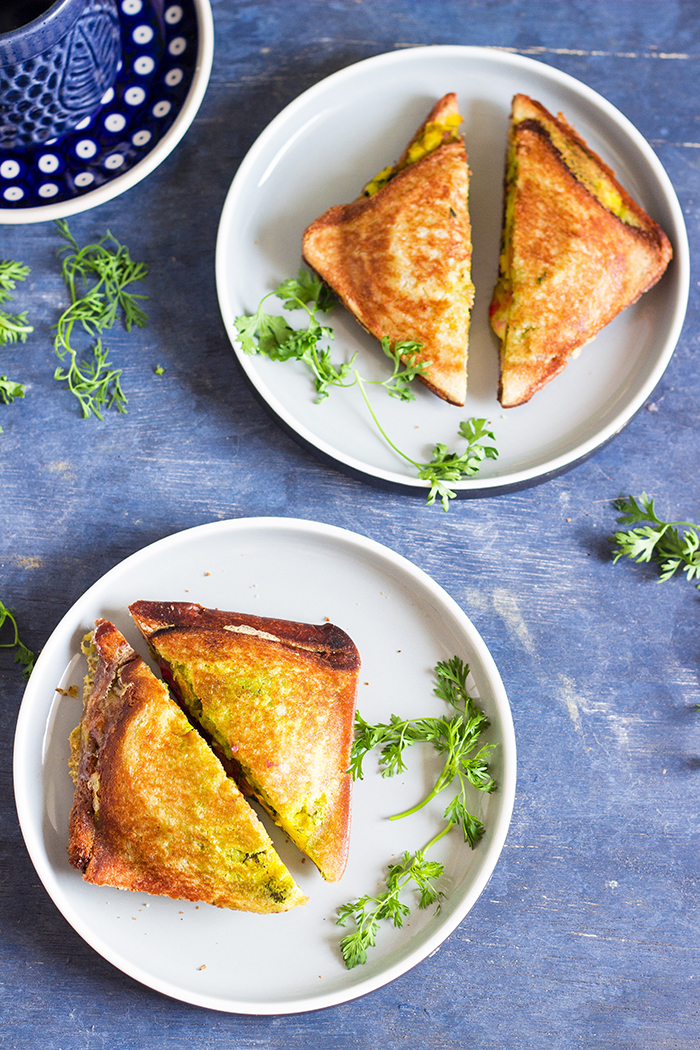
Mumbai Masla Toast or Bombay Sandwich is a popular street side sandwich from Mumbai (Bombay). The sandwich is a stove top toasted sandwich that is stuffed with spiced potato mash, sliced vegetables and grated cheese. 

In a hurry? Jump to Video or Jump to Recipe


Bombay sandwich, Bombay masala toast, Mumbai sandwich, Spiced potato sandwich

Bombay sandwich, Bombay masala toast, Mumbai sandwich, Spiced potato sandwich

7 Years!!! I can't believe that's how long I have been meeting you guys at this very space!!

On 9th February 2012, I posted by very first recipe Sweet Potato Chips, and started this journey. I was such an amateur in this space of blogging. I was horrible at taking photos, I owned a point and shoot and clicked all my photos under tube lights at home. I didn't know how to edit them or even the right angle to take photos. While I won't claim I am an expert today, I think I have grown leaps and bounds since then in my photography. I was an absolute zero in social media promotion. This is still something, I feel I'm poor at, but I hope to improve this year. Likewise, there is so much I believe I have overcome and improved, and it was you guys who made it all possible.

I love you guys for encouraging me to keep doing this, the comments and feedbacks, that I received have just kept me going. A very big Thank You!!

I struggled for a while on deciding which recipe should mark this momentous occasion. Gee suggested this one as this is one of her favorites and I liked the idea. It ticked all the check boxes - Easy (check), Delicious (check), Indulgent (check), Snacks (check), Kid friendly (check), Family favorite (check). What more could I ask for?

Bombay sandwich, Bombay masala toast, Mumbai sandwich, Spiced potato sandwich


So, today, apart from all the applause and thanks, I bring to you a very delicious street food dish - Mumbai Masala Toast, from the streets of, ehmmm..... Mumbai!! The coastal city of Mumbai (formerly Bombay) is home to some of the best street food. Vada Pav, Masala Pav, Pani Puri, Tava Pulao and so much more. And this Masala Toast or Bombay Sandwich is one of those many more street favorites. It is actually such a simple dish, but once you eat it you totally understand why thousands of people love it.

There are several variations of the dish, I am sharing one that I have eaten.

Mumbai Masala Toast is a vegetarian sandwich that is stuffed with so many flavorful things and then toasted. To build the perfect Mumbai Masala Toast, you will need:

  • Butter. Butter is your friend, your very best friend, while making this sandwich, The street food cooks, do not shy away from it, and neither should you. So be generous, street food was never meant to be healthy. 
  • After butter, embrace those potatoes. The spiced mash can be as simple as I have shared or full of spicy masalas like some folks make. Feel free to adjust the taste to your liking. 
  • Then come in all the veggies - now that's the healthy part. Tomatoes, Onions, Beets and Capsicum. Add in cucumber if you are in the mood.
  • Green chutney is added for more flavor. 
  • Then add cheese, the more cheese, the better. 
  • Once the tall sandwich is ready, it is toasted in a unique type of toaster. If you don't have that toaster, you can either grill the sandwich in a sandwich maker or you can toast it in a pan.

Serve these sandwiches while still hot, along with some piping hot adrak wali chai or ginger tea.

Happy Weekend to all you lovelies.

Bombay sandwich, Bombay masala toast, Mumbai sandwich, Spiced potato sandwich


If you made this recipe, let me know! Leave a comment here or on Facebook tag your tweet with @oneteaspoonlife on Twitter and don't forget to tag your photo #oneteaspoonoflife on Instagram. You can also email me at onetspoflife@gmail.com I'd love to see what you are upto.


If you like this recipe, do not forget to share it with your friends and family! 


You can follow One Teaspoon Of Life on FacebookTwitterInstagramPinterest and Google+ or you can subscribe to One Teaspoon Of Life and receive all the latest updated via Email


Video Recipe


--------------------------------------------------------------------------------------------------------------------------

Mumbai Masala Toast Recipe


Bombay sandwich, Bombay masala toast, Mumbai sandwich, Spiced potato sandwichMumbai Masala Toast or Bombay Sandwich is a popular street side sandwich from Mumbai (Bombay). The sandwich is a stove top toasted sandwich that is stuffed with spiced potato mash, sliced vegetables and grated cheese.

Recipe Type:  Snacks, Breakfast
Cuisine:            Indian
Prep Time:     10 minutes
Cook time:     15 minutes
Total time:     25 minutes
Yield:                6

Ingredients:


12 Bread slices
1.5 cups mashed boiled Potatoes
5-6 Curry leaves, finely chopped
1 Green Chilli, finely chopped
1 tsp Mustard Seeds
2 Tbsp Oil
1 tsp Turmeric Powder
2 Tbsp chopped Coriander leaves
1 tsp Chat Masala (optional)
Salt to taste
Sliced Tomatoes
Sliced Onions
Sliced Capsicum
Sliced Beetroot
0.5 cup Green Chutney
1 cup grated Cheese
Butter as required

Method:


1. Heat oil in a pan and add in the mustard seeds.
2. Once the mustard seeds splutter, add in the chopped curry leaves and green chilli.
3. Add the turmeric powder and the mashed potatoes and mix well.
4. Add salt to taste.
5. Add chat masala now, if adding. Mix well.
6. Remove from heat and add in chopped coriander leaves and keep aside.
7. Apply butter on 2 slices of bread and then spread 1 tsp of green chutney on each of them.
8. Add the spiced potato mash on one slice of bread, over the chutney.
9. Place sliced tomato, onion, capsicum and beetroot over the potato mash.
10. Add in grated cheese and place the other bread slice with the chutney side down.
11. Grease the stove top toast maker with butter. If using a pan, grease the pan.
12. Apply butter on the outside of the sandwich and place in toaster or on pan.
13. Toast until both sides are golden brown and crisp.
14. Remove from heat and cut the sandwich into half with a sharp knife.
15. Serve hot with chutney or ketchup.


If you liked this, you may also like:
Bangalore Iyengar Bakery Style bread toast topped with an onion-carrot masala
Masala Bread Toast

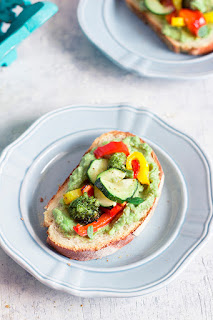
vegan grilled summer vegetable open sandwich
Grilled Vegetable Sandwich
Mediterranean Veg Sandwich


Read more ...

Jeera Rice Recipe | How to make Jeera Rice [Video]


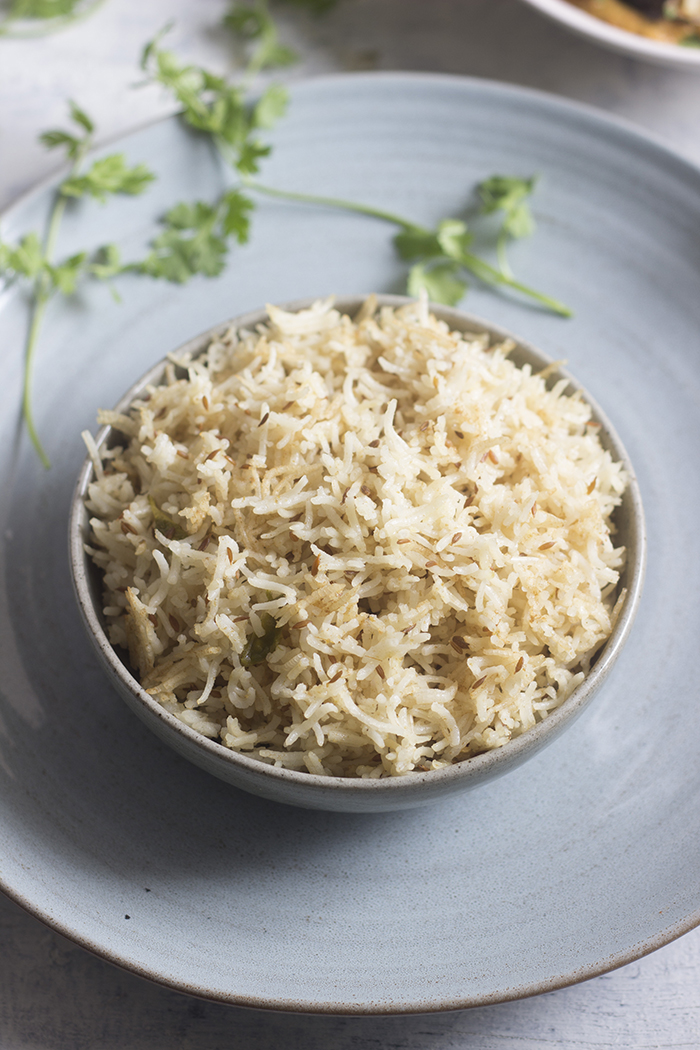
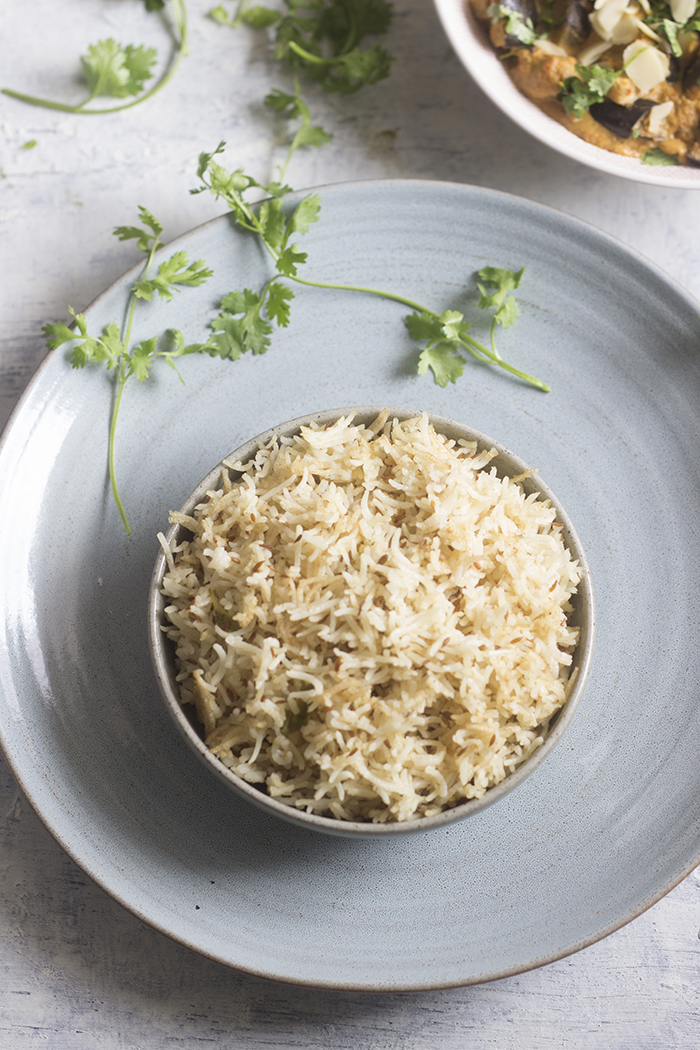
Jeera Rice or Cumin Rice is a simple flavorful rice main made by cooking Basmati rice with whole and ground cumin seeds. Jeera Rice is earthy, fragrant, healthy and delicious. It also fits into various diets - vegan, gluten-free and plant based with no or minimal alterations.


In a hurry? Jump to Video or Jump to Recipe

Jeera rice, cumin rice

I always considered December as the slowest month of the year at work. With everyone in the world looking forward to the holidays and doing their last minute holiday shopping, baking boozy cakes, and making travel plans. This year hasn't turned out to be that - Slow. Come December, and I've been busier than usual at work, and it may have something to do with the holidays. May be everyone wants to complete what they started before going off to enjoy some quality time with family. And that means we are all working twice as hard and scrambling to get stuff done at office. All in all, extremely exhausting and stressful. Add in all those pending treats from friends and dinners with family. It's led to me barely cooking on weekdays.

And when I am stressed out or busy, all I look forward to is comfort food. And my idea of comfort food is simple Indian food, especially, Rice. I hate to say this, but I think I secretly like rice. I spent a better part of my life, telling people how much I hate rice and how much I love wheat. If it was a battle of the cereals, my teenage self would have fought front and center of the wheat army. But now a days, I realize that although I eat wheat more regularly than rice, I tend to lean towards rice when I need comfort. And with such chaos at work, I've never needed more comfort. And this Jeera Rice is that and more. It is flavorful comfort food that is easy on your body and time.

Jeera rice, cumin rice

This Jeera Rice is not hot nor heavy on the spices, but it is definitely not flavor less. It has loads of that earthy cumin flavor. Plus it has the fragrance of Basmati Rice. You can get all chefy on this recipe and add all sorts of whole spices, but I kept it simple. Of all the spices out there, Cumin has to be my favorite. I add cumin to my tadka all the time.

You can make Jeera Rice two ways, one by tempering leftover rice with cumin seeds and the other by cooking raw rice along with cumin seeds. This recipe is the latter. I made this Jeera Rice in a pressure cooker, you can also make it in a pan or in a rice cooker. Jeera rice is Vegan, gluten free and healthy. It can also fit into a plant based diet, by totally eliminating the oil in the recipe.

Jeera Rice is almost always accompanied by a flavorful Dal. There are several recipes of Dal on One Teaspoon Of Life that will go wonderfully with this Jeera Rice.

Jeera rice, cumin rice

If you made this recipe, let me know! Leave a comment here or on Facebook tag your tweet with @oneteaspoonlife on Twitter and don't forget to tag your photo #oneteaspoonoflife on Instagram. You can also email me at onetspoflife@gmail.com I'd love to see what you are upto.


If you like this recipe, do not forget to share it with your friends and family! 


You can follow One Teaspoon Of Life on FacebookTwitterInstagramPinterest and Google+ or you can subscribe to One Teaspoon Of Life and receive all the latest updated via Email


Video Recipe


--------------------------------------------------------------------------------------------------------------------------

Jeera Rice Recipe


Jeera rice, cumin riceJeera Rice is a vegan and gluten free rice main dish made by cooking basmati rice along with cumin seeds.

Recipe Type:  Main
Cuisine:            Indian
Prep Time:     30 minutes
Cook time:     20 minutes
Total time:     50 minutes
Yield:                Serves 2-3

Ingredients:


1 cup uncooked Basmati Rice
1.5 cups Water
1 tsp Cumin Seeds
1 tsp Cumin Powder
1 Green Chilli, chopped
3 tsp Oil
Salt to taste

Method:


1. Wash the basmati rice 5-6 times until the water runs clean. Drain and keep aside for 30 minutes.
2. Heat oil in a pressure cooker and add cumin seeds.
3. Once they brown slightly, add in the chopped green chilli.
4. Add the basmati rice and mix until the oil coats the rice grains.
5. Add in the water and cumin powder.
6. Add salt to taste.
7. Cover and pressure cook for 2-3 whistles or 5-8 minutes after the pressure builds up.
8. Serve hot with dal.


If you liked this, you may also like:
Indian rice pilaf made with corn, spinach and whole spices
Corn Spinach Pulao

How to make ghee rice recipe at One Teaspoon Of Life www.oneteaspoonoflife.com
Ghee Rice
pudina pulao, mint rice, mint pulao
Mint Rice


Read more ...

Broccoli and Zucchini Fritters Recipe | Broccoli Cutlets Recipe [Video]


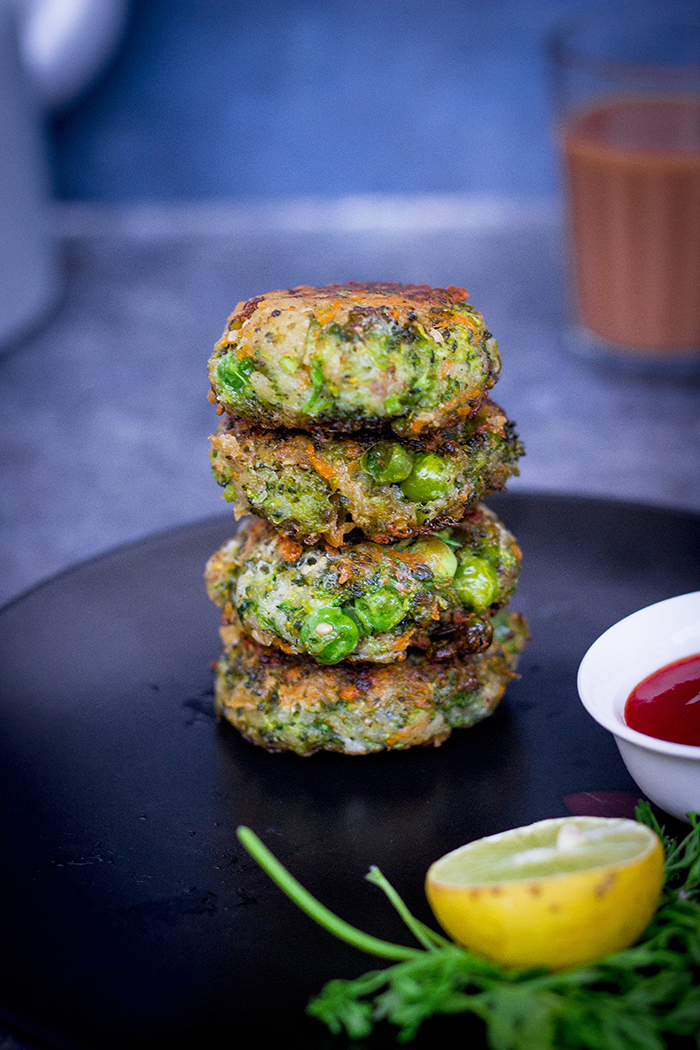
Broccoli Zucchini Fritters or Tikkis are cutlets made from finely chopped broccoli, grated zucchini, carrots and peas along with some cheese and spices. The fritters are shallow fried in this video. Broccoli Zucchini Fritters are a fun way to eat the healthy vegetables. This recipe is kid-friendly and the perfect dish to sneak in vegetables to your children.

In a hurry? Jump to Video or Jump to Recipe

Shallow fried fritters made from broccoli and zucchini stacked together


It's a Fabulous Friday and I'm back with a snack recipe. I realized you can never have enough of those.

These fritters are so DELICIOUS, you won't even know they are made from such healthy ingredients. It has so many vegetables, it is almost a salad! So these fritters are made with one of my favorite veggies - Broccoli. I've been in love with the vegetable since I first tasted it. The taste, the texture, the color, I cannot get enough of it and I find it hard to accept that there are folks out there hating this awesome vegetable. 

You have to try these Broccoli and Zucchini Fritters if you are a Broccoli lover like me, and you have to especially try it if you hate Broccoli. This recipe will CONVERT you! Trust me when I say, you won't even realize that you ate it with all the delicious medley of flavors in there. 

So these cutlets or fritters are not just about the Broccoli, as I mentioned, it is practically a salad, just shaped beautifully and shallow fried, but a salad nevertheless. It has the added goodness of carrots, now all of us love carrots, right? Now tell me you definitely love Zucchini. I totally do. Carrots, eh, not so much, but Zucchini, I can do so much with. Zucchinis are so versatile, use them in Zoodles, use them as a Lasagna sheet, or you can use them in a frittata like I did. Then I just added in some frozen green peas, because I just wasn't satisfied with all the other healthy ingredients... ok, jokes apart, the peas add a slight sweetness and texture that I really really like.

Some points...

  • To make these fritters, the veggies are microwaved before mixing in the other ingredients. This helps in reducing the batter getting moist at a later time. You can also lightly saute the veggies or just steam them slightly before using. 
  • Soaked and crumbled bread is added to help bind the veggies together. You can use bread crumbs instead. 
  • I used Pizza Cheese, which is a mix of mozzarella and cheddar cheese. Use any cheese you have. I recommend something that melts easily.
  • Deep fry or bake if you desire, I found shallow frying gives it the texture I desired without using too much of oil.
These cutlets are kid friendly and a perfect way to sneak in vegetables to your children.

These Broccoli and Zucchini Fritters are a perfect appetizer to serve for dinners or as a fancy tea time snack. 


If you made this recipe, let me know! Leave a comment here or on Facebook tag your tweet with @oneteaspoonlife on Twitter and don't forget to tag your photo #oneteaspoonoflife on Instagram. You can also email me at onetspoflife@gmail.com I'd love to see what you are upto.


If you like this recipe, do not forget to share it with your friends and family! 


You can follow One Teaspoon Of Life on FacebookTwitterInstagramPinterest and Google+ or you can subscribe to One Teaspoon Of Life and receive all the latest updated via Email


Video Recipe


--------------------------------------------------------------------------------------------------------------------------

Broccoli and Zucchini Fritters Recipe


Shallow fried fritters made from broccoli and zucchini stacked togetherBroccoli and Zucchini Fritters are shallow fried vegetarian cutlets made from broccoli, zucchini, carrots and green peas.

Recipe Type:  Snacks
Cuisine:            International
Prep Time:     15 minutes
Cook time:     20 minutes
Total time:     35 minutes
Yield:                Makes 8 cutlets

Ingredients:


1 cup finely chopped Broccoli
0.25 cup Green Peas
1 Carrot, grated
1 small Zucchini, grated
2 slices Bread
0.5 cup Pizza cheese, grated
2 Tbsp Corn flour (corn starch)
Salt to taste
Pepper to taste
Oil to fry

Method:


1. Add chopped broccoli and green peas to a microwave safe bowl and microwave on high for 2 minutes.
2. Squeeze out the water from the zucchini and add to the bowl along with grated carrot.
3. Microwave on high for another 2 minutes.
4. Add grated cheese, cornflour, salt and pepper to the bowl and mix well.
5. Soak the bread in water and squeeze out the water. Crumble the bread and add to the bowl. Mix well.
6. Divide the batter and shape into patties.
7. Heat oil in a pan and shallow fry the patties in it.
8. Flip when the first side browns.
9. Remove from oil once both sides browns.
10. Serve hot with ketchup.


If you liked this, you may also like:
chawal tikki garam masala vegan pan fried snacks appetizer
Curried Rice and Zucchini Fritters

Dahi Kebab Yogurt Kebab kabab kebob hung curd punjabi besan chickpeas snacks
Dahi Kebab
How to make vegan foxtail millet cutlet fritter or navane tikki at www.oneteaspoonoflife.com
Millet Cutlets


Read more ...