Showing posts with label Dal. Show all posts

Dal Chat Recipe | How to make Dal Chaat | Moradabadi Dal Chat Recipe [Video]


Dal Chaat or Moong Dal Chat is a tasty and nutritious breakfast or snack that is made by topping cooked moong dal (lentils) with fresh vegetables and chutneys. Dal Chaat can be made to suit a vegan and Jain diet.

In a hurry? Jump to Video or Jump to Recipe

Moradabadi Dal Chat, moong dal chaat

Dal chaat is a homely, hearty, healthy, and delicious dish that is super easy to make. It can be as simple as you like or as fancy as you like. It is made from cooked moong dal and is topped with a variety of fresh vegetables, fruits, and chutneys. It is a mix of textures and flavors. Best of all, it is probably one of the healthiest chats out there. It is also very easy to veganize this recipe.  

What is Dal Chaat?

Chaat is simply a finger licking snack and Dal is cooked lentils, in this case, moong dal or mung bean lentils.

Dal chaat has its origin in Moradabad, a town in Western Uttar Pradesh. It is popularly available sold there on the streets all day long. People have it as a breakfast or a filling meal throughout the day.

Moradabadi Dal Chat, moong dal chaat


How is Dal Chaat made?


To make dal chaat, you first need to cook the dal. Wash and soak the yellow moong dal for 20-30 minutes. Don't use the "chilka wala moong dal" or the moong dal with skin for this recipe as it will not be as creamy as it is supposed to be. Cook the moong dal until it is completely cooked and mushy. You can either pressure cook it or cook it on a pot on the stovetop. 

While the dal cooks, prep all the other ingredients - chop the onions, tomatoes, coriander leaves and ginger. Deseed the pomegranate. And lastly, cube the butter. 

You can buy the green chutney, tamarind chutney and papdi or you can make your own. I will leave the links for the chutneys in the recipe below.


Moradabadi Dal Chat, moong dal chaat

Moradabadi Dal Chat, moong dal chaat


Vegan and Jain option


To veganize the dal chaat, skip the butter or use vegan butter or just a few spoonfuls of your favorite extra virgin oil.

To make a Jain friendly dal chaat, skip the onions and ginger. You can instead top it with finely chopped cucumber for additional texture. Also, make sure that the green and tamarind chutney are free of ginger and garlic.


Moradabadi Dal Chat, moong dal chaat


If you made this recipe, let me know! Leave a comment here or on Facebook tag your tweet with @oneteaspoonlife on Twitter and don't forget to tag your photo @oneteaspoonoflife on Instagram. You can also email me at onetspoflife@gmail.com I'd love to see what you are up to.

If you like this recipe, do not forget to share it with your friends and family! 


You can follow One Teaspoon Of Life on FacebookTwitterInstagramPinterest or you can subscribe to One Teaspoon Of Life and receive all the latest updated via Email


Video Recipe


--------------------------------------------------------------------------------------------------------------------------

Dal Chaat Recipe | Moradabadi Dal Chat | How to make Moong Dal Chat
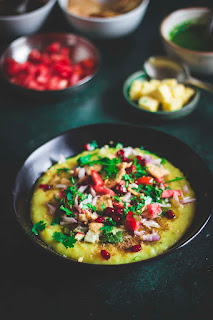

Moradabadi Dal Chat, moong dal chaat Dal Chaat or Moong Dal Chat is a tasty and nutritious breakfast or snack that is made by topping cooked moong dal (lentils) with fresh vegetables and chutneys. Dal Chaat can be made to suit a vegan and Jain diet.

Recipe Type:  Breakfast, Snacks
Cuisine:            North Indian
Prep Time:     30 minutes
Cook time:     30 minutes
Total time:     60 minutes
Yield:                Serves 2-3

Ingredients:


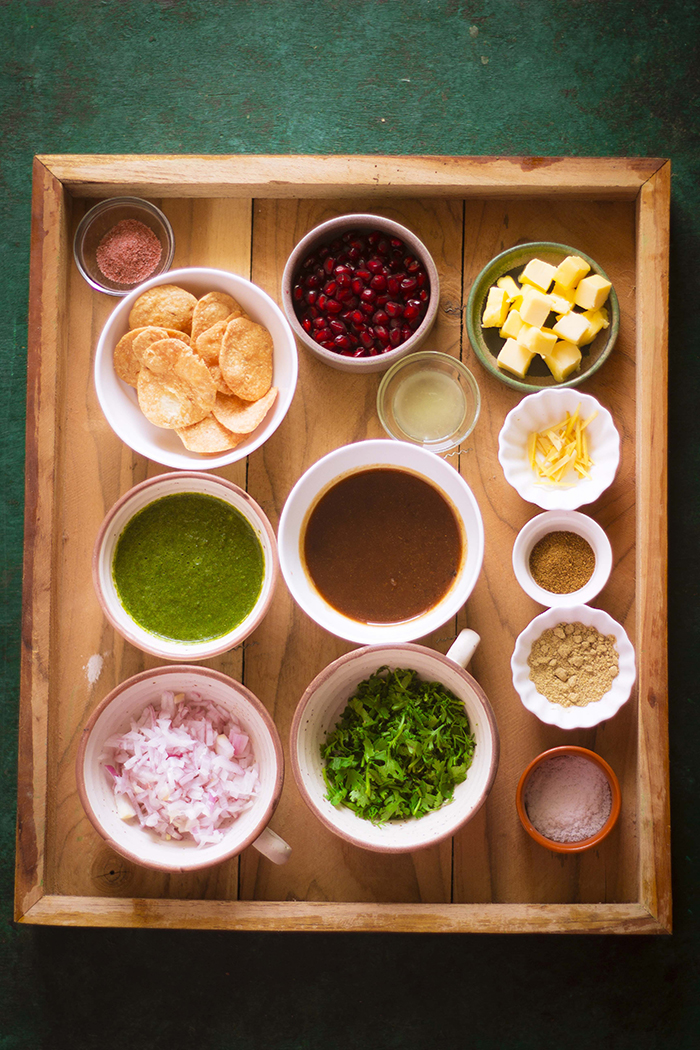
1 cup uncooked Moong Dal
50gms of Butter, cubed or 4-6 tsp Oil
1 Onion, finely chopped
1 Tomato, finely chopped
3-4 Tbsp Pomegranate seeds
2-3 Tbsp Coriander leaves, chopped
1" Ginger, chopped into matchsticks
8-10 Papdi or any Crackers
0.5 cup Coriander Mint Chutney (green chutney)
0.5 cup sweet and sour Tamarind chutney
Black salt as per taste
Salt to taste
Cumin powder to taste
Chat masala to taste
Lime juice or lemon juice

Method:


1. Wash the moong dal twice and soak the dal and keep aside for 20-30 mins.
2. After 30 minutes, pressure cook the dal with 2 cups of water or in a pot on the stovetop until the dal is completely cooked and soft.
3. Prep all the other ingredients while the dal cooks.
4. Once the dal is cooked, lightly mash the dal with the back of a spoon.
5. To assemble the dal chat, add a few cubes of butter to the plate and spoon over warm dal. If making a vegan version, you can replace the butter with vegan butter or replace with your favorite extra virgin oil.
6. Sprinkle black salt, cumin powder, chat masala and regular salt (optional).
7. Add some more butter or oil.
8. Spoon over the green chutney and the tamarind chutney.
9. Top with chopped onion, tomato, coriander leaves and pomegranate seeds.
10. Lightly crush a few papdi or crispy crackers and add to the chat.
11. Squeeze some lime juice and serve warm-hot.


If you liked this, you may also like:

Gluten free fluffy pancake made from moong dal  with pizza toppings
Moonglet

bangalore street food masala puri chat
Masala Puri
crispy moong dal namkeen
Crispy Moong Dal


Read more ...

Crispy Moong Dal Recipe | Moong Dal Namkeen Recipe [Video]


Crispy Moong Dal or Moong Dal Namkeen recipe with step by step photo and video instructions. Crispy Moong Dal is a deep-fried lentil snack that is popular in India. Crispy moong dal is inspired from Haldiram's moong dal namkeen and is great as a tea time snack. Crispy Moong Dal is vegan, gluten free and fits a Jain diet.

In a hurry? Jump to Video or Jump to Recipe


crispy moong dal namkeen

Ok, I'll be honest, I've been spending wayyy too much time on Twitter following #workingfromhome. And I'm jealous, of the lovely co-workers, read pet cats and dogs, that so many folks have. And here I am stuck with actual humans. But I guess that has some advantages too, at least I don't have to do the dishes. But I still feel, one look at that smushy puppy face and I would have forgotten all my stress and anxiety. This working from home thing has me discovering some new things about myself. One, I like hoarding vegetables. Yes, I'm less of a grocery or TP hoarder, but leave me with less than 3 types of veggies in the fridge, and I'm anxious. Two, I can live without chips, chocolate and ice cream. I know the rest of the world ran out of TP, but Bangalore ran out of chips. Apparently, that's what we need to fuel us down here. Three, I still am not a fan of exercise, well that's not a new one. Four, I love cooking more than I ever thought.

I've discovered in the absence of travel to work, I'm left with a lot more time, and I am investing that in cooking and prepping. We are eating more and more hot breakfasts that take a little longer to make, I've sundried two batches of potato chips, I've made 3 bottles of instant mango pickle, a few bottles of ice tea and pineapple squash, and I'm making a lot of snacks. Last week I posted the Paper Avalakki Mixture, which has been kind of a lifeline, because it also doubles up as breakfast when required. I've made loads of Churmuri Chiwda to much on along with tea. And this week I made this Crispy Moong Dal, in total Haldiram's style.

crispy moong dal namkeen


crispy moong dal namkeen


Crispy Moong Dal or Moong Dal Namkeen flooded the Indian market in the late 1990s and took the urban population by a storm. Everyone loved this simple salty snack. It became a family favorite, something to serve when your family and friends dropped in unannounced on the weekends. Kids loved it, double dipping their wet fingers into the bowl and amused when the dal stuck to their fingers, eh, just for this reason, always give kids their own bowl of moong dal. I've loved Moong Dal namkeen from the time I first ate it. But I never attempted to make it. Frankly I had no clue it was so easy to make it, until now.

Crispy Moong Dal requires just 3 ingredients in reality - the moong dal, salt and oil to fry it in. While the time taken to make the crispy moong dal is long, it is mostly effortless. The moong dal needs to soak for a good 3 to 4 hours and dry for nearly 1 hour before you can start frying it. This soak and dry time makes up for most of the time taken. Once the moong dal is dry, we fry it using a mesh strainer. The reason for this is simply because the dal is too small and if directly dumped in the oil, will spread all throughout and it will take a lot of effort to fish out every grain from the oil. A mesh strainer makes it much easier to fry. The temperature of the oil matters a lot here. If the oil is not hot enough, you will end up with a box of moong dal that is hard and not crispy. Very unpleasant. To test the temperature of the oil, drop in 1 or 2 grains, if they immediately rise to the top, the oil is hot enough.

Once you have fried the moong dal, use a clean paper napkin to remove the excess oil and immediately add seasoning. If you allow the dal to cool, the salt will not stick to the moong dal. I only added salt, you can add spices if you want.

Crispy Moong Dal stayed crisp and fresh for about a week in an airtight box. It didn't last beyond it for me to determine the shelf life.

crispy moong dal namkeen


If you made this recipe, let me know! Leave a comment here or on Facebook tag your tweet with @oneteaspoonlife on Twitter and don't forget to tag your photo @oneteaspoonoflife on Instagram. You can also email me at onetspoflife@gmail.com I'd love to see what you are up to.

If you like this recipe, do not forget to share it with your friends and family! 


You can follow One Teaspoon Of Life on FacebookTwitterInstagramPinterest or you can subscribe to One Teaspoon Of Life and receive all the latest updated via Email


Video Recipe


--------------------------------------------------------------------------------------------------------------------------

Crispy Moong Dal Recipe | Moong Dal Namkeen Recipe

crispy moong dal namkeenCrispy Moong Dal or Moong Dal Namkeen is a deep-fried lentil snack that is popular in India. Crispy moong dal is great as a tea time snack. Crispy Moong Dal is vegan, gluten free and fits a Jain diet.

Recipe Type:  Snacks
Cuisine:            Indian
Prep Time:     5 Hours
Cook time:     20 Minutes
Total time:     5 Hours 20 Minutes
Yield:                200 gms or 1 cup

Ingredients:


1 cup or 200gms Moong Dal
Salt to taste
Oil to fry
Water as required

Method:


1. Wash the moong dal twice in tap water and drain out the water.
2. Soak the moong dal in water for 3-4 hours.
3. Drain out the water and spread the moong dal on a kitchen towel for 1 hour, allowing it to dry.
4. Heat oil in a kadhai. Allow the oil to become very hot, if oil it not hot enough the moong dal will turn hard instead of crispy.
5. Take a little of the moong dal in a net strainer and place in the oil.
6. Stir the moong dal with a spoon frequently.
7. Fry for 1 to 3 minutes until the moong dal is crispy. The moong dal will shrink and color will change slightly.
8. Pour the moong dal onto a bowl lined with a paper napkins.
9. With another paper napkin, wipe off the excess oil from the moong dal.
10. While the moong dal is still hot, add salt and mix well.
11. Once cooled, store in an air tight container at room temperature.


Step by Step Photo Instructions


If you liked this, you may also like:

lahsun shev lasoon sev
Garlic Sev

traditional Indian chakli, savory deep fried snack
Chakli
popular Indian snack - baked flat discs made of four and spices
Baked Papdi


Read more ...

Moonglet Recipe | Moong Dal Pizza Recipe [Video]


Moonglet recipe with step by step photos and video instructions. Moonglet is a popular North Indian street food. Moonglet is a fluffy pancake made from split mung beans and topped like a pizza with vegetables, seasoning and cheese. Moonglet is gluten free. This recipe can be adapted to suit a vegan diet and a Jain diet.

In a hurry? Jump to Video or Jump to Recipe


Gluten free fluffy pancake made from moong dal  with pizza toppings

You guys, you have got to try this fluffy pancake meets Pizza aka Moonglet. It is light, flavorful and so customizable. It is also gluten-free and can be adapted to suit a plant-based / vegan diet and the Jain diet. So easy too.

I saw this on YouTube and I knew instantly that I had to try it. The idea of a gluten-free pizza made with all natural ingredients was too tempting to resist.

Gluten free fluffy pancake made from moong dal  with pizza toppings


I loved the crispy outside. I love the soft and fluffy inside. And I love the toppings. I've topped the Moonglets with so many different toppings - capsicum, tomato, baby corn, onion, paneer, tofu, etc. It is really your choice. I also found topping the Moonglet with pizza seasoning made it even more yum. You can either go the Italian way like I did and top with oregano, garlic powder, etc. or try a fajita seasoning. It's all in your hands.

Making the batter needs a little bit of patience, this is not an instant recipe. The moong dal or deskinned split mung beans need soaking. If you are short of time, soak for just 2 hours and if you have the time, you can soak it overnight. I just would not exceed 10 hours. Then just grind the moong dal along with ginger and green chilies to make a smooth batter. The dal itself will be moist and you may not require any extra water. Grind it as thick as possible, we can add water later while making the Moonglet. The Moonglet gets its fluffiness from Eno fruit salt, if you don't have Eno, use baking soda and a teaspoon of lime juice to help it get the rise. It may not be as fluffy as with Eno, but it will still be light. I have found adding a little water along with the Eno, helps it fluff up better.

Gluten free fluffy pancake made from moong dal  with pizza toppings


Now how many Moonglets you make is all up to the size of your pan. I prefer making several small ones instead of one large one. It makes it much easier to flip them. I suggest using the smallest frying pan you have to make them and dividing the batter accordingly. Grease the pan and add the batter. Top with whatever you choose and use the back of the spatula to press the toppings in.  Once the first side cooks, flip and cook the other side and top with cheese before serving.

This was my easy version of the Moonglet. YouTube is awash with several versions, some even go the cheese burst way where the Moonglet is cut open carefully and cheese is put inside along with the topping and allowed to melt. I would love to try that out someday.

Always, always serve the Moonglet hot. You can serve it with sauce or chutney or even salsa, something to just dip the Moonglet it.


Suggestions to suit other diets:


  • To adapt the recipe to a vegan / plant-based diet, use only vegetables or use tofu for the topping. You can either skip the cheese or use vegan cheese.
  • To adapt the recipe to a Jain diet, skip the ginger in the batter. You can replace it with asafoetida or hing.


Gluten free fluffy pancake made from moong dal  with pizza toppings


If you made this recipe, let me know! Leave a comment here or on Facebook tag your tweet with @oneteaspoonlife on Twitter and don't forget to tag your photo @oneteaspoonoflife on Instagram. You can also email me at onetspoflife@gmail.com I'd love to see what you are up to.

If you like this recipe, do not forget to share it with your friends and family! 


You can follow One Teaspoon Of Life on FacebookTwitterInstagramPinterest or you can subscribe to One Teaspoon Of Life and receive all the latest updated via Email


Video Recipe


--------------------------------------------------------------------------------------------------------------------------

Moonglet Recipe | Moong Dal Pizza Recipe


Gluten free fluffy pancake made from moong dal  with pizza toppingsMoonglet is a popular North Indian street food. Moonglet is a fluffy pancake made from split mung beans and topped like a pizza with vegetables, seasoning and cheese. Moonglet is gluten free. This recipe can be adapted to suit a vegan diet and a Jain diet.

Recipe Type:  Breakfast / Snacks
Cuisine:            North Indian
Prep Time:     5 hours
Cook time:     30 minutes
Total time:     5 Hours 30 Minutes (includes soaking time)
Yield:                3 to 4


Ingredients:


1 cup Moong Dal
2 Green Chillies
1 tsp Ginger, grated
1 tsp Eno fruit salt
1 tsp Pizza seasoning
Sliced vegetables for topping
Sliced paneer for topping
2 tbsp Coriander leaves, chopped
3-4 Tbsp Cheese, grated
3-4 Tbsp Oil
Salt to taste
Water as required

Method:


1. Wash the moong dal and soak it for 5 hours.
2. Drain the moong dal and grind it along with ginger and green chillies and 1 Tbsp of water until smooth. The batter has to be thick, so don't add too much water.
3. Add salt as per taste and the eno to the batter.
4. Add water if required and mix well until the eno is combined and the batter is fluffy.
5. Heat oil in a small non stick pan and add spoonfuls of the batter. Divide the batter depending on the size of your pan. I made 2 moonglets with a 6" frying pan.
6. Keep the pan on low heat and arrange the toppings. I used sliced capsicum, tomato and paneer.
7. Top with chopped coriander leaves and pizza seasoning.
8. Gently press the toppings into the moonglet with the back of a spatula.
9. Cover and cook on low heat for 6-8 minutes or until one side is cooked.
10. Gently flip the moonglet and spoon oil on the sides.
11. Remove from heat once the second side is cooked too.
12. Top with grated cheese.
13. Cut into slices and serve.


Gluten free fluffy pancake made from moong dal  with pizza toppings


Gluten free fluffy pancake made from moong dal  with pizza toppings

Gluten free fluffy pancake made from moong dal  with pizza toppings


If you liked this, you may also like:
eggless omelette made with chickpea flour
vegan Omelet

How to make vegan frittata recipe at One Teaspoon Of Life How to make vegetarian vegan omelet recipe at www.oneteaspoonoflife.com
Vegan Zucchini Spinach Frittata
How to make vegan beetroot besan dosa beetroot paratha recipe at www.oneteaspoonoflife.com
Beetroot Chickpea Pancake


Read more ...

Dahi Vada Recipe | How to make Dahi Vada [Video]


It's still Summer, the perfect time to have these chilled Dahi Vadas. Dahi Vada is a popular Indian snack that consists of soaking a savory lentil donut in yogurt and topping with a combination of sweet and spicy chutneys and some spice powders. 

In a hurry? Jump to Video or Jump to Recipe


curd vada

Cool and refreshing! Just 2 words to describe this Dahi Vada.

Dahi Vada has been a favorite of mine since childhood, the soft vadas dunked in a sweet dahi (yogurt), what's not to love. And in a place like Goa which is always hot, the chilled vadas are always welcome.

Apart from eating cool stuff, how do you keep your cool?


curd vada


A few months ago, I had posted the recipe for Medu Vada or Uddina Vada, that forms the base of this Dahi Vada. I never claim to be an expert or a chef, I am just a home cook who loves cooking and taking photos of food. But when I posted the recipe of Medu Vada on one of the Facebook Groups, a nasty man commented that it is okay for me to make misshapen vadas for home, but if I had to post it on Facebook, I should make them perfectly round. I was so upset when I read the comment, but Raj calmed me down and asked me to ignore it. And then I realized the power of women. By the time I woke up the next morning, a bunch of women had replied aptly to the man as well as asked me to continue posting. I haven't thanked each of those women personally, but I would like to take this opportunity to thank all of them once again. The way all the women got together and defended me, made me feel so special and loved. 

It reaffirmed my belief that Food Connects People!

Also, it got me thinking, why we assign so much importance to perfection and detail. Why do vadas or laddoos have to be perfectly round? Why do we want perfectly concentric circles in our Chaklis?Why to vegetables have to be blemish free and shaped perfectly? While I got thinking about all this, it reminded me of watching Jamie Oliver talk about "wonky vegetables" and how that desire for perfection led to so much food waste around the world. As a food blogger, it is my job to make my food look as good as possible, but I would never resort to using food coloring or wax or any of the other tactics advertising companies use to sell food. So while my food may be imperfect in shape and appearance, I can assure, it is food that I eat as well as I serve to my family. 

Deep thoughts, I know for a very light and refreshing recipe post, but I had to say it.

So don't worry if your food or your clothes or your hair doesn't look perfect. Own it! Ignore the bad and absorb the good.

Wishing you a Sunny day ahead!

curd vada

If you made this recipe, let me know! Leave a comment here or on Facebook tag your tweet with @oneteaspoonlife on Twitter and don't forget to tag your photo @oneteaspoonoflife on Instagram. You can also email me at onetspoflife@gmail.com I'd love to see what you are up to.


If you like this recipe, do not forget to share it with your friends and family! 


You can follow One Teaspoon Of Life on FacebookTwitterInstagramPinterest or you can subscribe to One Teaspoon Of Life and receive all the latest updated via Email


Video Recipe


--------------------------------------------------------------------------------------------------------------------------

Dahi Vada Recipe


curd vadaDahi Vada is a popular snack in which a savory lentil donut is soaked in sweet and salty yogurt and then topped with sweet tamarind chutney, spicy green chutney and spice powders. Served chilled, this make a perfect summer snack.

Recipe Type:  Snacks, Breakfast
Cuisine:            Indian
Prep Time:     4 Hours
Cook time:     60 minutes
Total time:     5 Hours
Yield:                Makes 12 small dahi vadas

Ingredients:


1 cup Urad Dal
1 Tbsp Rice Flour
6-8 Curry leaves, finely chopped
1 Green Chilli, finely chopped
0.5 tsp Pepper, freshly crushed
A pinch of baking soda
500gms Yogurt
4-5 Tbsp Tamarind Chutney
4-5 Tbsp Green Chutney
1-2 Tsp Cumin Powder
1-2 tsp Red Chilli Powder
Salt to taste
Oil to fry
Water as required
Coriander leaves to garnish

Method:


1. Wash the urad dal and soak the dal in water for around 3-4 hours.
2. Drain the dal and grind into a fine batter. Use as less water as possible. The batter should be thick.
3. Heat oil in a kadhai to deep fry the vadas.
4. While the oil heats, add in the rice flour, green chilli, pepper, baking soda and salt. Mix well until combined. IF the dough feels watery, add a little more rice flour.
5. Once the oil is hot enough, wet your hands and take a spoonful of batter onto your fingers. Using the wet finger of the other hand, make a hole in the center. Watch the video for help on how to do this.
6. Gently drop the vada in the oil.
7. Fry on high heat for 1 minute, then lower the heat slightly and continue to cook until the vada becomes golden brown.
8. Now gently slide this batter into the oil. Stir the vada occassionally and flip it, so that it cooks evenly. Cook until golden brown on both sides.
9. Remove the vada from the oil and immediately drop in a bowl filled with water.
10. Gently immerse the vada in the water and let it soak for 30 minutes.
11. Meanwhile, whisk the yogurt (dahi) until smooth. Add in salt to taste. You can also add in a little sugar and a tempering of mustard seeds to the yogurt.
12. To serve, take 1-2 vadas and gently squeeze out the water and place in a serving bowl. Spoon over some of the yogurt (dahi) along with a little of the yogurt, top with a spoonful of tamarind chutney, green chutney and sprinkle cumin powder and red chilli powder. Garnish with chopped coriander leaves and serve.
13. If planning to serve later, then squeeze out all the vadas and place in a large bowl, pour the yogurt on it and chill in the fridge. Top with the chutneys and spice powders before serving.


If you liked this, you may also like:
Indian accompaniment made with yogurt, boondi (fried gram flour balls) and spices
Boondi Raita

dahi sandwich yogurt sandwich hung curd sandwich
Dahi Sandwich
medu vada medhu vada with chutney
Medu Vada


Read more ...

Medu Vada Recipe | Uddina Vada Recipe [Video]


Uddina Vada or Medu Vada is a popular South Indian breakfast item. Medu vada is a savory donut made from urad dal or black lentils. Medu vadas are crispy and golden brown on the outside and soft and spongy on the inside. They taste best when served with fresh coconut chutney or dunked in a spicy hot sambar.


In a hurry? Jump to Video or Jump to Recipe

medu vada medhu vada with chutney

It's raining!!!! and I'm pretty sure it is a crime to not eat crispy fried food when it rains. It isn't? Well, it should be. 

I recently mentioned in my Instagram post that Bangalore weather is as unpredictable. Summer unofficially started in early March this year and it's been blazing hot, hotter than ever, out here. Every year when it gets slightly hot, rains come and it cools off. Last year, when I tried to make a second batch of these sun dried potato chips, they caught mold due to the humidity. But this year there was no sight of rain or even a little cloud to shade us from the sun. Until now. The weather has been pretty unpredictable this week, just like Bangaloreans are used to. Heavy rains caught us off guard this week. And the evening rains are cooling down the city. And when it rains, eat all the fried food you can. 

Frankly, Bangaloreans don't need a reason to eat this scrumptious crispy vada. Vada is eaten for breakfast, snacks, and may be lunch and dinner too. A plate of idli with one vada and a piping hot cup of traditional filter coffee, a simple soul satisfying breakfast for any South Indian. But the lazy me definitely needs a reason to make them at home.

medu vada medhu vada with chutney

Uddina Vada or Medu Vada is a quintessential item on the breakfast scene of South India, not just Bangalore. The vadas are crispy golden brown on the outside, soft and spongy on the inside. When they are served piping hot with a bowl of fresh coconut chutney and a spicy bowl of sambar, one just stops talking and digs in. Contrary to popular belief, making these vadas at home is not difficult. But what can be challenging is to make that hole in the center. You cannot cut it as you would with a donut. But there are a few simple tricks to making the perfect uddina vada, hole and all.

Firstly, the batter has to be thick. As thick as it can be. The urad dal or black lentils, have to be soaked for just the right amount of time. 3-4 hours at max. More than 4 hours, and you will get a soggy batter that cannot be shaped. After soaking, completely drain the lentils and grind with as little water as possible until you have a smooth creamy batter. 

Secondly, for a crispy vada, you need to add in a little rice flour and a pinch of cooking or baking soda. Too much of the soda and you will have a very crispy vada that won't go well with the purists.

Third, the flavor givers. Add in what you like to flavor the vada. Popular ingredients include cumin, pepper, curry leaves, coconut pieces, green chillies and coriander leaves. Add what you like in them. Also, add salt at the very end, just when about to make the vada, else the batter may turn soggy.

Fourth, the hole. Making the hole isn't as complicated as it sounds. All you need is a thick batter and wet hands. Yup. Wet your hands properly and then take a dollop of the batter, use your wet fingers to make a hole and then gently drop it in the oil. If you are unable to make the hole for any reason, don't worry too much, just drop the batter in oil using a spoon. The hole is just for visual appeal and doesn't impact the taste or the texture.

Five, the frying. To get a nice crispy exterior, fry for the first one minute of high flame. Then lower the heat and allow the vada to cook on the inside. Once the vada is the golden brown, it is ready to be served.

Six, make extra. Well, this isn't a trick or tip, as much as an advise. Vadas are irresistible, always make extra.

Wishing you a vada happy weekend!!

P.S - This recipe has been reposted. The recipe was originally published in 2014. Images have been updated and a video has been added. The recipe remains the same.

medu vada medhu vada with chutney


If you made this recipe, let me know! Leave a comment here or on Facebook tag your tweet with @oneteaspoonlife on Twitter and don't forget to tag your photo @oneteaspoonoflife on Instagram. You can also email me at onetspoflife@gmail.com I'd love to see what you are upto.


If you like this recipe, do not forget to share it with your friends and family! 


You can follow One Teaspoon Of Life on FacebookTwitterInstagramPinterest or you can subscribe to One Teaspoon Of Life and receive all the latest updated via Email


Video Recipe


--------------------------------------------------------------------------------------------------------------------------

Medu Vada Recipe | Uddina Vada Recipe


medu vada medhu vada with chutneyMedu Vada is an Indian deep fried savory donut made from lentils. A popular South Indian breakfast along with Idli.

Recipe Type:  Snacks / Breakfast
Cuisine:          South Indian
Prep Time:     3-4 Hours (Including lentil soaking time)
Cook time:     20 minutes
Yield:              12 small Vada

Ingredients:


1 cup Urad Dal
1 Tbsp Rice Flour
6-8 Curry leaves, finely chopped
1 Green Chilli, finely chopped
0.5 tsp Pepper, freshly crushed
A pinch of baking soda
Salt to taste
Oil to fry
Water as required

Method:


1. Wash the urad dal and soak the dal in water for around 3-4 hours.
2. Drain the dal and grind into a fine batter. Use as less water as possible. The batter should be thick.
3. Heat oil in a kadhai to deep fry the vadas.
4. While the oil heats, add in the rice flour, green chilli, pepper, baking soda and salt. Mix well until combined. IF the dough feels watery, add a little more rice flour.
5. Once the oil is hot enough, wet your hands and take a spoonful of batter onto your fingers. Using the wet finger of the other hand, make a hole in the center. Watch the video for help on how to do this.
6. Gently drop the vada in the oil.
7. Fry on high heat for 1 minute, then lower the heat slightly and continue to cook until the vada becomes golden brown.
8. Now gently slide this batter into the oil. Stir the vada occassionally and flip it, so that it cooks evenly. Cook until golden brown on both sides.
9. Serve the vada hot with coconut chutney or sambar.


See the notes mentioned above the Video for tips on making the perfect Medu Vada.


If you liked this, you may also like:
steamed idli made from oats, instant oats idli
Oats Idli

Mangalore Banana Buns
Mangalore Buns
instant mix vegetable uttappa dosa made from rava
Instant Mix Veg Uttappa


Read more ...

Bele Holige Recipe | Obbattu Recipe | Puran Poli Recipe [Video]


Bele Holige (Obbattu or Puran Poli) is a traditional Indian flatbread that is stuffed with a sweet lentil stuffing and pan fried in ghee. Popularly made for weddings and festivals.

In a hurry? Jump to Video or Jump to Recipe

Bele holige, obbattu, puran poli, sweet lentil stuffed flatbread

I confess, I have a sweet tooth. From the first drop of honey that I tasted as a baby, I’ve had that weakness for sweets.

Time has proven, that my weakness for sweets is much stronger than my will power to ignore them. So instead of fighting a losing battle, I’ve given up and let myself enjoy them. After all, there is so much chaos and bitterness everywhere, at least my stomach can be full of sweetness.

Of all the sweets I know, Holige has always been the crown jewel. You know how cakes are synonymous with weddings in the West, to a Kannadiga (people of the state of Karnataka), a holige holds the same place. When you are unmarried, a lot of the older folks in the family will inevitably ask you when you will treat them to a feast with Holige, which is nothing, but a nice way of asking you the nosy question of when will you get married. I know this from experience *rolling eyes*.

So when we were planning our wedding menu and Raj declared he hates Holige, for a fleeting moment I wondered if he was the guy for me. Here I was in love with Holige, the quintessential wedding dessert and here was my man questioning its presence it our wedding. (May be he was jealous that I’ve loved it longer, who knows?). But my mom settled it by having 2 desserts, one that he liked and one that I liked. Wise woman. And both of us were happy.

Bele holige, obbattu, puran poli, sweet lentil stuffed flatbread

Now, the Holige is not a very difficult dessert to make if you follow your instincts, but until recently, it was something that had to be made at home. No sweet shop ever stocked it, and even if they did, it was never as good as the homemade ones. But recently, I’ve seen a lot of holige shops spring up around the city and they make some really good ones there. You will know how fond people are of Holige by just looking at the crowd at these stores.

But we still love to make our own, because it is so easy and so delicious. A Holige is made of 2 components – the dough and the stuffing (also called hurna or puran). The dough can either be of only whole wheat flour (atta) or of only all purpose flour(maida) or a mix of the two. I’ve found that only whole wheat flour makes it slightly tougher in texture and only all purpose flour makes it chewier. The mix of flours works best for me. The stuffing is what gives flavor to the holige. Holige can be stuffed with a variety of things – lentils/dal, coconut, peanuts, and for the adventurous, there are dry fruits, dates and carrots too. While I love all varieties, this recipe is all about the lentil/dal or bele one. Chana Dal works best for Bele Holige.

To make the stuffing, chana dal is boiled, drained and pureed with very little water until smooth and then cooked with jaggery until it forms a thick paste. This is flavored with cardamom for the minimalist, while you can add other spices like dry ginger powder or fennel seeds powder etc. Getting the consistency of the stuffing right is what all the fuss is about in making the holige. Like I said before, follow your instincts, and you won’t falter. You should be able to take the stuffing in your hands (once cool) and shape it into a ball that holds its shape. If it sticks to your hands or doesn’t hold its shape, it needs to thicken further. Put it back on the heat and allow it to thicken. If the stuffing powders in your hands, add a little water or milk and make it thinner.

Once you have the right stuffing, the holige is very easy to make. Holige is traditionally pan fried with a lot of ghee, but to make it vegan, use vegetable oil. I’ve made it with oil too and it doesn’t affect the texture.

Holige tastes best when served warm, with lots of ghee or milk.

Bele holige, obbattu, puran poli, sweet lentil stuffed flatbread


If you made this recipe, let me know! Leave a comment here or on Facebook tag your tweet with @oneteaspoonlife on Twitter and don't forget to tag your photo @oneteaspoonoflife on Instagram. You can also email me at onetspoflife@gmail.com I'd love to see what you are upto.


If you like this recipe, do not forget to share it with your friends and family! 


You can follow One Teaspoon Of Life on FacebookTwitterInstagramPinterest or you can subscribe to One Teaspoon Of Life and receive all the latest updated via Email


Video Recipe


--------------------------------------------------------------------------------------------------------------------------

Bele Holige Recipe | Obbattu Recipe | Puran Poli Recipe


Bele holige, obbattu, puran poli, sweet lentil stuffed flatbreadBele Holige (Obbattu or Puran Poli) is a traditional Indian flatbread that is stuffed with a sweet lentil stuffing and pan fried in ghee. Popularly made for weddings and festivals.

Recipe Type:  Dessert
Cuisine:            Indian
Prep Time:     45 minutes
Cook time:     45 minutes
Total time:     90 minutes
Yield:                Makes 10 to 12 medium Holige

Ingredients:


For the Stuffing (Hurna / Puran)


1 cup Chana Dal
1.5 cups Jaggery Powder
1 tsp Cardamom Powder

For the Dough:


2 cups Wholewheat Flour
1 cup All Purpose Flour
0.5 tsp Turmeric Powder
0.25 tsp Salt
Water as required

Ghee or Oil to fry

Method:


To make the Stuffing:


1. Wash the chana dal twice in water and then soak and leave aside for 30 minutes.
2. Pressure cook the chana dal with 2-3 cups of water until it is cooked. It may take 4-5 whistles or 8-10 minutes after the pressure builds up. If not using a pressure cooker, cook the chana dal in a covered pan until completely cooked.
3. Drain the chana dal and allow it to cool.
4. Once cool, blend it into a smooth paste. Use as little water as possible.
5. Heat a non stick kadhai and add the chana dal paste to it. If you are not using a non stick kadhai, add a little ghee first and then add the chana dal paste.
6. Add in the jaggery powder and mix well. If you want a mildly sweet holige, add only 1 cup of the jaggery powder. You can taste the stuffing and add more if required.
7. Continue cooking the stuffing on low heat while stirring frequently until the stuffing thickens. It may take 15-20 minutes.
8. Add in the cardamom powder and mix well. Remove from heat and allow to cool.
9. If the stuffing feels thin in consistency after cooling, add it back to a kadhai and heat it again until it reaches the desired consistency.
10. While the stuffing cools, make the dough for the holige.

To make the Dough:


11. To make the dough, take the wholewheat flour and all purpose flour in a large bowl. Add in the turmeric powder and salt.
12. Knead it to a smooth dough with water. Add water as required.
13. Cover the dough and rest for 30 minutes.

To make the Holige:


14. To make the holige, take a lime sized ball of dough and roll it out into a small disc on a flour dusted surface.
15. Take a lime sized ball of stuffing and place it on the rolled out dough.
16. Seal the edges and roll out the holige as thin as possible. Dust the holige with flour as required.
17. Heat a tava and grease it with ghee or oil. Place the holige on it.
18. Spoon ghee or oil on the other side of the holige.
19. Cook the holige on medium to high heat until both the sides are cooked.
20. Remove from heat and serve with ghee or milk.


If you liked this, you may also like:

How to make shakkarpara recipe, shankarpole recipe at www.oneteaspoonoflife.com
Shankarpole

How to make Kadale Bele Payasa or Chana Dal Payasam at www.oneteaspoonoflife.com
Kadle Bele Payasa
How to make shavige payasa semiyan kheer vermicelli pudding recipe at www.oneteaspoonoflife.com
Shavige Payasa


Read more ...