Showing posts with label Video. Show all posts

Doddapatre Tambuli Recipe [Video]


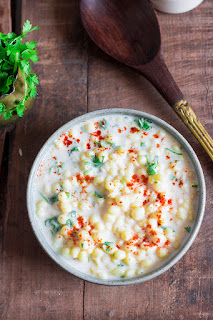
Doddapatre Tambuli is a traditional summer curry made with coconut and curd from Karnataka. This curry is made with Mexican mint leaves or Ajwain Patta.

In a hurry? Jump to Video or Jump to Recipe


South Indian curd based curry

South Indian curd based curry

There has never been a better time to make Tambuli or Thambli as now. This summer heat calls for eating something that cools your insides.

Every region in India has a yogurt (curd) based curry that is popularly made in summer. Tambuli is one of those curries in Karnataka. It is very similar to Majjige Huli, but is much simpler and cooler. The main difference is Majjige Huli is boiled, while the Tambuli is not cooked, hence, usually needs to be consumed fresh.

Doddapatre
Doddapatre is known as Big Thyme or Mexican Mint in English, Ajwain Patta in Hindi and Karpooravalli in Tamil. It is a leaf that has a pungent and distinct aroma that is closest to the aroma of bishop's weed or ajwain, although unrelated. Some people equate the aroma to that of oregano or mint. This distinct aroma and taste becomes mild when the leaves are combined with yogurt and coconut to make the Doddapatre Tambuli.

My first interaction with this dish was at a Temple. On the coastal belt of Karnataka, there is a Lord Ganapati temple at Idagunji. When my grandfather frequented the place, one had to walk for miles together to reach it and it was hidden away tucked into a forest. I've seen the temple change from a small village temple to a quite popular one. When I used to visit the temple with my parents, it was still pretty small and the highway gave no indication to the tucked away temple. With no Google maps, one had to know the road before hand or had to ask the village folks for directions. It was here that they served a simple meal for lunch - Rice and Tambuli. It was and has been the only meal at a temple that I have relished.

South Indian curd based curry

Tambuli can be made with a variety of greens, but the recipe differs slightly with each green. Some are cooked longer while some are used raw. Doddapatre is mildly sauteed until it turn slightly yellow and wilts, this makes them milder in taste. The browned leaves are ground to a fine paste along with green chilli and fresh coconut. Whisked curd or buttermilk is added along with some salt. Then a tempering of cumin seeds and curry leaves, and Tambuli is ready to be served. Tamuli is not heated again, unlike most other curries. Tambuli is served with steamed rice.

P.S - This recipe has been reposted. The recipe was originally published in 2014. Images have been updated and a video has been added. The recipe remains the same.

South Indian curd based curry


If you made this recipe, let me know! Leave a comment here or on Facebook tag your tweet with @oneteaspoonlife on Twitter and don't forget to tag your photo @oneteaspoonoflife on Instagram. You can also email me at onetspoflife@gmail.com I'd love to see what you are upto. If you like this recipe, do not forget to share it with your friends and family! 


You can follow One Teaspoon Of Life on FacebookTwitterInstagramPinterest or you can subscribe to One Teaspoon Of Life and receive all the latest updated via Email


Video Recipe


--------------------------------------------------------------------------------------------------------------------------


Doddapatre Tambuli


South Indian curd based curryDoddapatre Tambuli is a traditional summer curry from Karnataka that is made with coconut, buttermilk or curd and doddapatre leaves, also known as Mexican mint or Ajwain Patta. This cooling curry is served with rice.

Recipe Type:  Main Course
Cuisine:          Karnataka
Prep Time:     5 minutes
Cook time:     30 minutes
Yield:              2 Servings

Ingredients:


20-25 Doddapatre Leave, chopped
0.5 cup Fresh Coconut, grated
1.5 cups Curd
1 Green Chilli
1 tsp Cumin seeds
A few Curry leaves
3 tsp Oil
Salt to taste
Water as required

Method:


1. Heat 1 tsp of oil in a pan and add the chopped doddapatre leaves.
2. Saute until the leaves wilt and turn slightly yellow.
3. Remove from heat and cool slightly.
4. Fry until the doddapatre turns slightly yellow.
5. Remove from heat and allow it to cool.
6. Grind it along with coconut, green chilli and a little water to a fine paste
7. Heat oil in the pan and add the cumin seeds. Once they brown, add the curry leaves.
8. Remove the pan from heat and add the blended paste. Mix well.
9. Add in whisked curd or buttermilk. Add salt to taste.
10. Add in more water if it is very thick.
11. Serve it with hot rice


If you liked this, you may also like:

How to make majjige huli recipe at www.oneteaspoonoflife.com
Majjige Huli

stew made with vegetables, coconut and yogurt
Avial
Indian accompaniment made with yogurt, boondi (fried gram flour balls) and spices
Boondi Raita

Read more ...

Medu Vada Recipe | Uddina Vada Recipe [Video]


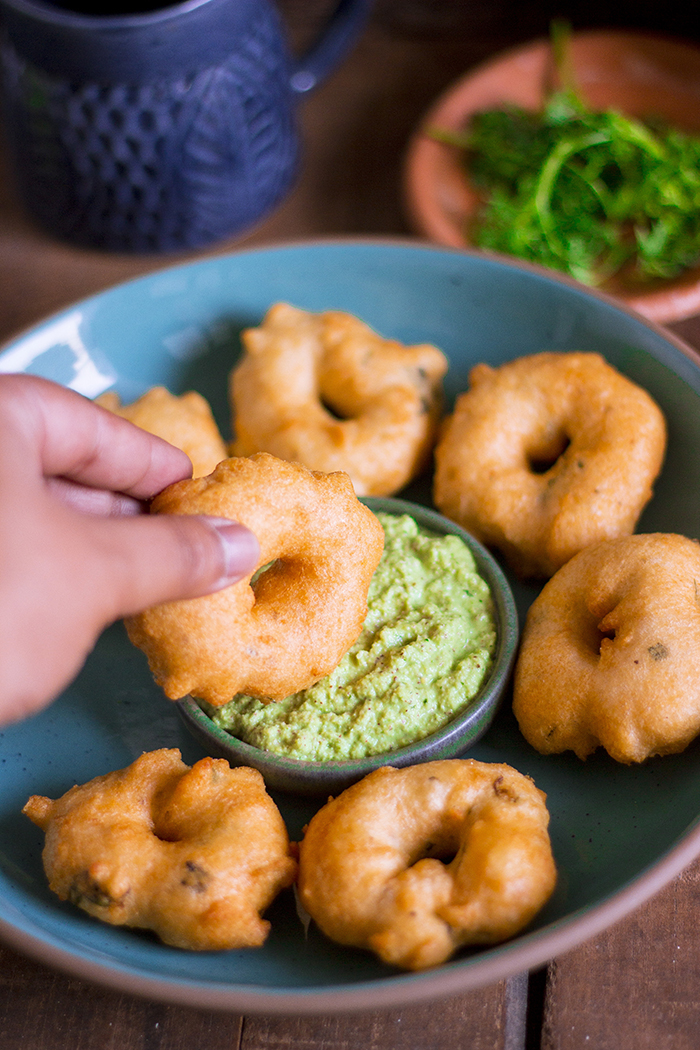
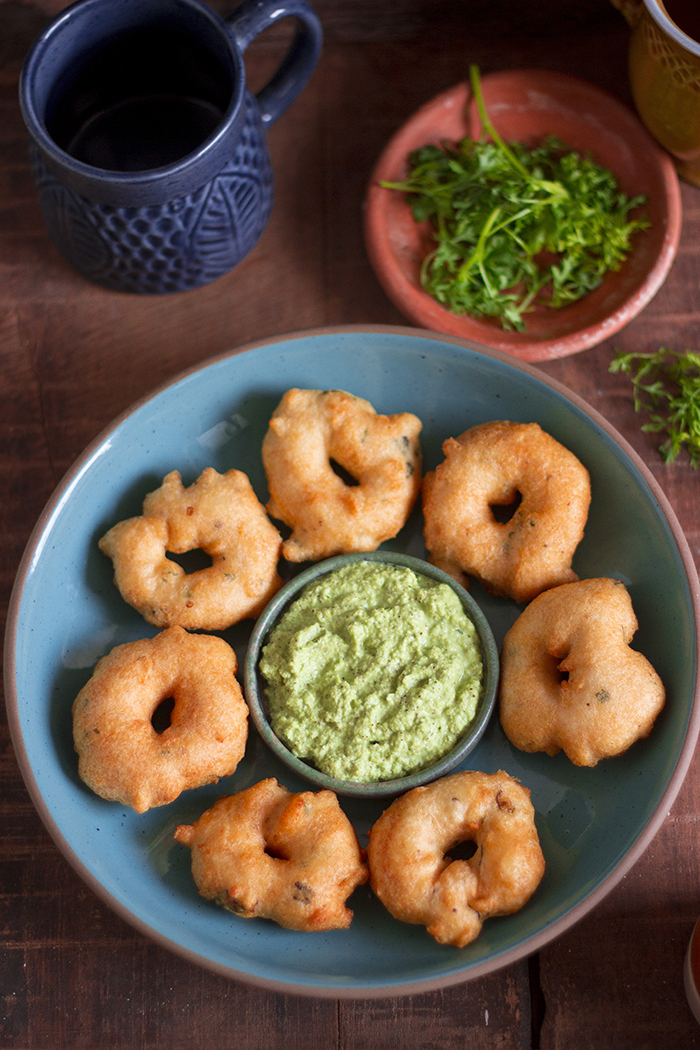
Uddina Vada or Medu Vada is a popular South Indian breakfast item. Medu vada is a savory donut made from urad dal or black lentils. Medu vadas are crispy and golden brown on the outside and soft and spongy on the inside. They taste best when served with fresh coconut chutney or dunked in a spicy hot sambar.


In a hurry? Jump to Video or Jump to Recipe

medu vada medhu vada with chutney

It's raining!!!! and I'm pretty sure it is a crime to not eat crispy fried food when it rains. It isn't? Well, it should be. 

I recently mentioned in my Instagram post that Bangalore weather is as unpredictable. Summer unofficially started in early March this year and it's been blazing hot, hotter than ever, out here. Every year when it gets slightly hot, rains come and it cools off. Last year, when I tried to make a second batch of these sun dried potato chips, they caught mold due to the humidity. But this year there was no sight of rain or even a little cloud to shade us from the sun. Until now. The weather has been pretty unpredictable this week, just like Bangaloreans are used to. Heavy rains caught us off guard this week. And the evening rains are cooling down the city. And when it rains, eat all the fried food you can. 

Frankly, Bangaloreans don't need a reason to eat this scrumptious crispy vada. Vada is eaten for breakfast, snacks, and may be lunch and dinner too. A plate of idli with one vada and a piping hot cup of traditional filter coffee, a simple soul satisfying breakfast for any South Indian. But the lazy me definitely needs a reason to make them at home.

medu vada medhu vada with chutney

Uddina Vada or Medu Vada is a quintessential item on the breakfast scene of South India, not just Bangalore. The vadas are crispy golden brown on the outside, soft and spongy on the inside. When they are served piping hot with a bowl of fresh coconut chutney and a spicy bowl of sambar, one just stops talking and digs in. Contrary to popular belief, making these vadas at home is not difficult. But what can be challenging is to make that hole in the center. You cannot cut it as you would with a donut. But there are a few simple tricks to making the perfect uddina vada, hole and all.

Firstly, the batter has to be thick. As thick as it can be. The urad dal or black lentils, have to be soaked for just the right amount of time. 3-4 hours at max. More than 4 hours, and you will get a soggy batter that cannot be shaped. After soaking, completely drain the lentils and grind with as little water as possible until you have a smooth creamy batter. 

Secondly, for a crispy vada, you need to add in a little rice flour and a pinch of cooking or baking soda. Too much of the soda and you will have a very crispy vada that won't go well with the purists.

Third, the flavor givers. Add in what you like to flavor the vada. Popular ingredients include cumin, pepper, curry leaves, coconut pieces, green chillies and coriander leaves. Add what you like in them. Also, add salt at the very end, just when about to make the vada, else the batter may turn soggy.

Fourth, the hole. Making the hole isn't as complicated as it sounds. All you need is a thick batter and wet hands. Yup. Wet your hands properly and then take a dollop of the batter, use your wet fingers to make a hole and then gently drop it in the oil. If you are unable to make the hole for any reason, don't worry too much, just drop the batter in oil using a spoon. The hole is just for visual appeal and doesn't impact the taste or the texture.

Five, the frying. To get a nice crispy exterior, fry for the first one minute of high flame. Then lower the heat and allow the vada to cook on the inside. Once the vada is the golden brown, it is ready to be served.

Six, make extra. Well, this isn't a trick or tip, as much as an advise. Vadas are irresistible, always make extra.

Wishing you a vada happy weekend!!

P.S - This recipe has been reposted. The recipe was originally published in 2014. Images have been updated and a video has been added. The recipe remains the same.

medu vada medhu vada with chutney


If you made this recipe, let me know! Leave a comment here or on Facebook tag your tweet with @oneteaspoonlife on Twitter and don't forget to tag your photo @oneteaspoonoflife on Instagram. You can also email me at onetspoflife@gmail.com I'd love to see what you are upto.


If you like this recipe, do not forget to share it with your friends and family! 


You can follow One Teaspoon Of Life on FacebookTwitterInstagramPinterest or you can subscribe to One Teaspoon Of Life and receive all the latest updated via Email


Video Recipe


--------------------------------------------------------------------------------------------------------------------------

Medu Vada Recipe | Uddina Vada Recipe


medu vada medhu vada with chutneyMedu Vada is an Indian deep fried savory donut made from lentils. A popular South Indian breakfast along with Idli.

Recipe Type:  Snacks / Breakfast
Cuisine:          South Indian
Prep Time:     3-4 Hours (Including lentil soaking time)
Cook time:     20 minutes
Yield:              12 small Vada

Ingredients:


1 cup Urad Dal
1 Tbsp Rice Flour
6-8 Curry leaves, finely chopped
1 Green Chilli, finely chopped
0.5 tsp Pepper, freshly crushed
A pinch of baking soda
Salt to taste
Oil to fry
Water as required

Method:


1. Wash the urad dal and soak the dal in water for around 3-4 hours.
2. Drain the dal and grind into a fine batter. Use as less water as possible. The batter should be thick.
3. Heat oil in a kadhai to deep fry the vadas.
4. While the oil heats, add in the rice flour, green chilli, pepper, baking soda and salt. Mix well until combined. IF the dough feels watery, add a little more rice flour.
5. Once the oil is hot enough, wet your hands and take a spoonful of batter onto your fingers. Using the wet finger of the other hand, make a hole in the center. Watch the video for help on how to do this.
6. Gently drop the vada in the oil.
7. Fry on high heat for 1 minute, then lower the heat slightly and continue to cook until the vada becomes golden brown.
8. Now gently slide this batter into the oil. Stir the vada occassionally and flip it, so that it cooks evenly. Cook until golden brown on both sides.
9. Serve the vada hot with coconut chutney or sambar.


See the notes mentioned above the Video for tips on making the perfect Medu Vada.


If you liked this, you may also like:
steamed idli made from oats, instant oats idli
Oats Idli

Mangalore Banana Buns
Mangalore Buns
instant mix vegetable uttappa dosa made from rava
Instant Mix Veg Uttappa


Read more ...

Bele Holige Recipe | Obbattu Recipe | Puran Poli Recipe [Video]


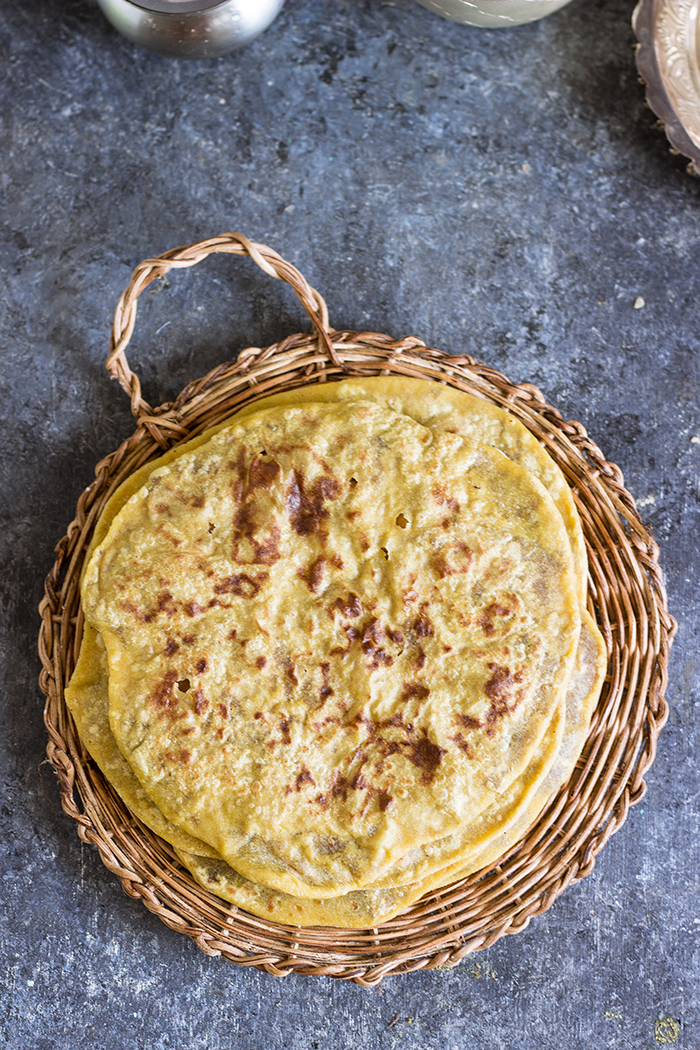
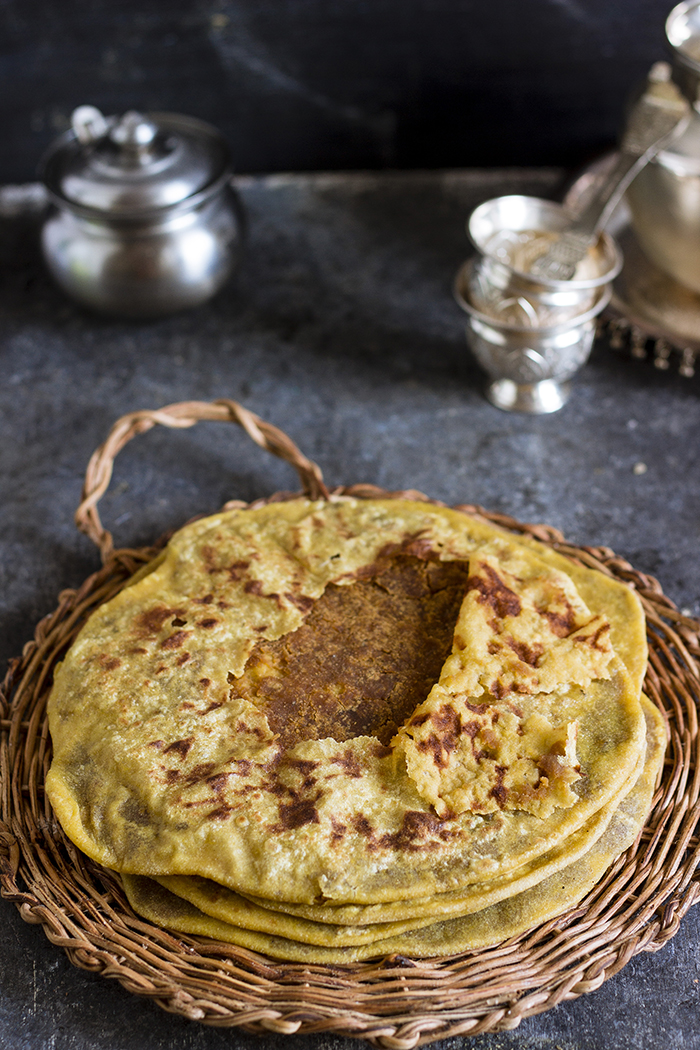
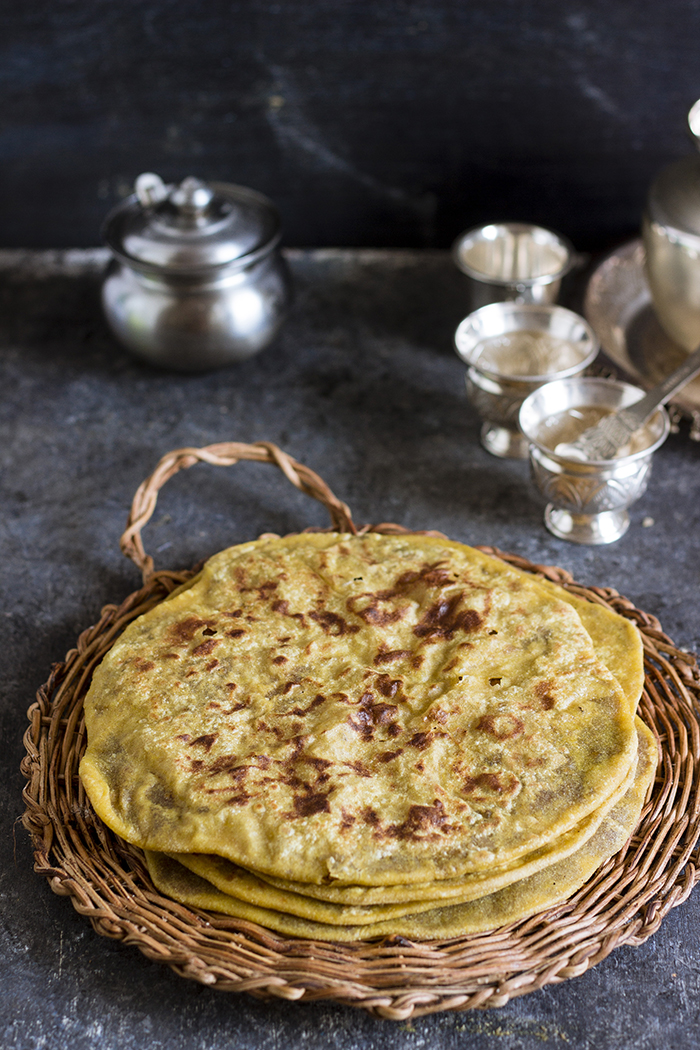
Bele Holige (Obbattu or Puran Poli) is a traditional Indian flatbread that is stuffed with a sweet lentil stuffing and pan fried in ghee. Popularly made for weddings and festivals.

In a hurry? Jump to Video or Jump to Recipe

Bele holige, obbattu, puran poli, sweet lentil stuffed flatbread

I confess, I have a sweet tooth. From the first drop of honey that I tasted as a baby, I’ve had that weakness for sweets.

Time has proven, that my weakness for sweets is much stronger than my will power to ignore them. So instead of fighting a losing battle, I’ve given up and let myself enjoy them. After all, there is so much chaos and bitterness everywhere, at least my stomach can be full of sweetness.

Of all the sweets I know, Holige has always been the crown jewel. You know how cakes are synonymous with weddings in the West, to a Kannadiga (people of the state of Karnataka), a holige holds the same place. When you are unmarried, a lot of the older folks in the family will inevitably ask you when you will treat them to a feast with Holige, which is nothing, but a nice way of asking you the nosy question of when will you get married. I know this from experience *rolling eyes*.

So when we were planning our wedding menu and Raj declared he hates Holige, for a fleeting moment I wondered if he was the guy for me. Here I was in love with Holige, the quintessential wedding dessert and here was my man questioning its presence it our wedding. (May be he was jealous that I’ve loved it longer, who knows?). But my mom settled it by having 2 desserts, one that he liked and one that I liked. Wise woman. And both of us were happy.

Bele holige, obbattu, puran poli, sweet lentil stuffed flatbread

Now, the Holige is not a very difficult dessert to make if you follow your instincts, but until recently, it was something that had to be made at home. No sweet shop ever stocked it, and even if they did, it was never as good as the homemade ones. But recently, I’ve seen a lot of holige shops spring up around the city and they make some really good ones there. You will know how fond people are of Holige by just looking at the crowd at these stores.

But we still love to make our own, because it is so easy and so delicious. A Holige is made of 2 components – the dough and the stuffing (also called hurna or puran). The dough can either be of only whole wheat flour (atta) or of only all purpose flour(maida) or a mix of the two. I’ve found that only whole wheat flour makes it slightly tougher in texture and only all purpose flour makes it chewier. The mix of flours works best for me. The stuffing is what gives flavor to the holige. Holige can be stuffed with a variety of things – lentils/dal, coconut, peanuts, and for the adventurous, there are dry fruits, dates and carrots too. While I love all varieties, this recipe is all about the lentil/dal or bele one. Chana Dal works best for Bele Holige.

To make the stuffing, chana dal is boiled, drained and pureed with very little water until smooth and then cooked with jaggery until it forms a thick paste. This is flavored with cardamom for the minimalist, while you can add other spices like dry ginger powder or fennel seeds powder etc. Getting the consistency of the stuffing right is what all the fuss is about in making the holige. Like I said before, follow your instincts, and you won’t falter. You should be able to take the stuffing in your hands (once cool) and shape it into a ball that holds its shape. If it sticks to your hands or doesn’t hold its shape, it needs to thicken further. Put it back on the heat and allow it to thicken. If the stuffing powders in your hands, add a little water or milk and make it thinner.

Once you have the right stuffing, the holige is very easy to make. Holige is traditionally pan fried with a lot of ghee, but to make it vegan, use vegetable oil. I’ve made it with oil too and it doesn’t affect the texture.

Holige tastes best when served warm, with lots of ghee or milk.

Bele holige, obbattu, puran poli, sweet lentil stuffed flatbread


If you made this recipe, let me know! Leave a comment here or on Facebook tag your tweet with @oneteaspoonlife on Twitter and don't forget to tag your photo @oneteaspoonoflife on Instagram. You can also email me at onetspoflife@gmail.com I'd love to see what you are upto.


If you like this recipe, do not forget to share it with your friends and family! 


You can follow One Teaspoon Of Life on FacebookTwitterInstagramPinterest or you can subscribe to One Teaspoon Of Life and receive all the latest updated via Email


Video Recipe


--------------------------------------------------------------------------------------------------------------------------

Bele Holige Recipe | Obbattu Recipe | Puran Poli Recipe


Bele holige, obbattu, puran poli, sweet lentil stuffed flatbreadBele Holige (Obbattu or Puran Poli) is a traditional Indian flatbread that is stuffed with a sweet lentil stuffing and pan fried in ghee. Popularly made for weddings and festivals.

Recipe Type:  Dessert
Cuisine:            Indian
Prep Time:     45 minutes
Cook time:     45 minutes
Total time:     90 minutes
Yield:                Makes 10 to 12 medium Holige

Ingredients:


For the Stuffing (Hurna / Puran)


1 cup Chana Dal
1.5 cups Jaggery Powder
1 tsp Cardamom Powder

For the Dough:


2 cups Wholewheat Flour
1 cup All Purpose Flour
0.5 tsp Turmeric Powder
0.25 tsp Salt
Water as required

Ghee or Oil to fry

Method:


To make the Stuffing:


1. Wash the chana dal twice in water and then soak and leave aside for 30 minutes.
2. Pressure cook the chana dal with 2-3 cups of water until it is cooked. It may take 4-5 whistles or 8-10 minutes after the pressure builds up. If not using a pressure cooker, cook the chana dal in a covered pan until completely cooked.
3. Drain the chana dal and allow it to cool.
4. Once cool, blend it into a smooth paste. Use as little water as possible.
5. Heat a non stick kadhai and add the chana dal paste to it. If you are not using a non stick kadhai, add a little ghee first and then add the chana dal paste.
6. Add in the jaggery powder and mix well. If you want a mildly sweet holige, add only 1 cup of the jaggery powder. You can taste the stuffing and add more if required.
7. Continue cooking the stuffing on low heat while stirring frequently until the stuffing thickens. It may take 15-20 minutes.
8. Add in the cardamom powder and mix well. Remove from heat and allow to cool.
9. If the stuffing feels thin in consistency after cooling, add it back to a kadhai and heat it again until it reaches the desired consistency.
10. While the stuffing cools, make the dough for the holige.

To make the Dough:


11. To make the dough, take the wholewheat flour and all purpose flour in a large bowl. Add in the turmeric powder and salt.
12. Knead it to a smooth dough with water. Add water as required.
13. Cover the dough and rest for 30 minutes.

To make the Holige:


14. To make the holige, take a lime sized ball of dough and roll it out into a small disc on a flour dusted surface.
15. Take a lime sized ball of stuffing and place it on the rolled out dough.
16. Seal the edges and roll out the holige as thin as possible. Dust the holige with flour as required.
17. Heat a tava and grease it with ghee or oil. Place the holige on it.
18. Spoon ghee or oil on the other side of the holige.
19. Cook the holige on medium to high heat until both the sides are cooked.
20. Remove from heat and serve with ghee or milk.


If you liked this, you may also like:
How to make shakkarpara recipe, shankarpole recipe at www.oneteaspoonoflife.com
Shankarpole

How to make Kadale Bele Payasa or Chana Dal Payasam at www.oneteaspoonoflife.com
Kadle Bele Payasa
How to make shavige payasa semiyan kheer vermicelli pudding recipe at www.oneteaspoonoflife.com
Shavige Payasa


Read more ...

Dalma Recipe | How to make Dalma | Oriya Dalma Recipe [Video]


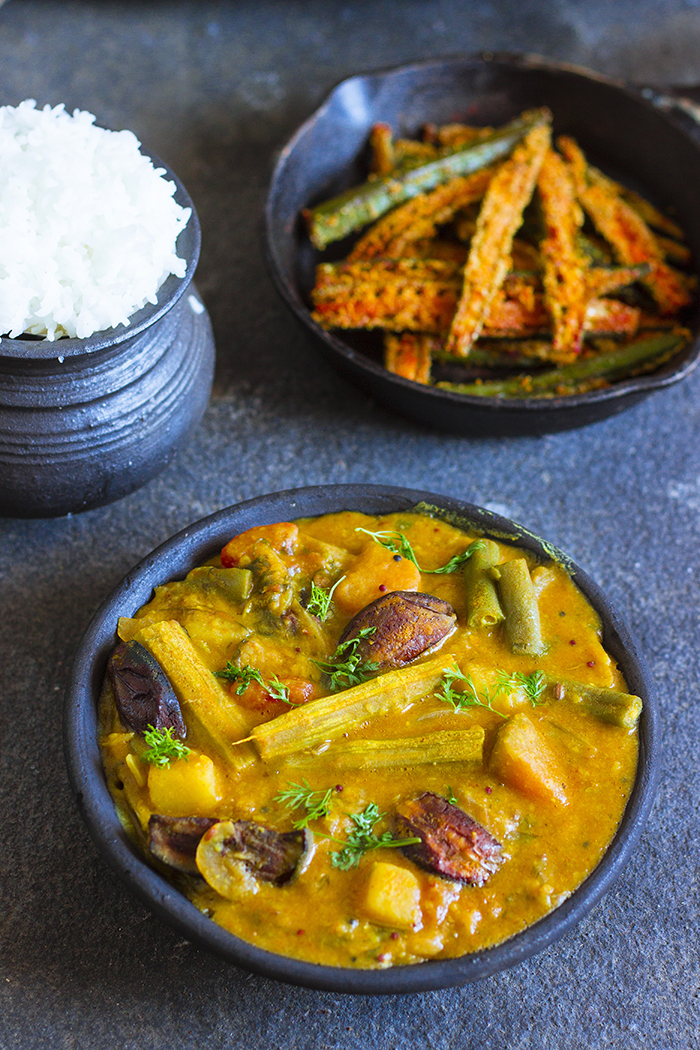
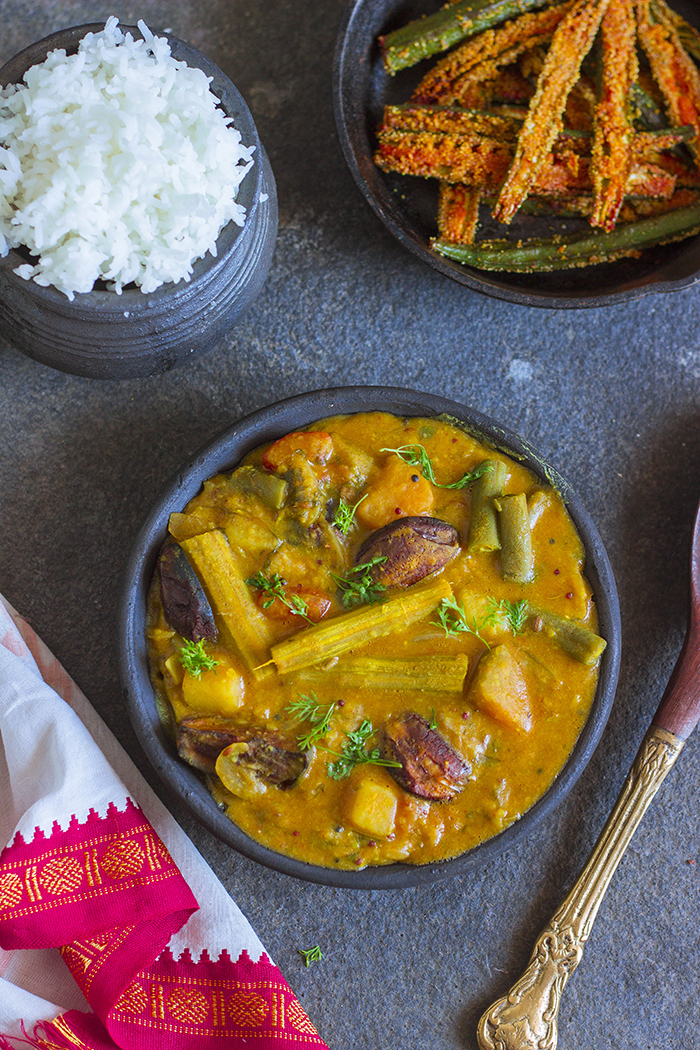
Dalma is a popular mix vegetable dal based curry from the region of Odisha in India. A variety of vegetables are simmered along with dal to give a delicious curry that is usually served with steamed white rice.

In a hurry? Jump to Video or Jump to Recipe

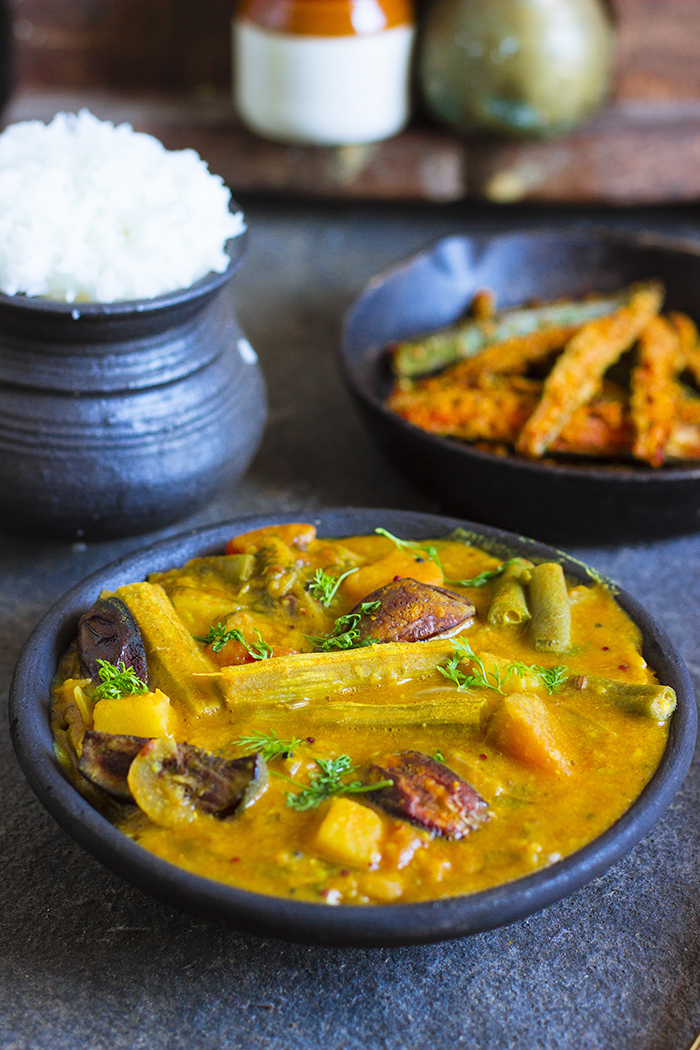
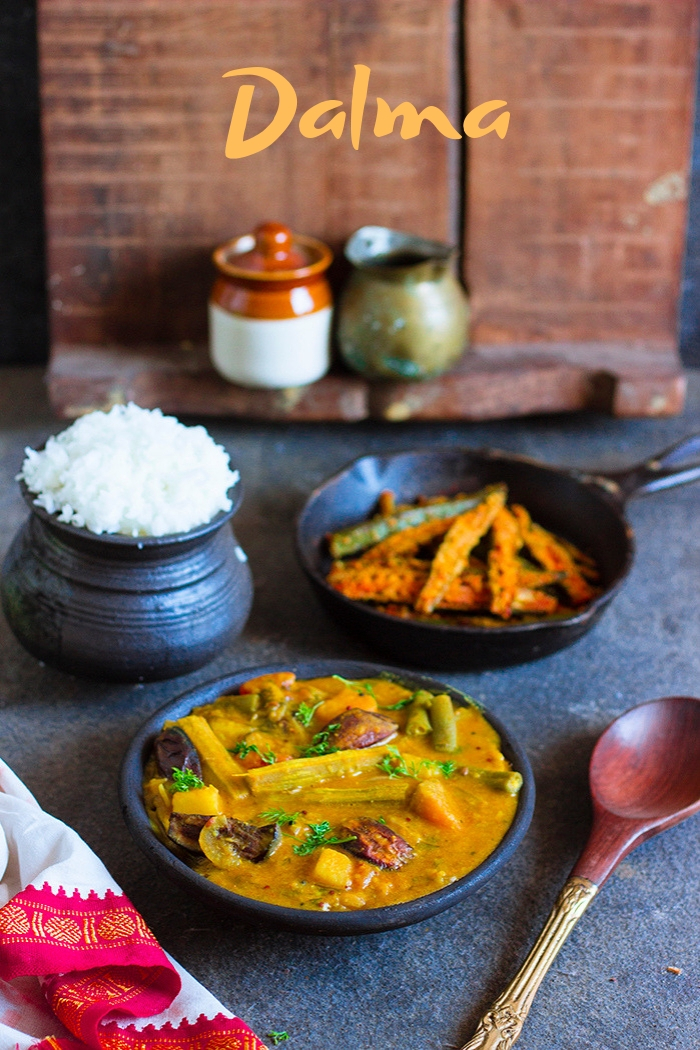
Oriya dalma with mix vegetables


Caution, this is not a Summer Recipe. But I still love it and can eat it anytime. 

The curiosity all started with a restaurant in Bangalore named Dalma. I would cross it and wonder what the name means. I had no clue it actually referred to this very popular classic Odia or Oriya dish. And then we met, me and Dalma, the curry, not the restaurant. The restaurant is still a mystery, never stepped in there.

Dalma was introduced to me by my neighbor who had an Oriya cook. He was fond of cooking his traditional cuisine once in a while and I loved it the first time I ate it. Unfortunately, I never took the recipe from him, but my neighbor who watched over him at times, gave this recipe to me. I have read online that there are different recipes of Dalma, some use coconut, some use onions, some use neither. I believe each region has adapted the dish to what is available locally. The coastal belt uses coconut while the interior regions do not. 

The Odia folks love Dalma so much that it is also served as a part of Chappan Bhog in Puri's Jagannath Temple.


Oriya dalma with mix vegetables

Oriya dalma with mix vegetables

Dalma is a very simple mix vegetable curry that is also very healthy. The dal is full of veggies and barely has any oil. The only oil used is that in tempering. Dalma is a hearty and wholesome curry that is usually served with Rice or Roti. If you plan to serve it with roti, add less water to keep the curry thick. Each variation of the recipe may use different vegetables, use what you can get your hands on. Vegetables that need time to cook are added in the beginning and once they are partially cooked, the faster cooking vegetables are added. The Oriya cook used to cook the dal in the same pan and while the dal was still cooking, he added in the veggies. I just sped up the process by using already cooked dal. Some folks may also use Chana Dal instead of Toor Dal or a mix of both. 

Wishing you a warm and comforting weekend with Dalma!

Oriya dalma with mix vegetables


If you made this recipe, let me know! Leave a comment here or on Facebook tag your tweet with @oneteaspoonlife on Twitter and don't forget to tag your photo @oneteaspoonoflife on Instagram. You can also email me at onetspoflife@gmail.com I'd love to see what you are upto.

If you like this recipe, do not forget to share it with your friends and family! 


You can follow One Teaspoon Of Life on FacebookTwitterInstagramPinterest and or you can subscribe to One Teaspoon Of Life and receive all the latest updated via Email


Video Recipe


--------------------------------------------------------------------------------------------------------------------------

Dalma Recipe | How to make Dalma | Oriya Dalma Recipe


Oriya dalma with mix vegetablesDalma is a popular mix vegetable dal based curry from the region of Odisha in India. A variety of vegetables are simmered along with dal to give a delicious curry that is usually served with steamed white rice.

Recipe Type:  Curry
Cuisine:            Indian
Prep Time:     15 minutes
Cook time:     45 minutes
Total time:     60 minutes
Yield:                Serves 3-4

Ingredients:


3 cups cooked Toor Dal (Pigeon Pea Lentils)
1 Drumstick, peeled and chopped
1 Raw Banana, peeled and diced
1 big Potato, peeled and diced
10-12 Beans, diced
0.5 cup diced Pumpkin
2 Brinjals, diced
1 Tomato, roughly chopped
1 Onion, sliced
2 Tbsp Mustard Oil
1 Tbsp Panch Phoran (whole spice mix)
1 Bayleaf
1 tsp Turmeric Powder
1 tsp Red Chilli Powder
1 tsp Cumin Powder
1 Tbsp chopped Coriander Leaves
Salt to taste
2-3 cups Water
Salt to taste

Method:


1. Add cooked toor dal (lentils) to a deep pan or kadhai. Add water as required and 1 tsp turmeric powder. Mix well.
2. Add in the drumsticks, raw banana, pumpkin, potato and beans.
3. Add salt to taste. Cover and cook until the vegetables are half cooked.
4. Add in the brinjal and cover and cook until the vegetables are almost cooked.
5. Add in the chopped tomato and cook until all the vegetables are cooked.
6. Adjust seasoning if required. Remove from heat and keep aside.
7. To make the tempering, heat mustard oil in a pan and add the panch phoran spice mix.
8. Once the spices splutter, add in the bay leaf and sliced onions.
9. Fry until the onions are translucent.
10. Add in red chilli powder and the cumin powder and saute for 1 minute.
11. Add the Dalma to the tempering and simmer for 5-6 minutes.
12. Add water if required.
13. Garnish with the chopped coriander leaves.
14. Serve hot with rice or roti.

If you liked this, you may also like:

How to make vegan Panchmel Dal or mixed lentil soup at www.oneteaspoonoflife.com
Pancharangi Dal

Black Chickpea Curry
Ghugni Masala
How to make gujarati undhiyo recipe at One Teaspoon Of Life. How to make vegan mix vegetable curry recipe at www.oneteaspoonoflife.com
Undhiyu


Read more ...

Steamed Veg Momo Recipe | Vegan Dumplings Recipe [Video]


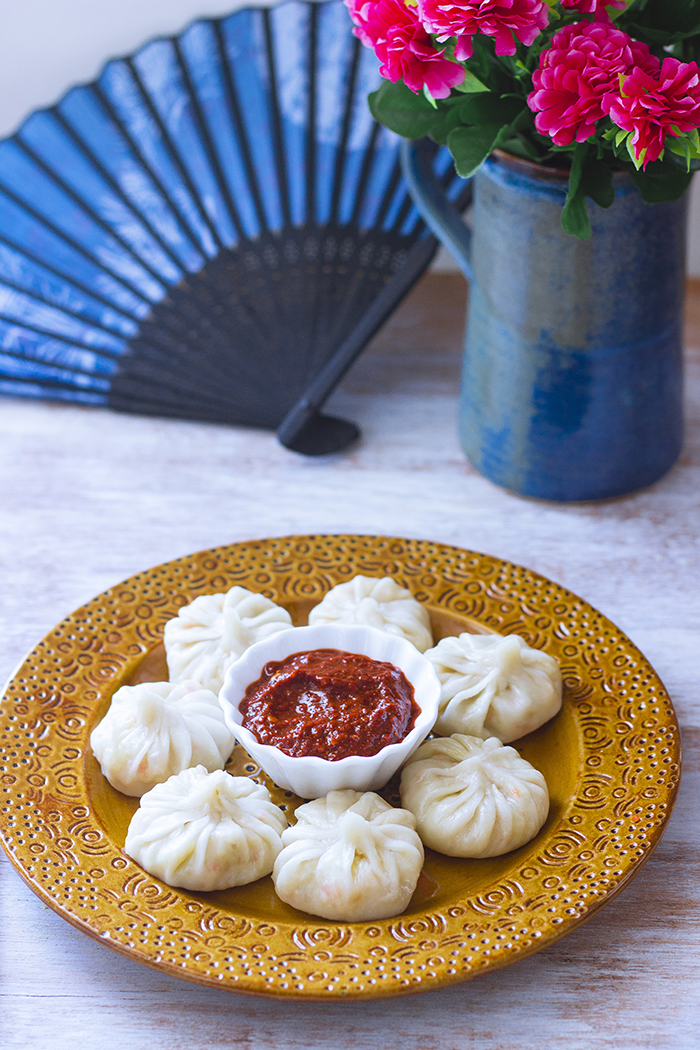
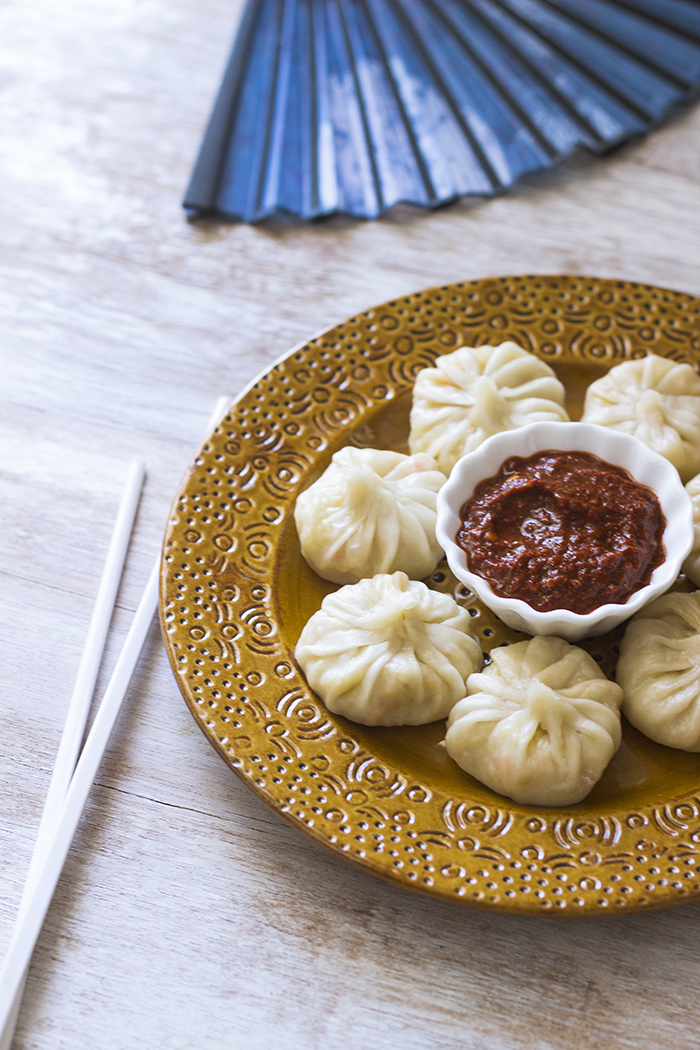
Veg Momos are vegan dumplings stuffed with a stir fried mix of finely chopped vegetables. The dumpling can either be steamed,  deep fried or pan fried. This is the recipe for steamed veg momos. Steamed veg momos are a specialty of North East India and these are now a popular street food all through India.

In a hurry? Jump to Video or Jump to Recipe

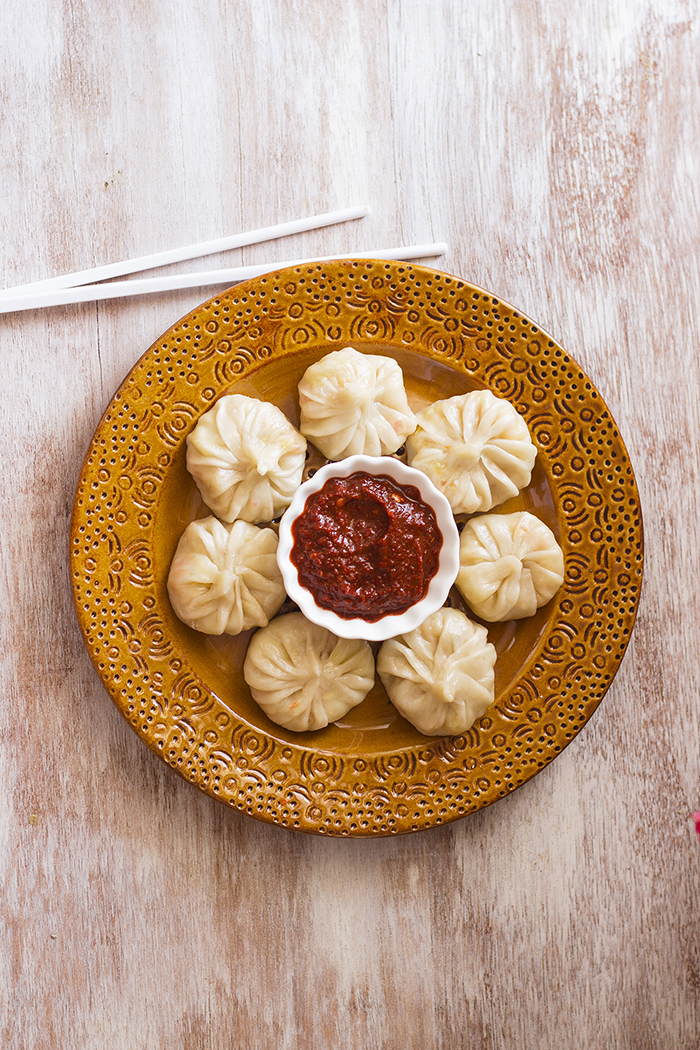
Steamed vegan dumplings or momo from India

I never skip a chance to eat a Momo. But making them, I've had my excuses.

I'm glad I finally got around to making some, because I simply loved this recipe and I'm so happy I can share it with you. And unlike what I imagined earlier, it is not that elaborate and no, homemade is so much better than the street side one. 

So.... a Momo is a dumpling that is native to the Himalayan region, mainly North-East India, Tibet, Nepal and regions around them. In recent times, momos have taken the streets by storm and it is not unusual to see folks selling momos at street corners. They have become extremely popular as street food. 

My first experience with momo making was in 2009, when we visited Darjeeling. Darjeeling is very famous for momos and I had it in my bucket list to try some there. We used to frequent a small family run restaurant called Nimto that served us vegetarian food. It was here that we saw Auntie (the owner and chef) prepare momos. I was amazed at the speed and quality of the pleating of her momos. While I am nowhere close to her's in aesthetic appeal, I believe I've made up for it with taste.

Steamed vegan dumplings or momo from India

Veg momos are usually stuffed with cabbage and a mix of other finely chopped veggies. A momo is very mild in flavor, it has a subtle hint of ginger, garlic and heat. It is usually served with either chilly vinegar or a spicy chilli garlic sauce or a spicy peanut sauce. There are some places that serve momos with mayo but I would never visit those places. 

In this post and video, I have included details on how to make the momo wrappers as well. In my next post, I will share a simple recipe to make the Chilli Garlic sauce that I served the momos with. While I did not do it this time, in the past I have frozen momos and steamed them when required. If you plan to freeze momos, place the momos in a large box in a single layer and freeze them. You can then directly steam them (no thawing required) when you want to eat the momos. But just serve them hot, momos tend to get chewy if allowed to cool.

This recipe shows one method of pleating the momos, this is usually how veg momos are pleated. But feel free to pleat or seal the momos as you please. Look up online, there are several easy ways to pleat. Hope you enjoy this recipe. If you do, please let me know!!

Happy Momo Making Weekend!

Steamed vegan dumplings or momo from India


If you made this recipe, let me know! Leave a comment here or on Facebook tag your tweet with @oneteaspoonlife on Twitter and don't forget to tag your photo #oneteaspoonoflife on Instagram. You can also email me at onetspoflife@gmail.com I'd love to see what you are upto.


If you like this recipe, do not forget to share it with your friends and family! 


You can follow One Teaspoon Of Life on FacebookTwitterInstagramPinterest or you can subscribe to One Teaspoon Of Life and receive all the latest updated via Email


Video Recipe


--------------------------------------------------------------------------------------------------------------------------

Steamed Veg Momo Recipe | Vegan Dumplings Recipe


Steamed vegan dumplings or momo from IndiaVeg Momos are vegan dumplings stuffed with a stir fried mix of finely chopped carrots and cabbage. The dumpling can either be steamed, deep fried or pan fried. This is the recipe for steamed veg momos. Steamed veg momos are a specialty of North East India and these are now a popular street food all through India.

Recipe Type:  Snacks
Cuisine:            Indian
Prep Time:     60 minutes
Cook time:     45 minutes
Total time:     50 minutes
Yield:                Makes 20 momos

Ingredients:


For the Dumpling Wrappers:


1 cup All Purpose Flour (Maida)
0.5 tsp Salt
0.5 cup hot Water

For the Momo filling:


3 cups finely chopped Cabbage
0.5 cup finely chopped Carrot
1 Tbsp finely chopped Garlic
1 Tbsp finely chopped Ginger
1 Green Chilli, finely chopped
2 Tbsp Oil
Salt to taste

Method:


1. To make the dumpling wrappers, take the flour in a large bowl and add salt to it.
2. Now add water by the spoonfuls and knead until you have a smooth dough. Knead the dough for at least 10 minutes to allow the gluten to develop. You can also use cold water to knead the dough, but hot water yields a softer wrapper.
3. Cover and keep aside for 30 minutes to 1 hours.
4. While the wrapper dough is resting, make the filling for the momo.
5. To make the momo filling, heat oil in a pan and add in the chopped garlic, ginger and green chilli. Saute until fragrant.
6. Now add the chopped carrot and saute for 2-3 minutes on medium heat.
7. Add in the chopped cabbage and salt to taste and continue to saute on low heat until the cabbage is almost cooked.
8. Remove from heat and allow to cool down to room temperature.
9. Divide the wrapper dough into 20 equal portions.
10. Fill in 1-2 spoons of filling.
11. Wet the edge with water.
12. Carefully pleat the edges to seal the momos.
13. Steam the momos for 5-6 minutes.
14. Serve hot with chilli sauce.


If you liked this, you may also like:
Malaysian Laksa Lemak or Curry Laksa. Vegan spicy asian noodle soup
Vegan Laksa Soup

Steamed cups made from rice semolina
Steamed Rice Cups
Steamed Lentil Dumplings


Read more ...

Dahi Sandwich Recipe | Yogurt Sandwich Recipe [Video]


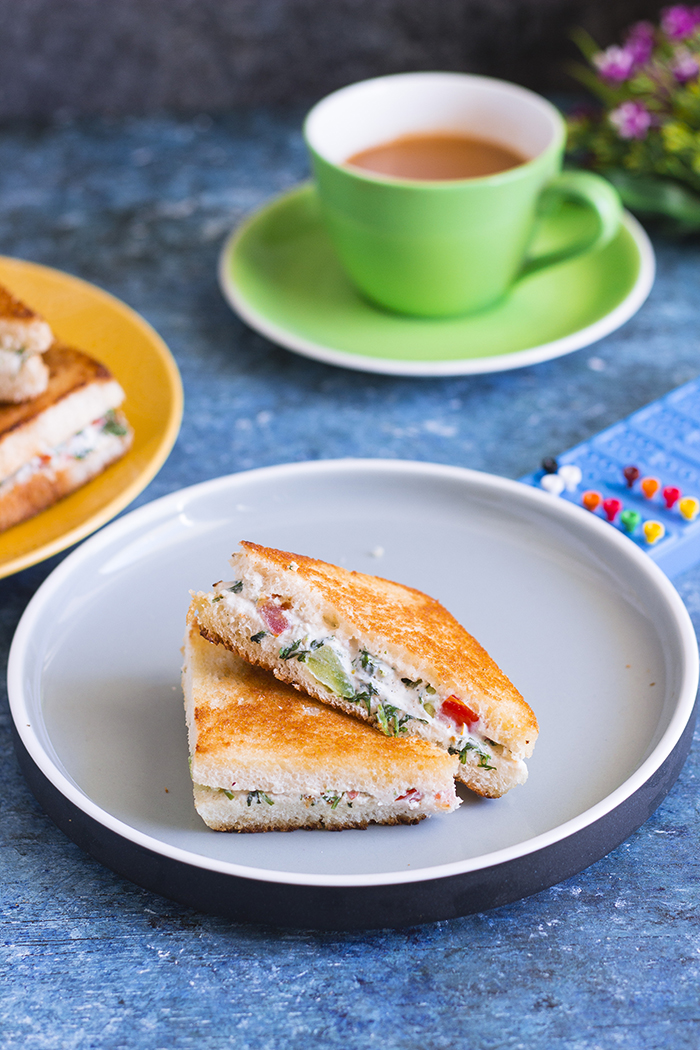
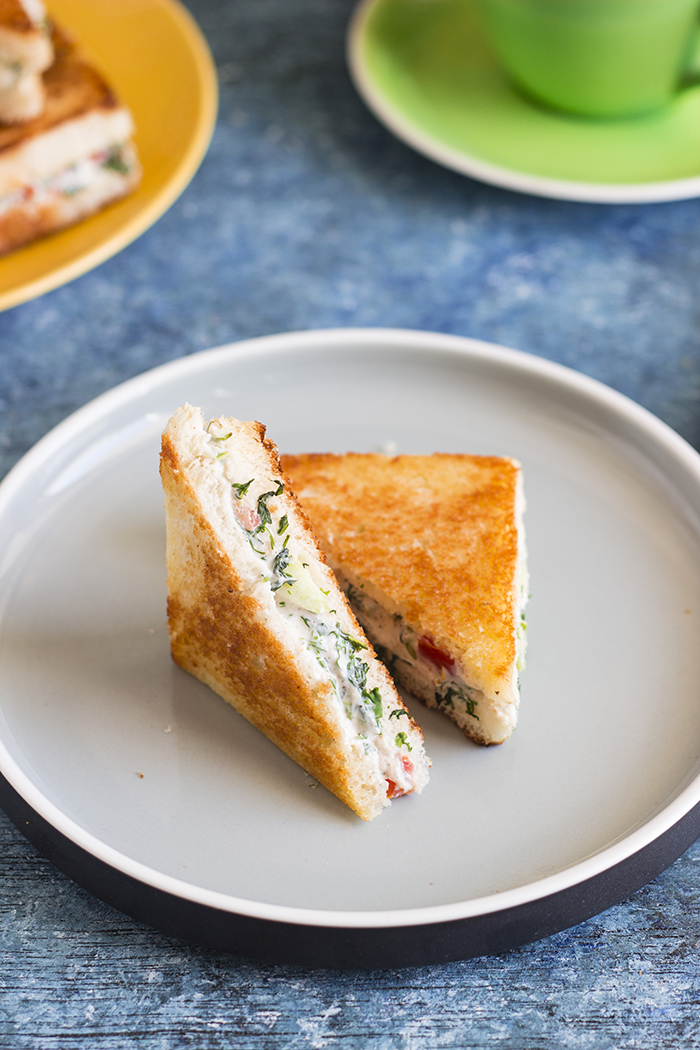
Dahi Sandwich or Yogurt Sandwich. An easy and healthy vegetarian sandwich that is made by stuffing bread with a delicious mix of hung curd (yogurt), finely chopped vegetables, and spices and toasting it off in a frying pan until golden and crispy. Perfect for breakfast or snacks.

In a hurry? Jump to Video or Jump to Recipe

dahi sandwich yogurt sandwich hung curd sandwich

Hola! to all you fun people out there. Weekend's near and I'm already in my lazy mood. And this sandwich is perfect for the mood. Today, I bring to you a fun and Summery sandwich - The Dahi Sandwich or the Yogurt Sandwich.

Say what you may, Summer is here, at least in Bangalore. And might I say I'm not loving it. It's gotten a tad too hot for my liking. I've been sending messages up in the sky for some rain and I hope I get a reply. Until then, all I can do is enjoy some Summery food in the shade with the fan on full speed.

So, Dahi Sandwich, when I first heard of it, I was so excited. I love Dahi (yogurt). It is the only thing that prevents me from becoming a vegan. Vegan yogurt is just not for me. If you love creamy sandwiches wrapped in crispy golden bread, then this one is the ONE for you.

dahi sandwich yogurt sandwich hung curd sandwich

Dahi Sandwich is super easy to make once you have the "hung curd". I will interchangeably use the words dahi, curd and yogurt, because they all are the same. And when I say yogurt, it is always the plain one and not flavored ones. Back to the "hung curd", hung curd is just curd from which the liquid has been drained out. There are several ways you can make hung curd. The traditional method is wrapping the curd in a muslin or thin cotton cloth and tying the cloth and then hanging it somewhere (preferably over the sink) and letting the liquid drain out. I choose the easy method, which is using a huge tea strainer. I add the curd to the strainer and keep it over a deep bowl in the fridge overnight. Come morning and all you curd is strained and you have the thick creamy solids. More about this in notes.

Once you have mastered making the hung curd, you can also try to make these delicious "Dahi Kebabs" that are perfect for dinner parties where you want to show your culinary skills. I only use homemade Dahi or Yogurt, you can learn how to make your own yogurt, here. It is super easy and the results are so much better than packaged yogurt.

After you have the hung curd, add in finely chopped vegetables, very little spice and then spread it on the bread and then toast the sandwich on a pan until crisp and golden. I kept the spices light, because I wanted the sandwich to be cooling. I added Chaat Masala, you can just add Garam Masala or any spice mix you like, or just stick to plain pepper. 

These Dahi Sandwiches are kid friendly and adult friendly (very). Also, between us, these are somewhat healthy, if you overlook the white bread and the butter. But I think on weekends, we can always cheat a little. So b-bye for now.

Happy Weekend folks, see you next week.

dahi sandwich yogurt sandwich hung curd sandwich


If you made this recipe, let me know! Leave a comment here or on Facebook tag your tweet with @oneteaspoonlife on Twitter and don't forget to tag your photo #oneteaspoonoflife on Instagram. You can also email me at onetspoflife@gmail.com I'd love to see what you are upto.


If you like this recipe, do not forget to share it with your friends and family! 


You can follow One Teaspoon Of Life on FacebookTwitterInstagramPinterest and Google+ or you can subscribe to One Teaspoon Of Life and receive all the latest updated via Email


Video Recipe


--------------------------------------------------------------------------------------------------------------------------

Dahi Sandwich Recipe


dahi sandwich yogurt sandwich hung curd sandwichInstant Mix Vegetable Uttappa is a quick savory South Indian pancake that is made from semolina and topped with finely chopped vegetables. It is popularly served as breakfast along with some fresh coconut chutney.

Recipe Type:  Snacks, Breakfast
Cuisine:            Indian
Prep Time:     10 minutes
Cook time:     15 minutes
Total time:     25 minutes
Yield:                5

Ingredients:


10 Bread Slices
0.75 cup hung Curd
2 Tbsp Tomato, finely chopped
2 Tbsp Capsicum, finely chopped
1 Green Chilli, finely chopped
2 Tbsp Coriander leaves, finely chopped
1 tsp Chaat Masala
Salt to taste
Butter as required

Method:


1. Mix together the hung curd (see Notes), tomato, capsicum, coriander leaves, green chilli, chaat masala and salt until combined.
2. Spread the curd mixture on a slice of bread and place another bread on top to make a sandwich.
3. Slice off the edges of the sandwich.
4. Grease a pan with butter and place the sandwich on the pan.
5. Cook on low to medium heat until the sandwich turns golden brown on one side.
6. Flip the sandwich and cook until the second side browns.
7. Cut diagonally and serve.

Notes:

1. Hung curd is made by straining thick dahi or curd or yogurt in a muslin cloth for a 4-5 hours. The same quantity of yogurt may give different people different quantities of hung curd as it depends on how much liquid the yogurt contains. Different brands may give different results too. Hence, for the sake of uniformity, this recipe uses the quantity of hung curd instead of quantity of curd or yogurt.

2. To make hung curd, take a muslin cloth and tie yogurt in it. Then suspend the cloth from a tap or rod for a few hours. Alternately, you can also use a fine strainer and leave the yogurt in it in the fridge overnight.


If you liked this, you may also like:
Bangalore Iyengar Bakery Style bread toast topped with an onion-carrot masala
Masala Bread Toast

Bombay sandwich, Bombay masala toast, Mumbai sandwich, Spiced potato sandwich
Mumbai Masala Toast
Masala Pav, Indian street food
Misal Pav


Read more ...