Showing posts with label Vegan. Show all posts

Kaju Katli Recipe | How to make Kaju Katli | Vegan Cashew Fudge Recipe [Video]


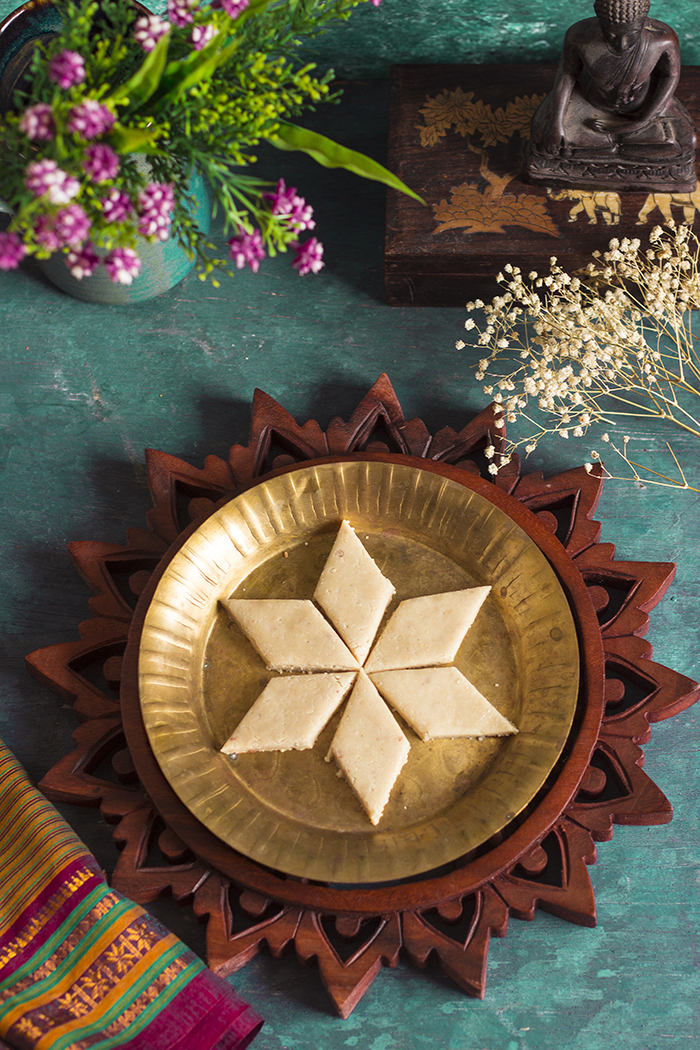
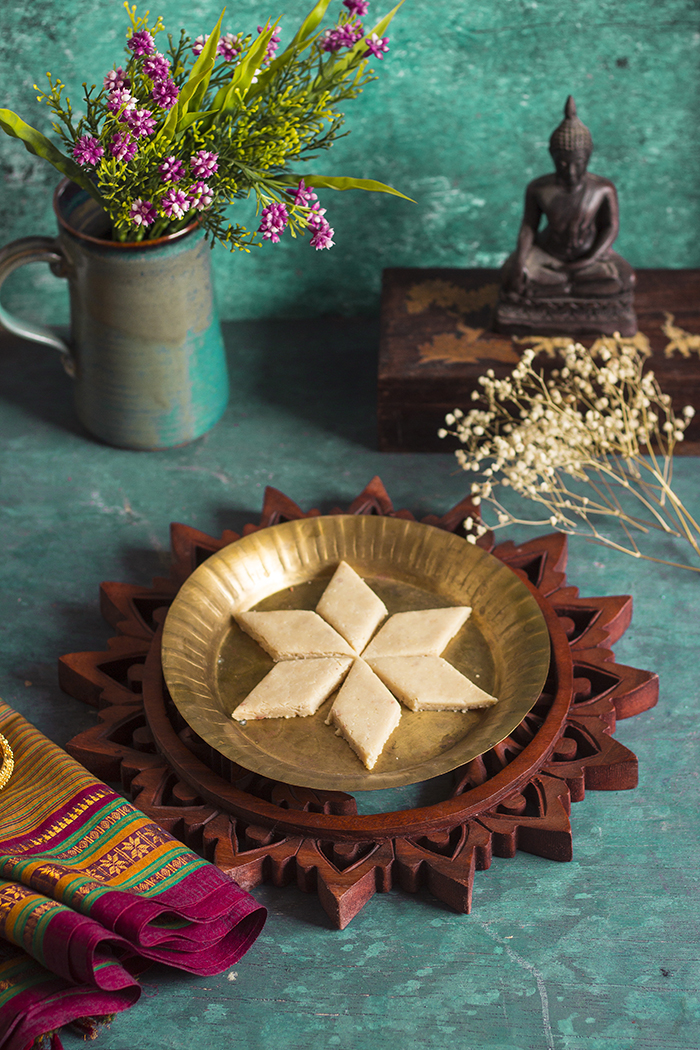
Kaju katli or kaju barfi is a diamond shaped soft fudge made from cashew nuts. It is a popular Indian sweet. Perfect to gift family and friends.

In a hurry? Jump to Video or Jump to Recipe

kaju barfi recipe, Indian cashew fudge

Deepavali is here!!

Deepavali or Diwali always brings with it the air of festivity. Deepas or lamps everywhere, akash kandils in the balconies, colorful rangolis near the threshold, brand new clothes and delicious sweets and savories. With such fervor in the air, it is hard not to celebrate.

The best part of Diwali for me has always been the sweets and savories. People painstakingly spend hours making an array of snacks to fill up boxes and on the day of diwali these are distributed between friends and family. While I always saw my mom do this when we were kids, I had never done so, until last year.

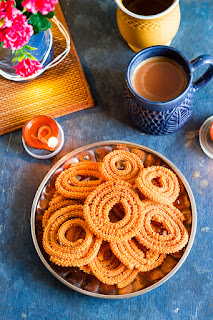
Last year for deepavali, I went to my childhood home and did just that. I made crispy Chakli and this delicious Kaju Katli. Kaju Katli is a sweet that everyone loves. It is generally mildly sweet and has a delicate flavor of cashew nuts. Kaju Katli is gluten free and can be vegan too. The version I make is always vegan, but some recipes I know call for the addition of milk or milk powder.

While the recipe looks simple, it really isn't. So don't fret if it doesn't work out for you the very first time you try. The first time I made it, the sugar syrup was not the right consistency and we ended up eating kaju halwa for a few days. That was delicious too.

kaju barfi recipe, Indian cashew fudge

What is Kaju Katli


Kaju Katli is cashew nut fudge, in simple words. It is a very popular Indian sweet that is sold worldwide and it can made from just three ingredients - Cashew nuts, Sugar and water. Some recipes call for milk, milk powder or condensed milk, but if you want a vegan recipe, you are in the right place.

Kaju Katli is a sweet that is commonly distributed for all celebrations from birthdays to promotions to festivals. Also, since it is a dry sweet that has a greater shelf life than most milk based sweets, it also makes for a good gifting option.

Kaju Barfi is a sweet similar to Kaju Katli but is made slightly differently and uses milk and milk solids. The names are used synonymously several times, so don't get confused. Kaju katli is usually thin - somewhere about 3-5mm in thickness while a kaju barfi is thicker.

kaju barfi recipe, Indian cashew fudge


Tips for making the best Kaju Katlis:


Some important notes and learnings from my mistakes, just to help you a little:

  1. Use everything at room temperature. Refrigerated cashew nuts will mess up the recipe, so keep them out overnight if you store cashew nuts in the fridge. 
  2. Pulse the grinder to powder the cashew nuts. Grinding them for too long will lead to cashew nuts leaving their oil and making them unusable.
  3. Sieve if you want to, or just skip it. Small bits of cashews just give the kaju katli a rustic feel and they are really not very noticeable in the end product.
  4. If you have some large chunks of cashew nuts that just won't grind fine enough, add as little water as possible and blend them to a puree.
  5. You need the sugar syrup at the right consistency. Use the water bowl trick mentioned in the video and the recipe to check for the right consistency.
  6. If the sugar syrup has gone beyond the required consistency and the dough looks brittle and forms hard lumps after removing from heat, allow it to cool a little, and then pulse it in the mixer until all lumps are broken and you get a fine powder. Knead this powder along with milk or water to get a smooth dough.
  7. You have to knead the dough while it is still hot. Use gloves if required.
  8. Do not knead the dough too much, it will release its oil and while it is still edible, the kaju katli will not have the same mouthfeel as the store bought ones.

kaju barfi recipe, Indian cashew fudge

If you made this recipe, let me know! Leave a comment here or on Facebook tag your tweet with @oneteaspoonlife on Twitter and don't forget to tag your photo @oneteaspoonoflife on Instagram. You can also email me at onetspoflife@gmail.com I'd love to see what you are up to.

If you like this recipe, do not forget to share it with your friends and family! 


You can follow One Teaspoon Of Life on FacebookTwitterInstagramPinterest or you can subscribe to One Teaspoon Of Life and receive all the latest updated via Email


Video Recipe


--------------------------------------------------------------------------------------------------------------------------

Kaju Barfi Recipe | How to make Kaju Katli

kaju barfi recipe, Indian cashew fudge

Kaju katli or kaju barfi is a diamond shaped soft fudge made from cashew nuts. It is a popular Indian sweet. It can be made vegan.

Recipe Type:  Dessert
Cuisine:            Indian
Prep Time:     15 minutes
Cook time:     45 minutes
Total time:     55 minutes
Yield:                12-15

Ingredients:


1 cup Cashew nuts
0.5 cup Sugar
0.25 cup Water
Oil or Ghee for greasing

Method:


1. Powder the cashew nuts until fine. Use cashew nuts at room temperature, cashew nuts used directly from the fridge will not give you a fine powder.
2. If the cashews are not finely powdered, you can use a sieve and remove the big unground pieces. Use a medium sized sieve. Sieve and keep aside.
3. To make the sugar syrup, in a pan (preferably nonstick), add the sugar and water and cook on medium heat. The sugar syrup needs to reach one string consistency.
4. To check if the consistency of the sugar syrup, add a small drop of the syrup into a bowl of water. If the syrup dissolves in the water, then the syrup needs more cooking. If the syrup doesn't dissolve but forms a flexible string, then it is ready.
5. Add in the ground cashew nuts and mix until combined.
6. Continue to cook on low heat until the cashew dough becomes one mass.
7. Remove from heat and move the dough to a large plate. Allow it to cool for 2-3 minutes.
8. While the cashew dough is still hot, gently knead it for 2-3 minutes until it is smooth. Do not over-knead, else the cashew will leave its oil.
9. Grease the back of a plate and place the dough on it. Roll it out until the dough is around 5mm thick.
10. Cut the kaju katli into diamond shaped pieces. Allow to cool completely.
11. Using a butter knife, gently remove the kaju katli from the plate and store it in a cool place.
12. Serve Kaju Katli at room temperature.


If you liked this, you may also like:

How to make shakkarpara recipe, shankarpole recipe at www.oneteaspoonoflife.com
Shankarpole

Coconut Laddoo
Bele holige, obbattu, puran poli, sweet lentil stuffed flatbread
Holige | Puran Poli


Read more ...

Lahsun Shev Recipe | Garlic Sev Recipe [Video]


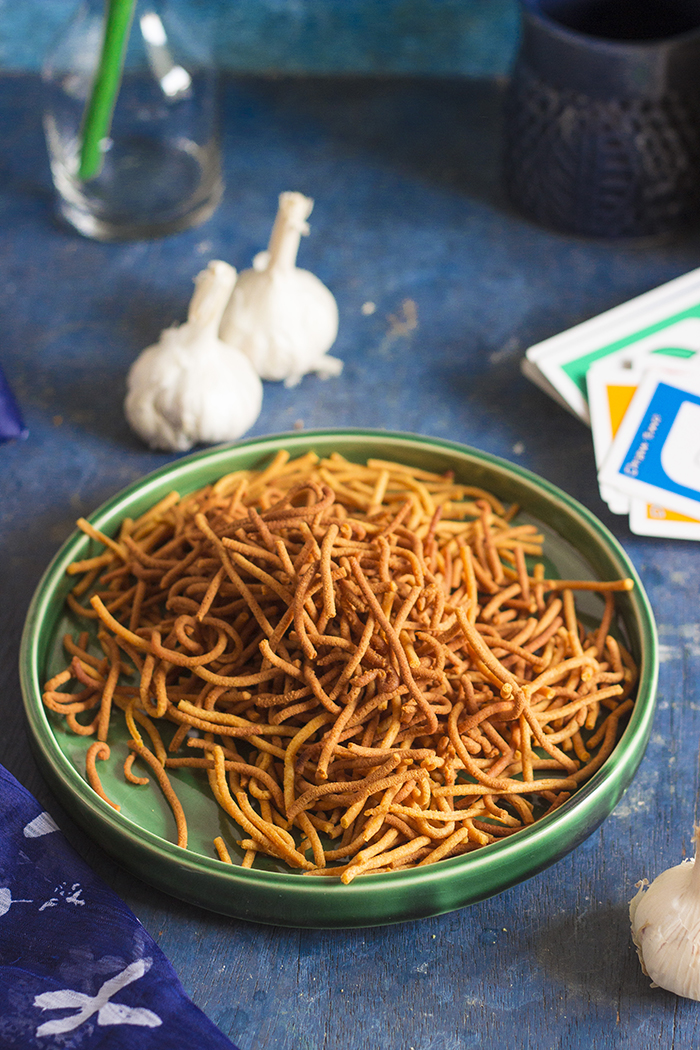
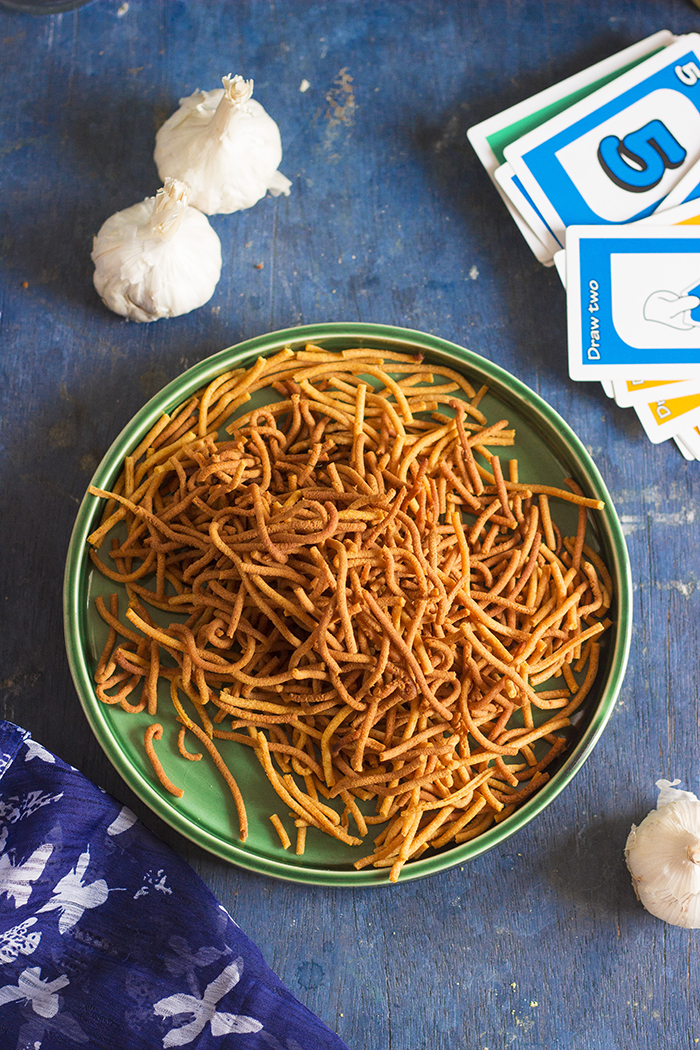
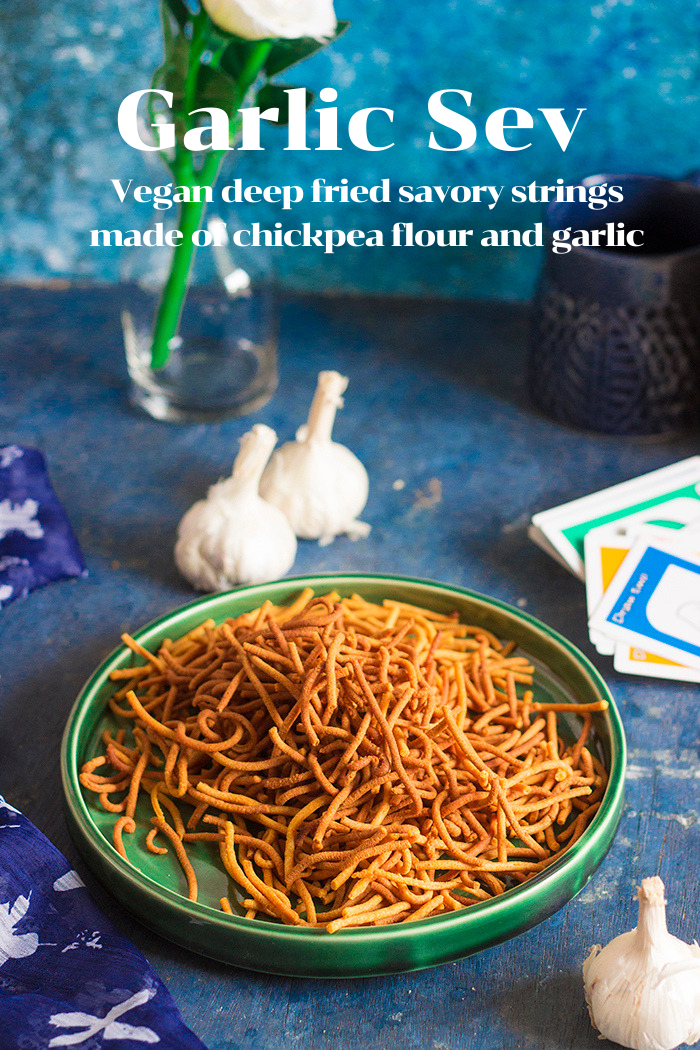
Garlic Sev or Lahsun Shev is deep fried savory strings made of chickpea flour that has been flavored with garlic. Serve garlic sev as an evening snack during tea time. Garlic Sev is vegan.

In a hurry? Jump to Video or Jump to Recipe

lahsun shev lasoon sev

So how have you guys been? I'm making an appearance after a gap of few weeks now.

For the first time, it is not because I was busy with work, but because I was on vacation. Finally!! The last real vacation that did not involve attending weddings or meeting family was when we went to Bali in 2017 and we were both craving some "us" time. This year we kept it local and visited North East India.

Before I went on vacation, I shared the recipe of the BEST CHOCOLATE CAKE ever!!! I hope you tried that out cause that's a keeper. But that cake, was what I wanted to make for Gee and Raj's birthday. They had asked me for totally different things.

Gee, not one with a sweet tooth and someone craving a certain savory for months now, asked me to make her Garlic Sev, the way they sell in Goa. She's been trying her luck to find something similar in Bangalore, but not succeeded. I thought I would attempt to make some for her. Whether it tastes exactly like the one she buys in Goa, it is up to her to tell, but I thought it was really really tasty and it was so simple to make.

lahsun shev lasoon sev


Garlic Sev or Lahsun Shev is deep fried savory strings made of chickpea flour that has been flavored with garlic. The dough is very simple, just a few ingredients. The dough doesn't require any real kneading, just enough to combine all the ingredients together. Then you need a sev press or any press really that can shape the sev. Using the press, release the dough straight into the hot oil and deep fry until crisp.

The amount of garlic I used gives the sev a mild garlic flavor. To get a more prominent flavor, add more garlic.

Garlic Sev stores well for 1-2 weeks in an airtight container, but, I assure you it won't last that long for you to test. This thing is so addictive, it will be gone in a jiffy. Serve garlic sev with tea during tea times or just snack day long.


lahsun shev lasoon sev


If you made this recipe, let me know! Leave a comment here or on Facebook tag your tweet with @oneteaspoonlife on Twitter and don't forget to tag your photo @oneteaspoonoflife on Instagram. You can also email me at onetspoflife@gmail.com I'd love to see what you are up to.

If you like this recipe, do not forget to share it with your friends and family! 


You can follow One Teaspoon Of Life on FacebookTwitterInstagramPinterest or you can subscribe to One Teaspoon Of Life and receive all the latest updated via Email


Video Recipe


--------------------------------------------------------------------------------------------------------------------------

Garlic Sev Recipe | How to make Lahsun Sev

lahsun shev lasoon sevGarlic Sev or Lahsun Shev is deep fried savory strings made of chickpea flour that has been flavored with garlic. Serve garlic sev as an evening snack during tea time. Garlic Sev is vegan.

Recipe Type:  Snacks
Cuisine:            Indian
Prep Time:     15 minutes
Cook time:     30 minutes
Total time:     45 minutes
Yield:                One small jar

Ingredients:


1 cup Chickpea Flour (Besan)
5 to 6 Garlic cloves
0.25 tsp Asafoetida (Hing) (Use gluten-free hing)
2 tsp Red Chilli Powder
1 tsp Turmeric Powder
1 Tbsp Oil
Salt to taste (Curd)
Oil for deep frying
Water as required

Method:


1. Blend the garlic, asafoetida, red chilli powder, turmeric powder, salt and 1 Tbsp oil with a little water into a smooth paste. The mentioned amount of garlic gives a very mild flavor, add more garlic for a more prominent garlic flavor.
2. Take the chickpea flour/besan in a large bowl and add the blended garlic masala.
3. Knead until combined. Add more water if required. If it is too sticky, add a little more chickpea flour/besan. Adjust salt or red chilli powder as required.
4. Take a chakli press or a sev press and select the sev plate of the thickness you desire. Grease the plate and the press.
5. Add in a portion of the dough to the press and stuff it in tight.
6. Heat oil for deep frying.
7. Once the oil is hot, press the sev directly into it.
8. Allow the sev to cook for 1-2 minutes on medium heat, then flip it.
9. Cook for 4-7 minutes until crisp and lightly browned.
10. Remove from heat and either place it on an absorbant paper towel or a collander.
11. Once the sev has cooled completely, gently break it into smaller pieces.
12. Store in an airtight container so that sev remains crisp.


If you liked this, you may also like:
How to make shakkarpara recipe, shankarpole recipe at www.oneteaspoonoflife.com
Shankarpole

traditional Indian chakli, savory deep fried snack
Chakli
popular Indian snack - baked flat discs made of four and spices
Baked Papdi


Read more ...

Chhole Pulao | Chickpea Pilaf [Video]


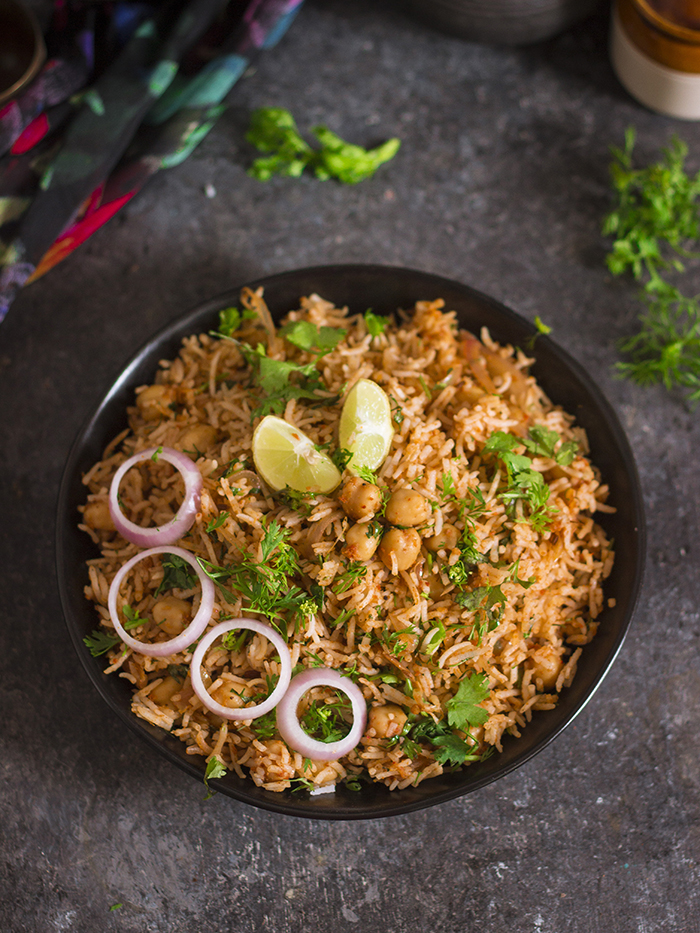
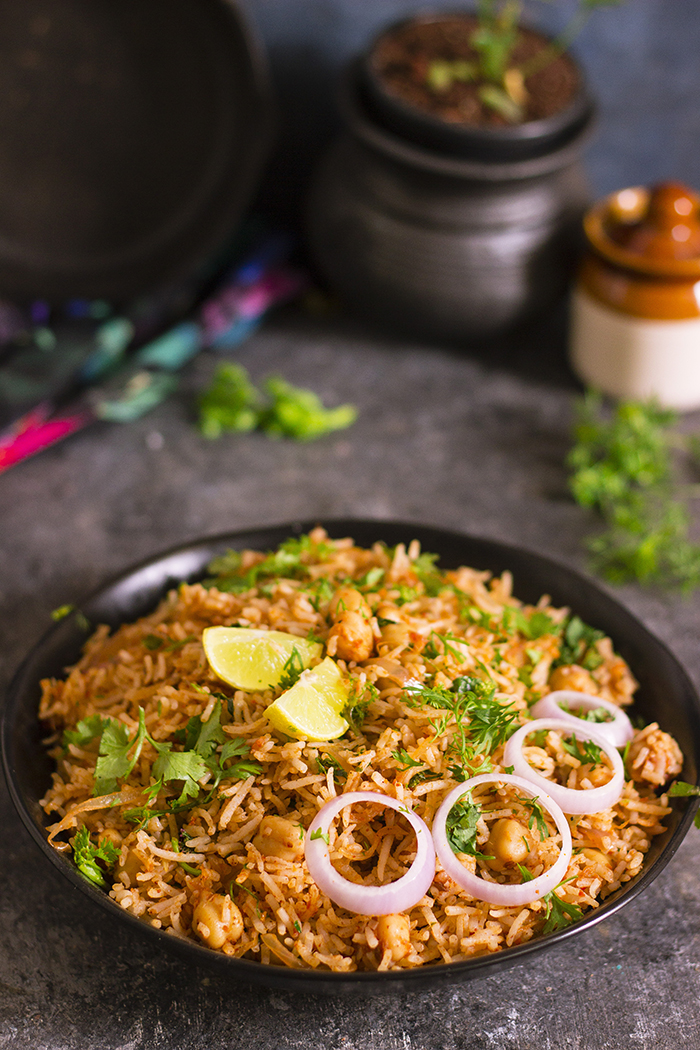
Chhole Pulao is a spicy rice main made with chickpeas or kabuli chana. This vegan and gluten-free rice is made by cooking fragrant Basmati rice with a spicy tomato based masala and boiled chickpeas.

In a hurry? Jump to Video or Jump to Recipe

spicy chickpea rice

spicy chickpea rice


Chhole Pulao - a combination of two of my favorite dishes - chhole and pulao, now encompassed into one dish! Growing up, this was our Sunday lunch (mostly). My mom made her famous Pulao and Chhole on Sundays and on special occasions. It was a family favorite. The idea of combining both and making one dish originated from Instagram. A long time ago, one of my favorite Instagrammers, thegutlessfoodie posted her meal of a Chhole Pulao, albeit without chickpeas in there. I loved the idea and took on to making this dish. It has been a success. 

This Chhole Pulao simply put, is made by cooking a dry version of our regular Chhole or chickpea curry and mixing in cooked Basmati rice. It is an easy to make meal and it can be prepped well in advance. You can cook the chickpeas a few days ago and store them in the fridge, for an even easier approach, just buy canned chickpeas. The Basmati rice also can be cooked in advance and stored in the fridge. You can also make it with leftover rice, any variety you have. I personally like cooking the masala fresh, because it really doesn't take much time, but you can also make this in advance and on the day of the meal, just combine the three.


spicy chickpea rice


For the past two weeks, I have been stressed with very little time at my hands to cook a meal. It is at times like this, that recipes like Chhole Pulao come very handy. As far as I prep everything on the weekend, the weekdays seem easier.

Since the Chhole Pulao is a carb-heavy dish, so it ends up satiating you. I call it comfort food. Chhole Pulao is a plant-based meal that fits well into the Vegan lifestyle. It can be served as a main dish at festivities and celebrations. 


If you made this recipe, let me know! Leave a comment here or on Facebook tag your tweet with @oneteaspoonlife on Twitter and don't forget to tag your photo @oneteaspoonoflife on Instagram. You can also email me at onetspoflife@gmail.com I'd love to see what you are up to.


If you like this recipe, do not forget to share it with your friends and family! 


You can follow One Teaspoon Of Life on FacebookTwitterInstagramPinterest or you can subscribe to One Teaspoon Of Life and receive all the latest updated via Email


Video Recipe


--------------------------------------------------------------------------------------------------------------------------

Chhole Pulao Recipe | Chickpea Pilaf Recipe


spicy chickpea riceChhole Pulao is a spicy rice main made with chickpeas or kabuli chana. This vegan and gluten-free rice is made by cooking fragrant Basmati rice with a spicy tomato based masala and boiled chickpeas. 

Recipe Type:  Main
Cuisine:            Indian
Prep Time:     15 minutes
Cook time:     45 minutes
Total time:     60 minutes
Yield:                Serves 2

Ingredients:


1 cup Chickpeas, boiled
0.75 cup raw Basmati Rice
0.75 cup Tomato Puree
2 Onions
2 Tbsp Oil
1 Tbsp Ginger-Garlic Paste
1 tsp Cumin seeds
2 Tbsp Chhole Masla
1 tsp Coriander Powder
2 Tbsp Kasuri Methi
Coriander leaves to garnish
Salt to taste
Water as required

Method:


1. Wash the Basmati rice 4-5 times until the water runs clear. Soak the Basmati rice in water for 15 minutes.
2. After 15 minutes, boil 1.25 cups of water with a pinch of salt. Drain the rice and add it to the boiling water. Cover and cook on low heat until the rice is cooked. Remove from heat and allow to cool.
3. Heat oil in a large kadhai and add in the cumin seeds.
4. Once the cumin seeds splutters, add in the sliced onions. Fry until the onions are golden.
5. Add in the ginger-garlic paste. Saute until fragrant.
6. Add in the chhole masala and the coriander powder and stir fry for 1-2 minutes.
7. Add in the tomato puree and cook on low heat until the liquid evaporates and the masala thickens.
8. Add salt to taste and mix well.
9. Add the cooked Basmati rice. You can also use any leftover rice instead of Basmati rice.
10. Mix well until completely combined. You can adjust seasoning at this stage.
11. Sprinkle kasuri methi and mix well.
12. Remove from heat and garnish with fresh coriander leaves.
13. Serve hot with raita.


If you liked this, you may also like:

How to make methi rice recipe at www.oneteaspoonoflife.com How to make Fenugreek Pilaf recipe How to make Methi Pulao recipe at One Teaspoon Of Life
Methi Rice

Tava Pulao
South Indian Chickpea Curry with coconut
Chana Masala


Read more ...

Schezwan Paratha Recipe | Szechuan Paratha Recipe [Video]


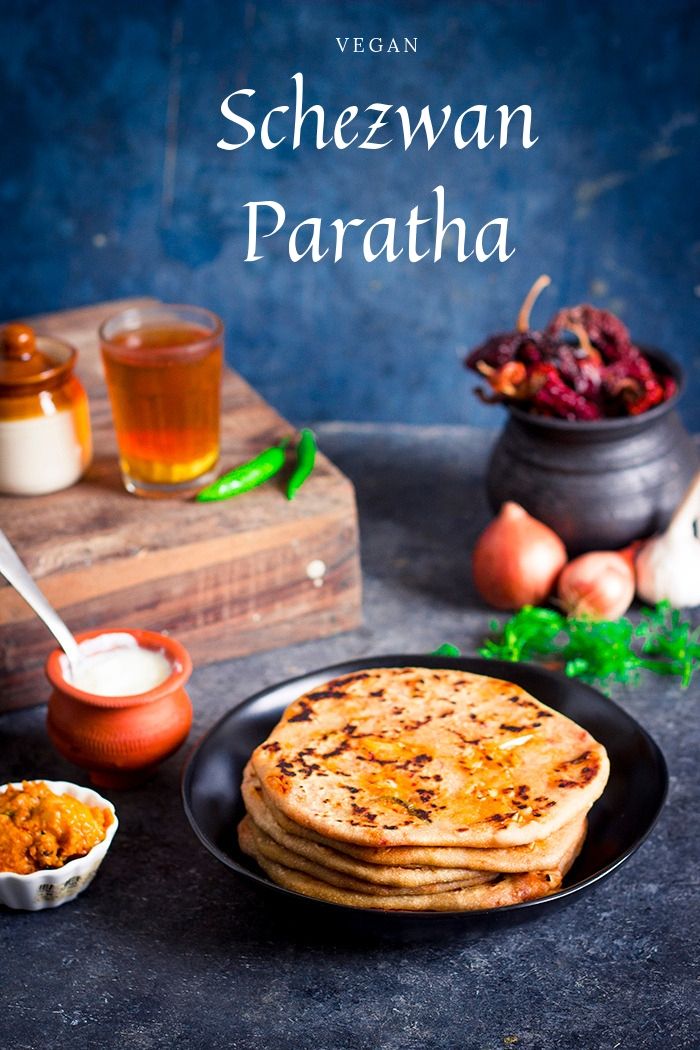
Schezwan Paratha is a Chinese inspired stuffed Indian wholewheat flatbread. The paratha is stuffed with a spicy cabbage, capsicum and onion stuffing.

In a hurry? Jump to Video or Jump to Recipe


szechuan paratha


When normal people think Paratha, schezwan paratha doesn't even pop up in the head. But for a foodie, anything is possible and this schezwan paratha possibly popped in some Indo-Chinese food-obsessed North Indian foodie. Just to let you know, this is not my idea. Na-ah. But the recipe is definitely my own.

Six years ago, I watched a Gujarati cooking show that showed the making of a schezwan paratha. I didn't understand the language, but as they say, food has a language of its own. And that's what happened, I got the gist of the dish while I didn't understand a word of the instructions. And after a few attempts, this paratha was here to stay.

Schezwan Paratha is a perfect fusion of two styles of cuisine. The Chinese inspired vegetable mix is stuffed inside a whole wheat dough, rolled and pan-fried until crisp. The paratha satisfies several cravings - craving for Chinese food, craving for comforting Parathas, the craving for spice and of course, the basic craving for some delicious and new food.

szechuan paratha


Any stuffed paratha has 2 parts, the stuffing, and the coating. The coating, in this case, is a regular dough made of wholewheat flour, a pinch of salt and water. The dough is kneaded the same way one would for chapati or other parathas. If you want you can add some maida or all purpose dough as well while kneading the dough. The soft dough is stuffed with a spicy mixed vegetable stuffing. The stuffing, in this case, is made with julienned vegetables such as onions, capsicum, and cabbage. You can also add carrots. The vegetables are cooked down with a spicy homemade garlic-chilli sauce that is ready in 15 minutes.

Paratha is generally as breakfast item as it is filling and it gives you energy to cruise through the day. But parathas are also a great dinner option. Pair paratha up with some homemade yogurt (Dahi) and pickle and you are all set to lull yourself to a food coma.


szechuan paratha

If you made this recipe, let me know! Leave a comment here or on Facebook tag your tweet with @oneteaspoonlife on Twitter and don't forget to tag your photo @oneteaspoonoflife on Instagram. You can also email me at onetspoflife@gmail.com I'd love to see what you are up to.


If you like this recipe, do not forget to share it with your friends and family! 


You can follow One Teaspoon Of Life on FacebookTwitterInstagramPinterest or you can subscribe to One Teaspoon Of Life and receive all the latest updated via Email


Video Recipe


--------------------------------------------------------------------------------------------------------------------------

Schezwan Paratha Recipe | Szechuan Paratha Recipe


szechuan parathaSchezwan Paratha is a Chinese inspired stuffed Indian wholewheat flatbread. The paratha is stuffed with a spicy cabbage, capsicum and onion stuffing.

Recipe Type:  Main
Cuisine:            Indian
Prep Time:     30 minutes
Cook time:     30 minutes
Total time:     60 minutes
Yield:                Makes 4 Parathas


Ingredients:


For the stuffing:


3 cups shredded Cabbage
0.5 Capsicum, julienned
1 Onion, julienned
8-10 dry Red Chillies
1 Tbsp chopped Garlic
1 Tbsp Vinegar
2 Tbsp Oil
Salt to taste
Water as required

For the dough:


2 cups Wholewheat flour
0.25 tsp Salt
Water as required
Oil to fry the parathas

Method:


1. Soak the dry red chillies in hot water and keep aside.
2. Add the salt to the wholewheat flour and knead into a smooth dough using water as required. Cover and allow it to rest until the stuffing is ready.
3. Drain the red chillies. Deseed the red chillies if you don't want a very spicy stuffing.
4. Blend together the red chillies, chopped garlic, 0.5 tsp salt, and vinegar into a smooth schezwan sauce. Add little water if required to help the blending process.
5. Heat 2 Tbsp oil in a kadhai and add in the sliced onions. Cook until the onions are golden.
6. Add in the julienned capsicum and fry for 1 minute.
7. Add 1-2 Tbsp of the schezwan sauce or as required. Fry for 1 minute.
8. Add in the shredded cabbage and salt for taste. Add more schezwan sauce if required. Cook until the cabbage is soft.
9. Remove from heat and allow it to cool.
10. Divide the dough into 4 equal parts and roll into balls.
11. Dust the counter with a part of the remaining flour and roll out the dough into small circles.
12. Divide the stuffing into 4 equal parts and spoon onto the dough. Seal the parathas.
13. Dust flour on the counter as required and roll out the parathas as thin as possible.
14. Heat the tava or a flat pan and grease it. Place the rolled paratha on the tava and spoon oil and spread well.
15. Flip the paratha and cook until the it is cooked on one side.
16. Flip the paratha again and cook until the second side is cooked. Press with a spatula so that the paratha is cooked evenly.
17. Serve the parathas hot along with either butter,  or curd (yogurt).


If you liked this, you may also like:
How to make shakharkand aloo cheese paratha recipe at www.oneteaspoonoflife.com
Sweet Potato Cheese Paratha

How to make vegan methi fenugreek paratha recipe at www.oneteaspoonoflife.com
Methi Paratha
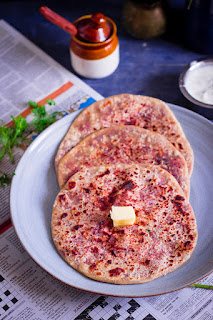
beet root paratha
Beetroot Paratha


Read more ...

Patoli Recipe | Sihi Kadabu Recipe | Goan Patoleo Recipe [Video]


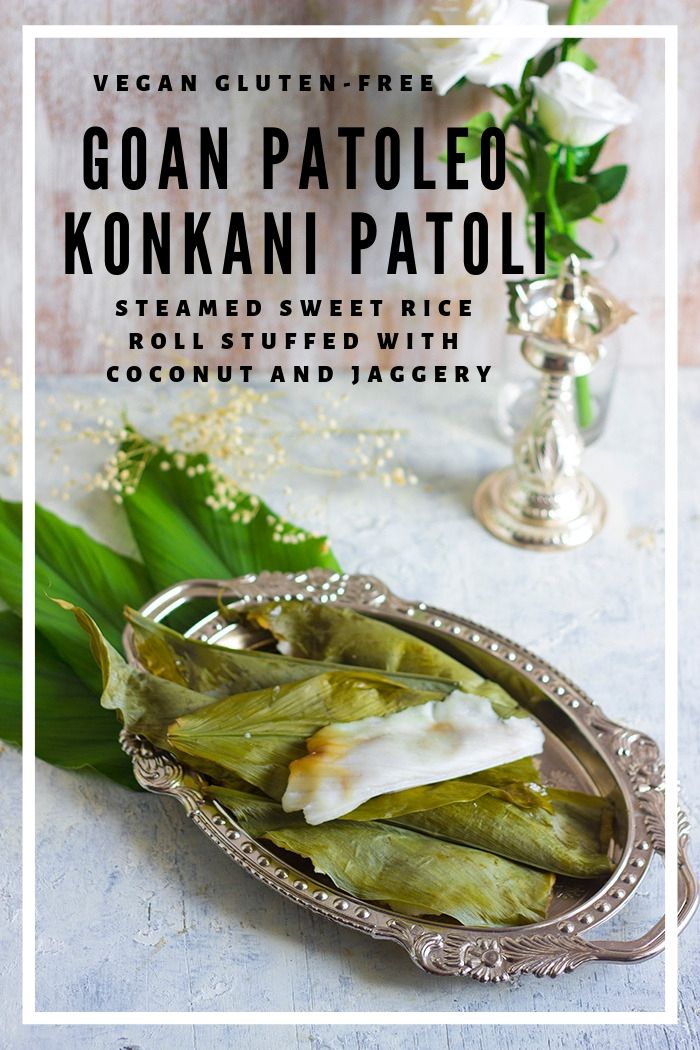
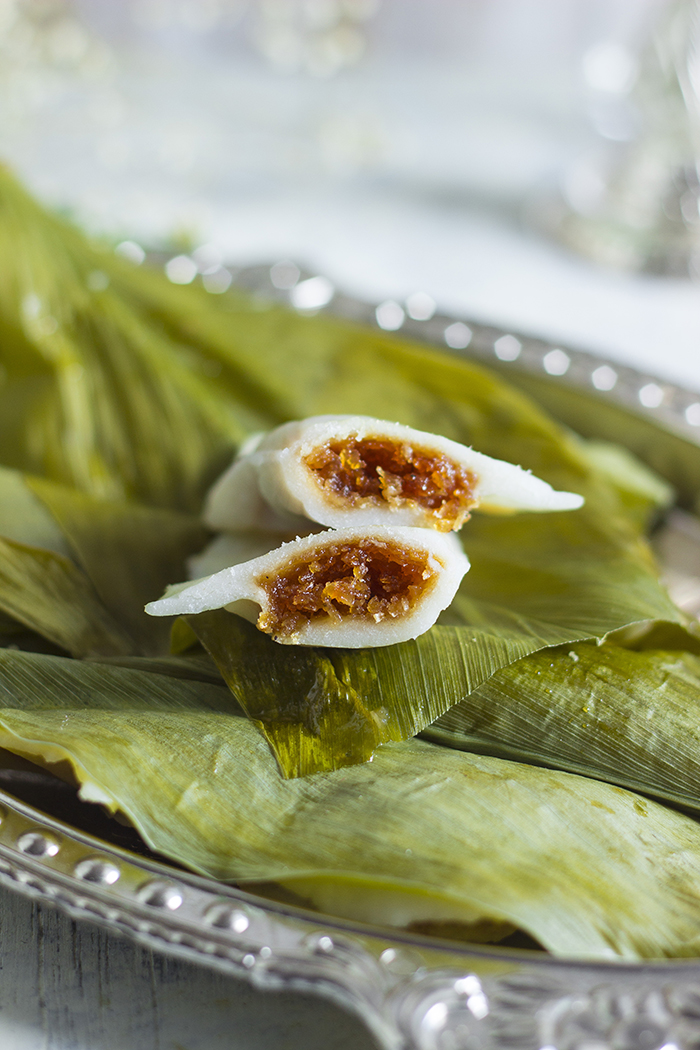
Patoleo or Patoli is a traditional Konkani sweet made for Nag Panchami or Ganesh Chaturthi. Patholi are jaggery-coconut stuffed rice rolls that are steamed in fresh Turmeric leaves. This dessert is also made in Udupi-Mangalore as Sihi Kadabu.

In a hurry? Jump to Video or Jump to Recipe


Patoli Recipe, Sihi Kadabu Recipe, Goan Patoleo Recipe

Patoli or Patoleo or Sihi Kadabu, a sweet with many names and just as many different recipes. Last year when I saw fresh turmeric leaves in the market, I felt the desire to make this sweet. After all, Gee loves it and so does Raj. Me? Not as much a fan of it. but I will still eat it because it is sweet and my sweet tooth can rarely pass an opportunity to be indulged. 

And then began the quest to find the perfect recipe - my mom's recipe. It is times like this that I feel the huge gap my mom's absence has left me with. She never wrote down her recipes or even remembered it enough to tell us. She believed we need to watch and learn when she cooked something. And most often, we did not, because I think we believed she will always be around to help us out when we needed it. So there I was with these fresh seasonal leaves and no recipe.

Patoli Recipe, Sihi Kadabu Recipe, Goan Patoleo Recipe


The first thing I did was look up recipes online, only to find so many variations, that I ended up confused. Next, I messaged by Goan friends, hoping to find some commonality there. Alas, there too each one had their own version. I called up my aunt to get her recipe, wishing she had my mother's recipe, but it wasn't it. I could make any one of the 100 recipes that I find online, but just 1 will taste close to what she made it. And I was on the lookout for that recipe. I'm not sure this is exactly the one, but it sure came close. I had photos from the last time she made them for us and I just found them the other day, so when I saw those turmeric leaves again in the market, it was go time. 

It is a simple recipe I'm sharing today, 7 ingredients including the fresh turmeric leaves. And that sounds just like amma. She never over-complicated her cooking. It was the simplest one with the least ingredients but tasted delicious, I guess it was the magic in her hands. Last year, I cooked the filling, this year the pics showed me, my mom, just mixed it and there was no cooking involved. Last year I soaked raw rice, then ground it to make the dough, this year I just used rice flour, as one of the pics seem like that's what she did. This is the only step I don't have photos of. The rest is similar to all the recipes. And guess what, this year, the patoli came damn close to the real deal. And we've all wolfed down so many, that we've lost count. I only hope I've done justice to her recipe.


Patoli Recipe, Sihi Kadabu Recipe, Goan Patoleo Recipe


If you made this recipe, let me know! Leave a comment here or on Facebook tag your tweet with @oneteaspoonlife on Twitter and don't forget to tag your photo @oneteaspoonoflife on Instagram. You can also email me at onetspoflife@gmail.com I'd love to see what you are up to.


If you like this recipe, do not forget to share it with your friends and family! 


You can follow One Teaspoon Of Life on FacebookTwitterInstagramPinterest or you can subscribe to One Teaspoon Of Life and receive all the latest updated via Email


Video Recipe


--------------------------------------------------------------------------------------------------------------------------

Patoli Recipe | Goan Patoleo Recipe | Sihi Kadabu Recipe


Patoli Recipe, Sihi Kadabu Recipe, Goan Patoleo RecipePatoleo or Patoli is a traditional Konkani sweet made for Nag Panchami or Ganesh Chaturthi. Patholi are jaggery-coconut stuffed rice rolls that are steamed in fresh Turmeric leaves. This dessert is also made in Udupi-Mangalore as Sihi Kadabu.

Recipe Type:  Dessert
Cuisine:            Indian
Prep Time:     15 minutes
Cook time:     45 minutes
Total time:     60 minutes
Yield:                Makes 3 Patoleos


Ingredients:


1 cup grated fresh Coconut
1 cup Jaggery Powder or grated Jaggery
1 tsp Cardamom Powder
1 cup Rice Flour
Pinch of Salt
Hot water as required
3 fresh Turmeric leaves

Method:


1. Mix the grated coconut, jaggery (as per taste) and cardamom powder until completely combined. Adjust the jaggery as per the desired sweetness.
2. Take rice flour in a large plate or bowl, add in a pinch of salt and knead into a smooth dough with hot water.
3. Turn on the steamer.
4. Check if the turmeric leaf fits horizontally in the steamer, if not, you can cut it into half.
5. Wash the turmeric leaves.
6. If using the whole leaf, divide the dough into 3 parts. If you have cut the leaf, divide the dough into 6 parts.
7. Wet your hands and take 1 part of the dough and gently spread it onto the smooth side of the turmeric leaf.
8. Spread the dough as thin as possible. Ensure there are no holes. You can use more dough if required. If there is excess dough, wipe it off.
9. Once the whole leaf is covered with the dough, spoon in the filling. Do not overstuff, else the stuffing will ooze out while cooking.
10. Fold the leaf lengthwise and seal the edges by pinching them.
11. Place the patoleos in the steamer and steam for 15-20 minutes. The colour of the leaf will change once it is done.
12. Remove from heat and gently peel the turmeric leaf.
13. Serve the patoleos warm.


If you liked this, you may also like:

How to make Ukadiche Modak Recipe at www.oneteaspoonoflife.com
Steamed Modak

How to make Kadale Bele Payasa or Chana Dal Payasam at www.oneteaspoonoflife.com
Chana Dal Payasa
Bele holige, obbattu, puran poli, sweet lentil stuffed flatbread
Bele Holige | Puran Poli
How to make shavige payasa semiyan kheer vermicelli pudding recipe at www.oneteaspoonoflife.com
Semiyan Kheer

How to make gajar ka halwa or carrot halwa recipe at www.oneteaspoonoflife.com
Gajar ka Halwa
Coconut Laddoo


Read more ...

Lauki Kofta Biryani Recipe | How to make kofta biryani [Video]


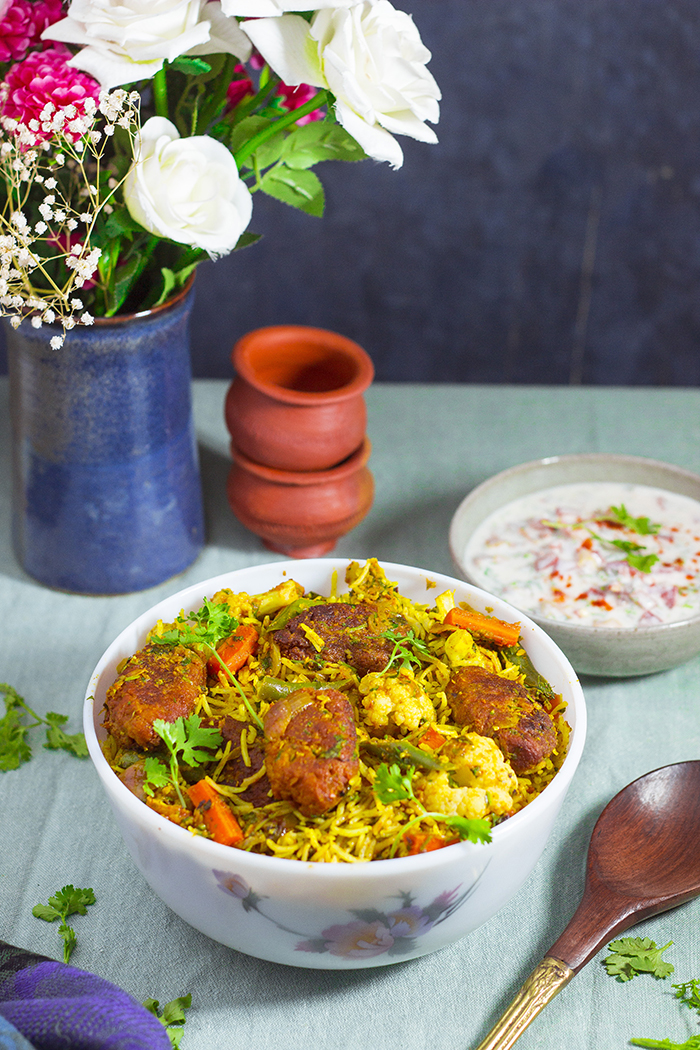
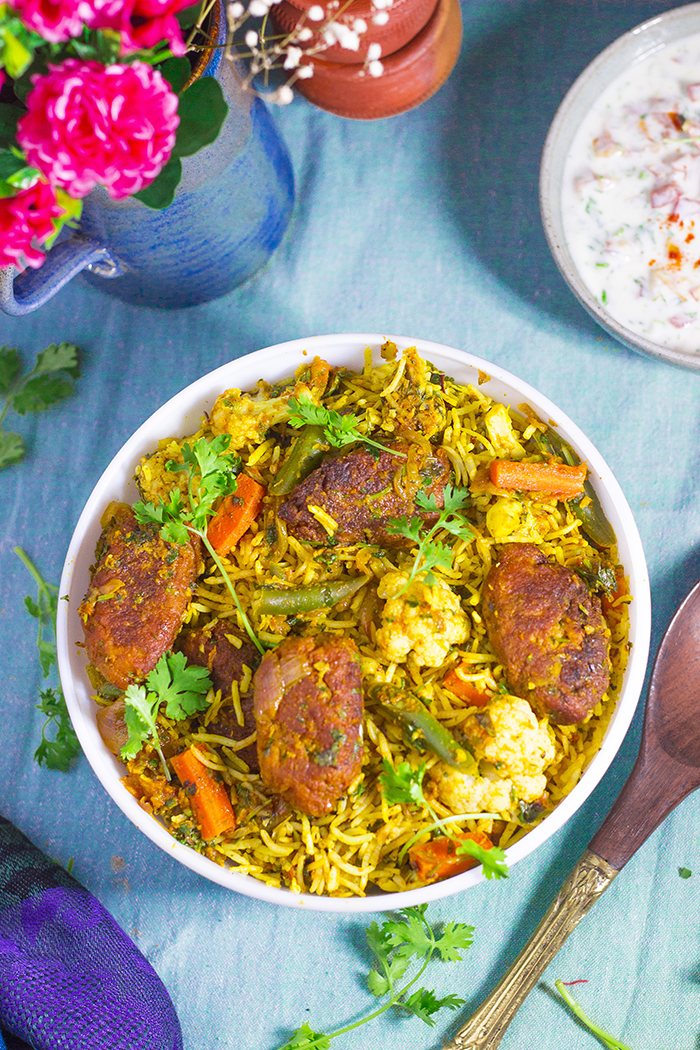
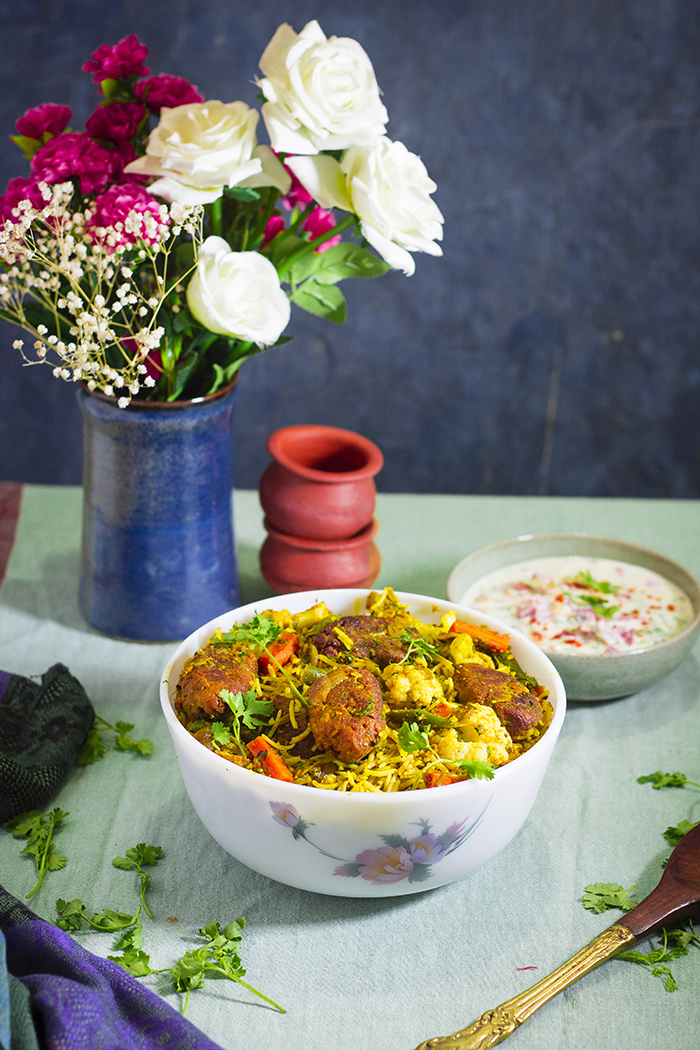
Lauki Kofta Biryani is a spiced vegan rice dish made with fried dumplings of bottle gourd (lauki), spices, mixed vegetables and fragrant long basmati rice.  Perfect for Sunday lunch!

In a hurry? Jump to Video or Jump to Recipe

vegetable biryani


Wanna know a secret?

We NEVER eat biryani in restaurants!

At least, I may once in a blue moon, but Raj absolutely detests biryani from restaurants. But whip it up at home and he'll enjoy it. We are yet to find a restaurant biryani that hits all the right buttons for us. We usually find that restaurant biryanis are high on spice and low on flavor, either have no vegetables or have undercooked vegetables and like all takeout, extremely greasy. No wonder he abhors it, which is quite surprising for a lot of friends. Bangalore is almost Biryani Town, with at least 2-3 biryani outlets on every main road and here, there are people who won't even look at one.

So, once in a while, just to treat ourselves, I put on my chef's hat and cook up a biryani that suits our tastebuds and our sensitive tummies. I add spices for flavor but reduce the chilli powder, so we still taste flavor, but not get burned by the heat. I always add a lot of vegetables, because I simply love the different textures. And a Biryani isn't a Biryani for me if it is not made with fragrant Basmati rice. 

The story of this Vegan Lauki Kofta Biryani, goes back a few months, when I was irritated with Raj for being fussy during vegetable shopping. He kept rejecting all my choices of vegetables for the week, that I lost it and made him shop what he wanted for the whole week. In came the lauki or bottle gourd, one of my least favorite of the veggies. I'm not sure even he likes it. But there it was staring at me from my fridge for a week. And finally on a Sunday, when I was in a good mood, I decided this lauki deserved to be finally eaten and this Lauki Kofta Biryani was born. And since, I've made it multiple times and we've all had a hearty sunday lunch.

vegetable biryani


Lauki Kofta Biryani, as the name suggests, contains koftas or fried dumplings made from grated lauki. The water from the grated lauki is squeezed out and a few spice mixes are added for flavor. I added chickpea flour or besan and corn flour as the binding agent to make the koftas. You can add potatoes or breadcrumbs or even grated paneer. I've tried with Paneer and it gave me these amazing rich and chewy koftas. You can either shallow fry the koftas, pan fry the koftas or even deep fry them. If your kofta feels crumbly after cooking, add it to the biryani only while serving, instead of cooking it in the masala.

I added a lot of boiled vegetables to the Biryani, but you can skip it and let only the kofta shine. If you want to add vegetables, you can add cauliflower, beans, carrots, green peas, potato, or broccoli. Cut them chunky and cook them to your liking. I like my beans completely cooked, while my cauliflower still crunchy. 

Use aged Basmati rice to get the best results. I always cook my biryani rice with spices for added flavor, but if you don't have whole spices, you can give them a miss. Or if you want a change, you can also cook the rice with saffron for a richer feel. 

The masala made with onions and tomatoes is what imparts flavor to the biryani. A Biryani does take more oil than a pulao, don't skimp on it too much, it will impact the flavor. The oil is what ensures that the rice takes on the flavor of the masala. I used store bough biryani masala, you can grind whole spices to make your own too. 

Lauki Kofta Biryani can be prepped in advance too. The rice can be cooked a few days before and so can the masala. Vegetables too can be boiled in advance. I would only suggest making the koftas fresh.

Biryani tastes best when served with raita or salan. You can try this Boondi Raita to go with the Biryani,

vegetable biryani


If you made this recipe, let me know! Leave a comment here or on Facebook tag your tweet with @oneteaspoonlife on Twitter and don't forget to tag your photo @oneteaspoonoflife on Instagram. You can also email me at onetspoflife@gmail.com I'd love to see what you are up to.


If you like this recipe, do not forget to share it with your friends and family! 


You can follow One Teaspoon Of Life on FacebookTwitterInstagramPinterest or you can subscribe to One Teaspoon Of Life and receive all the latest updated via Email


Video Recipe


--------------------------------------------------------------------------------------------------------------------------

Lauki Kofta Biryani


vegetable biryaniLauki Kofta Biryani is a spiced vegan rice dish made with fried dumplings of bottle gourd (lauki), spices, mixed vegetables and fragrant long basmati rice.

Recipe Type:  Main
Cuisine:            Indian
Prep Time:     30 minutes
Cook time:     60 minutes
Total time:     90 minutes
Yield:                Serves 3-4


Ingredients:


For the Lauki Kodta


1 Bottlegourd
3-4 Tbsp Besan (chickpea flour)
1 Tbsp Cornflour
0.5 tsp Garam Masala
0.5 tsp Turmeric Powder
0.5 tsp Red Chilli Powder
Salt to taste
Oil to fry

For the Biryani


1 cup Basmati Rice
2 medium Onions, sliced
1 cup Tomato Puree
2 cups mixed boiled Vegetables (cauliflower, carrots, beans)
0.5 cup Coriander leaves, chopped
0.5 cup Mint leaves, chopped
1 Tbsp Ginger Garlic Paste
2 Tbsp Biryani Masala
0.5 tsp Turmeric Powder
1 tsp Shah Jeera (Caraway seeds)
1 Tbsp Dagad Phool (black stone flower)
2 Cloves
1 Green Cardamom
1 Black Cardamom
1 Bay leaf
0.5" Cinnamon
4 Tbsp Oil
Salt to taste
Water as required

Method:


1. Wash the basmati rice 4 to 5 times until the water runs clear. Soak in 2 cups water and keep aside for 30 minutes.
2. After 30 minutes, boil 1.5 cups water in a pan and add 0.25 tsp salt, cloves, green cardamom, black cardamom, bayleaf and cinnamon to the water. Allow the water to come to a rolling boil.
3. Drain the rice and add to the water. Cover and cook on low to medium heat until the rice is cooked and all the water is absorbed.
4. Allow to cool uncovered.
5. To make the kofta, peel, cut and deseed the bottle gourd. Grate or shred the bottle gourd.
6. Add a little salt and keep aside for 10 minutes.
7. After 10 minutes, squeeze out the water from the bottle gourd.
8. Take the squeezed bottle gourd in a bowl. Add in the salt, red chilli powder, turmeric powder, garam masala, corn flour and besan. Mix well until combined. If the batter feels wet, add more besan.
9. Heat oil for frying the koftas, you can either deep fry or shallow fry the koftas.
10. Shape the koftas and fry until browned and crisp. Remove from heat and keep aside.
11. Heat 4 Tbsp oil and add in shah jeera and dagad phool. Saute for 30 minutes.
12. Add in sliced onions and fry until the onions are golden brown.
13. Add in the ginger garlic paste and saute until fragrant.
14. Add the tomato puree and cook on low-meidum heat for 6-8 minutes or until oil separates.
15. Add in the biryani masala and turmeric powder, mix well. Cook on low heat for 3-4 minutes.
16. Add in chopped coriander and mint leaves.
17. Add in the boiled vegetables and the kofta. Mix well until combined.
18. Add in the basmati rice and mix until completely combined.
19. Serve hot with raita.


If you liked this, you may also like:

Spicy Soya Biryani made with soya chunks, mix vegetables and basmati rice
Soya Biryani

How to make jackfruit biryani, jackfruit biryani recipe, vegan jackfruit recipe, raw jackfruit recipe, young jackfruit recipe, how to make kathal biryani, kathal biryani recipe, kathal recipes at www.oneteaspoonoflife.com
Jackfruit Biryani
How to make mushroom biryani recipe at www.oneteaspoonoflife.com
Mushroom Biryani
How to make methi rice recipe at www.oneteaspoonoflife.com How to make Fenugreek Pilaf recipe How to make Methi Pulao recipe at One Teaspoon Of Life
Methi Rice

How to make ghee rice recipe at One Teaspoon Of Life www.oneteaspoonoflife.com
Ghee Rice
Indian rice pilaf made with corn, spinach and whole spices
Corn Spinach Pulao
raw mango rice
Raw Mango Rice

pudina pulao, mint rice, mint pulao
Mint Rice
Palak Rice


Read more ...