Showing posts with label Snacks. Show all posts

Stuffed Potato Skins

Crispy potato, crunchy green Capsicum, punchy tomato sauce and oozy mozzarella cheese. That’s what this whole blog post it about.

 Baked Stuffed Potato Skins Capsicum Tomato Mozzarella Cheese Olive oil gluten free


I’ve never baked a potato. Or rather, until last week, I had never baked a potato. And now that I have, I feel I’ve opened a door with many many possibilities.

This recipe is a result of entering a competition that asked contestants to cook with 5 ingredients – Potato, Tomato, Capsicum, Cheese and Olive Oil. You couldn’t leave out an ingredient.
I thought of a few options but decided I really wanted to stuff something. Stuffed capsicum or stuffed tomato may be? But when I mentioned stuffed potato skins, I saw Raj’s eye light up. It’s no secret he loves Potato. That was it then – Baked Potato Skins.

 Baked Stuffed Potato Skins Capsicum Tomato Mozzarella Cheese Olive oil gluten free


Now there is a lot you can do with these Potato Skins, I myself had a dozen ideas, but then I was restricted by the competition rules. Not that I regret that, they were AWESOME just like that.

These little boats to taste-bud-heaven have some lightly stir fried capsicum and an easy-to-make awesome INSTANT super punchy tomato sauce. Apart from the 5 ingredients mentioned above, all you need is oregano or any pizza seasoning, garlic, salt and loads of pepper. This sauce goes amazingly well with pasta and pizza. So increase the quantity and freeze it for rainy days if you wish.

Baked Stuffed Potato Skins Capsicum Tomato Mozzarella Cheese Olive oil gluten free

Step one: Crisping up the potato skins. You want them crisppyyyy:
Wash and scrub those potatoes clean. This is how you build muscles working at home. Exercise for today – DONE. Dry them and rub olive oil all over them. Watch out for those slippery ones that go bouncing all over your counter. Use a fork and prick them all over.
Bake them for 1 hour at 200 C of 400 F. In the meanwhile, move on to steps 2 & 3 and come back to one later.

Step two: Making the AWESOME Tomato sauce.
Chop those tomatoes roughly and fry along with some garlic in a pan with some olive oil. Once the tomatoes are soft, add in the oregano, salt and pepper. If you are like me, pepper == lots and lots of pepper.
Blend it into a coarse sauce. This is a thick sauce. If you plan on using it for pasta, you may want to thin it a little.

Step three: Crunchy crunchy Capsicum.
Chop the capsicum into small pieces. Stir fry in some olive oil until it is slightly cooked. Don’t let it mush up. Sprinkle some salt and keep aside.

Baked Stuffed Potato Skins Capsicum Tomato Mozzarella Cheese Olive oil gluten free

Step one again: Crispy skin dreams come true here.
Once the potatoes have cooled enough to handle, slice them lengthwise into  half. Using a sharp edged spoon, scoop out the potato gently. Leave around ¼ inch or 0.5 cm of potato still in the skin so it holds it’s shape. Brush generously with olive oil on the inside and outside. Rub some salt.
Now bake it skin side down for 5 mins @ 220 degree C and then flip them over and bake again for 5 mins until the skins are crispy.

Step four: Let’s get the cheese BUBBLING
Assembly is all that it left before oozy cheese. Spoon in the capsicum and the sauce. Then grate over some mozzarella or any stringy melty cheese. This is what my food dreams are made of! Back into the oven for 4-5 mins until the cheese melts and it all bubbly.

Step five: Finish them off immediately!!!

Let’s face it, step five isn’t really a cooking step, but it is the most important step in the process.

 Baked Stuffed Potato Skins Capsicum Tomato Mozzarella Cheese Olive oil gluten free


I did not use the scooped out potato in this recipe. You can stuff it back in. I used it up to make some buttery Aloo Paratha.


Stuffed Potato Skins


 Baked Stuffed Potato Skins Capsicum Tomato Mozzarella Cheese Olive oil gluten freeBaked potato skins stuffed with an instant tomato sauce, fried green Capsicum and Mozzarella cheese.

Recipe Type:  Appetizers / Snacks
Cuisine:            International
Prep Time:     20 mins
Cook time:     1 hour 45 minutes
Yield:                6 skins

Ingredients:


3 large Potatoes
2 Tomatoes
1 Capsicum
2-3 Tbsp Olive Oil
5-6 Tbsp Mozzarella Cheese
2 Garlic Cloves
1 tsp Oregano
1-2 tsp Pepper
Salt to taste

Method:


Preheat the oven to 200 degree C.
Wash, scrub and dry the potatoes.
Rub with olive oil and Ppick them with a fork all over.
Bake in the oven for 1 hour.
Heat 1/2 Tbsp of Olive oil and add crushed garlic and chopped tomato to it. Cook until the tomatoes have become soft and mushy
Add salt, pepper and oregano. Mix well.
Allow it to cool and then grind to a coarse sauce.
Heat 1/2 Tbsp of Olive oil and fry chopped capsicum in it.
Slice the potatoes lengthwise and with a spoon gently scoop out the potato. Leave at least 1/4 inch of potato with the skin.
Rub olive oil and salt on the inside of the potato and outside.
Increase the temperature of the oven to 220 degree C.
Bake the potato skins in oven for 10 minutes, turning the potatoes after 5 minutes.
Remove the potatoes from the oven and when they are cool enough to handle, stuff them with capsicum, tomato sauce and top with cheese.
Bake for 4-5 minutes until the cheese has melted.


Read more ...

Maggi Pakoda | Instant Noodle Fritters with Step by Step Photo Instructions


Maggi Pakoda recipe with step by step video instructions. Maggi Pakodas are deep fried fritters made using Maggi instant noodles, chickpea flour (besan) and a few spices. Maggi Pakoda are instant noodles fritters and any instant noodles can be used. Maggi Pakoda are perfect for snacking on a rainy evening. They go famously with a hot cup of chai.


In a hurry? Jump to Video or Jump to Recipe


maggi instant noodles fritters fried pakoda chickpeas besan

Every time it rains, I want something hot and spicy (and mostly fried). What I crave when it rains, I crave more when we are out on a long drive during rains. For all those health food eaters out there, this post is most definitely not for you, unless of course you occasionally binge on some DELICIOUS fried food. This is one of those one-time INDULGENCE recipes that just makes you wish it rains every day.

On a different note, has an idea gotten stuck in your head and grown into a tree until you can no longer resist it? Something like “Inception”? On one of these long-drive-in-rain, I imagined what would a “Maggi Pakoda” taste like. And after that, nothing tasted good enough on that drive. I wanted MAGGI PAKODA, that’s it! And I thought I was being very inventive and all with my idea of Maggi pakoda until I heard it has already been around in Delhi for a long time. Those Delhi-ites definitely know their fried food.

maggi instant noodles fritters fried pakoda chickpeas besan

Maggi is an instant noodle brand from Nestle. And since it was the first instant noodle brand in the Indian market and remained the sole one for many many years, instant noodles are synonymous with Maggi for most of us. So when I say Maggi, you can think of ANY instant noodles. Any noodles you like.

The first time I went to Rohtang Pass in the Himalayas to see snow, I was pleasantly surprised to find little shacks selling Maggi at that altitude. Absolutely loved eating Maggi while our teeth chattered with the chill in the air. The next time I went to Rohtang, I was actually looking forward to eating Maggi up there. Maggi, Chai, and the mountains felt like heaven.

maggi instant noodles fritters fried pakoda chickpeas besan

How many of you out there have had hot hot Maggi when you’ve gone to a cold cold place? Let me know your story.

These pakodas have that warmth of noodles and the crispiness of the pakodas all combined in one. Perfect for rainy evenings. You can use any instant noodles, Chinese flavored, Thai flavored, Chicken flavored, as I said anything. Just cook the noodles as usual, add the chickpea flour or besan, mix and deep fry.

maggi instant noodles fritters fried pakoda chickpeas besan


If you made this recipe, let me know! Leave a comment here or on Facebook tag your tweet with @oneteaspoonlife on Twitter and don't forget to tag your photo @oneteaspoonoflife on Instagram. You can also email me at onetspoflife@gmail.com I'd love to see what you are up to.

If you like this recipe, do not forget to share it with your friends and family! 


You can follow One Teaspoon Of Life on FacebookTwitterInstagramPinterest or you can subscribe to One Teaspoon Of Life and receive all the latest updated via Email


Video Recipe


--------------------------------------------------------------------------------------------------------------------------

Maggi Pakoda or Instant Noodle Fritters

maggi instant noodles fritters fried pakoda chickpeas besan
Maggi Pakodas are deep fried fritters made using Maggi instant noodles, chickpea flour (besan) and a few spices. Maggi Pakoda are instant noodles fritters and any instant noodles can be used. Maggi Pakoda are perfect for snacking on a rainy evening.

Recipe Type:  Snacks
Cuisine:            Indian
Prep Time:     10 mins
Cook time:     30 mins
Yield:                12 pakodas

Ingredients:


1 packets Maggi Instant Noodles
3 Tbsp Chickpea Flour or Besan
1 tsp Red Chilli Powder
1 tsp Garam MAsala (if not using the tastemaker)
2 Tbsp Coriander Leaves, finely chopped
1-2 tsp Chaat Masala (Optional)
Water as required
Salt to taste
Oil  to deep fry

Method:


1. Boil 2 cups of water in a sauce pan and add 1 tsp of Oil to it.
2. Add the instant noodles to the water and cook until the noodles are done. Do not add the taste maker to it.
3. Once the noodles are cooked, drain the water and rinse them with cold water to stop the cooking.
4. Mix in the taste maker or 1 tsp Garam Masala, red chilli pwoder, salt and coriander leaves.
5. Add the chickpea flour or besan and mix until combined.
6. Add more salt and chilli powder if required.
7. Heat Oil in a deep pan for frying.
8. Divide the noodles into small portions.
9. Once the oil is hot, carefully dump the portions in the oil.
10. Fry on medium to high heat. Flip the pakodas once the lower side is partially set. Keep stirring the pakodas until all sides are browned and cooked. Remove from heat once the pakodas are crisp and golden brown.
11. Sprinkle chaat masala (optional).
12. Serve hot with ketchup.


If you liked this, you may also like:

Cucumber pakoda fritter sautekayee bonda khira khire kakdi
Cucumber Pakoda

how to make vegetable cutlets recipe, aloo tikki recipe, vegan cutlet recipe, beetroot cutlet recipe at www.oneteaspoonoflife.com
Veg Cutlet
masala vada, ambode, chana dal vada recipe
Masala Vada
Read more ...

Mysore Masala Dosa

Mysore Masala Dosa is a rice and lentil pancake that has a chilli and garlic chutney spread on the inside and stuffed with a potato bhaji and served with a simple coconut chutney.

How to make Mysore Masala Dosa recipe at www.oneteaspoonoflife.com


Weekends are meant to be slept in. Aren't they? But sometimes, waking up early on a weekend has it's own excitement - that slight chill in the air, the sky all grey and cloudy, birds chirping away from their hiding places and an occasional car or bus on the road. At times like this, all I need is a steaming hot cup of coffee and a blanket to wrap myself as I sit in the balcony watching the world go by. And you know what's better than that? Having a plate of absolutely delicious homemade Mysore Masala Dosa to eat.

There is absolutely nothing like a Mysore Masala Dosa for breakfast. The good thing about Bangalore is you can eat a Masala Dosa morning, evening or night and for as little as Rs.20 and for as much as Rs.200. But this homemade Masala Dosa is sooo much better than the restaurant ones. I swear you won't like those once you have tasted one that YOU made at home.

How to make Mysore Masala Dosa recipe at www.oneteaspoonoflife.com

A Mysore Masala Dosa is crisp and golden brown on the outside and soft and fluffy on the inside. It has a spicy red chilli and garlic chutney spread on the inside and is always stuffed with a potato bhaji. Served with a simple coconut chutney, it actually makes one of the most delicious breakfast. Sometimes, dinner too. Skip the red chilli chutney, to get a regular Masala Dosa.

In the age of fast food, a Dosa is a mix of both food movements - slow and fast. It needs to go through the slow process of fermentation but after that, it is a matter of minutes to cook it. 

How to make Mysore Masala Dosa recipe at www.oneteaspoonoflife.com

Points to keep in mind:

  • There are many recipes out there that replace the rice with rice flour or with all purpose flour, but a Dosa tastes authentic only when it is made with with rice grains as opposed to flour. 
  • I ALWAYS use an age old cast iron griddle or tava to make Dosa. It gives it that amazing color and crispness, but my sister swears by her non stick tava or griddle. Either way, a Dosa tava is meant to be absolutely flat, non stick or cast iron. You can also use a flat frying pan. 
  • In winters or if the day is cold, you may need more time to ferment the batter. Keeping it near a warm stove or oven helps. If you live in a hot region or it is summer, you may need only 6-8 hours for the batter to ferment. 
  • You will know that the batter is fermented when it has risen and tastes sour. 
  • If you do not plan to use the entire batter at one go, remove the excess and only add salt to the batter you plan to use immediately. 


How to make Mysore Masala Dosa recipe at www.oneteaspoonoflife.com


Mysore Masala Dosa


How to make Mysore Masala Dosa recipe at www.oneteaspoonoflife.comMysore Masala Dosa is a rice and lentil pancake that has a chilli and garlic chutney spread on the inside and stuffed with a potato bhaji.

Recipe Type:  Breakfast
Cuisine:            South Indian
Prep Time:     24 Hours (Including soaking and fermenting)
Cook time:     5 minutes per Masala Dosa
Yield:                Makes 12-15

Ingredients:


For the Dosa:


1.5 cups Dosa Rice (Use regular rice if you don't have dosa rice)
0.5 cup Urad Dal or Split Black Gram
1 tsp Fenugreek seeds or Methi seeds
Water to grind
1-2 tsp Salt
1.5-2 tsp Oil per Dosa

For the Red Chilli Chutney:


8-10 dry Red Chillies
1-2 Garlic cloves
1-2 Tbsp Water
1/2-1 tsp Salt

For the Potato Bhaji:


3-4 medium sized Potatoes (Boiled and Peeled)
1 large Onion
3-4 Green Chillies
1 sprig Curry Leaves
1 tsp Mustard Seeds
1 tsp Turmeric Powder
3-4 tsp Oil
Salt to taste
2 Tbsp finely chopped Coriander Leaves

Method:


To make the Dosa Batter:


Soak the rice, urad dal and methi seeds for 8-10 hours. To make Dosa for breakfast, soak the grains the previous morning. So you can grind the batter at night.
Drain the water and grind the soaked rice and dal into a fine batter. Use as little water as possible while grinding. Adding too much of water will not allow the batter to become fine. Start with 1/4-1/2 cups of water and then add more if required.
Pour the batter into a deep vessel. Mix well if you ground the batter in batches.
Cover and keep in a warm place to ferment overnight.
When the batter has risen and become sour, it has fermented enough and can be used to make Dosa.
The batter keeps well in the fridge for almost a week. See "Points to keep in mind" above for more information on storage.

To make the Red Chilli Chutney:


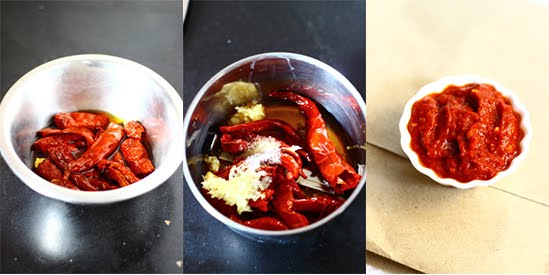
red chilli chutney garlic

Remove the seeds from the dry red chillies and soak them in warm water for 30 minutes.
Grind them into a fine paste along with the garlic, salt and a little water.
Store in an airtight box in the fridge. It keeps well for 2 weeks in the fridge.

To make the Potato Bhaji:


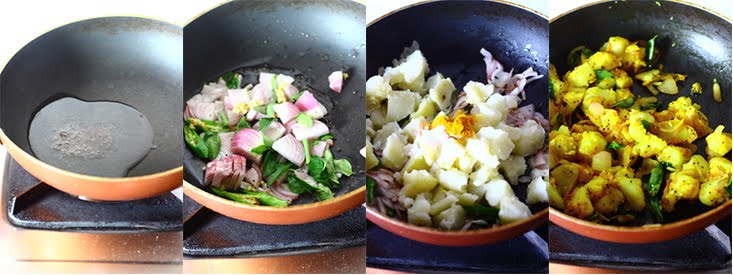
potato onion hash

Mash the potatoes into rough cubes.
Slice the onions and chop green chillies.
Heat oil in a pan and add the mustard seeds.
Once they splutter, add the curry leaves, onions and the green chillies.
Fry the onions until they are translucent.
Add the potato and mix well. 
Now add the salt and turmeric powder. Mix well.
Fry for 1-2 minutes.
Garnish with the chopped coriander leaves.

To make the Mysore Masala Dosa:


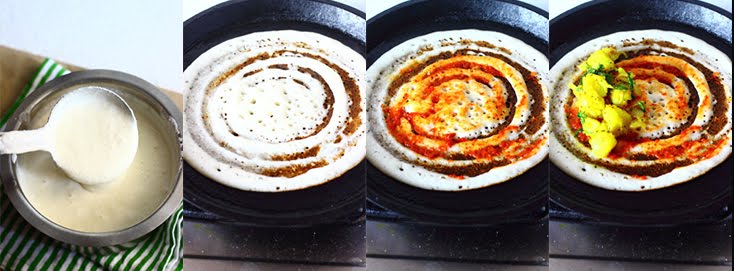
dosa mysore masala chutney pancake red chilli rice urad dal

Grease a cast iron or non stick griddle and heat it.
Once the griddle is hot (not smoking), pour one ladle full of batter on the griddle and spread it from the inside out into a thin circle.
Drizzle a spoonful of oil on it and allow it to cook on medium heat.
When the side touching the griddle turns golden brown and crisp and the side facing you is cooked and there is no raw batter there, spread 1/2-1 tsp of the red chilli chutney on the dosa.
Place a spoonful of potato bhaji on the dosa and fold the dosa into half.
Serve it hot with coconut chutney.

Read more ...

Instant Cucumber Dhokla | Cucumber Chickpea Steamed Cakes


Cucumber Dhokla is a savory steamed chickpea flour and semolina cake with added cucumber that is perfect for breakfast or as a tea time healthy snack.

How to make instant khira dhokla recipe at www.oneteaspoonoflife.com


I've been missing around the blog for 2 weeks now. I've been busy cooking up an amazing spread that will soon appear here. Now that's what I would love to say. But that's not what I have been doing. Everyone at home has been under the weather and what I have been cooking has been just soup and regular dal rice. and my taste buds totally ditched me too. I could barely make out what the food tasted like. 

I can finally taste the food and I'm SOO happy about it. 

I've recently gotten obsessed with one particular fruit and one particular vegetable - the water melon and the cucumber. And today is all about the Cucumber. I've been adding cucumber to almost everything - Upma, Akki Rotti, Sambar etc. What I love about adding Cucumber to any dish is that it ends up giving it that moistness along with a very subtle flavor. That is exactly what it did to this Dhokla.

How to make instant khira dhokla recipe at www.oneteaspoonoflife.com


Cucumber Dhokla is my own concoction that is inspired from the traditional Dhokla. I recently had a cucumber pakoda (Seriously!!!) and it tasted good (Really!). I never would have guessed that cucumber that besan (chickpea flour or gram flour) would go so well together. So when I set out to make dhokla this time, I got a little creative, I added in a grated cucumber and a bit more. I also added in a little bit of grated carrot, a few frozen peas, and finely chopped capsicum. Although technically, I should be calling it a mix vegetable Dhokla. I prefer calling it the Cucumber Dhokla, cause that flavor it had in the end was all fresh Cucumber.

You can skip the remaining vegetables and just stick to the cucumber and it will taste just as good - I promise.


Instant Cucumber Dhokla | Cucumber Chickpea Steamed Cakes


How to make instant khira dhokla recipe at www.oneteaspoonoflife.comInstant Cucumber Dhokla is a savory steamed chickpea flour and semolina cake with added cucumber that is perfect for breakfast or as a tea time healthy snack.

Recipe Type:  Breakfast
Cuisine:            Indian
Prep Time:     15 minutes
Cook time:     20 minutes
Yield:                Serves 2-3

Ingredients:


For the Cucumber Dhokla:


3/4 cup Chickpea Flour or Besan
3/4 cup Semolina or Rava
1 grated Cucumber
1 tsp of Ginger- Garlic Paste
1 crushed Green Chilli
1 grated Carrot (Optional)
1 Tbsp Green Peas (Optional)
2 Tbsp chopped Capsicum
1.5 tsp Fruit Salt or Eno
1/4 tsp Asafoetida or Hing
2 Tbsp Yogurt or Curd
1 cup Water
Salt to taste
Oil to grease the steamer

For the Tempering:


3-4 tsp Oil
1 tsp Mustard Seeds
8-10 Curry Leaves
1-2 tsp of Lemon juice
1/2 tsp of Sugar or Jaggery

For Garnish:


2 Tbsp fresh grated Coconut
2 Tbsp finely chopped Coriander leaves

Method:


Preparing the Steamer:


1. You can steam in an Idli steamer or a pressure cooker or a large deep saucepan. If using a pressure cooker, remove the whistle.
2. Pour around 2-3 cups of water in it and cover it and allow the water to come to a boil.
3. Place a small upturned  flat bottomed bowl or vessel at the bottom of the steamer.

Preparing the Dhokla:


4. Mix together all the ingredients except the water, oil and the fruit salt.
5. Add 3/4 cup of water and mix well. Add more water if required. The dough should be thick yet pourable. Almost like a cake or idli batter. The quantity of water depends on the type of rava and besan.
6. Once your steamer is ready, grease a flat vessel that will fit into your steamer with oil. 
7. Now add the fruit salt and the remaining water and mix well. The fruit salt should cause the batter to start foaming and become light.
8. Pour the batter into the greased vessel and place it in the steamer.
9. Allow it to steam for 10-15 minutes. Depending on the depth of your vessel, you may need to keep it in longer. The Cucumber Dhokla is ready when a skewer or knife comes out clean.
10. Allow it to cook and remove from the vessel. 

Preparing the Tempering:

11. Heat oil in a pan and add the mustard seeds.
12. Once the seeds splutter, add the curry leaves.
13. Remove it off the heat and add the sugar and the lemon juice.

Assembling the Cucumber Dhokla:

14. Cut into bite sized pieces.
15. Pour the tempering over the Cucumber Dhokla.
16. Garnish with the coconut and the coriander.
17. Serve warm with coriander chutney or sweet and spicy yogurt.


Read more ...

Beetroot and Cauliflower Burgers with Eggless Mayo

kidney beans rajma vegetarian sandwich

BURGER or PIZZA? Definitely, burgers for me. When I've had a hard day and my stomach craves some comforting fast food, it is always the burger I turn to. Every single time (I've had hundreds), I decide to go on a diet, I always grab that one last burger. I always assume it's my last for a loonnng time. You can't punish a  girl for being positive. But my weakness for food usually overtakes my willpower to lose weight and I'm quicker at a burger joint than I'd prefer to be.

kidney beans rajma vegetarian sandwich

This time tough, I'm not on a diet and neither at a burger joint. I'm in my house, standing in my kitchen, making my own HEALTHY burger. Usually, a veggie burger has to have Potato, correct? WRONG!!! Not this one. This is 100% potato free. It is full of beets, cauliflower and beans. It's a nice way to trick someone into having their veggie fix for the day. 

I've always loved beets. As a kid I was obsessed with the color Pink. I had to have that pink dress, that pink ribbon, that pink compass box, that pink pencil. Show me something in pink and orange, and I would always pick the pink one. May be it was my obsession with the color pink that made me love beets or may be it was the sweetness of the beets. I've always had a massive sweet tooth. But beets remained my friend for life. Look how pretty pink these burgers look....

kidney beans rajma vegetarian sandwich

I added the cauliflower, just to add some bite to the burgers. The beans are a must though. You can replace the kidney beans with chickpeas, black eyed peas or any beans capable of becoming mushy. The beans act as a binding agent in the burger in the absence of potato or eggs. 

Most of the beet burger recipes I've browsed in the past, ask for roasted beets and that is a lot of effort. So I made the LAZY version of the beet burger. Just some grated beets, grated cauliflower, some cooked beans - mash mash mash. Add spices. Mix mix mix. Then shape and fry in a pan. EASY, right? It definitely is!! To get firm burgers, us


kidney beans rajma vegetarian sandwich

I paired the burgers with homemade eggless Mayo. Very simple to make and tastes just like the store bought one. Some tips for the Eggless Mayo:
  • The mustard makes all the difference. If you don't have mustard powder, just crush a few mustard seeds and add that.
  • If the Mayo ends up having lumps, do not worry, just strain it using a strainer once it cools to remove the lumps.
  • If the Mayo ends up becoming one hard lump, blend it in the mixer or blender with a little milk to loosen it up.
  • Allow the Mayo to cook, before adding the vinegar to prevent the milk in it from curdling.
  • To make it Vegan, use any vegan milk like soy or almond.
kidney beans rajma vegetarian sandwich


Beetroot and Cauliflower Burgers with Eggless Mayo


kidney beans rajma vegetarian sandwichSpiced beetroot, cauliflower and beans patty combined with some eggless mayo to make a Veggie Burger

Recipe Type:  Snacks
Cuisine:          International
Prep Time:     15 minutes
Cook time:     20 minutes
Yield:              4


Ingredients:


Beetroot and Cauliflower Patties:


1 cup Red Kidney Beans (cooked)
1 cup grated Cauliflower
2 cups grated Beetroot
2 Tbsp finely chopped Coriander leaves
1 tsp of Garlic Powder
1 tsp of Garam Masala
1 tsp of Red Chilli Powder
1/2 sp of Turmeric Powder
Salt to taste
3-4 Tbsp Oil to fry

Eggless Mayo:


1 cup Milk
2 Tbsp Plain flour or Maida
1 tsp white Vinegar
1/2 tsp Mustard Powder or Mustard Seeds
1/4 tsp of powdered Sugar
Salt to taste

To assemble:


4 burger buns
Beetroot and Cauliflower Patties
Eggless Mayo

Method:


Beetroot and Cauliflower Patties:


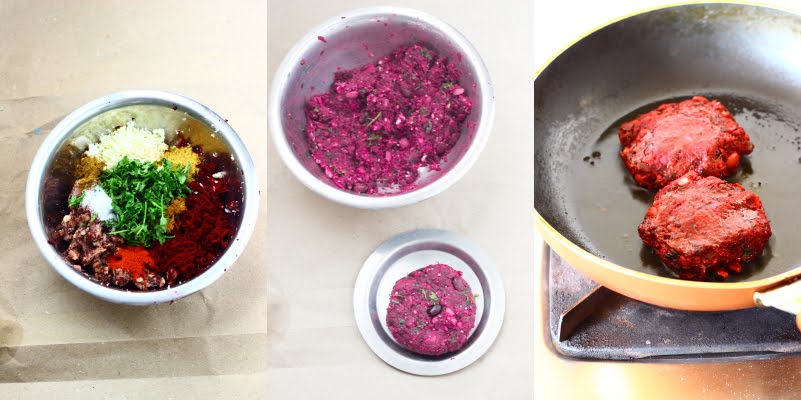
Mash the beans well.
Add all the other ingredients to it except the oil and mix well.
Shape into patties.
Heat oil in a pan and place the patties.
Cook the first side on medium flame for 3-4 minutes. Flip and cook for another 5-6 minutes.

Eggless Mayo:


Mix the flour in 1/2 cup of milk.
Heat the remaining milk in a pan and when it starts to boil, add the milk and flour mixture and whisk well so that there are no lumps.
Keep stirring or whisking until the mayo thickens and reaches the consistency you want.
Remove from heat and allow to cool.
Add the remaining ingredients and mix well.

To assemble:


Toast the burger buns,
Spread the mayo on the buns.
Place the hot patties and serve.
Read more ...

Chilli Basil Potato

chilli basil potato fry french fries chips thai aloo

CHILLI. BASIL. POTATO. Winning combo!!!

There is something about that aroma of Basil that awakens. It's so FRESH and EARTHY. It somehow reminds me of the fragrance of first rain. RAIN - I'm dying for some rains to bring down the heat. And all my thoughts are invariably leading to monsoons. Until, then I'm left with just sniffing away on some fresh Basil.

This Chilli Basil Potato is my FAVORITE Potato appetizer. We always order it at our local Thai restaurant. We tried other appetizers - Sesame Potato, Cauliflower Pepper Salt etc etc. But we always come back to these Chilli Basil Potatoes.

I wanted to make something really really healthy this weekend. Really!!! But those potatoes were really just staring me in the face from their basket. I thought they said PICK ME too... or may be that was just a voice in my head. Eh, who cares? These Chilli Basil Potato were totally worth the Potato indulgence. I stir fried them instead of deep frying, so I kept some end of my healthy eating bargain.


You know the other advantage of these Chilli Basil Potatoes? Your kitchen smells AMAZING. That's right! That wafting aroma actually got the I-am-addicted-to-my-phone hubby dearest Raj into the kitchen to check out what was cooking. 

Don't you simply hate how these men are always on... actually almost into their laptop / phone/ tablet ? I wish we were in simpler times, when a phone meant a box in the corner of the room with a cord hanging off it. Leave me a comment if you have succeeded in getting your man off his gadget.

And you know what? Back in those days, no food was bad food. There was no good fat, no bad fat. No high sugar, low sugar. No "let's-hate-the-potato" club. 

Anyway, back to the Chilli Basil Potatoes, I marinated them in some lemon juice and salt for around 10 minutes. And then stir fried them in sesame oil along with chilli flakes and fresh basil. They made a beautiful side for my homemade burgers.


Chilli Basil Potato


Potato stir fried with chilli flakes and fresh basil to make a delicious appetizer or snack.

Recipe Type:  Snacks / Appetizer
Cuisine:         Thai
Prep Time:     15 minutes
Cook time:     30 minutes
Yield:             Serves 2

Ingredients:


1 large Potato
3-4 tsp of Sesame Oil or Vegetable Oil
1/2 tsp Turmeric Powder
1 tsp of Chilli flakes
1 tsp of Lemon juice
A handful of fresh Basil leaves
Salt to taste

Method:


Cut the Potato into long thick strips like french fries.
Mix them with salt and lemon juice and keep aside for 10 minutes.
Drain the potatoes and keep aside.
Heat oil in a pan and drop the potato in it.
Stir the potatoes well so that they are all coated by the oil.
Now cook on low heat until the potatoes are done.
Add the turmeric powder, chilli flakes and the basil leaves and stir fry for 2-3 minutes until the basil leaves wilt.
Add more salt if required.
Serve hot.


Read more ...

Churmuri Soosla | Puffed Rice Breakfast

I LOVE ___ This is usually how I start my posts. You must think I love practically everything that I can eat (i.e. Vegetarian). I do hate some food. Well, hate may be a strong word. More like dislike. And I dislike something that more than half the world loves - Breakfast Cereals.

susla oggarne murmura kadle puri puffed rice breakfast vegan


I'll replay a usual breakfast discussion between me and my hubby dearest Raj.

Me (crestfallen, yet optimistically looking for answers) - "I don't know what to make for breakfast"

Raj - "Don't worry, lets eat cornflakes"

Me - "Nooooo... I'll make something, give me 10 minutes"

He loves it, I dislike it (at least the ones currently in the market). All those cereal lovers out there, please FORGIVE me for my next statement. I somehow feel Cereals are just loaded with sugar and offer nothing health wise. And I'm somehow not a big fan of sweet breakfast.

So this promise of 10 minutes isn't always upheld, but then, he's out there with the Newspaper and doesn't really keep track of time.

Isn't a girl allowed plus or minus 10 minutes? I'm sure she is. This wonderfully light breakfast of puffed rice (Churmuri or murmura or mandakki or kadle puri. Whew! that's a lot of "or"s) is done and on your plate in less than 20 minutes. And no - I'm not exaggerating at all.

susla oggarne murmura kadle puri puffed rice breakfast vegan


Puffed rice is exactly what the name says - it is puffed up rice. It is basically Rice Popcorn (more like popRICE). There are varieties in it - salted and unsalted. They both differ slightly texture wise. I've always used the salted variety.

This Churmuri Soosla as I call it, it my goto breakfast when I'm short of time. It's light, quick and it has the sweetness from the onions, tartness from the tomatoes and the lime, the heat from the green chillies and freshness from the coriander leaves. Basic spices like cumin seeds (jeera) and turmeric (haldi) just make it all the more delicious. You can skip the roasted gram, but I highly recommend it. If you cannot find it, I'd say try replacing it with powdered roasted peanuts and that should do.


Churmuri Soosla | Puffed Rice Breakfast


susla oggarne murmura kadle puri puffed rice breakfast veganA light South Indian breakfast made with puffed rice.

Recipe Type:  Breakfast
Cuisine:          South Indian
Prep Time:     10 minutes
Cook time:     15 minutes
Yield:              Serves 2-3

Ingredients:


150 gms of Puffed Rice / Churmuri
1 small Onion
1 medium sized Tomato
1-2 Green Chillies
1/2 tsp Turmeric Powder
1/2 Lemon / Lime
1/3 cup of Roasted Gram / Puthani
3 tsp of Oil
1 tsp of Cumin seeds
6-8 Curry leaves
1 Tbsp of finely chopped Coriander leaves
Salt to taste

Method:


Heat oil in a pan or kadhai.
Add the cumin seeds and allow them to brown slightly.
Add finely chopped onions, curry leaves and slit green chillies. Cook until the onions turn translucent.
Add chopped tomatoes and fry them for around 2 minutes until the tomatoes are soft.
Add the turmeric powder and mix well.
Wash the puffed rice and squeeze out the water.
Add to the pan and mix well.
Now add salt and lemon juice.
Grind the roasted gram into a fine powder and add to the pan. Mix well.
Garnish with coriander leaves and serve.
Read more ...

Curried Brown Rice and Zucchini Fritters


chawal tikki garam masala vegan pan fried snacks appetizer

Game Day? Movie Day? These Curried Brown Rice and Zucchini Fritters is are perfect for every occasion that DEMANDS you to to be glued to 2 things - your Sofa and your TV.

Called your friend over for Tea or Drinks? Curried Brown Rice and Zucchini Fritters - Perfect snack again.

chawal tikki garam masala vegan pan fried snacks appetizer

I can keep going and listing down all the occasions when you can make it. But frankly speaking, you don't need any occasion to enjoy good finger food. We just had this as an appetizer during dinner - no guests over or anything, just us two enjoying a quiet dinner.

It is also a great way to use up leftover rice if you have any.

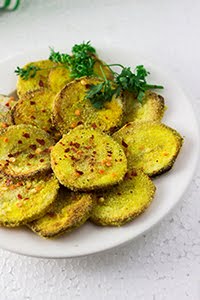
Brown rice is healthy, even, fashionable these days. Not as fashionable as Quinoa, but fashionable enough. These fritters are loaded with the goodness of brown rice and zucchini - they are almost HEALTH FOOD! Almost!  Tasty health food - oxymoron isn't is?

chawal tikki garam masala vegan pan fried snacks appetizer

I've seasoned these fritters with Italian seasonings like oregano, basil etc, in the past, but I'm a CURRY GIRL at heart. I love my spices and my curry. The Garam Masala - the quintessential Indian blend of spices adds a wonderful Zing to the fritters. 

These Curried Brown Rice and Zucchini Fritters taste great when served piping hot with some good old ketchup.

Step by Step Instructions:


chawal tikki garam masala vegan pan fried snacks appetizer

1) Cook the rice as per instructions.
2) Allow the rice to cool and then mash it. You can use a food processor or mixer to mash it.
3) Grate the zucchini and add to the mashed rice.
4) Add all the ingredients except the oil and mix well.

chawal tikki garam masala vegan pan fried snacks appetizer


5) Shape the mixture into small patties and place in the hot pan and cook on medium heat.
6) Allow the first side to brown, and flip after 3-4 minutes. Allow the second side to brown and crisp up.
7) Serve hot with ketchup.


Curried Brown Rice and Zucchini Fritters


chawal tikki garam masala vegan pan fried snacks appetizerFritters or Tikkis made with mashed Brown Rice and grated Zucchini. Spiced with Garam Masala and pan fried. 

Recipe Type:  Snacks / Appetizer
Cuisine:          Indian
Prep Time:     15 minutes
Cook time:     20 minutes
Yield:              15 fritters

Ingredients:


1/2 cup Brown Rice
1 Zucchini
2 Tbsp finely chopped Coriander leaves
1 tsp Garlic Powder
1/2 tsp Garam Masala
1/2 tsp Turmeric Powder
1 tsp Red Chilli Powder
2-3 Tbsp Corn Flour
3-4 Tbsp Oil to fry
Salt to taste

Method:


Cook the rice as per instructions. I pressure cooked it in 1.25 cups of water for about 10 minutes or 3-4 whistles. The rice should be soft and well done.
Allow the rice to cool and then mash it. You can use a food processor or mixer to mash it.
Grate the zucchini and add to the mashed rice.
Add all the ingredients except the oil and mix well.
The corn flour is added as the mixture begins to leave water after the addition of salt. If your mixture becomes too wet, add more corn flour. Heat oil in a shallow pan.
Shape the mixture into small patties and place in the hot pan and cook on medium heat.
Allow the first side to brown, and flip after 3-4 minutes. Allow the second side to brown and crisp up.
Serve hot with ketchup.
Read more ...

10 minute Plantain Chips | Balekayee Podi | Kelyachi Kapa


Balekayi balekayee podi kelyachi kapa raw banana fry vegan snacks indian goan maharashtrian

Crisp on the outside, soft on the inside. Coated with fine semolina and coloured yellow by Turmeric. A dash of heat and seasoning. Sounds fancy doesn't it? 
I'm only describing these awesomely EASY to make 10 minute quick Plantain Chips. Yup! that's all it takes to make them. 10 minutes. And did I mention, they are pan fried? YES! They are NOT deep fried. That just made them healthy, did it not? Healthy chips - that's the way we roll....

And the ingredients are even lesser in number than the time- Just 6. And that includes salt and oil. Now isn't that economical.

Balekayi balekayee podi kelyachi kapa raw banana fry vegan snacks indian goan maharashtrian

This recipe comes from Goa - the tiny state on the west coast of India is extremely popular for its heavenly beaches and with the beach, comes the amazing seafood (or so I've heard). I'm a vegetarian, so I haven't sampled any of this amazing seafood, but I believe my friends when they say it. On certain days, even the most hard core non vegetarian craves Vegetarian food. On those days, comes out the fish fry substitute - Plantain chips. Sometimes it is made with Potato or Brinjals too. For us vegetarians, this is just daily food.

These chips are a very common side dish / accompaniment to a rice and dal meal. It goes amazingly well with the starchy soft white rice and the mild yellow dal. These chips just add a bit of texture to the meal. They are crisp, they are soft, they are yellow and they are just slightly hot.

Some days I don't even make the rice and dal, I just have them as a snack in the evenings. 

I ate it differently this time. I had my last week's Olive Hummus in the fridge and I baked a few whole wheat pita breads, and instead of stuffing my Pita Pockets with falafels, I stuffed it with my Plantain chips. Soooo QUICK  to make. Did I mention they hardly take 10 minutes? So what are you waiting for? Get set go...

Balekayi balekayee podi kelyachi kapa raw banana fry vegan snacks indian goan maharashtrian


10 minute Plantain Chips | Balekayee Podi | Kelyachi Kapa


Quick and easy pan fried semolina coated plantain chips. A famous accompaniment to rice and dal in Goa

Balekayi balekayee podi kelyachi kapa raw banana fry vegan snacks indian goan maharashtrianRecipe Type:  Snacks
Cuisine:          Indian / Goan
Prep Time:     10 minutes
Cook time:     10 minutes
Yield:              20-25

Ingredients:


1 Raw Banana / Plantains
1 tsp of Turmeric Powder
1 tsp of Red Chilli Powder
1/2 cup of fine Semolina / Chiroti Rava
Oil to fry
Salt to taste

Method:


Peel the raw banana and slice into discs. I usually keep them at least 3-4mm in thickness.
Toss the slices with turmeric powder, red chilli powder and salt.
Heat up a griddle or a flat bottomed frying pan.
Dip the slices one by one in the fine semolina and place on the hot griddle.
Spoon over oil so that each one is coated in oil.
Once the first side browns a little, flip them and cook until done.
Insert a knife to check if done, if the knife goes in smoothly and there is no resistance, the chips are done.
Serve hot.
Read more ...

Sabudana Chana Vada | Sago Pearls and Chickpea Patty [Vegan & GF]


Sabudana Chana Vada Sago Chickpea patty burger garbanzo fritter wada pakoda bonda sabakki

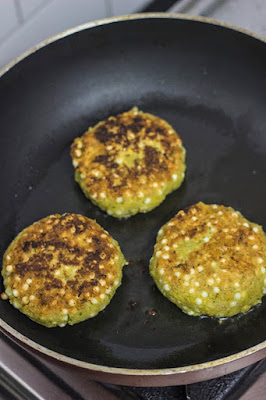
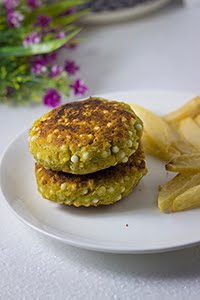
Sabudana vada is a traditional Maharastrian snack eaten during fasting / upvas. I was trying to avoid potatoes in my diet, so I replaced it with chickpeas or kabuli chana. This vada (patty) is a fusion between the traditional Sabudana Vada and the Middle Eastern Falafel. Although both the original snacks are deep fried, I shallow fried. 

Deep frying definitely makes them tastier, but then, doesn't it always do it? I watched an older episode of Eat Street on TV, where they showed a truck that deep fried Cup cakes. I wonder how that tastes. 

The chickpea in the vada increases the protein content of the vada. It also adds a nuttiness to it. You can eat it just as it is or add it in a burger like I did. I used the dry chickpeas that I soaked overnight, you can replace this with canned chickpeas as well. The sabudana or the sago pearls sold in supermarket are dried. They need to be soaked to fluff up and become spongy. You can add spices to enhance the flavor.

All the work in this recipe is during the preparation stage, the cooking is actually a no brainer - grind, mix and fry. That's it! 

This vada is vegan and gluten free.

Step by Step Instructions:

Sabudana Chana Vada Sago Chickpea patty burger garbanzo fritter wada pakoda bonda sabakkiSabudana Chana Vada Sago Chickpea patty burger garbanzo fritter wada pakoda bonda sabakki


1) Soak the kabuli chana or chickpeas in 3 cups of water overnight.Drain the water and keep aside.
You can use canned chickpeas as well. Skip the above steps if using canned chickpeas. Wash and drain the canned chickpeas. Use 2 cups of canned chickpeas.
2) Soak the sabudana in 2 cups of water and leave aside for 1/2 hour.Drain the water and cover and keep it aside for 2 hours.If you plan on making this for breakfast, then after draining the water, cover and keep it aside overnight.
3) Grind the peanuts into a coarse powder.
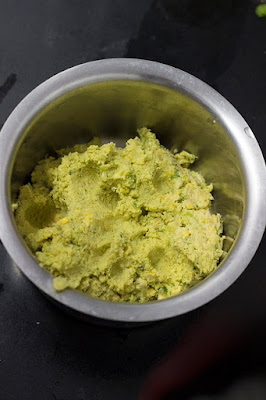
4) Grind together the chickpeas and green chillies coarsely.
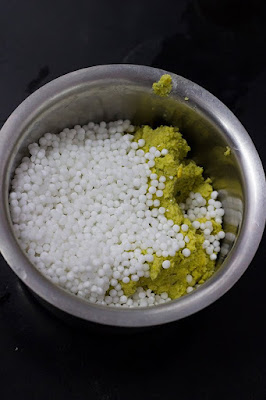
5) Add the ground peanuts, sabudana, curry leaves, coriander leaves and salt and mix well.
6) Shape into patties / vadas.

Sabudana Chana Vada Sago Chickpea patty burger garbanzo fritter wada pakoda bonda sabakkiSabudana Chana Vada Sago Chickpea patty burger garbanzo fritter wada pakoda bonda sabakki

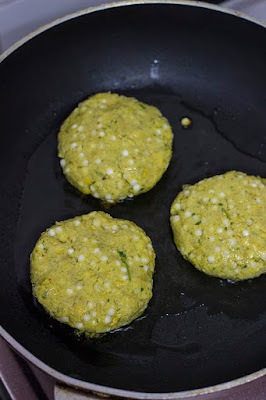
7) Heat around 2 Tbsp of oil in a shallow pan for shallow frying. You can decide to deep fry it too.
8) Once the oil is hot, add the vadas to the pan and cook on medium heat.
9) Flip the vadas when the first side is browned and cook it until the other side browned.
10) Serve hot with coriander chutney or ketchup.


Sabudana Chana Vada | Sago Pearls and Chickpea Patty


Sabudana Chana Vada Sago Chickpea patty burger garbanzo fritter wada pakoda bonda sabakki Pan fried patties/ vada made with sabudana (sago pearls) and kabuli chana (chickpeas). Vegan and gluten free.

Recipe Type:  Snacks /Breakfast
Cuisine:          Indian
Prep Time:     8 hours (Including soaking time) or 3 hours (If using canned chickpeas)
Cook time:     30 minutes
Yield:              7-8 vadas

Ingredients:


1 cup dry Kabuli Chana / Chickpeas
1.5 cups of dry Sabudana / Sago Pearls
1/2 cup of roasted Peanuts
1-2 Green Chillies
7-8 Curry Leaves
2 Tbsp of chopped Coriander Leaves
Salt
Water
Oil for frying

Method:


Soak the kabuli chana or chickpeas in 3 cups of water overnight.
Drain the water and keep aside.
You can use canned chickpeas as well. Skip the above steps if using canned chickpeas. Wash and drain the canned chickpeas. Use 2 cups of canned chickpeas.
Soak the sabudana in 2 cups of water and leave aside for 1/2 hour.
Drain the water and cover and keep it aside for 2 hours.
If you plan on making this for breakfast, then after draining the water, cover and keep it aside overnight.
Grind the peanuts into a coarse powder.
Grind together the chickpeas and green chillies coarsely.
Add the ground peanuts, sabudana, curry leaves, coriander leaves and salt and mix well.
Shape into patties / vadas.
Heat around 2 Tbsp of oil in a shallow pan for shallow frying. You can decide to deep fry it too.
Once the oil is hot, add the vadas to the pan and cook on medium heat.
Flip the vadas when the first side is browned and cook it until the other side browned.
Serve hot with coriander chutney or ketchup.
Read more ...