Showing posts with label Video. Show all posts

Honey Cake (Video Recipe)


Bangalore Iyengar Bakery style Honey Cake is made by soaking an orange sponge cake with honey syrup and then topping it with a jam-coconut frosting

how to make honey cake recipe,how to make bangalore honey cake recipe, how to make iyengar bakery honey cake recipe, eggless cake recipe, eggless baking at www.oneteaspoonoflife.com


how to make honey cake recipe,how to make bangalore honey cake recipe, how to make iyengar bakery honey cake recipe, eggless cake recipe, eggless baking at www.oneteaspoonoflife.com


Flashback to April 2002, 15 years and 1 month ago, I was in Bangalore with my dad, all set to answer the Common Entrance Test (CET) that would give me a chance to study Engineering in Karnataka. Because I took so long to decide that I want to answer CET, all the hotels we knew of were full. My aunt came to our rescue and arranged for us to stay at her sister's place. Her family was extremely hospitable, so before we left, we asked them what their favorite sweet was so we could it buy it for them as a gift. Their response was - Honey Cake, a complete novelty to me. 

Honey Cake is a Bangalore special. It is not something you will get in the gourmet high end bakeries, it is something that is available in the humble Iyengar Bakeries that dot the old city. A simple orange sponge that is soaked in a sweet honey syrup, topped with a jam coconut frosting is what this sweet treat is all about.

how to make honey cake recipe,how to make bangalore honey cake recipe, how to make iyengar bakery honey cake recipe, eggless cake recipe, eggless baking at www.oneteaspoonoflife.com

I had completely forgotten about this beauty until I went to the bakery randomly to buy some bread and saw them bring out a tray full of fresh honey cake. I had to have it!!! Unfortunately, the cake wasn't eggless and that prevented us from enjoying it then and there. So the food blogger was given the task of making the cake at home so all could enjoy it. I'm happy to say I did not disappoint. The cake was very similar to that memory of 2002. The only little tip I have is let that cake soak for a few hours. The syrup needs to soak up the entire cake and not just the bottom. Eating it immediately (like we impatient bunch did), will not let the honey permeate through the cake.  If you cannot resist the cake (like us, again), just keep a bowl of syrup nearby and just drizzle it over the sides of the piece of cake while you eat.

how to make honey cake recipe,how to make bangalore honey cake recipe, how to make iyengar bakery honey cake recipe, eggless cake recipe, eggless baking at www.oneteaspoonoflife.com

how to make honey cake recipe,how to make bangalore honey cake recipe, how to make iyengar bakery honey cake recipe, eggless cake recipe, eggless baking at www.oneteaspoonoflife.com

Soooo, let's break down the Honey Cake:

ORANGE SPONGE CAKE - The base of the whole cake, well, is the cake. This orange sponge was sooo delicious that I could eat it just like that over a cup of tea. In fact, I will, very soon, just when I feel I've denied myself of sufficient number of calories to bake a cake again. Until then, I just live with the memory of this yummy orange sponge. This sponge is so simple to make, you could have a kid do it. No creaming butter until your arm aches. Just 6 simple ingredients, hand whisked until combined. I used freshly squeezed Orange Juice in my cake, 2 not so juicy oranges gave me half a cup of OJ. Use more to get a more pronounced Orange flavor. I know I will. If you dislike oranges, however, just skip it and use water in place of it. 

HONEY SYRUP - This syrup isn't like your regular syrups. It is not boiled until you get a certain thread consistency. Just mix honey in warm water and your syrup is ready. Tastes purely of honey. 

JAM COCONUT FROSTING - Use whichever jam you want. The cake you get in bakeries seem to use mixed fruit, so I used mixed fruit. But I know I would love a mango jam to go with this cake. Heat together the jam and desiccated coconut (dry) along with a little water or honey syrup to make the frosting. The consistency should be slightly loose so it is easy to spread. You can buy desiccated coconut from the supermarket or you can just grate dry coconut using a fine grater to make your own. Top the frosted cake with more of this desiccated coconut to make it more coconut-y.

I have a Video Recipe for you too: 


Video Recipe


If you made this recipe, let me know! Leave a comment here or on Facebook, tag your tweet with @oneteaspoonlife on Twitter and don't forget to tag your photo #oneteaspoonoflife on Instagram. You can also email me at onetspoflife@gmail.com. I'd love to see what you are upto. 

If you like this recipe, do not forget to share it with your friends and family! 

You can follow One Teaspoon Of Life is there on Facebook, Twitter, Instagram, Pinterest and Google+ or you can subscribe to One Teaspoon Of Life and receive all the latest updated via Email (How convenient!!)

how to make honey cake recipe,how to make bangalore honey cake recipe, how to make iyengar bakery honey cake recipe, eggless cake recipe, eggless baking at www.oneteaspoonoflife.com

how to make honey cake recipe,how to make bangalore honey cake recipe, how to make iyengar bakery honey cake recipe, eggless cake recipe, eggless baking at www.oneteaspoonoflife.com


If you liked this, you may also like:


Honey Cake


how to make honey cake recipe,how to make bangalore honey cake recipe, how to make iyengar bakery honey cake recipe, eggless cake recipe, eggless baking at www.oneteaspoonoflife.comBangalore Iyengar Bakery style Honey Cake is made by soaking an orange sponge cake with honey syrup and then topping it with a jam-coconut frosting.

Recipe Type:  Dessert
Cuisine:            Indian
Prep Time:     15 minutes
Cook time:     60 minutes
Yield:                Serves 5-6


Ingredients:


For the Orange Sponge Cake:


1.5 cup all purpose Flour (Maida)
1 cup + 2 Tbsp sweetened Condensed Milk
0.5 cup fresh Orange Juice
0.5 cup Oil
1 tsp Baking Powder
0.5 tsp Baking Soda

For the Honey Syrup:


0.5 cup Water
3 Tbsp Honey

For the Jam Coconut Frosting:


2 Tbsp mixed fruit Jam
1.5 Tbsp Water or Honey Syrup
3 Tbsp dry desiccated Coconut

Others


3 Tbsp dry desiccated Coconut

Method:


To make the Orange Sponge Cake:


Add baking powder and bakind soda to the flour and mix well.
Add orange juice, oil and sweetened condensed milk and mix until combined and smooth.
Preheat the oven to 180 degree Celsius.
Grease a cake mould or baking tin and dust it with flour until coated. Remove the excess flour by upturning the tin.
Bake the cake for 30-35 minutes or until done. Test by inserting a toothpick in the center, if it comes out clean, the cake is done, else, let is bake a little longer.

To make the Honey Syrup:


Mix the honey in warm water and keep aside.

To make the Jam-Coconut Frosting:


Heat the jam in a pan and add the desiccated coconut.
Loosen the jam-coconut mixture by adding a little water or honey syrup.
Stir and cook for 2-3 minutes. The frosting should be smooth without any lumps of jam in it.

To assemble the Honey Cake:


Remove from heat and keep aside.
Prick the cake with a toothpick or a fork to create holes.
Pour half to 3/4th of the syrup onto the cake and allow it to soak. You can keep the cake aside at this point for 30-60 minutes and then pour the remaining syrup on the cake.
Spread the jam-coconut frosting on the cake.
Top with more dry desiccated coconut and chill until ready to serve.


how to make honey cake recipe,how to make bangalore honey cake recipe, how to make iyengar bakery honey cake recipe, eggless cake recipe, eggless baking at www.oneteaspoonoflife.com


Read more ...

Pani Puri Recipe| Golgappa Recipe | Puchka Recipe [Video]


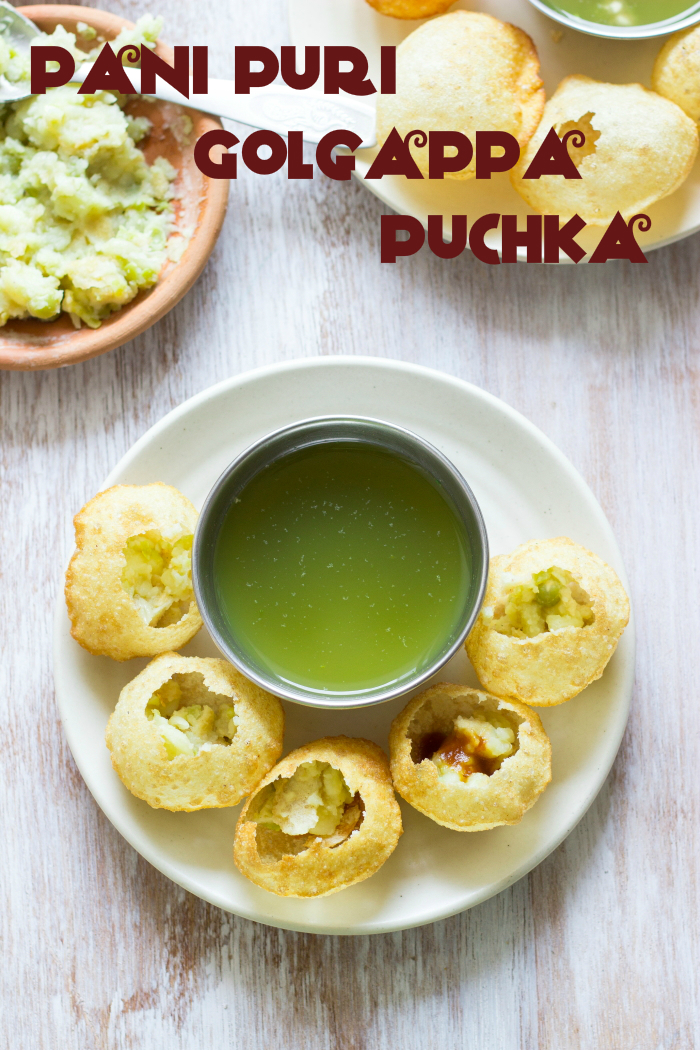
Pani Puri recipe with step by step Video instructions. The KING of Indian Street food - Pani Puri or Golgappa or Puchka. Crispy fried dough balls stuffed with a potato pea mash, sweet tamarind chutney and a chilled spicy coriander-mint water.


In a hurry? Jump to Video or Jump to Recipe


How to make pani puri recipe, how to make puchka recipe, how to make golgappa recipe, pani puri ka pani recipe at www.oneteaspoonoflife.com

What kind of a place would the world be if there was no street food? Boring???

I think Street Food talks a lot more than Restaurant food. Street food is like the soul of the place. You learn so much more about the culture and people just by looking at the street food being sold. While restaurant food is usually mellowed down and modified to suit the palate of the customers it serves, street food is bold and original. If you haven't eaten street food, you probably haven't tasted the city yet.

India wouldn't be India if it were not for its "Chaat". Chaat refers to a variety of savory sweet tangy food sold on the roadsides from either small stalls or little food carts. And according to me, the most popular Chaat has always been - Pani Puri, also known as Golgappa in the North and Puchka towards the East. Names may vary, but the love for this dish does not. You can find Pani Puri being sold in every nook and corner of any city in India. But each one has their own favorite stall that they are extremely loyal to. Our favorite, is the Bihari guy outside a supermarket in Jayanagar 4th Block. He makes the crispest puri there is. I have never made my own Puris, that is an experiment for some other day. Buying is a lot easier.

How to make pani puri recipe, how to make puchka recipe, how to make golgappa recipe, pani puri ka pani recipe at www.oneteaspoonoflife.com

How to make pani puri recipe, how to make puchka recipe, how to make golgappa recipe, pani puri ka pani recipe at www.oneteaspoonoflife.com

Puris are crispy hollow balls made of deep fried dough. These balls are gently tapped with fingers to make a hole on one side. Then comes the stuffing, the stuffing varies according to the region you are in. It can be a potato mash, potato-green pea mash, sprouts, black chana, chickpeas etc. A little bit of this stuffed is stuffed into the puri. Then comes the celebration - the Pani or water. The Pani awakens every teeny weeny taste bud in your mouth. It is sour, it is spicy, it is salty. Made of mint, coriander, tamarind, chillies and spices, it is a flavor bomb. One of the essential ingredients for making the perfect pani is Black Salt or Kala Namak. A funky smelling salt that has its origin in the Himalayas. The pani is stirred before dipping the puri in it to fill up the puri with this wonderful Pani. Now if you want, you can add jaggery or sugar to the Pani to make it slightly sweet, or you can make the Date Tamarind Chutney like it is traditionally done and spoon in a little of it along with the Pani to get a slightly sweet Pani Puri. Keeping the sweet chutney separate from the Pani allows you to adjust the sweetness according to each individual's taste.

How to make pani puri recipe, how to make puchka recipe, how to make golgappa recipe, pani puri ka pani recipe at www.oneteaspoonoflife.com

How to make pani puri recipe, how to make puchka recipe, how to make golgappa recipe, pani puri ka pani recipe at www.oneteaspoonoflife.com

Once the puri is filled with the pani, it has to be eaten immediately. Eating a Pani Puri can be tricky if you have never had it. You have to eat the puri in one go. It is like a filled water balloon, you try to cut it in half and all the water will be out and you will be left with a soggy puri. 

My love for Pani Puri comes from my Dad. He never missed a chance to eat a plate of pani puri, neither does Raj. When I am shopping for weekly groceries at the super market, he's outside sneaking a plate of pani puri. In this one matter, we are definitely made for each other. We are 2 bottomless holes when it comes to pani puris. We can just keep on going!!

How to make pani puri recipe, how to make puchka recipe, how to make golgappa recipe, pani puri ka pani recipe at www.oneteaspoonoflife.com


If you made this recipe, let me know! Leave a comment here or on Facebook, tag your tweet with @oneteaspoonlife on Twitter and don't forget to tag your photo #oneteaspoonoflife on Instagram. You can also email me at onetspoflife@gmail.com. I'd love to see what you are upto. 

If you like this recipe, do not forget to share it with your friends and family! 

You can follow One Teaspoon Of Life is there on Facebook, Twitter, Instagram, Pinterest and Google+ or you can subscribe to One Teaspoon Of Life and receive all the latest updated via Email (How convenient!!)


Video Recipe


--------------------------------------------------------------------------------------------------------------------------

Pani Puri | Golgappa | Puchka Recipe


How to make pani puri recipe, how to make puchka recipe, how to make golgappa recipe, pani puri ka pani recipe at www.oneteaspoonoflife.comPani Puri | Golgappa | Puchka is an Indian Street food or Chaat item in which crispy fried dough balls are stuffed with mashed potatoes, spicy coriander-mint water and a sweet tamarind chutney.

Recipe Type:  Snacks
Cuisine:            Indian
Prep Time:     8 hours (includes soaking time for peas)
Cook time:     45 minutes
Yield:                Makes 100

Ingredients:


To make the Pani:


0.75 -1 cup chopped Coriander leaves
0.75 -1 cup chopped Mint leaves
1 litre cold Water
Lemon sized piece of Tamarind
2-3 green Chillies
1 tsp Cumin Powder
2 tsp Chaat Masala
Black Salt to taste

To make the Potato-Pea Stuffing:


5-6 Potatoes
3/4 cup dried Green Peas
1 tsp Chaat Masala
Salt to taste
Water as required

To Assemble the Pani Puri:


100 Puris
1 bowl Date Tamarind Chutney

Method:


To make the Potato-Pea Stuffing:


1. Soak the dried green peas overnight or for 6-8 hours.
2. Drain and boil them until done. I usually pressure cook them for 2-3 whistles.
3. Boil and peel the potatoes.
4. Mash together the potatoes and the green peas.
5. Add in salt and chaat masala and mix well. Keep it slightly under seasoned as the pani is already salty.

To make the Pani:


6. Soak the tamarind in a cup of water for 15 minutes and squeeze out the liquid. Remove the pulp and keep the tamarind juice aside.
7. Blend together the coriander leaves, mint leaves and green chilli with a little water into a smooth puree.
8. Add the puree to 1 litre of water , preferably cold.
9. Add the cumin powder, tamarind juice, black salt and chaat masala to taste.
Chill the green pani in the fridge until serving. Alternately, you can add ice to the pani to serve immediately.
10. Strain the water before serving.

To Assemble the Pani Puri:


11. Gently tap a hole in the puri using your finger.
12. Spoon in the potato stuffing into the puri.
13. Now pour in the date tamarind chutney if you like the pani puri to be slightly sweet.
14. Spoon in the green pani and eat immediately.


How to make pani puri recipe, how to make puchka recipe, how to make golgappa recipe, pani puri ka pani recipe at www.oneteaspoonoflife.com


If you liked this, you may also like:

bangalore street food masala puri chat
Masala Puri

Masala Pav, Indian street food
Masala Pav
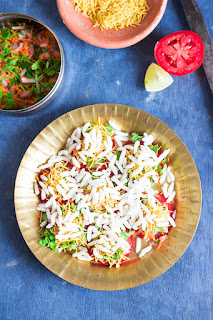
Bangalore Street food made by topping tomato slices with a mix of sweet and spicy chutneys and topped off with salted puffed rice
Tomato Puri


Read more ...

Dill and Caramelized Onion Bread Rolls [Video]


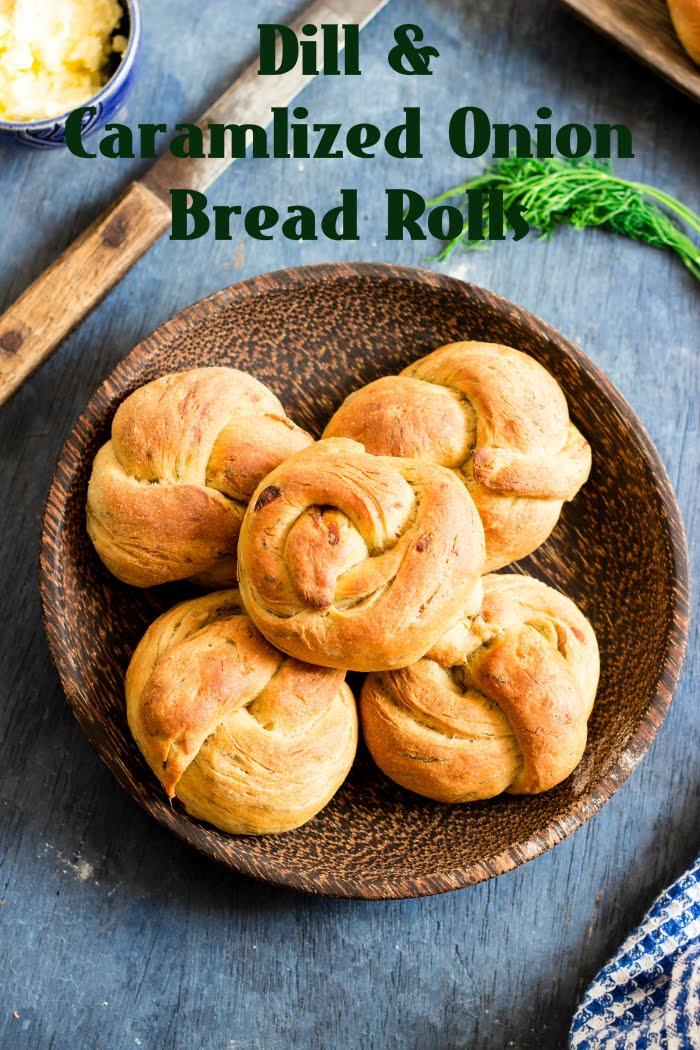
These Dill and Caramelized Onion Bread Rolls are sooo good, this is the ONLY recipe you will ever need for flavored bread rolls

How to make dill bread recipe, dill and onion bread recipe, eggless dill and onion bread recipe, how to bake bread rolls recipe, how to bake bread at www.OneTeaspoonOfLife.com


How to make dill bread recipe, dill and onion bread recipe, eggless dill and onion bread recipe, how to bake bread rolls recipe, how to bake bread at www.OneTeaspoonOfLife.com

Happy Sunday Guys!!

These Bread Rolls... YUMMMMMM....

If you take it from me, these Dill and Caramelized Onion Bread Rolls are the ONLY flavored bread rolls recipe you will ever need. I made this twice in one week. TWICE!!

I first made them on Sunday, last Sunday, and it was more of a trial batch. And then again on Wednesday. Never done that before. I'm more of a buy-bread-from-store types than bake bread from scratch person. I surprised myself by making it twice in a week. See, the thing was, Raj did not get to eat any on Sunday as he wasn't around. I had nice fresh warm bread from the oven and I had just made butter at home. Yes, I make butter at home almost every week, I just love fresh homemade butter so much. And among Gee and I, we wiped off the entire lot of 7 bread rolls. It was soooo GOOD!! Then I just felt bad that he did not get to even taste one, so I made it again in the week.

How to make dill bread recipe, dill and onion bread recipe, eggless dill and onion bread recipe, how to bake bread rolls recipe, how to bake bread at www.OneTeaspoonOfLife.com

I'd first seen a Dill and Onion bread roll recipe in an airline magazine. It used dill seeds and raw onions. Fresh Dill is so much easier to find than dill seeds here in Bangalore, so I swapped that. I love caramelized onions. They are soft, and brown and sweet. Yum! I never miss a chance to use them in a recipe and I always make extra to eat along in the week. This week, I stuffed some flatbread rolls with them. But if you are short of time, just saute the onions for 2-3 minutes and add them in the bread. I don't want you to miss out on eating this bread just because caramelizing onions takes time.
Or like me, you can make them in advance and keep them in the fridge, they stay good for one week in there.

There is one more cheat to save time here - Buy Paneer or Cottage cheese from the store. If buying frozen, let it thaw completely before using. Making Paneer at home can seem daunting, but it is the easiest cheese you can make at home. This recipe does not require you to make paneer completely, just the curds. Drain the curds and blend them into a smooth puree for this recipe. You can also replace with cream cheese.

How to make dill bread recipe, dill and onion bread recipe, eggless dill and onion bread recipe, how to bake bread rolls recipe, how to bake bread at www.OneTeaspoonOfLife.com

You know what's the best thing about these rolls? Taste, of course, but the aroma that fills your house when a fragrant herb like Dill is cooking is so heavenly. I just love Dill, and its sharp earthiness, it is my favorite green, right from childhood. 

Now that I've made these twice is such quick succession, I'm confident that this is my go to recipe for dinner rolls. They taste great with any gravy, but they taste BEST just by themselves. Slather on some butter and that's IT!! Soft, buttery, fragrant, salty rolls with that little hint of sweetness when you bite into a caramelized onion slice. What more do you really need?

How to make dill bread recipe, dill and onion bread recipe, eggless dill and onion bread recipe, how to bake bread rolls recipe, how to bake bread at www.OneTeaspoonOfLife.com

P.S - I have a bonus for you, a VIDEO recipe!!

Video Recipe


If you made this recipe, let me know! Leave a comment here or on Facebook, tag your tweet with @oneteaspoonlife on Twitter and don't forget to tag your photo #oneteaspoonoflife on Instagram. You can also email me at onetspoflife@gmail.com. I'd love to see what you are upto. 

If you like this recipe, do not forget to share it with your friends and family! 

You can follow One Teaspoon Of Life is there on Facebook, Twitter, Instagram, Pinterest and Google+ or you can subscribe to One Teaspoon Of Life and receive all the latest updated via Email (How convenient!!)


If you liked this, you may also like:


Dill and Caramelized Onion Bread Rolls


How to make dill bread recipe, dill and onion bread recipe, eggless dill and onion bread recipe, how to bake bread rolls recipe, how to bake bread at www.OneTeaspoonOfLife.comDill and Caramelized Onion Bread Rolls are fragrant flavorful bread rolls made with fresh cottage cheese, dill leaves and sweet caramelized onions.

Recipe Type:  Bread
Cuisine:            International
Prep Time:     3 Hours
Cook time:     1 Hour
Yield:                Makes 14 rolls

Ingredients:


For Caramelized Onions:


3 Onions
2 Tbsp Olive Oil
1 tsp Sugar or Jaggery
1-2 tsp Balsamic Vinegar
1 Tbsp Water
Pinch of salt

For Cottage Cheese / Paneer:


1 litre Milk
2 Tbsp Lime Juie
3-4 Tbsp Water

For the Dill and Caramelized Onion Bread Rolls:


2 cups Wholewheat flour (Atta)
1 cup All purpose flour (Maida)
1.25 cups Water
3-4 Tbsp chopped Dill leaves
2 tsp Active Dry Yeast
2 Tbsp Oil
Salt to taste

Method:


To make Caramelized Onions:


Heat oil in a pan and add sliced onions.
Sprinkle a pinch of salt and mix well.
Allow the onions to cook on medium to low heat until they are slightly brown.
Add sugar or jaggery and balsamic vinegar.
Add little water to prevent the onions from sticking to the pan.
Remove from heat once the onions are dark brown and sweet. This takes around 30-40 minutes.

To make Cottage Cheese / Paneer:


Boil the milk until it comes to a rolling boil.
Turn off the heat and immediately add the lime juice and mix well.
Once the milk curdles, strain it and keep aside for 15 minutes allowing the water to drain from the cheese curds.
Once the cheese cools, blend it along with a little water to a smooth puree.

To make the Dill and Caramelized Onion Bread Rolls:


Heat 1.5 Tbsp Oil in a pan and add 1/4 cup water.
Add the cheese puree, chopped dill and caramelized onions. Mix well.
Simmer on low heat for 3-4 minutes. Remove from heat and keep aside to cool.
Heat 3/4 cup of water until lukewarm. Add the active dry yeast to it and allow the yeast to bloom.
Once the cheese mixture is cool, pour it into a clean bowl and add the yeast.
Add salt, 1.5 cups whole wheat flour and the all purpose flour.
Knead until combined. Add more whole wheat flour if the dough is very sticky.
Take another large clean bowl and grease it slightly. Move the dough to it. Rub the dough with oil. Cover and allow it to rise for 1-2 hours until doubled.
Once the dough has risen, divide the dough into 14 equal balls.
Grease a baking tray. Shape the rolls and place on the baking tray leaving at least 1" gap between rolls.
Cover and allow it to rise a second time for around 45 mins to 1 hour.
Preheat the oven to 250 degree C.
Bake the rolls for 12-15 minutes until browned.


How to make dill bread recipe, dill and onion bread recipe, eggless dill and onion bread recipe, how to bake bread rolls recipe, how to bake bread at www.OneTeaspoonOfLife.com
Read more ...

MIL's Spicy Tomato Curry with fried Bhindi (Okra) [Video]


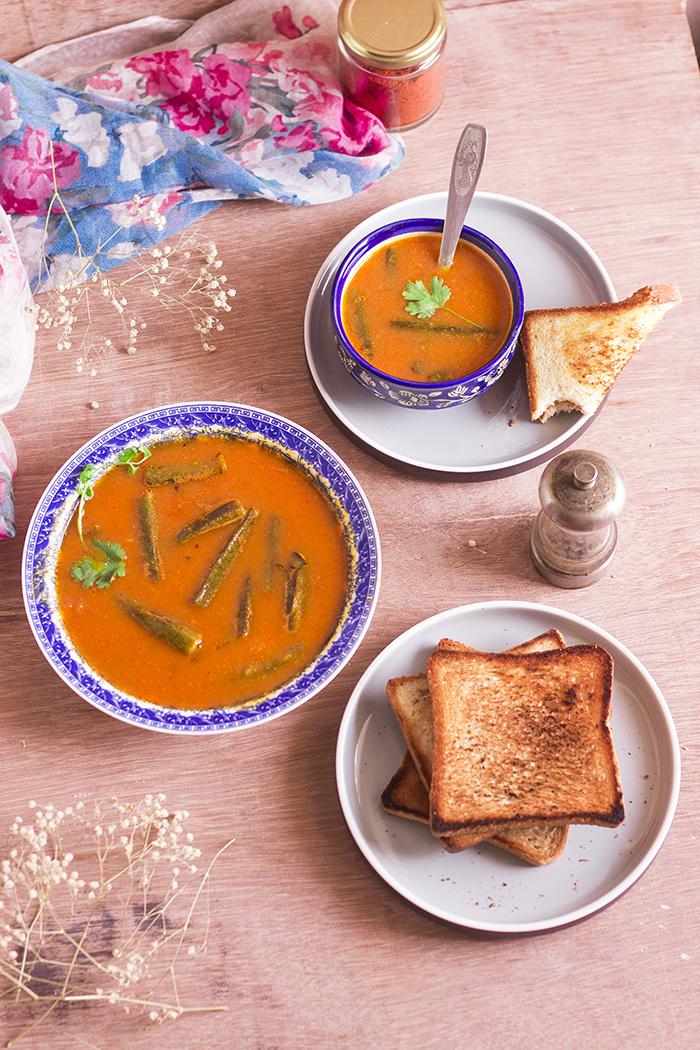
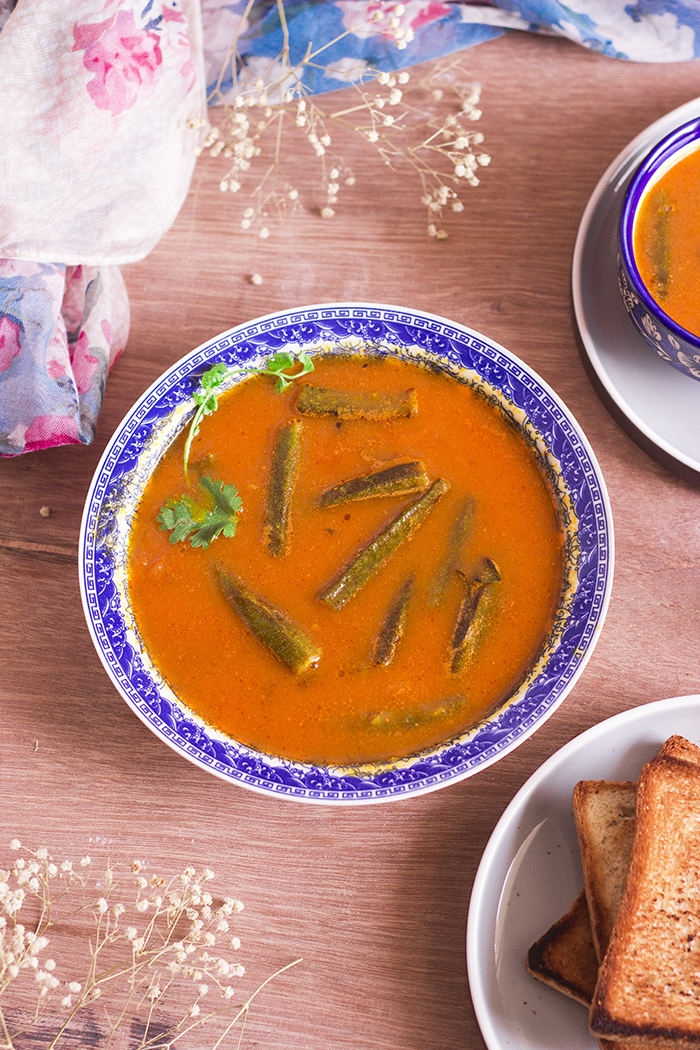
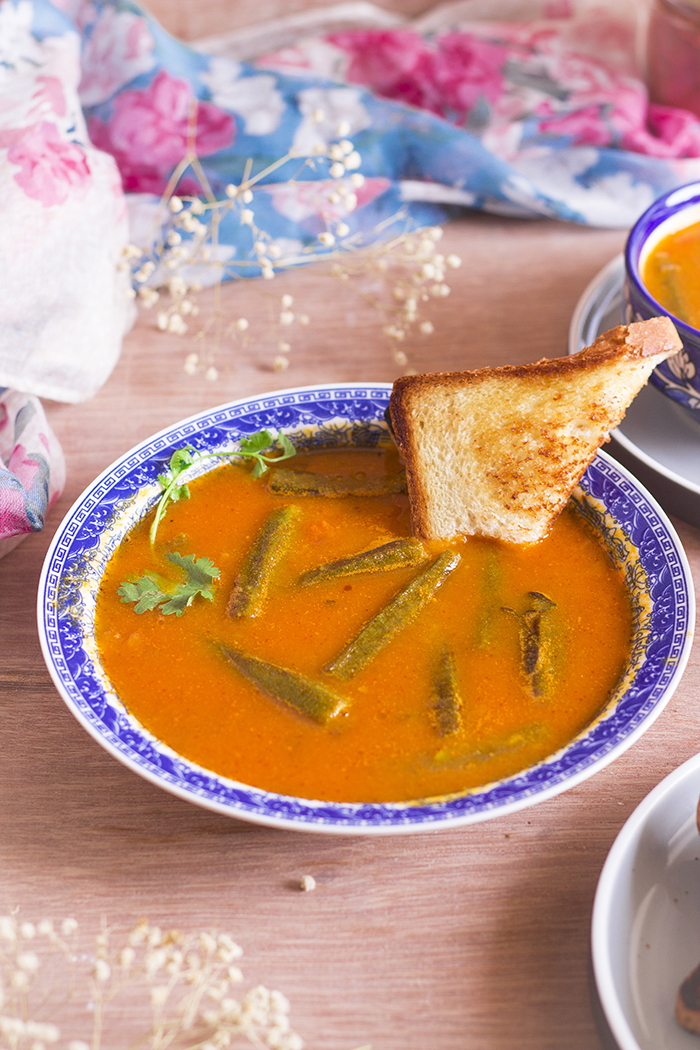
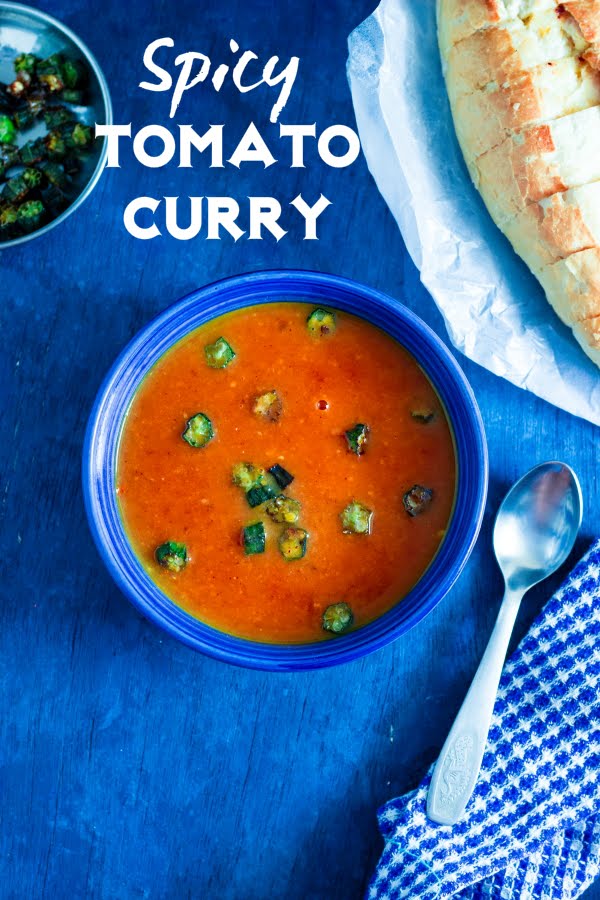
Spicy Tomato Curry with fried Bhindi / Okra recipe with video instructions. Spicy Tomato Curry is a quick vegan tomato soup that is served with pan fried okra. Spicy Tomato Curry is vegan, gluten free and fits a Jain diet.


In a hurry? Jump to Video or Jump to Recipe


How to make spicy tomato soup recipe at One Teaspoon Of Life www.oneteaspoonoflife.com


How to make spicy tomato soup recipe at One Teaspoon Of Life www.oneteaspoonoflife.com


They say winter is over. While I love the promise of sunshine all through the day, I miss the chill in the air. Luckily, it is still chilly in the morning, so I'm enjoying the last few days with my jacket until it is stacked in the cupboard for the next 6-7 months until the monsoons bring on some more chill.

Winter may be over, and warm nights back on the calendar, but hey, that really does not stop me from enjoying hot meals. And speaking of hot meals, especially my Mother-in-law's Spicy Tomato Curry. This curry is perfect for winter nights or rainy nights when all you want is a bowl of spicy sour soul warming goodness. But don't let the weather stop you from enjoying something this delicious. Unless you live on the coast in a tropical country in the Northern Hemisphere, you still have a few days of cold nights left, use it to enjoy this Tomato Curry.

While the name suggests curry, this is really a spicy Tomato Soup flavored with cumin, thickened with chickpea flour (gram flour/ besan) and garnished with fried okra (bhindi). Isn't fried okra the BEST? Crispy crunchy salty and we can always pretend it is healthy, after all it is a vegetable. If I haven't convinced you to fry that okra, you can just as well be a health freak and grill it up until it is nice and charred. My mother in law sometimes adds boiled potato cubes to the curry as well, but okra is the family favorite.

This is probably the quickest and absolutely no fuss soup I know to prepare. So no fine chopping, no 100 ingredients, no exotic spices (unless you consider cumin exotic), no hours and hours of simmering. NADA!!! Just 3 main ingredients and barely 40 minutes to prepare. No chopping, just blending.

How to make spicy tomato soup recipe at One Teaspoon Of Life www.oneteaspoonoflife.com

How to make spicy tomato soup recipe at One Teaspoon Of Life www.oneteaspoonoflife.com


Making this curry is super simple. I pressure cook the tomatoes whole for 8-10 minutes or 1-2 whistles. Then allow them to cool a little, before peeling them and blending. Meanwhile, fry up your chopped okra or boil the potatoes. Heat oil in a kadhai or pot and add cumin seeds. When they brown, add in the gram flour and saute it well for 1 minute. Then add in the blended tomatoes. Add water if required. Season with salt and red chilli powder and allow it to simmer for 5-8 minutes. If it is too thin, add more gram flour. If it is too thick add water. Too sweet, then add a little tamarind juice or lime juice. Too sour, then you can sweeten it with sugar or jaggery. Just TRUST your taste buds more than anything. I like my curry hot, sour with full flavor of cumin. Add the fried okra or potato just before serving.

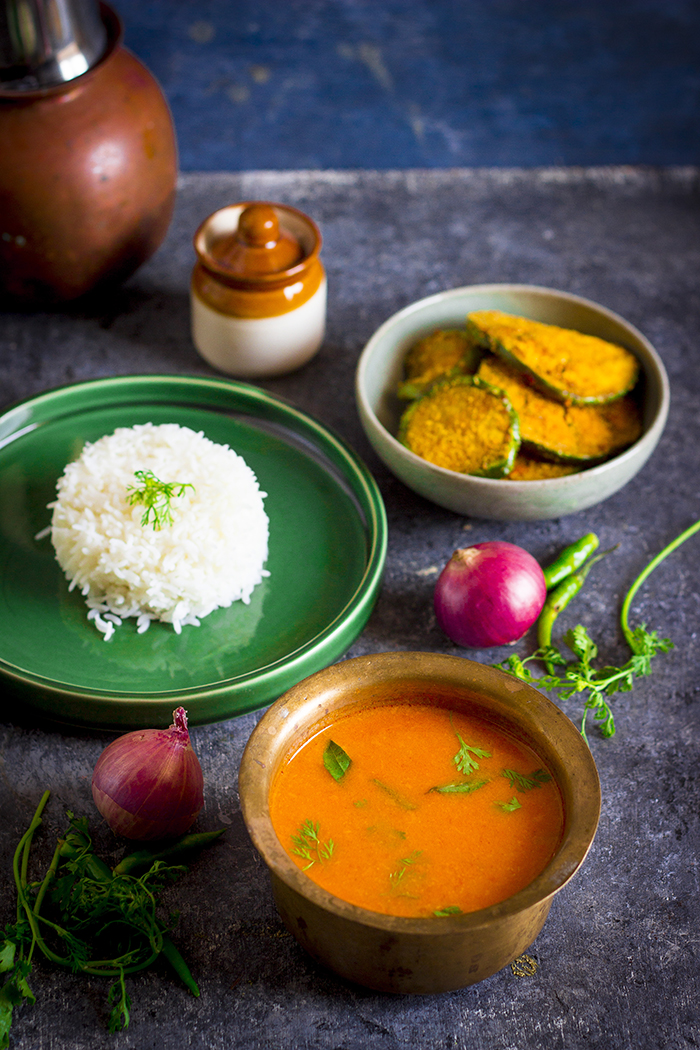
Serve it with some crusty bread and dinner is done! You can also serve it with rice, though then I'd recommend you keep it thick.

How to make spicy tomato soup recipe at One Teaspoon Of Life www.oneteaspoonoflife.com

How to make spicy tomato soup recipe at One Teaspoon Of Life www.oneteaspoonoflife.com


How to make spicy tomato soup recipe at One Teaspoon Of Life www.oneteaspoonoflife.com


If you made this recipe, let me know! Leave a comment here or on Facebook, tag your tweet with @oneteaspoonlife on Twitter and don't forget to tag your photo #oneteaspoonoflife on Instagram. You can also email me at onetspoflife@gmail.com. I'd love to see what you are upto. 

If you like this recipe, do not forget to share it with your friends and family! 

You can follow One Teaspoon Of Life is there on Facebook, Twitter, Instagram, Pinterest and Google+ or you can subscribe to One Teaspoon Of Life and receive all the latest updated via Email (How convenient!!)


Video Recipe


--------------------------------------------------------------------------------------------------------------------------

Spicy Tomato Curry


How to make spicy tomato soup recipe at One Teaspoon Of Life www.oneteaspoonoflife.comSpicy and easy Tomato Curry or Soup made with fresh tomatoes, thickened with gram flour and garnished with crispy fried okra.

Recipe Type:  Soup
Cuisine:            Indian
Prep Time:     10 minutes
Cook time:     40 minutes
Yield:                Serves 2-3

Ingredients:


5-6 large Tomatoes
6 tsp Oil
1 Tbsp Gram Flour (Chickpea Flour / Besan)
1 tsp Cumin seeds (Jeera)
15-20 small Okra (Bhindi)
0.5 tsp Turmeric Powder (Optional)
A handful of Curry leaves
Red Chilli Powder to taste
Salt to taste
Water as required

Method:


1. Pressure cook the tomatoes with 1 cup of water for 1-2 whistles or 8-10 minutes. If cooking in a pan, cook the tomatoes until they are soft. Reserve the water.
2. Peel the tomatoes and leave aside to cool.
3. Chop the end of the okra.
4. Heat 3 tsp oil in a small pan and fry the okra until they are slightly browned and crispy. Keep flipping the okra so that they cook evenly.
5. Once the tomatoes have cooled, blend into a puree with 1 cup of reserved water.
6. Once the tomatoes have cooled, blend into a puree.
7. Heat 3 tsp Oil in a large pan or pot and add the cumin seeds and curry leaves.
8. Once they brown slightly, add the gram flour and saute for 1 minute until the raw smell disappears.
9. Add turmeric powder and red chilli powder.
10. Pour in the blended tomatoes and 1 cup of water. Add salt to taste.
11. Let it come to a boil and then simmer for 5-8 minutes.
12. If the consistency is too thick, add more water. If it is too thin, add a 1 Tbsp gram flour mixed in water.
13. If the curry is too sour, add a little sugar. If the curry is not sour enough add a little tamarind juice or lime juice.
14. Add the crispy okra just before serving.
15. Serve hot with crusty bread or rice.


How to make spicy tomato soup recipe at One Teaspoon Of Life www.oneteaspoonoflife.com


If you liked this, you may also like:

Corn Tomato Bharta

Vegan tomato curry from Maharashtra, Maharshtrian tomato saar
Tomato Saar
Tomato Gazpacho


Read more ...

Undhiyu | Gujarati Undhiyo Recipe | Gujarati Mix Vegetable Curry [Video]


Undhiyu Recipe with step by step video instructions. Undhiyu is a mix vegetable Winter curry from the western state of Gujarat. It is a lovely green curry made from fresh coconut, coriander leaves and other aromatics and spices. The choicest of the winter vegetables are added along with the quintessential Muthia or Muthiya. This winter special is best enjoyed with hot Puris.

In a hurry? Jump to Video or Jump to Recipe

gujarati undhiyo, surti undhiyu

Food is how I celebrate and this mix vegetable Gujarati Undhiyu is just that. A celebration in your mouth. Full of seasonal winter vegetables and spices. A warming bowl of curry. I made this last week. Somehow it took me a week to get this published. I cooked some other amazing dishes like this Vegan Zucchini Kale Lasagna that I was really excited to post about, and somehow this celebratory bowl just took the backseat. Not that this is any less amazing, but I was super excited to have tried my hand at making vegan cheese that I had to bring it out to the world just as quickly as I could. 

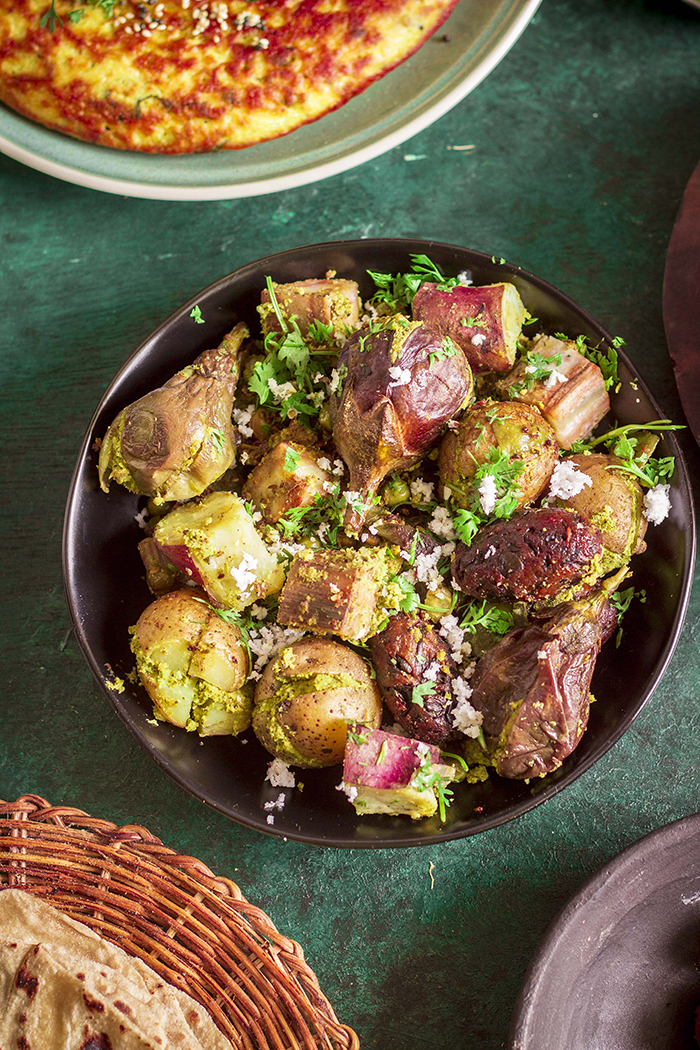
Back to my all-time favorite Gujarati curry - Undhiyu. While one thinks of India as a predominantly vegetarian eating country, it happens we are all wrong. Apparently a lot of India actually caters to the non vegetarians, but there is one state that never lets down vegetarians - Gujarat. The western most state of India is full of flavorful vegetarian food. From Dhokla to Handvo and similar scary sounding dishes that actually explode with flavor in your mouth to this super delicious Undhiyu. Undhiyu in it's humblest form is actually just a simple mix vegetable curry that is made using seasonal winter vegetables and a masala paste made using coconut, fresh coriander leaves and a few spices.

I had forgotten how much I liked Undhiyu until recently my sis's sis in law got us some. I couldn't get enough of it. I could have eaten the entire pot full of curry, but hey, I'm not that rude, I had to leave some for the rest. I HAD to make some of my own that I need not share with anyone, except of course Raj. I can rarely sneak food without him knowing, after all, he does the dishes. I love that man.

gujarati undhiyo, surti undhiyu

gujarati undhiyo, surti undhiyu

Traditionally, Undhiyu uses the following vegetables:
  • Potato
  • Baby brinjal or eggplant
  • Purple yam
  • Yam
  • Raw banana or plantain
  • Fresh Toovar or Pigeon Peas (Togarikalu)
  • Fresh Surti Papdi or Hyacinth Beans (Avarekai / Avarekalu)

A lot of this can be substituted if it is not the season or not available in your area. I could get most of it, except the purple yam. I'm yet to find it in Bangalore. I used Arbi. You can replace it with any variety of yam. The fresh toovar or pigeon peas can be replaced with fresh green beans. The surti papdi can be replaced with green beans and the surti beans can be replaced with Edamame. Don't worry about having the exact ingredients, just use what is available.

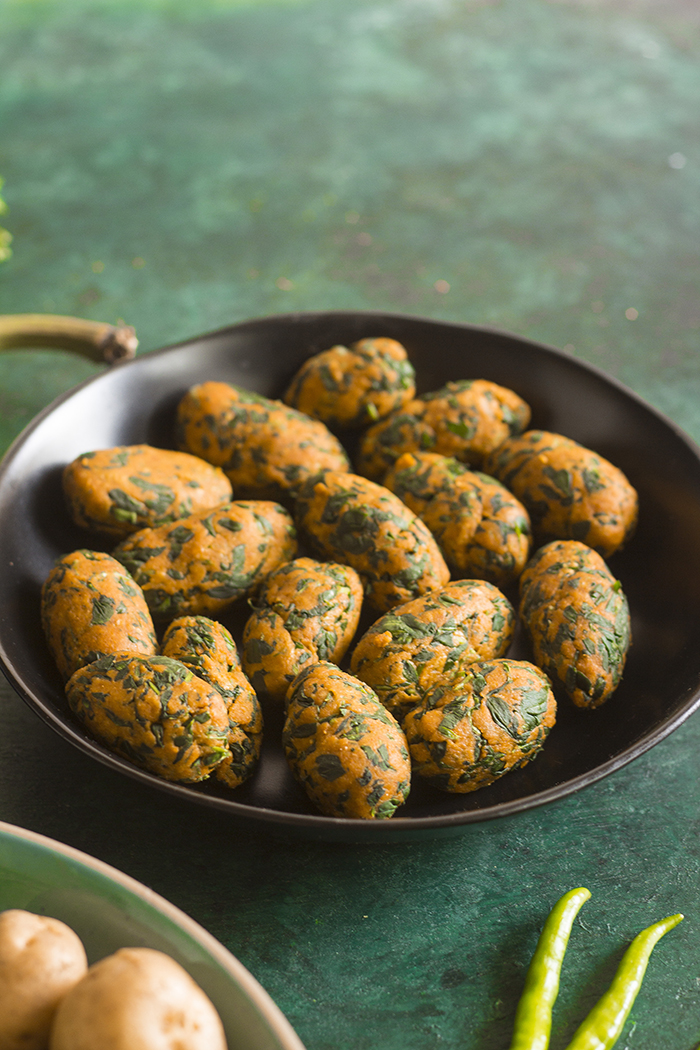
Apart from the vegetables, steamed balls made of gram flour or besan, spices and methi leaves (fenugreek leaves) called Muthia are also added for more flavor and texture. Methi leaves add a nice salty fragrance to the dish. But if you cannot find methi, feel free to replace with dill leaves, coriander or any fragrant greens. You can also buy ready made muthia in some places, like Ahmedabad and Mumbai.

gujarati undhiyo, surti undhiyu

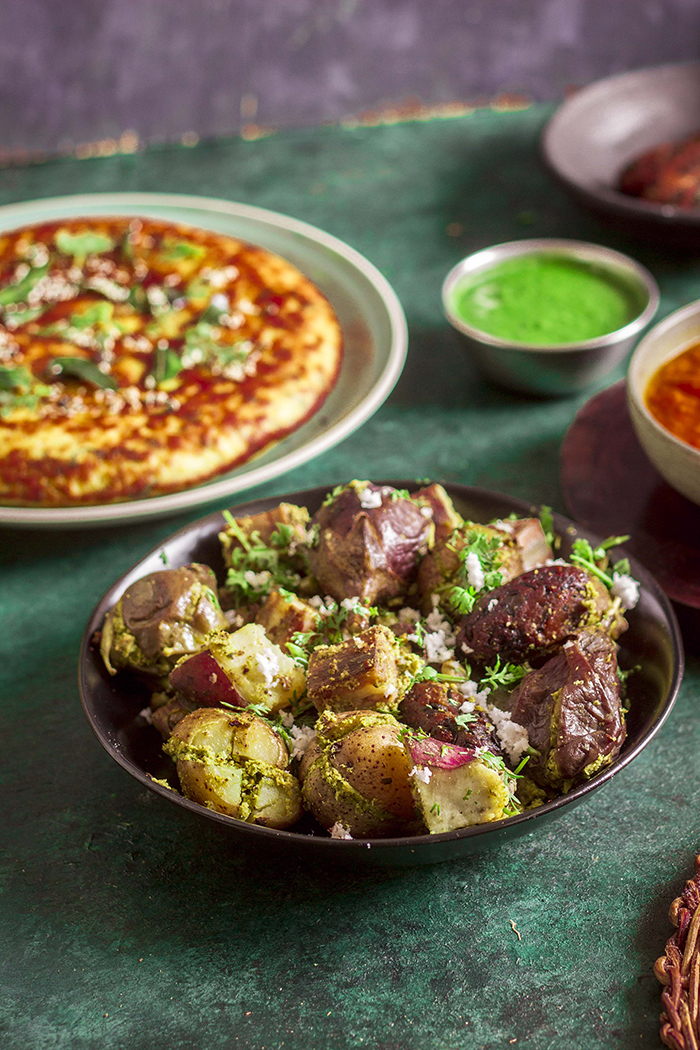
Undhiyu gets all its flavor from the green masala. The green masala is made by blending together fresh coriander leaves, fresh coconut, ginger, garlic, green chillies, sesame seeds, coriander powder, cumin powder, sugar, salt and lime juice. This masala is then stuffed into brinjal, and into baby potatoes if you use them. Then just heat oil in a pressure cooker and layer the vegetables and leftover masala and cook for 1-2 whistles until done. A pressure cooker drastically cuts down the cooking time making it a very quick cooking dish. However, if you don't own a pressure cooker, just use a covered flat bottomed saucepan or pot, preferably deep.

Undhiyu is generally eaten with either roti or puri.

gujarati undhiyo, surti undhiyu


If you made this recipe, let me know! Leave a comment here or on Facebook tag your tweet with @oneteaspoonlife on Twitter and don't forget to tag your photo @oneteaspoonoflife on Instagram. You can also email me at onetspoflife@gmail.com I'd love to see what you are up to.


If you like this recipe, do not forget to share it with your friends and family! 


You can follow One Teaspoon Of Life on FacebookTwitterInstagramPinterest or you can subscribe to One Teaspoon Of Life and receive all the latest updated via Email


Video Recipe


--------------------------------------------------------------------------------------------------------------------------


Undhiyu | Gujarati Undhiyo Recipe | Gujarati Mix Vegetable Curry


gujarati undhiyo, surti undhiyu Gujarati Undhiyu or Undhiyo is a vegan mix vegetable curry made with seasonal winter vegetables, methi muthia and a coriander based masala.

Recipe Type:  Curry
Cuisine:            Indian
Prep Time:     30 minutes
Cook time:     45 minutes
Total time:     75 minutes
Yield:                Serves 4 to 5


Ingredients:


The Vegetables:


5-6 Baby Potatoes
5-6 small Brinjals
1 raw Banana
1 small Sweet Potato
0.5 cup fresh Toovar or Pigeon Peas or Green Peas
0.5 cup fresh Surti beans or Hyacinth Beans or Edamame
8-10 fresh Surti Papdi or Green Beans

For the green masala:


1 cup chopped Coriander
1 cup grated Coconut
1 Tbsp Garlic, chopped
1 Tbsp Ginger, chopped
2-3 Green Chilli
2 tsp Coriander Powder
1 tsp Cumin Powder
0.5 tsp Turmeric Powder (Optional)
1 Tbsp Sesame Seeds
1 tsp Sugar
0.5 lime
Salt to taste

For the methi muthia:


1 cup Methi leaves, tightly packed
1 cup Whole wheat flour (atta)
0.5 cup fine Semolina (rava / sooji)
1 Tbsp Gram flour (Besan)
1 tsp Cumin Powder
2 tsp Coriander Powder
1 tsp Sugar
Pinch of asafoetida (hing)
2 tsp Red chilli powder
0.5 tsp Turmeric powder
3 Tbsp Oil
Salt to taste
Water as required
Oil to fry

For the tempering (tadka):


4-5 Tbsp Oil
0.5 tsp Carom seeds or Ajwain
1 tsp Cumin seeds or Jeera

1 cup Water

Method:


To make the methi muthia:


1. Add the coriander powder, cumin powder, hing, red chilli powder, turmeric powder, sugar, salt and 2 Tbsp oil to the chopped methi leaves and mix well.
2. Add in gram flour (besan), whole wheat flour, semolina (rava / sooji) and 1 Tbsp of remaining oil and knead into a stiff dough with water.
3. Heat Oil in a deep pan for frying.
4. Shape the muthia into small logs and deep fry until done and browned.
5. Keep aside until required.

To make the green masala:


6. Grind together all the ingredients for the green masala. If the mixture is too dry and difficult to grind, add only 1 tsp of water to help grinding. Adding too much water will make the consistency of the masala too loose.

To make the Undhiyu:


7. Peel the raw banana and cut into large chunks.
8. Chop the sweet potato into chunks.
9. Chop the surti papdi or the beans into 1" pieces.
10. Make a criss cross lengthwise slit on the brinjal and the baby potato.
11. Stuff the brinjals and potatoes with the masala.
12. Heat 4-5 Tbsp oil in the pressure cooker.
13. Add carom seeds (ajwain) and cumin seeds.
14. Once they brown slightly, add the surti papdi, surti beans and the fresh toovar or their replacements.
15. Add one third of the leftover masala and mix well.
16. Now add the raw banana and sweet potato.
17. Sprinkle over one third of the green masala. Sprinkle over 2-3 pinches of salt and 1-2 Tbsp oil.
18. Now layer the stuffed vegetables on the top along with the muthia.
19. Add the remaining masala and sprinkle a pinch of salt.
20. Add 1 cup of water from the side. Cover and pressure cook for 2-3 whistles or 8-10 minutes.
21. After the pressure settles, open the pressure cooker and gently mix the curry without breaking the stuffed vegetables.
22. Garnish with lots of fresh grated coconut and chopped coriander leaves before serving. Serve hot with roti or puris.


If you liked this, you may also like:

mix vegetable gravy paneer jalfrezi indian
Vegetable Jalfrezi

Oriya dalma with mix vegetables
Dalma
mixed dal gujarati handvo
Handvo
Read more ...

Sweet Potato Chaat Recipe | Shakarkand Chaat Recipe [Video]


Sweet Potato Chaat recipe with video instructions. Sweet Potato Chaat is a flavorful street food inspired snack that is made with baked sweet potato, sweet and spicy chutneys, finely chopped vegetables, spices and sev.

In a hurry? Jump to Video or Jump to Recipe


How to make shakarakand or aloo chaat recipe at www.oneteaspoonoflife.com

I had an in-between kinda week. Some ups, some down, but definitely busy on all fronts.

Firstly, lots of work at office. I've been spending all my time in meetings and discussions. For once, talking is really tiring me out. I've gone super early to work (by my standards) and left late almost everyday this week. And worst of all, I've been working after I reach home too. Sad state of affairs there. I hope it ends soon.

Raj had potluck on Wednesday and I cooked him a big batch of food to take to work. I took that as an opportunity to click my first ever food video. Video, Guys!!! Exciting stuff there. I'm waiting for some time so I can start editing my humongous video and add some nice captions so I can post my very first video post. If that work out, I bet you'll see more of that in the future.

How to make shakarakand or aloo chaat recipe at www.oneteaspoonoflife.com

I think I was all buzzed up with energy this week (or may be it was that large scoop of Cold Stone ice cream), I actually managed to finish off 2 novels this week. I'm glad that I'm back to my reading self that had taken a backseat in the recent past. It may have been something to do with the fact that James Patterson novels were so thrilling, it was impossible to put them down. I'm on his third novel and absolutely loving it as of now. I see myself reading quite a bit this weekend.

Now that the weekend is almost upon us, what are your plans? Doing something interesting or just relaxing?

I would love to tone it down a bit and relax this weekend, but I don't see it happening. My aunt is coming from out of state for just the weekend. I see a lot of running around taking her places in store for us. Gardening takes a back seat, yet again this weekend. 

How to make shakarakand or aloo chaat recipe at www.oneteaspoonoflife.com

I'll now stop ranting about busy weeks and busy weekends and get down to business.

This Sweet Potato Chaat is E-X-P-L-O-S-I-V-E ! Yup, it totally is. Every spoonful is a flavor bomb.
Chaat is one word for a variety of Indian street food that is served in tiny little carts all across the country. There are so many different types of chaat available - Pani Puri, Bhel Puri, Sev Puri, Masala Puri etc. This Sweet Potato Chaat is inspired from Aloo Chaat and Dahi Puri. 

This Sweet Potato Chaat has many layers, the first is baked sweet potato. While it can be fried, I chose to bake it just to keep it healthier. You can deep fry it or parboil the sweet potato and then shallow fry them. I had imagined that the sweet potato will turn too sweet for my chaat, but with all the chutneys and sprinklings, it actually tasted very good and added just a slight hint of sweetness to the entire dish.

How to make shakarakand or aloo chaat recipe at www.oneteaspoonoflife.com

The Sweet Potato Chaat is incomplete without the chutneys. I used 2 chutneys out here - spicy and fresh Coriander Mint Chutney and the tangy and sweet Tamarind Date Chutney. The 2 chutneys balance each other out in flavor. If you are making these chutney, make a little more and store it in the fridge, they both taste amazing with a variety of finger food or make really awesome marinades and dressings.

Chopped onions, tomatoes and coriander add crunch and freshness to the chaat. I would recommend that you do not skip any of them if you can help it.
I also zinged up the chaat with yogurt, but if you are a vegan, feel free to skip it. 

How to make shakarakand or aloo chaat recipe at www.oneteaspoonoflife.com

Chaat is never complete without the chaat powder. Chaat Powder is a mix of spices and you can easily get them in stores. I also add Black Salt in all my chaats, it gives it another layer of flavor. It has a funky smell and can be turning off to some people. You can replace it with Himalayan Pink Salt or regular salt. 

Add a handful of fine Sev and a squeeze of lime and you are done. 

Don't get bogged down by all the instructions, just mix up everything in one bowl and serve it. The ingredients below are just a guiding value, customize the chaat according to your liking. Adjust the quantities as per your taste. If you tried the Sweet Potato Chaat, leave me a comment with your experience.

How to make shakarakand or aloo chaat recipe at www.oneteaspoonoflife.com

If you liked this, you may also like:


Video Recipe


--------------------------------------------------------------------------------------------------------------------------


Sweet Potato Chaat


How to make shakarakand or aloo chaat recipe at www.oneteaspoonoflife.comSweet Potato Chaat is a flavorful street food inspired snack that is made with baked sweet potato, sweet and spicy chutneys, finely chopped vegetables, spices and sev.

Recipe Type:  Snacks
Cuisine:            North Indian
Prep Time:     30 minutes
Cook time:     20 minutes
Yield:                Serves 2-3


Ingredients:


1 large Sweet Potato
1 Onion, finely chopped
1 Tomato, finely chopped
0.5 cup whisked Yogurt
3-4 Tbsp Tamarind Date Chutney
3-4 Tbsp Mint Coriander Chutney
2-3 Tbsp Coriander Leaves, finely chopped
1 cup fine Sev
2 tsp Red Chilli Powder
2-3 tsp Oil
2-3 tsp Lime Juice (optional)
2-3 tsp Chaat masala 
2-3 tsp Roasted Cumin powder to taste
1-2 tsp Black salt to taste
Salt to taste

Method:


1. Preheat the oven to 220 degree Celsius.
2. Peel and dice the sweet potato into 1 cm sized cubes.
3. Mix in oil, 2 tsp red chilli powder (optional) and salt with the sweet potato and place it on a baking tray in a single layer.
4. Bake for 15-20 minutes or until the sweet potato is cooked.
5. Allow it to cool a little.
6. Depending on how many servings you want, divide the sweet potato.
7. Place the sweet potato on a plate.
8. Add in mint coriander chutney, tamarind date chutney, cumin powder, black salt, red chilli powder and chaat masala as per taste and mix well. Add lime juice if desired.
9. Add in finely chopped onions, tomatoes and coriander leaves.
10. Top with fine sev and serve immediately

How to make shakarakand or aloo chaat recipe at www.oneteaspoonoflife.com
Read more ...