Showing posts with label Video. Show all posts

Dahi Kebab Recipe | Yogurt Kabab Recipe [Video]


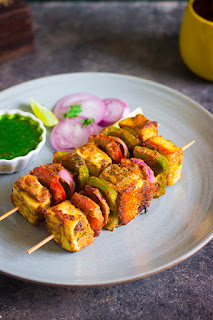
Dahi Kebab Recipe with step by step video instructions. Dahi Kebab is a pan fried appetizer / snack made from thick yogurt or hung curd, chickpea flour and nuts. The kebab is crispy on the outside and creamy and soft on the inside. Dahi Kebab is gluten free and fits a Jain diet.

In a hurry? Jump to Video or Jump to Recipe


Dahi Kebab Yogurt Kebab kabab kebob hung curd punjabi besan chickpeas snacks

Dahi  kebab… sounds interesting, doesn’t it? That’s the very reason I ordered it in a food court and I was pleasantly surprised. It actually tasted delicious. And as though fate meant for me to make it, the recipe was showed on TV before I could even google it. It is so simple to make, and it is crowd pleaser. Most people I’ve served it to, haven’t heard of it and eat it out of intrigue. But there is no stopping after one, believe me. It even turned a “dahi hater” around.


Dahi Kebab Yogurt Kebab kabab kebob hung curd punjabi besan chickpeas snacks

It actually tastes a lot like paneer, but it is creamier and has that tang of dahi. It is pan fried, so up goes the healthiness factor.

You can add spice powders like cinnamon, cardamom, clove etc and zing it up. I preferred to keep it as simple as possible to let the dahi shine through.

You can either buy already hung curd or make it yourself. I made it myself. Hung curd is just regular yogurt with all the whey drained out. To make it at home, tie the yogurt into a muslin cloth and leave it hanging for 6-8 hours. I left it overnight in the fridge.


If you made this recipe, let me know! Leave a comment here or on Facebook tag your tweet with @oneteaspoonlife on Twitter and don't forget to tag your photo @oneteaspoonoflife on Instagram. You can also email me at onetspoflife@gmail.com I'd love to see what you are up to.

If you like this recipe, do not forget to share it with your friends and family! 


You can follow One Teaspoon Of Life on FacebookTwitterInstagramPinterest or you can subscribe to One Teaspoon Of Life and receive all the latest updated via Email


Video Recipe


--------------------------------------------------------------------------------------------------------------------------

Dahi Kebab Recipe | Yogurt Kebab Recipe
Dahi Kebab Yogurt Kebab kabab kebob hung curd punjabi besan chickpeas snacks
Dahi Kebab is a popular gluten free North Indian appetizer. Dahi Kebabs are pan fried Kebabs made with thick yogurt and chickpea flour.
Recipe Type:  Snacks
Cuisine:          North Indian
Prep Time:     8 Hours
Cook time:     20 minutes
Total time:     8 Hours 20 Minutes
Yield:                12-15 kebabs
Author:                Anupama

Ingredients:


3 cups Yogurt (Curd/Dahi)
2-3 Tbsp Chickpea Flour (Besan)
1-2 Green Chillies
2 Tbsp chopped Nuts (almonds, cashews, pistachios) (Optional)
1 Tbsp Coriander leaves
Salt to taste
Oil to fry

Method:


1. To make hung curd, place a muslin cloth on a strainer and add the yogurt. Tie the cloth and either leave in the strainer for 4-6 hours or tie the cloth over the sink. You can also leave this in the fridge overnight.
2. 3 cups of yogurt will yield 1 cup of hung curd. Take the hung curd in a large bowl.
3. Add all the ingredients except the oil and mix well.
4. Heat oil in a frying pan for shallow frying.
5. Wet your hands and take a small ball of batter and shape it as a kebab.
6. Gently place the kebab in the frying pan. If you are unable to shape the kebabs, you can use two spoons and spoon the kebabs into the frying pan.
7. Cook on medium heat.
8. Flip when the first side browns.
9. Cook until the second side is cooked too.
10. Serve hot with mint coriander chutney or ketchup.


If you liked this, you may also like:

Paneer Tikka

vegan pan fried turnip chops
Shalgam ke Kebab
Sweet Potato Kebabs
Sweet Potato Kebabs
Read more ...

Vegetable Jalfrezi Recipe | How to make vegetable jalfrezi | Mix vegetable curry [Video]


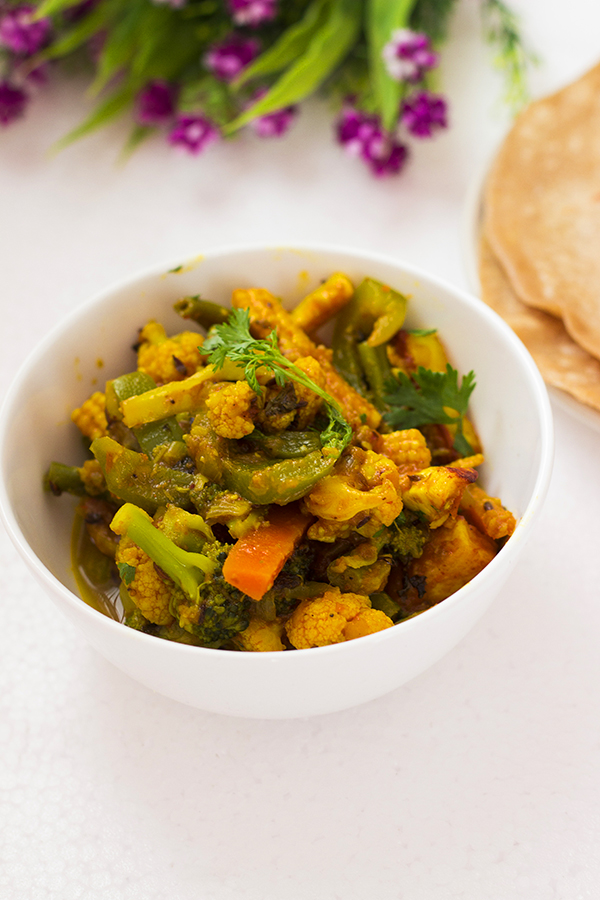
Vegetable Jalfrezi recipe with step by step photo and video instructions. Vegetable Jalfrezi is a mixed vegetable curry with a tomato based gravy. Vegetable Jalfrezi is gluten free and can be made to fit a vegan or plant based diet with simple replacements. 

In a hurry? Jump to Video or Jump to Recipe


mix vegetable gravy paneer jalfrezi indian

mix vegetable gravy paneer jalfrezi indian


Guests coming over and you wanna impress them? Or are you just bored of your usual dinner fare? Jalfrezi can be your answer. Try it !

I saw this lovely photo of Jalfrezi in a magazine, it had me salivating. That one photo was my inspiration to try my hand at Jalfrezi. Jalfrezi has made its presence felt worldwide. It was voted to be UK’s most popular Indian curry a few years ago. And who would believe making it was so easy. 

The only effort needed is actually in cutting the vegetables, but you can totally skip it by buying already cut veggies from the supermarket or using your food processor. And you can relax doing your crossword or watching your favorite show on TV, while it simmers slowly. All it needs is like a check around 5-10 mins. Open the pan, peek, stir, close and back to what ever you were doing. Lovely, isn't it?

The best part is, you can add any vegetables you fancy or use up all your leftover vegetables at the end of the week to make it. I would however recommend adding baby corn as I felt it gives it an added crunch. To make it vegan, replace the paneer with Tofu or totally skip it, you won't be missing out on anything.

mix vegetable gravy paneer jalfrezi indian


mix vegetable gravy paneer jalfrezi indian


If you made this recipe, let me know! Leave a comment here or on Facebook tag your tweet with @oneteaspoonlife on Twitter and don't forget to tag your photo @oneteaspoonoflife on Instagram. You can also email me at onetspoflife@gmail.com I'd love to see what you are up to.

If you like this recipe, do not forget to share it with your friends and family! 


You can follow One Teaspoon Of Life on FacebookTwitterInstagramPinterest or you can subscribe to One Teaspoon Of Life and receive all the latest updated via Email


Video Recipe


--------------------------------------------------------------------------------------------------------------------------

Vegetable Jalfrezi


mix vegetable gravy paneer jalfrezi indianVegetable Jalfrezi is a popular Indian mix vegetable curry with a tomato based gravy. Vegetable Jalfrezi is gluten free and vegetarian. It can be made vegan by either skipping the Paneer or swapping it out for Tofu.

Recipe Type:  Curry
Cuisine:          North Indian
Prep Time:     30 minutes
Cook time:     30 minutes
Yield:              3-4

Ingredients:


1 large Onion
3 Tomatoes
0.5 cup Cauliflower florets
0.5 cup Broccoli florets
1 Carrot
8-10 Green Beans
8-10 Baby corn
0.5 Capsicum (or a mix of colored Capsicums/Peppers)
2 Tbsp chopped Coriander leaves
50 gms Paneer or Tofu
1 Tbsp Ginger Garlic Paste
2 Tbsp Tomato Ketchup
1.5 cups Water
3 Tbsp + 2 tsp Vegetable Oil
0.5 tsp Turmeric Powder (Haldi)
1 tsp Kitchen King Masala or Garam Masala
1 tsp Red Chilli Powder
1 tsp Sugar or Jaggery (Optional but recommended)
1 tsp Cumin seeds (Jeera)
Salt to taste

Method:


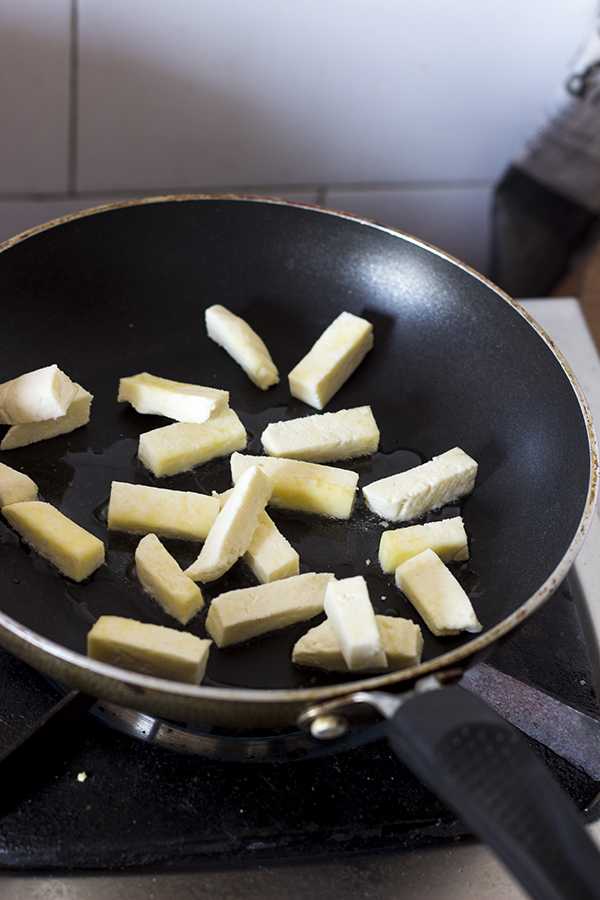
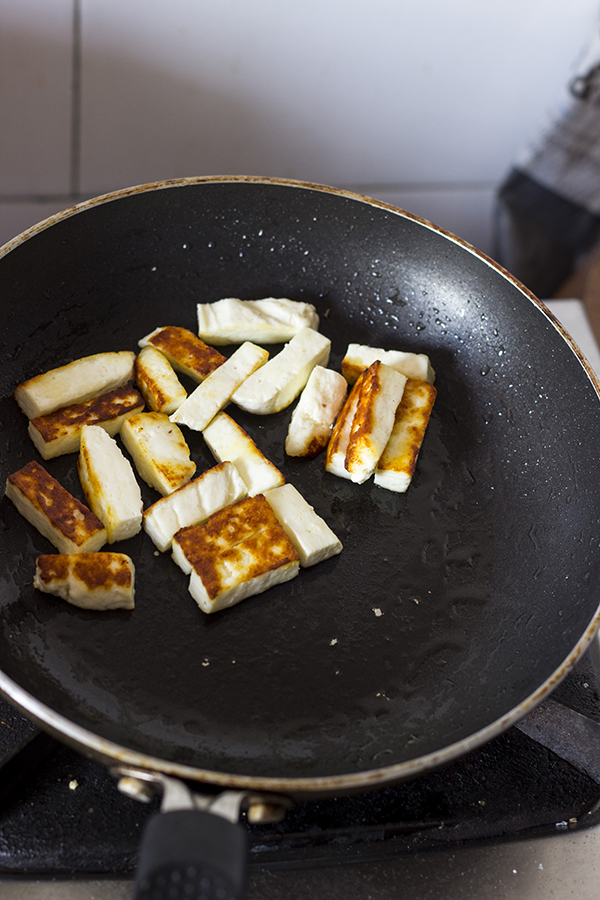
1. Heat 2 tsp oil in a kadhai. Cut the paneer into batons and fry them lightly until golden brown on all sides. Remove from heat and keep aside.
2. Add the remaining oil to the kadhai and add the cumin seeds.
3. Add the finely chopped onions and saute until golden brown.
4. Add in the ginger garlic paste and saute until fragrant.
5. Puree the tomatoes and add in the kadhai.
6. Cook on medium heat for 8-10 minutes or until the oil separates.
7. Add in the ketchup and mix well.
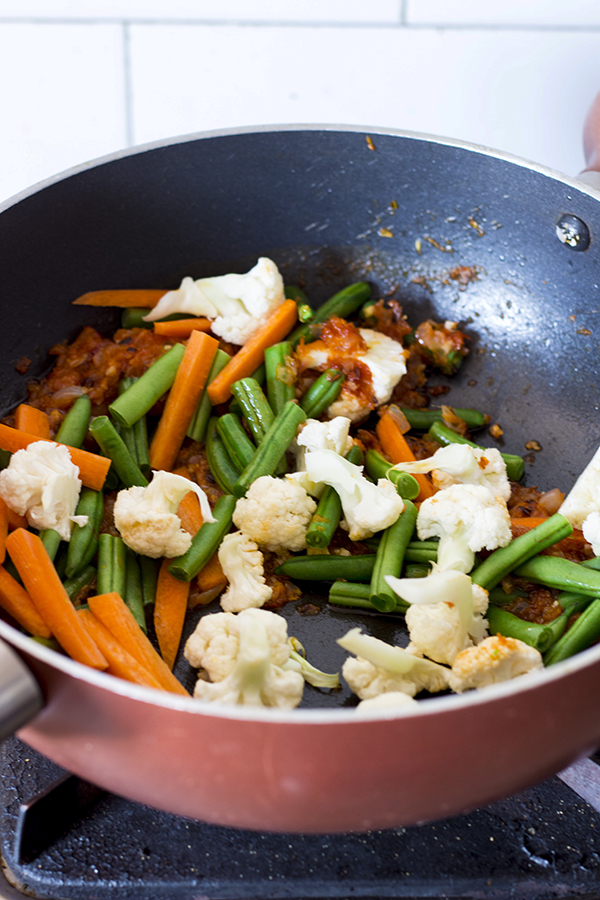
8. Now the vegetables like cauliflower, carrot and beans which take a little longer to cook. 
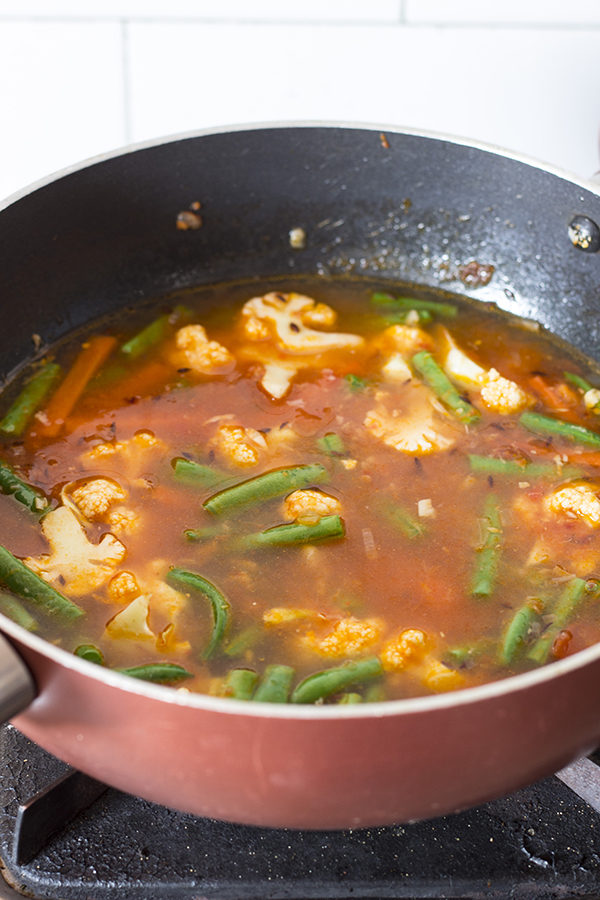
9. Add water.
10. Cook on medium heat until the vegetables are almost done.
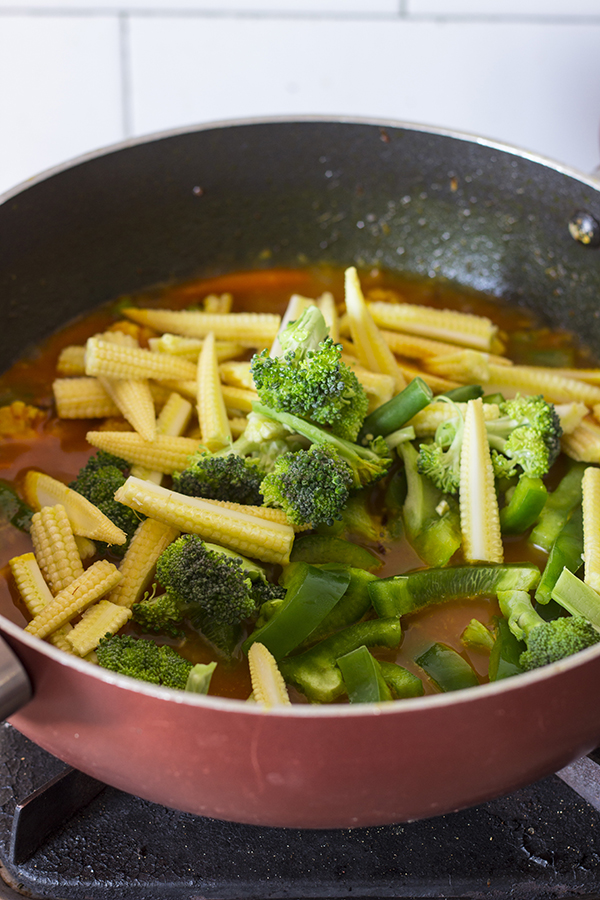
11. Now add the remaining vegetables like baby corn, broccoli, capsicum.
12. Add the turmeric powder, kitchen king masala, red chilli powder and salt.
13. Cook until the vegetables are done and the curry has the desired consistency. If it is too thin, you can cook it a little longer.
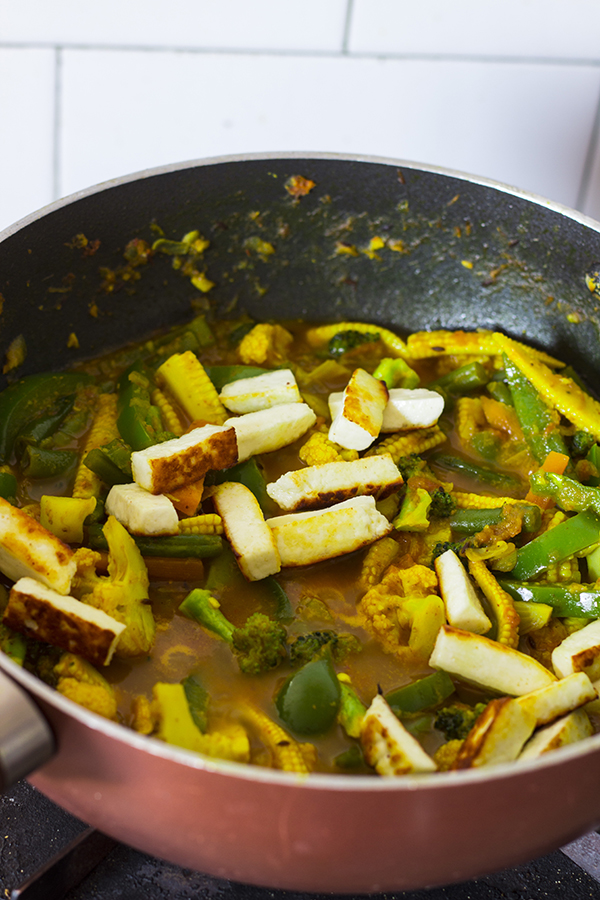
14. Add the paneer to the gravy.
15. Add sugar/jaggery to suit your taste.
16. Garnish with coriander leaves and serve hot with rotis or rice.


Step by Step Recipe with Photos:


mix vegetable gravy paneer jalfrezi indian

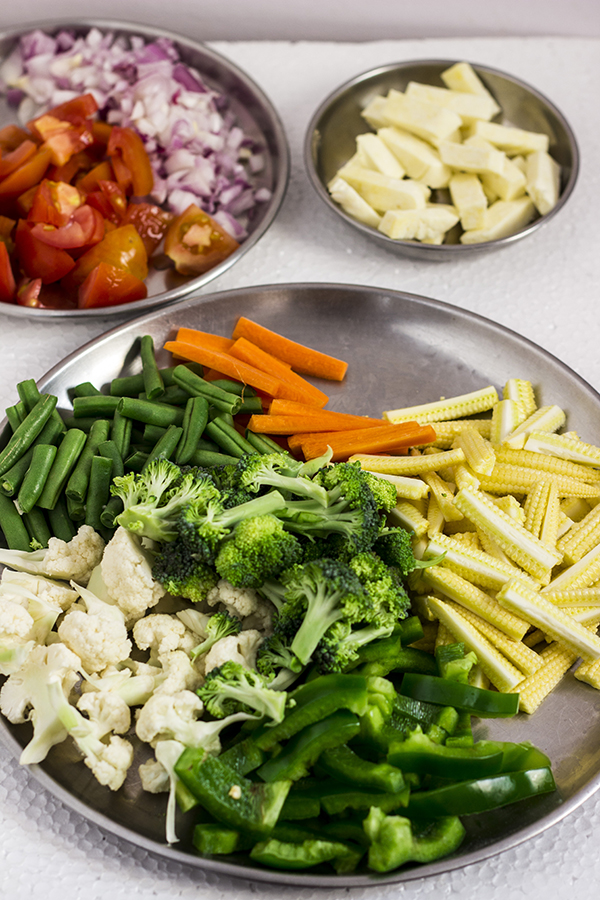
1) Cut all vegetables except the onion and tomato into baton sized pieces. Cut the paneer /tofu similarly Chop the onion finely. Puree the tomato. 

mix vegetable gravy paneer jalfrezi indian

2) Heat oil in a large pan and add the cumin seeds.


mix vegetable gravy paneer jalfrezi indian

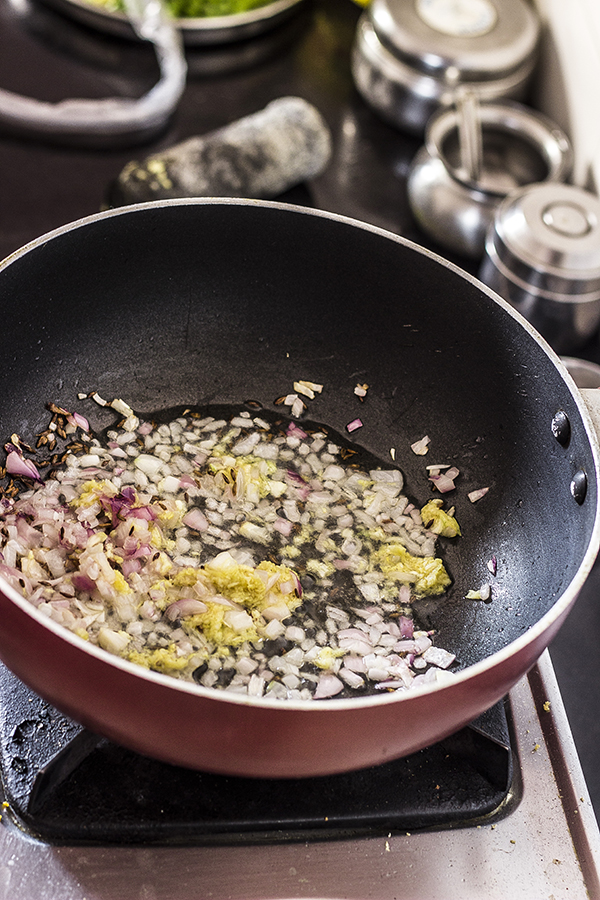
3) Once they brown slightly, add the onions and saute until they are translucent. Add the ginger garlic paste and mix well.

mix vegetable gravy paneer jalfrezi indian

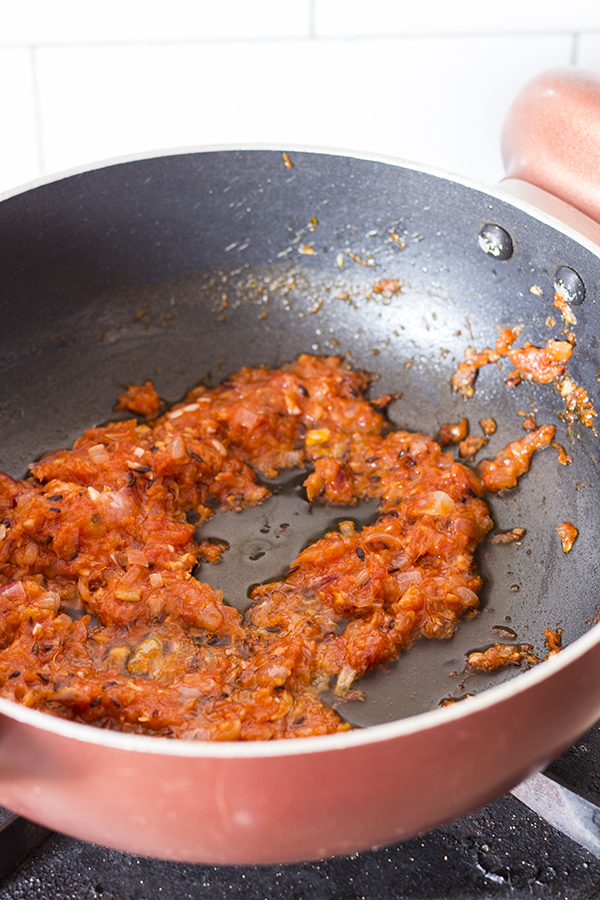
4) Add the tomato puree. 


mix vegetable gravy paneer jalfrezi indian

5) Add ketchup.

mix vegetable gravy paneer jalfrezi indian

6)  Cook on low heat until the oil separates. Approximately 8-10 minutes.

mix vegetable gravy paneer jalfrezi indian

7) Now the vegetables like cauliflower, carrot and beans which take a little longer to cook. 

mix vegetable gravy paneer jalfrezi indian

8) Add water. Cook on medium high heat until the vegetables are almost done.

mix vegetable gravy paneer jalfrezi indian

9) Now add the remaining vegetables like baby corn, broccoli, capsicum.
Add the turmeric powder, kitchen king masala, red chilli powder and salt.
Cook until the vegetables are done and the curry has the desired consistency. If it is too thin, you can cook it a little longer.

mix vegetable gravy paneer jalfrezi indian

10) In the meanwhile, heat 1 tsp of oil in a non stick pan. When the oil is hot, add the paneer / tofu.

mix vegetable gravy paneer jalfrezi indian

11) Fry until the paneer is slightly brown.

mix vegetable gravy paneer jalfrezi indian


12) Add the paneer to the gravy. Add sugar/jaggery to suit your taste.


13) Garnish with coriander leaves and serve.


Read more ...

Vegetable Cutlets with Coriander Mint Chutney | Indian Veg Cutlet Recipe [Video]


Vegetable Cutlet Recipe with step by step video instructions. Indian veg cutlet is a shallow or deep fried patty made of potatoes, mixed vegetables and spices. Vegetable cutlet may be coated in semolina or breadcrumbs. This recipe of vegetable cutlet is vegan.


In a hurry? Jump to Video or Jump to Recipe

how to make vegetable cutlets recipe, aloo tikki recipe, vegan cutlet recipe, beetroot cutlet recipe at www.oneteaspoonoflife.com

I’m free I’m free… from those hectic schedules to those late night calls. I’m finally free, for a short while, but I know to appreciate the smaller things in life.

So what did I do? Well, I actually went to the mall on a weekday evening. Really!! With no laptop to burden me, I happily went to the happiness sale at Bangalore Central. And then I went to my sister’s house and had her cook me dinner. I know, could I get any lazier? I like laziness :D. And then I actually started reading my library book. Oh my dear books have been neglected this entire time. I issued booked, renewed them and then returned them. But finally, I’ve started on “Gone Girl” and am liking it till now. I even went out and watched Minions. Acche din (Good days).

how to make vegetable cutlets recipe, aloo tikki recipe, vegan cutlet recipe, beetroot cutlet recipe at www.oneteaspoonoflife.com


I’ve been trying to cram all the good things in these 2-3 weeks I’ll have before the next project and the next grind starts. So Saturday night, I made my childhood favorite – Vegetable Cutlets, to celebrate. It is still my favorite, but I don’t like what I get in Bangalore. I miss my Goan cutlets with little pieces of red beetroot in them. That’s something special to Goa I think, beetroot is added to cutlets and samosa’s there, and believe me, it just makes them extra special. Tasty, yummmm. 

Veg potato vegan snacks Cutlet patty fritter Coriander cilantro kothmir Mint pudina hari green Chutney


Cutlets are so easy to make. All you need are mashed vegetables and desire to make something of them. For most non vegetarian cutlets, egg is used as a binding agent to bind the breadcrumbs, but this is a Vegetarian blog, so not eggs here mister. Just use a mixture of milk and flour and dip the cutlets in that before dipping it into semolina or bread crumbs. You can use bread crumbs, but cutlets always have semolina or rava coating on them. If you skip this, the rava coating just disintegrates once it is in the pan and you are left with a shapeless cutlet and oil full of rava. I am speaking from experience here.

Veg potato vegan snacks Cutlet patty fritter Coriander cilantro kothmir Mint pudina hari green Chutney

how to make vegetable cutlets recipe, aloo tikki recipe, vegan cutlet recipe, beetroot cutlet recipe at www.oneteaspoonoflife.com


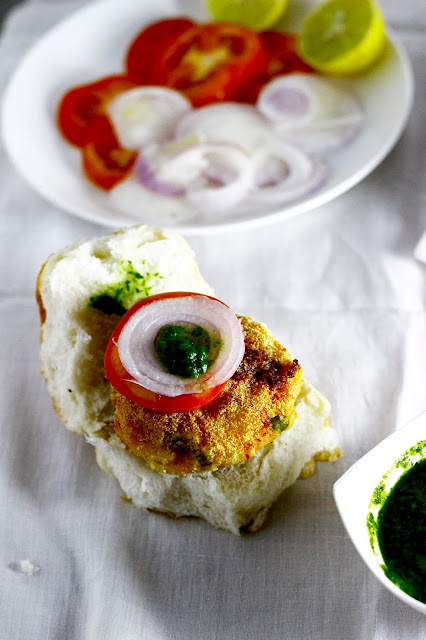
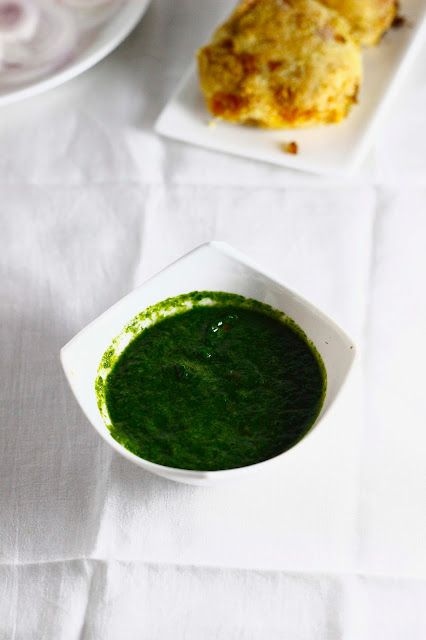
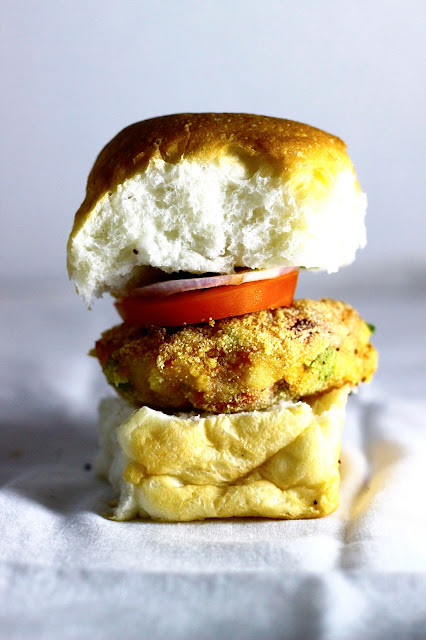
I decided to go an extra step and I made this nice green chutney to go along with the cutlet. It tastes just as delicious with ketchup or just like that. But then, I am a chutney girl. Always been one. So I made this chutney, bought some Pao, stuffed some sliced onions and tomatoes and made my local burger. Skip all this and enjoy it just as it is, or go full gourmet and add sliced avocado, cheese or anything else you fancy. It  is all upto you and your family’s taste buds.

Veg potato vegan snacks Cutlet patty fritter Coriander cilantro kothmir Mint pudina hari green Chutney


If you made this recipe, let me know! Leave a comment here or on Facebook tag your tweet with @oneteaspoonlife on Twitter and don't forget to tag your photo @oneteaspoonoflife on Instagram. You can also email me at onetspoflife@gmail.com I'd love to see what you are up to.

If you like this recipe, do not forget to share it with your friends and family! 


You can follow One Teaspoon Of Life on FacebookTwitterInstagramPinterest or you can subscribe to One Teaspoon Of Life and receive all the latest updated via Email


Video Recipe


--------------------------------------------------------------------------------------------------------------------------

Vegetable Cutlets with Coriander Mint Chutney


how to make vegetable cutlets recipe, aloo tikki recipe, vegan cutlet recipe, beetroot cutlet recipe at www.oneteaspoonoflife.comIndian veg cutlet is a shallow or deep fried patty made of potatoes, mixed vegetables and spices. Vegetable cutlet may be coated in semolina or breadcrumbs. This recipe of vegetable cutlet is vegan.

Recipe Type:  Snacks
Cuisine:          Indian
Prep Time:     30 minutes
Cook time:     30 minutes
Yield:              8-10 Cutlets

Ingredients:


For the cutlet:


3 to 4 Potatoes, medium sized
0.5 cup mixed vegetables (carrot, green beans, green peas)
0.5 Beetroot
2 Tbsp Coriander leaves
1 tsp Red chilli powder
0.5 tsp Turmeric powder
1 tsp Garam masala
2 Tbsp Flour (maida)
3-4 Tbsp Fine semolina (Chiroti rava)
Oil to fry
Salt to taste
Water as required

For the chutney:


0.5 cup Fresh coriander leaves 
0.5 cup Fresh mint leaves
1 Green chilli
1 clove Garlic
Salt
Water

Method:


To make the Cutlet:


1. Boil the potato until done. Peel and mash them.
2. Chop carrot and beans finely. Boil them along with the peas until done.
3. Peel and chop the beetroot and boil until cooked.
4. Drain and add the vegetables along with chopped coriander leaves to the potato.
5. Add all the spices and salt to the potato and mix well. If the cutlet mixture feels wet, add either bread crumbs or dip a slice of bread in water and immediately remove it out, squeeze out the water and crumble the bread into the mixture.
6. Divide the mixture into 10 equal parts and roll them into balls. Gently flatten the balls to make a patty. You can be creative and make fancy shapes too with a cookie cutter.
7. Heat oil in a pan. You can either shallow fry or deep fry the cutlets.
8. Take the flour in a shallow plate and add 0.25 to 0.5 tsp salt to it. Add water by the spoonfuls and whisk until you have a smooth slurry.
9. Dip the cutlet in the slurry and dip in semolina and place it in the pan.
10. Cook on each side until it is golden brown. Remove from heat once both sides are cooked.
11. Serve hot with Ketchup or Chutney

To make the Coriander Mint Chutney:


1. Grind everything in the mixer/blender with 1 tbsp of water


If you liked this, you may also like:
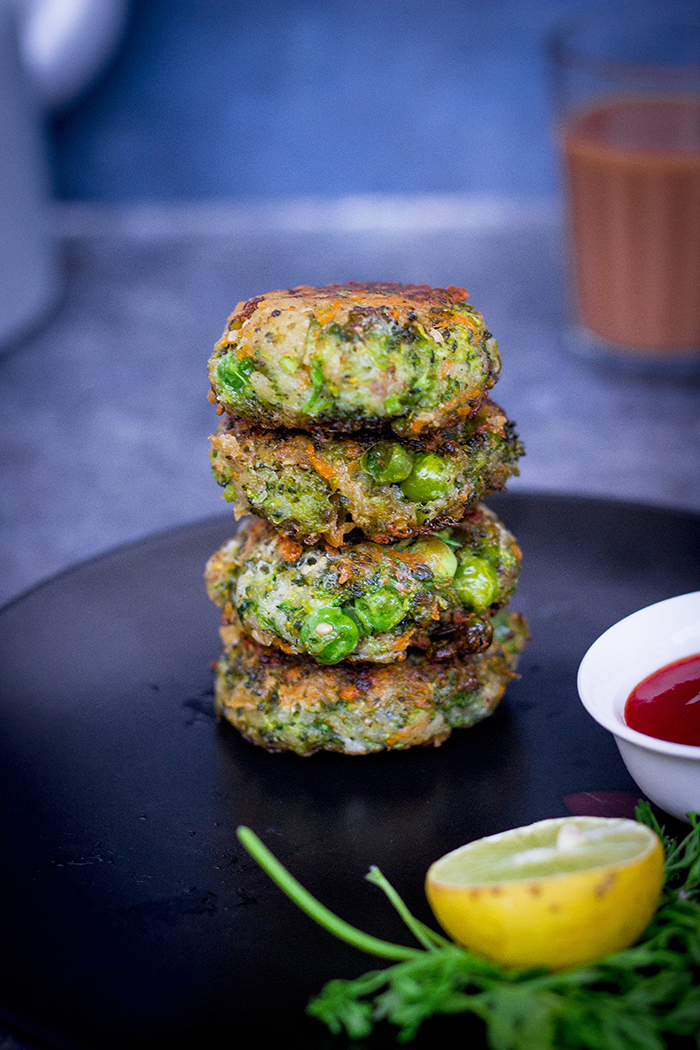
Shallow fried fritters made from broccoli and zucchini stacked together
Broccoli Zucchini Fritters

Sweet Potato Kebabs
Sweet Potato Kebab
chawal tikki garam masala vegan pan fried snacks appetizer
Brown Rice Fritters

Read more ...

Vegetable Stew Recipe [Video]


Vegetable Stew recipe with video instructions. Vegetable Stew is a mildly spiced vegan stew made by cooking colorful peppers, cauliflower, carrots and beans in coconut milk. Vegetable Stew is a gluten free curry.

In a hurry? Jump to Video or Jump to Recipe


Vegan curry made with mixed vegetables and coconut milk


The weather is confusing, on some days it feels like summer and on others it looks like the monsoons are already here. Today was one such a day. It started out sunny and ended up wet.
When it rains, I feel like having some warm comfort food. Don't you?

And a vegetable stew is just that. It is comfort food personified. I made it with rainbow veggies. You can make it with what you have available, but I find that colorful food cheers me up. I watched this food truck on Eat Street that seemed to have the same thinking. It was a healthy food truck where the chef served everything with a colorful salad. Oooh! today's newspaper is saying food trucks are in town. Yeah, baby! I hope I find myself in the neighborhood of one interesting truck. Let me know if you try one out. Until then our little bhel puri carts will have to do.

Vegan curry made with mixed vegetables and coconut milk


Anyway back to the stew. I will not call this a Kerala veg stew, but it is inspired from Kerala. I made this stew with coconut milk like a lot of Kerala curries. This is my sister's recipe. So its been tried and tested on other people before me :)

Vegan curry made with mixed vegetables and coconut milk

I made it with cauliflower, tri-colored peppers, carrot, and french beans. You can add green peas, potatoes, frankly, any vegetable you fancy in a curry. Anything tastes good with coconut milk, I swear. This curry is mildly spiced, so it does not take you away from the delicate taste of coconut milk and the vegetables.

Vegan curry made with mixed vegetables and coconut milk

It can be eaten with rice or bread. The choice is yours. We enjoyed the stew with rice and spicy jeegujje podi. Ummm... my mouth is watering just remembering my lunch.

Vegan curry made with mixed vegetables and coconut milk

If you made this recipe, let me know! Leave a comment here or on Facebook tag your tweet with @oneteaspoonlife on Twitter and don't forget to tag your photo #oneteaspoonoflife on Instagram. You can also email me at onetspoflife@gmail.com I'd love to see what you are up to.


If you like this recipe, do not forget to share it with your friends and family! 


You can follow One Teaspoon Of Life on FacebookTwitterInstagramPinterest and Google+ or you can subscribe to One Teaspoon Of Life and receive all the latest updated via Email


Video Recipe


--------------------------------------------------------------------------------------------------------------------------

Vegetable Stew


Vegan curry made with mixed vegetables and coconut milkMildly spiced vegetable stew made by cooking colourful peppers, cauliflower, carrots and beans in coconut milk 

Recipe Type:  Main Course
Cuisine:          South Indian
Prep Time:     10 minutes
Cook time:     45 minutes
Yield:              3 Servings

Ingredients:


1 cup Capsicum ( red, yellow, orange, green)
0.5 cup Cauliflower florets
1 Carrot, diced
6-8 Beans, chopped
2 cups Coconut Milk
3 tsp Oil
2 Cloves
0.5 tsp Black Pepper
0.5" Cinnamon
1 sprig Curry leaves
1 Onion, sliced
1 tsp Ginger Garlic Paste
1-2 Green Chillies, sliced
Salt to taste
Water as required


Method:


1. Heat oil in a pan and add the whole spices and curry leaves.
2. Once curry leaves splutter, add the sliced onion and fry until translucent.
3. Add the ginger garlic paste and saute until fragrant.
4. Add the vegetables that take longer to cook like the cauliflower, carrot and beans.
5. Add half a cup of water and salt and cover and cook until the vegetables are partially cooked.
6. Then add the capsicum or bell peppers and cook until all the vegetables are cooked.
7. Add in the coconut milk and salt to taste.
8. Simmer the stew for 3-4 minutes.
9. Enjoy it hot/warm with rice/bread.


If you liked this, you may also like:

Vegan glutenfree creamy north indian punjabi dum aloo baby potatoes masala gravy
Punjabi Dum Aloo

Raw banana plantain koftas in a coconut milk based spicy tangy gravy
Raw Banana Kofta Curry
Vegan curry made with eggplant and coconut milk
Eggplant Coconut Curry
Read more ...

Shankarpali / Shankarpole / Shakarpara (Video Recipe)


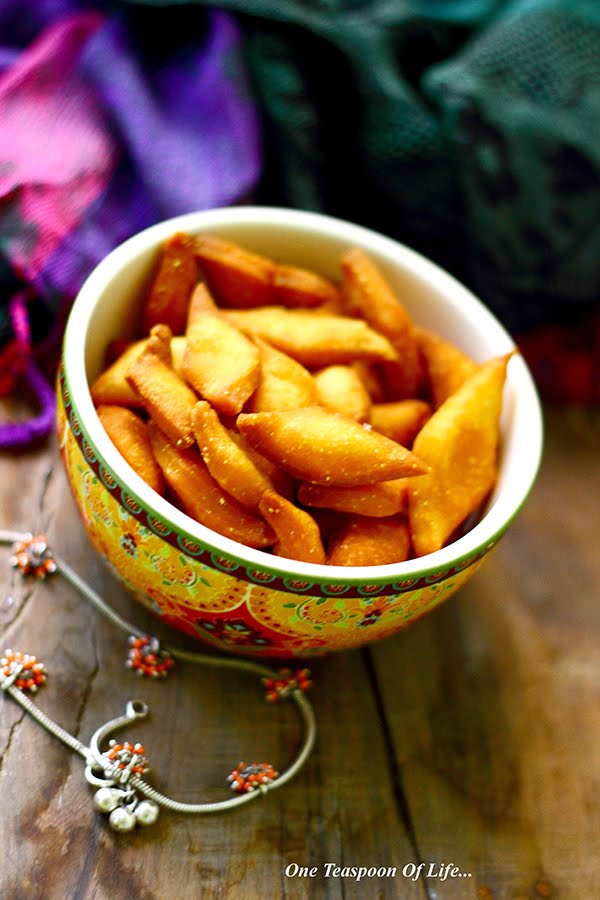
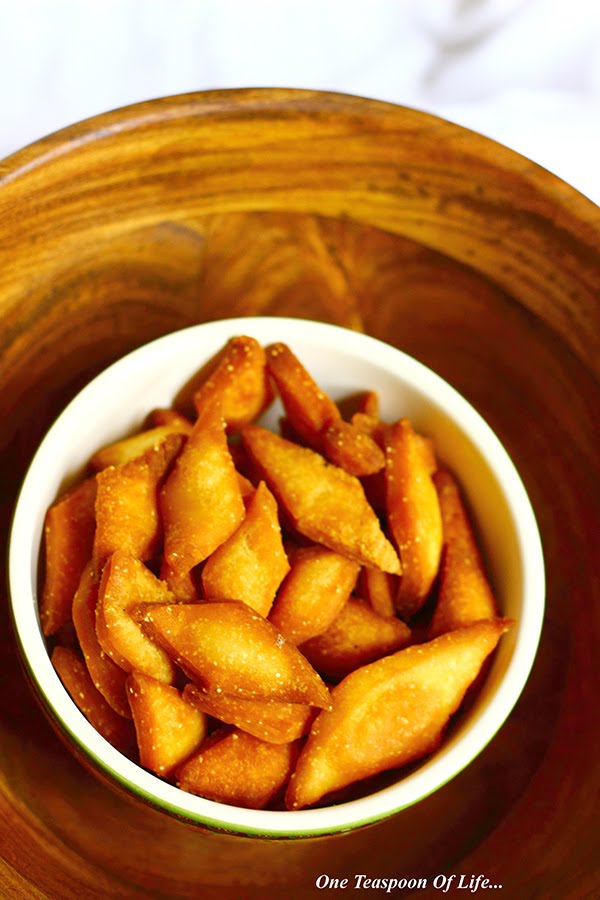
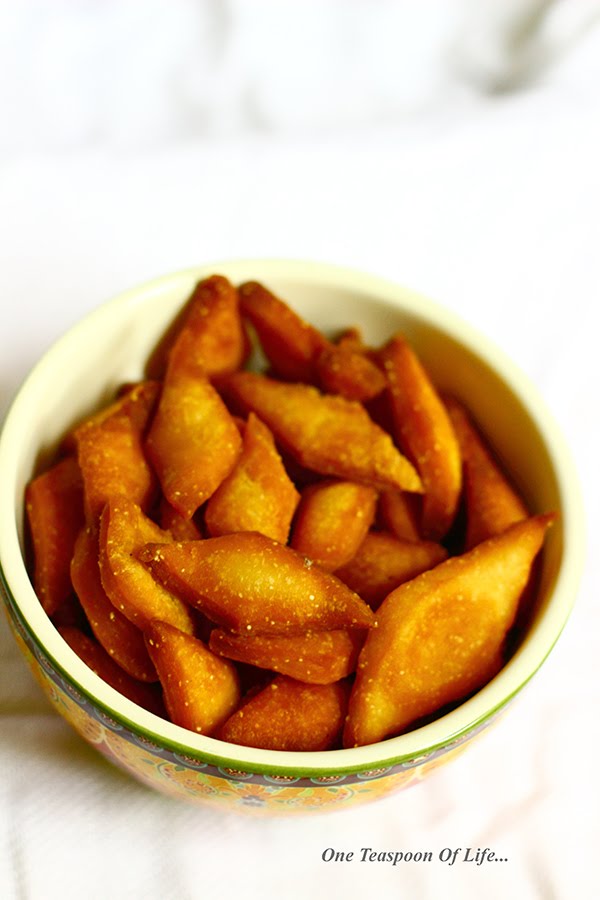
How to make shakkarpara recipe, shankarpole recipe at www.oneteaspoonoflife.com

Aren't road trips so much fun??? :D

Not knowing where you may end up, what you may end up eating is so thrilling.

We, hubby dearest and I, have more differences than similarities, but in this one matter we are made for each other. Come long weekend, and off we go. No clue of the destination, only the direction. No planning, no hotel booked, no real map in hand and no real food to eat. All we have is a hurriedly packed bag of clothes, my trusted camera, bottles of water and of course, my iPod and we are all set.

How to make shakkarpara recipe, shankarpole recipe at www.oneteaspoonoflife.com


We've done instant trips to Ooty, Wayanad and our latest was to Belur. We had a long long weekend last week. I miss it already, We started on the most peaceful day of the year - Oct 2nd, with our basic necessities dumped in the car. When we started out we weren't sure if we were planning to go north or west. Finally thought of west and I'd never seen ShravanBelgola, so that became Destination number 1, With some Kunigal Tatte idlis in our tummies, we scaled the hill to see the Bahubali statue. 

Halebeedu became destination number 2. The beautiful architecture of that temple puts to shame even the best architects today I think. The workmanship is awesome. If you haven't seen it, it's time to visit. Belur was our next destination. Similar to Halebeedu, the architecture is simply amazing. The only sad thing was by the time we reached Belur, night had fallen, so we could not really spend a lot of time there.

Bangalore was 5 hours away, it was 7pm, crazy as we are, we decided we should go ahead instead of returning, So off we went to Karkala, hubby dearest's hometown and spent our extremely looong weekend there.

How to make shakkarpara recipe, shankarpole recipe at www.oneteaspoonoflife.com

Back to my recipe now, Monday was a holiday for me. Alone on a holiday gets boring sometimes, So what better to occupy myself than cook, right? I've been wanting to make Shankapali for a long time now. This is a traditional Maharastrian fried sweet made especially during the festival of lights - Diwali. 

I'd gotten multiple recipes from my mom, mom in law, sister, her mom in law etc. I think you get the picture. I finally mixed them up and made my own recipe that turned out pretty great. Really! And I could not believe it is so easy to make. Only tricky thing is the temperature of the oil, Once you get that correct, you needn't worry about anything, 

The below recipe makes 150-200. Don't worry, they are sooo yummy, they won't last too long. They stay fresh for weeks in stored in air tight container.


How to make shakkarpara recipe, shankarpole recipe at www.oneteaspoonoflife.com


Video Recipe


If you made this recipe, let me know! Leave a comment here or on Facebook, tag your tweet with @oneteaspoonlife on Twitter and don't forget to tag your photo #oneteaspoonoflife on Instagram. You can also email me at onetspoflife@gmail.com. I'd love to see what you are upto. 

If you like this recipe, do not forget to share it with your friends and family! 

You can follow One Teaspoon Of Life is there on Facebook, Twitter, Instagram, Pinterest and Google+ or you can subscribe to One Teaspoon Of Life and receive all the latest updated via Email (How convenient!!)


If you liked this, you may also like:

  • Modak - Steamed dumplings stuffed with coconut and jaggery.
  • Khova Peda - Peda (fudge) made with milk from scratch.
  • Coconut Laddoo - Easy to make laddoos with only 4 ingredients.


Shankarpali / Shankarpole / Shakarpara


How to make shakkarpara recipe, shankarpole recipe at www.oneteaspoonoflife.comLight and crisp bite sized sweet snacks 

Recipe Type:  Dessert / Snacks
Cuisine:          Indian
Prep Time:     60 minutes (Includes resting of dough)
Cook time:     60 minutes
Yield:              250-300

Ingredients:


6-7 cups Maida / All purpose flour
3/4 cup Chiroti rava / Fine semolina
1 cup Milk
1 cup Ghee / Clarified butter
2.5-3 cups Powdered Sugar
1 tsp Salt
Oil for deep frying

Method:


Mix the milk and ghee and microwave on high for 30 seconds until the ghee melts. You can do this on stove too, just don't heat it too long or the mix may curdle. If the ghee is already liquid, skip this step.
Add the sugar to this mix and stir until it dissolves.
Add salt, semolina and the flour by the spoonfuls. Stir to remove lumps.
Once all the flour is added, knead the dough using your hands for 2-3 mins until it is one shiny mass.
If after kneading the dough, you feel it isn't sweet enough, then take a little milk and dissolve the required amount of sugar in it.Add this to the dough and knead well. Add a little more flour if needed.
Cover and allow it to rest for at least half hour.
Divide the dough into smaller balls and roll them out to approximately 3-5 mm thickness
Cut into diamond shape with each side of appx 1.5-2cm. You can use the crimped cutter, pizza cutter or a knife. Don't worry if the shape or size is not consistent. It does not change the taste.
Heat oil in a thick bottomed kadhai.
The oil should not be too hot or too cold. I test fried a couple to get the temperature right. Between Low to Medium heat works well. If the oil is too hot, the shankarpali will turn brown but will not be cooked, too low will make them oily.
Remove them when they turn golden brown and crisp.


Read more ...