Showing posts with label Potato. Show all posts

Sabudana vada | Sabakki vada | Sago Poppers


Hi folks, what's cooking this week?

How to make vegan sabudana vada sabakki vada recipe at www.oneteaspoonoflife.com

Now that Navratri is here, what are your plans? Has that gorgeous "Ghagra-Choli" come out of the wardrobe ? Did you go for Garba or Dandiya?

I'm not sure I'll ever wear a Ghagra-Choli, but dancing the Dandiya is definitely on my bucket list and I wish to cross it off soon. 

You know what I enjoy about festivals in India? The colors. I love to see people dressed up in colorful attire. Colorful flowers in markets and adorning houses. Large "Pandals" where community or sarvajanik celebrations happen. The diyas or lanterns that are lit up outside houses. Beautiful Rangolis everywhere. It sets such a festive mood, you want to celebrate. What is it about festivals that excites you?

How to make vegan sabudana vada sabakki vada recipe at www.oneteaspoonoflife.com

Festivals always bring good food with them. So does Navratri. A lot of people fast during Navratri where they avoid rice, wheat, meat etc. Sabudana Vada is very popular during such "upavaas" or fasting. I don't fast, I've never done so till date and considering the foodie I am, I doubt I'll ever be able to avoid food for too long. But that does not stop me from eating all the yummy snacks like Sabudana Vada. In fact, I make them very often for breakfast or tea time snacks. They disappear quicker than I can cook them. 

Sabudana Vada is a popular Mahastrian snack made by frying balls of sabudana (sago), mashed potato and crushed peanuts. While traditionally, the vadas are deep fried, I pan fry them or shallow fry them. 

How to make vegan sabudana vada sabakki vada recipe at www.oneteaspoonoflife.com

To make the Sabudana Vada, first the sabudana needs to be soaked for around half hour and then drain out the water and leave the sabudana in a box or a covered bowl for 1-2 hours until they fluff up. Then add in the mashed boiled potato, crushed peanuts, curry leaves, chopped green chilli, chopped coriander leaves and salt and mix. Take lemon sized balls of this mixture and flatten them gently and place on a hot greased pan. Spoon in 1 tsp of oil on them and cook until one side browns, then flip and cook until the next side browns. If you are in a hurry, or you don't mind deep fried snacks, then go ahead and deep fry them and enjoy the traditional taste of Sabudana Vada.

Sabudana Vada tastes awesome with chutney or ketchup. I don't bother with either, as no one in my family cares what comes with it, as I said it disappears quicker than it appears. 

How to make vegan sabudana vada sabakki vada recipe at www.oneteaspoonoflife.com

If you liked this, you may also like:

  • Sabudana Khichdi - Another popular Maharastrian fasting meal made with the exact same ingredients as this vada.
  • Sabudana Chana Vada - Sabudana Vada where Potatoes are replaced with Chhole or Chickpeas.
  • Millet Cutlets - Shallow fried cutlets made from foxtail millet and mixed vegetables.
  • Curried Brown Rice and Zucchini Fritters -  Fritters or Tikkis made with mashed Brown Rice and grated Zucchini. Spiced with Garam Masala and pan fried. 


Sabudana Vada / Sabakki Vada/ Sago Poppers

How to make vegan sabudana vada sabakki vada recipe at www.oneteaspoonoflife.comSabudana Vadas are shallow fried vadas or poppers made with Sabudana/Sago, Peanuts and mashed potatoes.

Recipe Type:  Snacks
Cuisine:          Indian/ Maharashtrian
Prep Time:     2 hours
Cook time:     20 minutes
Yield:              Makes 12-15 vadas


Ingredients:


1 cup Sabudana/Sago
2 medium sized Potato
2 finely chopped Green Chilli
8-10 Curry Leaves
0.25 cup Peanuts
2 Tbsp chopped Coriander leaves
A pinch Garam Masala (Optional)
1 tsp Red Chilli Powder (Optional)
4-5 tbsp Oil
Salt to taste

Method:


Wash the sabudana and drain all the water. Let it rest covered for about 2 hours or until the sabudana have softened.
Boil the potato and peel it.
Roast the peanuts and grind into powder in the mixer.
Mash the potato, add the sabudana, curry leaves,coriander and green chilies. Mix well.
Add salt, red chili powder, garam masala, peanut powder and mix well.
Shape into balls and flatten them gently.
Heat a tava or frying pan and grease it.
Place the sabudana vada hot tava and spoon around 1-1.5 tsp of Oil per vada. You may need more or less oil depending on your liking and the tava you have used. I used a non stick tava.
Flip them when they brown on one side.
Remove from heat once both the sides are browned.
This can be served with chutney or ketchup.

How to make vegan sabudana vada sabakki vada recipe at www.oneteaspoonoflife.com
Read more ...

Stuffed Potato Skins

Crispy potato, crunchy green Capsicum, punchy tomato sauce and oozy mozzarella cheese. That’s what this whole blog post it about.

 Baked Stuffed Potato Skins Capsicum Tomato Mozzarella Cheese Olive oil gluten free


I’ve never baked a potato. Or rather, until last week, I had never baked a potato. And now that I have, I feel I’ve opened a door with many many possibilities.

This recipe is a result of entering a competition that asked contestants to cook with 5 ingredients – Potato, Tomato, Capsicum, Cheese and Olive Oil. You couldn’t leave out an ingredient.
I thought of a few options but decided I really wanted to stuff something. Stuffed capsicum or stuffed tomato may be? But when I mentioned stuffed potato skins, I saw Raj’s eye light up. It’s no secret he loves Potato. That was it then – Baked Potato Skins.

 Baked Stuffed Potato Skins Capsicum Tomato Mozzarella Cheese Olive oil gluten free


Now there is a lot you can do with these Potato Skins, I myself had a dozen ideas, but then I was restricted by the competition rules. Not that I regret that, they were AWESOME just like that.

These little boats to taste-bud-heaven have some lightly stir fried capsicum and an easy-to-make awesome INSTANT super punchy tomato sauce. Apart from the 5 ingredients mentioned above, all you need is oregano or any pizza seasoning, garlic, salt and loads of pepper. This sauce goes amazingly well with pasta and pizza. So increase the quantity and freeze it for rainy days if you wish.

Baked Stuffed Potato Skins Capsicum Tomato Mozzarella Cheese Olive oil gluten free

Step one: Crisping up the potato skins. You want them crisppyyyy:
Wash and scrub those potatoes clean. This is how you build muscles working at home. Exercise for today – DONE. Dry them and rub olive oil all over them. Watch out for those slippery ones that go bouncing all over your counter. Use a fork and prick them all over.
Bake them for 1 hour at 200 C of 400 F. In the meanwhile, move on to steps 2 & 3 and come back to one later.

Step two: Making the AWESOME Tomato sauce.
Chop those tomatoes roughly and fry along with some garlic in a pan with some olive oil. Once the tomatoes are soft, add in the oregano, salt and pepper. If you are like me, pepper == lots and lots of pepper.
Blend it into a coarse sauce. This is a thick sauce. If you plan on using it for pasta, you may want to thin it a little.

Step three: Crunchy crunchy Capsicum.
Chop the capsicum into small pieces. Stir fry in some olive oil until it is slightly cooked. Don’t let it mush up. Sprinkle some salt and keep aside.

Baked Stuffed Potato Skins Capsicum Tomato Mozzarella Cheese Olive oil gluten free

Step one again: Crispy skin dreams come true here.
Once the potatoes have cooled enough to handle, slice them lengthwise into  half. Using a sharp edged spoon, scoop out the potato gently. Leave around ¼ inch or 0.5 cm of potato still in the skin so it holds it’s shape. Brush generously with olive oil on the inside and outside. Rub some salt.
Now bake it skin side down for 5 mins @ 220 degree C and then flip them over and bake again for 5 mins until the skins are crispy.

Step four: Let’s get the cheese BUBBLING
Assembly is all that it left before oozy cheese. Spoon in the capsicum and the sauce. Then grate over some mozzarella or any stringy melty cheese. This is what my food dreams are made of! Back into the oven for 4-5 mins until the cheese melts and it all bubbly.

Step five: Finish them off immediately!!!

Let’s face it, step five isn’t really a cooking step, but it is the most important step in the process.

 Baked Stuffed Potato Skins Capsicum Tomato Mozzarella Cheese Olive oil gluten free


I did not use the scooped out potato in this recipe. You can stuff it back in. I used it up to make some buttery Aloo Paratha.


Stuffed Potato Skins


 Baked Stuffed Potato Skins Capsicum Tomato Mozzarella Cheese Olive oil gluten freeBaked potato skins stuffed with an instant tomato sauce, fried green Capsicum and Mozzarella cheese.

Recipe Type:  Appetizers / Snacks
Cuisine:            International
Prep Time:     20 mins
Cook time:     1 hour 45 minutes
Yield:                6 skins

Ingredients:


3 large Potatoes
2 Tomatoes
1 Capsicum
2-3 Tbsp Olive Oil
5-6 Tbsp Mozzarella Cheese
2 Garlic Cloves
1 tsp Oregano
1-2 tsp Pepper
Salt to taste

Method:


Preheat the oven to 200 degree C.
Wash, scrub and dry the potatoes.
Rub with olive oil and Ppick them with a fork all over.
Bake in the oven for 1 hour.
Heat 1/2 Tbsp of Olive oil and add crushed garlic and chopped tomato to it. Cook until the tomatoes have become soft and mushy
Add salt, pepper and oregano. Mix well.
Allow it to cool and then grind to a coarse sauce.
Heat 1/2 Tbsp of Olive oil and fry chopped capsicum in it.
Slice the potatoes lengthwise and with a spoon gently scoop out the potato. Leave at least 1/4 inch of potato with the skin.
Rub olive oil and salt on the inside of the potato and outside.
Increase the temperature of the oven to 220 degree C.
Bake the potato skins in oven for 10 minutes, turning the potatoes after 5 minutes.
Remove the potatoes from the oven and when they are cool enough to handle, stuff them with capsicum, tomato sauce and top with cheese.
Bake for 4-5 minutes until the cheese has melted.


Read more ...

Mysore Masala Dosa

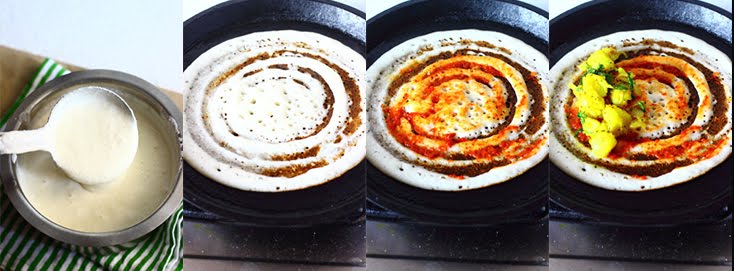
Mysore Masala Dosa is a rice and lentil pancake that has a chilli and garlic chutney spread on the inside and stuffed with a potato bhaji and served with a simple coconut chutney.

How to make Mysore Masala Dosa recipe at www.oneteaspoonoflife.com


Weekends are meant to be slept in. Aren't they? But sometimes, waking up early on a weekend has it's own excitement - that slight chill in the air, the sky all grey and cloudy, birds chirping away from their hiding places and an occasional car or bus on the road. At times like this, all I need is a steaming hot cup of coffee and a blanket to wrap myself as I sit in the balcony watching the world go by. And you know what's better than that? Having a plate of absolutely delicious homemade Mysore Masala Dosa to eat.

There is absolutely nothing like a Mysore Masala Dosa for breakfast. The good thing about Bangalore is you can eat a Masala Dosa morning, evening or night and for as little as Rs.20 and for as much as Rs.200. But this homemade Masala Dosa is sooo much better than the restaurant ones. I swear you won't like those once you have tasted one that YOU made at home.

How to make Mysore Masala Dosa recipe at www.oneteaspoonoflife.com

A Mysore Masala Dosa is crisp and golden brown on the outside and soft and fluffy on the inside. It has a spicy red chilli and garlic chutney spread on the inside and is always stuffed with a potato bhaji. Served with a simple coconut chutney, it actually makes one of the most delicious breakfast. Sometimes, dinner too. Skip the red chilli chutney, to get a regular Masala Dosa.

In the age of fast food, a Dosa is a mix of both food movements - slow and fast. It needs to go through the slow process of fermentation but after that, it is a matter of minutes to cook it. 

How to make Mysore Masala Dosa recipe at www.oneteaspoonoflife.com

Points to keep in mind:

  • There are many recipes out there that replace the rice with rice flour or with all purpose flour, but a Dosa tastes authentic only when it is made with with rice grains as opposed to flour. 
  • I ALWAYS use an age old cast iron griddle or tava to make Dosa. It gives it that amazing color and crispness, but my sister swears by her non stick tava or griddle. Either way, a Dosa tava is meant to be absolutely flat, non stick or cast iron. You can also use a flat frying pan. 
  • In winters or if the day is cold, you may need more time to ferment the batter. Keeping it near a warm stove or oven helps. If you live in a hot region or it is summer, you may need only 6-8 hours for the batter to ferment. 
  • You will know that the batter is fermented when it has risen and tastes sour. 
  • If you do not plan to use the entire batter at one go, remove the excess and only add salt to the batter you plan to use immediately. 


How to make Mysore Masala Dosa recipe at www.oneteaspoonoflife.com


Mysore Masala Dosa


How to make Mysore Masala Dosa recipe at www.oneteaspoonoflife.comMysore Masala Dosa is a rice and lentil pancake that has a chilli and garlic chutney spread on the inside and stuffed with a potato bhaji.

Recipe Type:  Breakfast
Cuisine:            South Indian
Prep Time:     24 Hours (Including soaking and fermenting)
Cook time:     5 minutes per Masala Dosa
Yield:                Makes 12-15

Ingredients:


For the Dosa:


1.5 cups Dosa Rice (Use regular rice if you don't have dosa rice)
0.5 cup Urad Dal or Split Black Gram
1 tsp Fenugreek seeds or Methi seeds
Water to grind
1-2 tsp Salt
1.5-2 tsp Oil per Dosa

For the Red Chilli Chutney:


8-10 dry Red Chillies
1-2 Garlic cloves
1-2 Tbsp Water
1/2-1 tsp Salt

For the Potato Bhaji:


3-4 medium sized Potatoes (Boiled and Peeled)
1 large Onion
3-4 Green Chillies
1 sprig Curry Leaves
1 tsp Mustard Seeds
1 tsp Turmeric Powder
3-4 tsp Oil
Salt to taste
2 Tbsp finely chopped Coriander Leaves

Method:


To make the Dosa Batter:


Soak the rice, urad dal and methi seeds for 8-10 hours. To make Dosa for breakfast, soak the grains the previous morning. So you can grind the batter at night.
Drain the water and grind the soaked rice and dal into a fine batter. Use as little water as possible while grinding. Adding too much of water will not allow the batter to become fine. Start with 1/4-1/2 cups of water and then add more if required.
Pour the batter into a deep vessel. Mix well if you ground the batter in batches.
Cover and keep in a warm place to ferment overnight.
When the batter has risen and become sour, it has fermented enough and can be used to make Dosa.
The batter keeps well in the fridge for almost a week. See "Points to keep in mind" above for more information on storage.

To make the Red Chilli Chutney:


red chilli chutney garlic

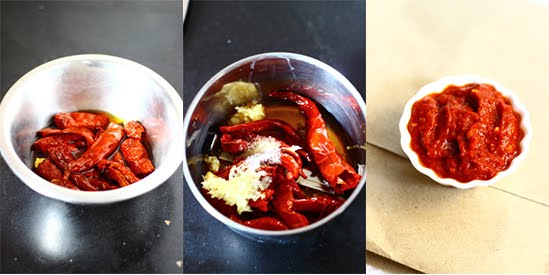
Remove the seeds from the dry red chillies and soak them in warm water for 30 minutes.
Grind them into a fine paste along with the garlic, salt and a little water.
Store in an airtight box in the fridge. It keeps well for 2 weeks in the fridge.

To make the Potato Bhaji:


potato onion hash

Mash the potatoes into rough cubes.
Slice the onions and chop green chillies.
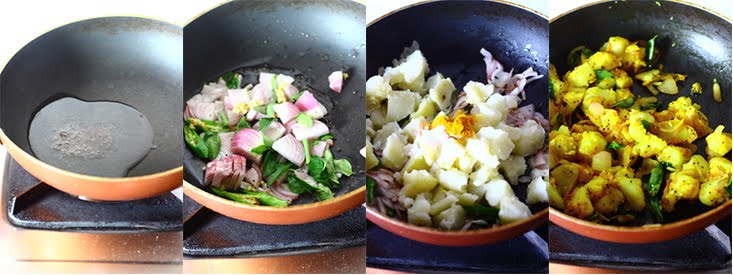
Heat oil in a pan and add the mustard seeds.
Once they splutter, add the curry leaves, onions and the green chillies.
Fry the onions until they are translucent.
Add the potato and mix well. 
Now add the salt and turmeric powder. Mix well.
Fry for 1-2 minutes.
Garnish with the chopped coriander leaves.

To make the Mysore Masala Dosa:


dosa mysore masala chutney pancake red chilli rice urad dal

Grease a cast iron or non stick griddle and heat it.
Once the griddle is hot (not smoking), pour one ladle full of batter on the griddle and spread it from the inside out into a thin circle.
Drizzle a spoonful of oil on it and allow it to cook on medium heat.
When the side touching the griddle turns golden brown and crisp and the side facing you is cooked and there is no raw batter there, spread 1/2-1 tsp of the red chilli chutney on the dosa.
Place a spoonful of potato bhaji on the dosa and fold the dosa into half.
Serve it hot with coconut chutney.

Read more ...

Chilli Basil Potato

chilli basil potato fry french fries chips thai aloo

CHILLI. BASIL. POTATO. Winning combo!!!

There is something about that aroma of Basil that awakens. It's so FRESH and EARTHY. It somehow reminds me of the fragrance of first rain. RAIN - I'm dying for some rains to bring down the heat. And all my thoughts are invariably leading to monsoons. Until, then I'm left with just sniffing away on some fresh Basil.

This Chilli Basil Potato is my FAVORITE Potato appetizer. We always order it at our local Thai restaurant. We tried other appetizers - Sesame Potato, Cauliflower Pepper Salt etc etc. But we always come back to these Chilli Basil Potatoes.

I wanted to make something really really healthy this weekend. Really!!! But those potatoes were really just staring me in the face from their basket. I thought they said PICK ME too... or may be that was just a voice in my head. Eh, who cares? These Chilli Basil Potato were totally worth the Potato indulgence. I stir fried them instead of deep frying, so I kept some end of my healthy eating bargain.


You know the other advantage of these Chilli Basil Potatoes? Your kitchen smells AMAZING. That's right! That wafting aroma actually got the I-am-addicted-to-my-phone hubby dearest Raj into the kitchen to check out what was cooking. 

Don't you simply hate how these men are always on... actually almost into their laptop / phone/ tablet ? I wish we were in simpler times, when a phone meant a box in the corner of the room with a cord hanging off it. Leave me a comment if you have succeeded in getting your man off his gadget.

And you know what? Back in those days, no food was bad food. There was no good fat, no bad fat. No high sugar, low sugar. No "let's-hate-the-potato" club. 

Anyway, back to the Chilli Basil Potatoes, I marinated them in some lemon juice and salt for around 10 minutes. And then stir fried them in sesame oil along with chilli flakes and fresh basil. They made a beautiful side for my homemade burgers.


Chilli Basil Potato


Potato stir fried with chilli flakes and fresh basil to make a delicious appetizer or snack.

Recipe Type:  Snacks / Appetizer
Cuisine:         Thai
Prep Time:     15 minutes
Cook time:     30 minutes
Yield:             Serves 2

Ingredients:


1 large Potato
3-4 tsp of Sesame Oil or Vegetable Oil
1/2 tsp Turmeric Powder
1 tsp of Chilli flakes
1 tsp of Lemon juice
A handful of fresh Basil leaves
Salt to taste

Method:


Cut the Potato into long thick strips like french fries.
Mix them with salt and lemon juice and keep aside for 10 minutes.
Drain the potatoes and keep aside.
Heat oil in a pan and drop the potato in it.
Stir the potatoes well so that they are all coated by the oil.
Now cook on low heat until the potatoes are done.
Add the turmeric powder, chilli flakes and the basil leaves and stir fry for 2-3 minutes until the basil leaves wilt.
Add more salt if required.
Serve hot.


Read more ...

Vegetable Cutlets with Coriander Mint Chutney | Indian Veg Cutlet Recipe [Video]


Vegetable Cutlet Recipe with step by step video instructions. Indian veg cutlet is a shallow or deep fried patty made of potatoes, mixed vegetables and spices. Vegetable cutlet may be coated in semolina or breadcrumbs. This recipe of vegetable cutlet is vegan.


In a hurry? Jump to Video or Jump to Recipe

how to make vegetable cutlets recipe, aloo tikki recipe, vegan cutlet recipe, beetroot cutlet recipe at www.oneteaspoonoflife.com

I’m free I’m free… from those hectic schedules to those late night calls. I’m finally free, for a short while, but I know to appreciate the smaller things in life.

So what did I do? Well, I actually went to the mall on a weekday evening. Really!! With no laptop to burden me, I happily went to the happiness sale at Bangalore Central. And then I went to my sister’s house and had her cook me dinner. I know, could I get any lazier? I like laziness :D. And then I actually started reading my library book. Oh my dear books have been neglected this entire time. I issued booked, renewed them and then returned them. But finally, I’ve started on “Gone Girl” and am liking it till now. I even went out and watched Minions. Acche din (Good days).

how to make vegetable cutlets recipe, aloo tikki recipe, vegan cutlet recipe, beetroot cutlet recipe at www.oneteaspoonoflife.com


I’ve been trying to cram all the good things in these 2-3 weeks I’ll have before the next project and the next grind starts. So Saturday night, I made my childhood favorite – Vegetable Cutlets, to celebrate. It is still my favorite, but I don’t like what I get in Bangalore. I miss my Goan cutlets with little pieces of red beetroot in them. That’s something special to Goa I think, beetroot is added to cutlets and samosa’s there, and believe me, it just makes them extra special. Tasty, yummmm. 

Veg potato vegan snacks Cutlet patty fritter Coriander cilantro kothmir Mint pudina hari green Chutney


Cutlets are so easy to make. All you need are mashed vegetables and desire to make something of them. For most non vegetarian cutlets, egg is used as a binding agent to bind the breadcrumbs, but this is a Vegetarian blog, so not eggs here mister. Just use a mixture of milk and flour and dip the cutlets in that before dipping it into semolina or bread crumbs. You can use bread crumbs, but cutlets always have semolina or rava coating on them. If you skip this, the rava coating just disintegrates once it is in the pan and you are left with a shapeless cutlet and oil full of rava. I am speaking from experience here.

Veg potato vegan snacks Cutlet patty fritter Coriander cilantro kothmir Mint pudina hari green Chutney

how to make vegetable cutlets recipe, aloo tikki recipe, vegan cutlet recipe, beetroot cutlet recipe at www.oneteaspoonoflife.com


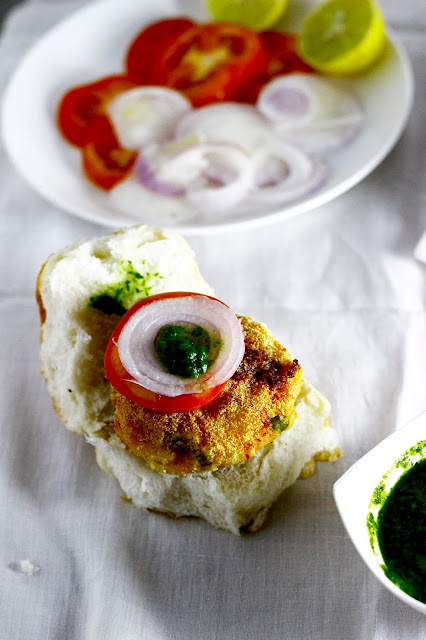
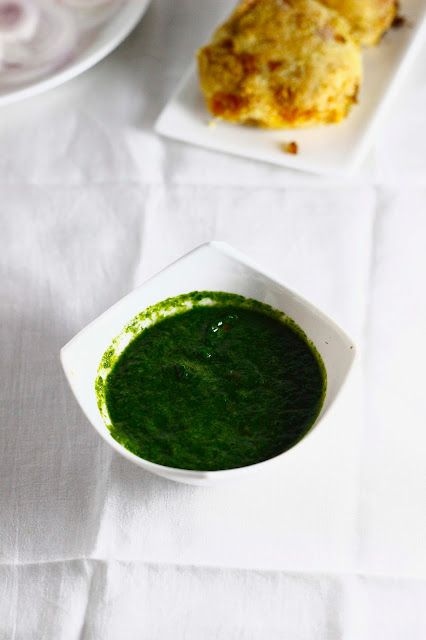
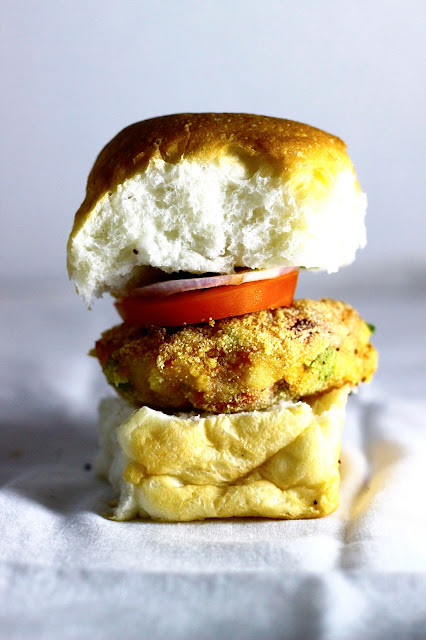
I decided to go an extra step and I made this nice green chutney to go along with the cutlet. It tastes just as delicious with ketchup or just like that. But then, I am a chutney girl. Always been one. So I made this chutney, bought some Pao, stuffed some sliced onions and tomatoes and made my local burger. Skip all this and enjoy it just as it is, or go full gourmet and add sliced avocado, cheese or anything else you fancy. It  is all upto you and your family’s taste buds.

Veg potato vegan snacks Cutlet patty fritter Coriander cilantro kothmir Mint pudina hari green Chutney


If you made this recipe, let me know! Leave a comment here or on Facebook tag your tweet with @oneteaspoonlife on Twitter and don't forget to tag your photo @oneteaspoonoflife on Instagram. You can also email me at onetspoflife@gmail.com I'd love to see what you are up to.

If you like this recipe, do not forget to share it with your friends and family! 


You can follow One Teaspoon Of Life on FacebookTwitterInstagramPinterest or you can subscribe to One Teaspoon Of Life and receive all the latest updated via Email


Video Recipe


--------------------------------------------------------------------------------------------------------------------------

Vegetable Cutlets with Coriander Mint Chutney


how to make vegetable cutlets recipe, aloo tikki recipe, vegan cutlet recipe, beetroot cutlet recipe at www.oneteaspoonoflife.comIndian veg cutlet is a shallow or deep fried patty made of potatoes, mixed vegetables and spices. Vegetable cutlet may be coated in semolina or breadcrumbs. This recipe of vegetable cutlet is vegan.

Recipe Type:  Snacks
Cuisine:          Indian
Prep Time:     30 minutes
Cook time:     30 minutes
Yield:              8-10 Cutlets

Ingredients:


For the cutlet:


3 to 4 Potatoes, medium sized
0.5 cup mixed vegetables (carrot, green beans, green peas)
0.5 Beetroot
2 Tbsp Coriander leaves
1 tsp Red chilli powder
0.5 tsp Turmeric powder
1 tsp Garam masala
2 Tbsp Flour (maida)
3-4 Tbsp Fine semolina (Chiroti rava)
Oil to fry
Salt to taste
Water as required

For the chutney:


0.5 cup Fresh coriander leaves 
0.5 cup Fresh mint leaves
1 Green chilli
1 clove Garlic
Salt
Water

Method:


To make the Cutlet:


1. Boil the potato until done. Peel and mash them.
2. Chop carrot and beans finely. Boil them along with the peas until done.
3. Peel and chop the beetroot and boil until cooked.
4. Drain and add the vegetables along with chopped coriander leaves to the potato.
5. Add all the spices and salt to the potato and mix well. If the cutlet mixture feels wet, add either bread crumbs or dip a slice of bread in water and immediately remove it out, squeeze out the water and crumble the bread into the mixture.
6. Divide the mixture into 10 equal parts and roll them into balls. Gently flatten the balls to make a patty. You can be creative and make fancy shapes too with a cookie cutter.
7. Heat oil in a pan. You can either shallow fry or deep fry the cutlets.
8. Take the flour in a shallow plate and add 0.25 to 0.5 tsp salt to it. Add water by the spoonfuls and whisk until you have a smooth slurry.
9. Dip the cutlet in the slurry and dip in semolina and place it in the pan.
10. Cook on each side until it is golden brown. Remove from heat once both sides are cooked.
11. Serve hot with Ketchup or Chutney

To make the Coriander Mint Chutney:


1. Grind everything in the mixer/blender with 1 tbsp of water


If you liked this, you may also like:

Shallow fried fritters made from broccoli and zucchini stacked together
Broccoli Zucchini Fritters

Sweet Potato Kebabs
Sweet Potato Kebab
chawal tikki garam masala vegan pan fried snacks appetizer
Brown Rice Fritters

Read more ...

Potato and Drumsticks in a Mustard Gravy (Oriya Style)

Laziness… that’s all is my excuse. It’s been a very long time since I posted. Initially, I had an excuse, I took a weeklong vacation to my parents’ house. Who blogs on vacation, right? *sheepish smile*. I relaxed whilst watching the monsoon and drinking endless cups of tea. Playing board games and watching TV. Then I had to answer 2 exams, I helped paint a school etc etc. But after that, only laziness. I have seen this quote making rounds on Facebook “Laziness is the mother of all evils, but she is a mother and we need to respect her :P”. So maybe I was just showing respect :P


At lunch the other day, we were discussing how bad the cafeteria okra was and then one colleague told us a recipe his mom used to cook okra. He said the same Oriya recipe is used for potatoes, brinjals, drumstick etc. He wasn’t aware of any popular name for the dish. Also, I got some vague quantities, so I just used my instincts with measurements. In the end, it turned out awesome. I did try it with okra, but I liked the potato and drumsticks better. The following recipe serves 2.

Potato and Drumsticks in a Mustard Gravy (Oriya Style)


Drumsticks and Potato in a mustard sauce - Oriya style curry

Recipe Type:  Main Course
Cuisine:          Indian / Oriya
Prep Time:     45 minutes (Includes the soaking time)
Cook time:     45 minutes
Yield:              2 servings

Ingredients:

2 Potatoes
1 Drumstick (Optional)
2-3 cloves
2 Yellow Mustard Seeds
2 Tbsp Poppy seeds / Khus khus
2 tsp Vegetable Oil
½ tsp Turmeric powder
½ tsp Mustard Oil
2-3 dry Red Chillies
Salt to taste
Water

Method:

Soak the mustard, garlic and poppy seeds in half a cup of water and keep aside for at least 30 mins.
Chop the potato into rough cubes.
Peel and chop the drumstick into chunks.
Drain the mustard, garlic and poppy and grind into a fine paste using a little water.
Heat the vegetable oil and the red chillies.
Add the potatoes and turmeric powder and stir fry them for 30 secs.
Add the drumstick and fry for 30 secs
Add the mustard paste and mix until the vegetables are coated with it.
Add 1 cup of water and salt and cover and cook until the potatoes are cooked.
Add water to get desired consistency.
Add a dash of mustard oil once the pan is off the stove and mix well.
Serve hot with roti or bread
Read more ...

Baked Bread Rolls

I am blank! Just like a paper. 

There are times when you want to write but you don’t know what to write. It is called a writer’s block. Most of the times I am blank, but not about writing, but about cooking. What is that called? Cooking block? Chef’s block? Cooking lunch and dinner is pretty easy for me. 

I am a chapatti/roti lover so most days it is chapatti with some vegetables that are there at home. But I hate thinking about what to make for breakfast. And then start the calls. I call up my mom and my sister and ask the same question “What should I make for Breakfast?” and I get the same answer “Please don’t ask me, I’m confused too” :(


May be the women in office face the same issue everyday too. The women’s association in office started an online competition for quick and healthy breakfast recipes. I was extremely excited, I thought with at least the 200+ women in office, I’ll get many recipes. I, myself, submitted the recipe for my oats idlis. I must say though, that competition did not do much more than flooding my inbox with emails. I barely got any new recipes. Some were not healthy, some were not quick, some I would not even call breakfast. I did win the third prize though :).


I got the idea for this breakfast recipe when on a hungry weekday evening we went to a tiny shop to eat Vada Pao and Break pakoda and my sister remarked that she prefers break roll. The idea stayed in my head and from that seed grew a tree, that tempted me to make bread rolls. As I have mentioned before, I try to avoid deep frying, so I baked it. I stuffed with a combination of potato, carrot, cauliflower, spices and cheese. Stuff it with anything that takes your fancy, the bread is your stage… :) You can have it as a snack with nice hot cup of tea on a rainy evening….*slurp* or as a breakfast.


Definitely, a kid friendly recipe. I can vouch for that. What’s not to like? Bread, potatoes and cheese :) The only suggestion I have is: have it hot, it loses its crispness once it is cold. Dunk it in some cool mint chutney or some tangy ketchup. Or like us, just have it on its own. But have it, for sure :)


Baked Bread Rolls


Bread stuffed with a vegetable mixture, rolled and baked to make a roll.

Recipe Type:  Snacks/ Appetizer
Cuisine:          International
Prep Time:     15 minutes
Cook time:     60 minutes
Yield:              12 rolls

Ingredients:


12 Bread slices
2 small or 1 large Potatoes
1 Carrot
1/4 – 1/2 cup chopped Cauliflower
1 small Onion
1 Green chilli
1-2 cloves of Garlic
1 Tbsp Coriander leaves (chopped)
2 cubes or 3-4 Tbsp Cheese (Grated)
2 Tbsp Butter
½ tsp Cumin seeds
3 tsp Oil
½ tsp Turmeric powder / Haldi
A pinch of Garam Masala
A pinch of Dry Mango Powder / Amchur
Salt
Water

Method:


1. Boil and peel the potatoes. Mash them roughly.
2. Finely chop the onion, garlic, carrot, green chilli and the cauliflower.
3. Heat oil in a pan, add the cumin seeds.
4. Once the seeds brown, add the onion, chilli and the garlic.
5. Once the onion is slightly browned, add the carrot and cauliflower.
6. Cover and cook until the vegetables are done. They should still have a bite in them, don’t overcook them.
7. Add the spices and the mashed potatoes and mix well.
8. Add the coriander leaves.
9. Remove from heat and keep aside.
10. Cut the edges of the bread slices.
11. Using a rolling pin flatten out the bread.
12. In the center of the flattened bread, add a spoonful of the mixture and the cheese.
13. Wet the sides of the bread and join them.
14. Apply butter on the roll from outside
15. Preheat the oven to 200 degree Celsius.
16. Place the rolls on a cookie sheet in one layer and cook for 10 mins.
17. After 5 mins, flip the rolls.
18. Depending on the power of your oven you may need to keep it in for more or less time.
19. It should be crisp and golden brown.


    P.S: Don't throw out the edges. You can use it to thicken gravies and soup. You can also use it as a binding agent in tikkis and patties. For a soup which uses bread edges, watch out for my next post :)
    Read more ...

    Mexican Green Rice with Spicy Fried Potatoes

    Work has been very stressful lately. All I want to do is get home and start blogging. But at the end of the day I have literally no energy left. In fact, hubby dearest has been cooking dinners too. It’s been raining outside, and I have no time to enjoy it :( . I’m missing watching MasterChef on TV :( . I am craving for my end of the month vacation. I hope for it to be my much needed relief. Until then, my blog will have to be my only source of relaxation. *End of ranting*


    Now, back to my sane self. Forgive me, sometimes “Hyper-Stressed out-Worried Anu” makes an appearance here. This post is going to cater to those with lack of time – like me. One pot meal. The answer to a busy night. I know the name sounds simply Exotic. I’ll let you in on a secret *hush* it is only coriander rice *hush*. Yup, you heard it right. Coriander/Cilantro is abundantly available in India, albeit it’s gotten really costly off late. I pay Rs.40 for a bunch :( in Bangalore. I did try growing it. It grew too, though not enough to suffice and the heavy rains killed almost half of my saplings :( . Too many sad smileys. Isn’t that an oxymoron? Sad smiley. Or is there a more appropriate name for it?


    For a lot of communities, rice is a side dish and the main is something else. But for us Indians, especially South Indians, rice is the star. Everything else is a side dish. I have seen a lot of friends for whom a meal isn’t complete if they don’t have a spoonful  of curd rice at the end. If you have never seen a paddy field, I suggest you do see one, especially in or after the monsoons. That is probably the brightest green nature can throw at you. It really relaxes the eyes and the mind.

    The original Mexican rice obviously uses Mexican chillies, I had no time to find exotic chillies, so I just used the regular desi chillies. They are probably a little spicier than their Mexican counterparts, so use it carefully to match your taste buds.


    I toyed with the idea of different accompaniments and finally settled on the spicy potato fry. I did seriously consider the raita, but gave it to my greediness of having some fried potatoes *feeling guilty*

    So on a slightly free weeknight, we enjoyed a part Mexican and part Indian meal of Green rice with spicy fried potatoes watching another exciting episode of MasterChef. Hope you enjoy it as much as we did.


    Mexican Green Rice with Spicy Fried Potatoes

    Mexican green rice with spicy fried potatoes

    Rice flavored with Coriander and Spinach served with spicy fried potatoes 

    Recipe Type:  Main Course
    Cuisine:          Mexican
    Prep Time:     15 minutes
    Cook time:     60 minutes
    Yield:              2 servings

    Ingredients:

    Mexican Green Rice:

    3/4 cup Basmati Rice
    1/2 cup coriander leaves
    1/2 cup spinach leaves
    2-3 cloves of garlic
    1-2 green chillies
    4 tsp oil
    1 Onion
    1 tsp Lemon juice
    1.5 cups Water
    Salt

    Spicy Fried Potatoes:

    2 Potatoes
    3 tsp oil
    1 tsp Red Chilli Powder
    1/2 tsp Turmeric Powder
    1/2 tsp Mustard seeds
    1/2 tsp Coriander powder
    4-5 Curry leaves
    Salt

    Method:

    Mexican Green Rice:

    • Wash and drain the rice.
    • Lay it out on a towel to dry.
    • Grind the spinach, coriander, garlic. onion and green chillies into a coarse paste
    • Heat oil in a pan/kadhai and add the rice
    • On a medium flame fry the rice until it is slightly golden appx. 5 mins
    • Add the green paste, water and salt
    • Cover and cook on low flame until the rice is cooked
    • Add lime juice and garnish with chopped coriander leaves and serve hot

    Spicy Fried Potatoes:

    • Peel and chop the potatoes
    • Heat oil in a pan, add the mustard seeds
    • Once they splutter, add the curry leaves and the potatoes
    • Add the spices and salt and mix well
    • Cover and cook until the potatoes are done
    • You can have this with roti/chapati also
    Read more ...

    Bombay Pav Bhaji

    The reason I call this the Bombay Pav Bhaji is because I eat and make 2 kinds of Pav bhajis and it gets confusing about which one I'm talking about. The other one being the Goan Pav bhaji ( recipe will be posted soon). The Bombay pav bhaji is the red coloured pav bhaji most commonly eaten across India in restaurants or small chaat carts / gaadis . As a kid, eating out meant small snacks in the evenings, as restaurant culture had not yet caught on as it has today. We would go on my dad's Bajaj scooter to our favorite chaat cart/ gaadi in the market to eat Pav bhaji. With very low tolerance for spices, I was generally stuck eating just butter pav. But as I grew up, the spice tolerance also grew and I was able to enjoy this spicy red bhaji with the greasy yet amazingly tasty butter pav. I'm sure a lot of us have similar memories of the 1990s. Till date, whenever I go home, I make it a point to go to the same gaadi and eat the same pav bhaji. I don't know his secret recipe that makes it so yummy, but I do make it my way at home... The recipe that follows is the way I make it at home...


    Bombay Pav Bhaji


    A popular Bombay street food consisting of spicy mix vegetable mash and bread rolls/pav.

    Recipe Type:  Snacks
    Cuisine:          Indian
    Prep Time:     30 minutes
    Cook time:     30 minutes
    Yield:              2-3 Servings

    Ingredients:

    3 medium Potato
    1 cup chopped Tomato
    3/4 cup chopped Onion
    1/2 cup chopped Capsicum
    1/4 cup chopped Carrot
    1/2 cup Cauliflower (broken into small florets or chopped)
    1/4 cup Green peas
    3-4 cloves or 1 Tbsp paste of Garlic
    1" piece or 1 Tbsp paste of Ginger
    2 Tbsp Pav bhaji masala (In case you don't have this available, use Garam masala - 1/2 tsp, Coriander powder - 1 tsp, Amchur/ Dry mango powder - 1/4 tsp, Cumin powder - 1/2 tsp)
    A pinch of Garam masala
    2 Tbsp Butter
    Red chilli powder - To taste
    Salt - To taste
    A handful of Coriander leaves
    Lemon wedges

    Method:

    • Boil and peel the potatoes
    • Boil the carrot, cauliflower, peas and capsicum.
    • Grind the ginger-garlic into a fine paste.
    • Heat 1 tbsp of butter in a kadhai or pan
    • Add the onions and fry until golden brown.
    • Add the ginger-garlic paste and fry until fragrant.
    • Add the tomatoes and fry until soft and cooked.
    • Add all the remaining vegetables and mash them.
    • Add all the spices and salt.
    • Add a little water to achieve the desired consistency
    • Boil for 5-6 mins
    • Add 1 tbsp of butter on top
    • Garnish with chopped coriander leaves
    • Serve hot with some lemon wedges, chopped onion and buttered Pav


    Read more ...

    Vegetable Pulao

    In the early 1990s, cable TVs had just entered homes, infact, TVs had just entered a few homes. International brands were unknown to most except probably those who had travelled abroad. Internet was virtually unheard of and computers unseen by most. Weekends were 1.5 days long and travels by Bajaj scooters. The only McDonald we had heard of was the old farmer who had pigs and ducks on his farm. Eating out was restricted to local foods like pao bhaji, sev puri, samosas and dosas. Eating out was an extravagance, a luxury. Families ate out once in 1-2 months. Sundays became special affairs. Sunday was a day to cook out specialities by the woman of the house. The menu for sunday until lunch was pretty much fixed. Idlis with hot sambhar and spicy chutney for breakfast. And my mom's special Pulao and Chana masala for lunch. How we lusted for the lunch. All the while, playing in the street, the mind was still in the kitchen smelling in the aroma of pulao. My mom's simple yet delicious vegetable pulao was always a favourite among friends and relatives. I use the same recipe, the same ingredients, but I can never match up to the pulao of those early sunday afternoons of my life. But each time I make this pulao, the feeling of nostalgia envelopes me.


    Vegetable Pulao


    Indian rice pilaf made with vegetables and whole spices

    Recipe Type:  Main Course
    Cuisine:          Indian
    Prep Time:     30 minutes
    Cook time:     20 minutes
    Yield:              2-3 Servings

    Ingredients:

    1 cup Rice
    2 cups Water (Or how much is needed to cook 1 cup of rice in a pressure cooker)
    1 cup Assorted vegetables  (Roughly chopped Cauliflower, Potato, French beans. Carrots and Green Peas)
    1 Onion
    1 Tomato
    2-3 Green Chillies
    5-6 Black peppercorns
    1-2 Cloves
    1" stick Cinnamon
    1 Bayleaf / Tej patta (dry)
    1 cube Maggi magic cube (veg)
    2 Tbsp Oil
    Salt

    Method:
    • Wash the rice and spread on a muslin cloth to dry until ready to use.
    • Heat oil in a pressure cooker
    • Add the finely chopped onions and slit green chillies
    • Add all the whole spices and fry until the onions are light brown
    • Add the tomato and fry for 1 min
    • Add the rice and fry for 30secs - 1 min
    • Add the water. Crush the magic cube and add it to the cooker.
    • Add salt. The magic cube itself has salt, keep that in consideration while adding salt.
    • Pressure cook for 3-4 whistles or until the rice is done.
    • Serve hot with raita or pickle


    Read more ...