Showing posts with label Easy. Show all posts

Homemade Yogurt Recipe | How to make thick creamy yoghurt at home [Video Recipe]


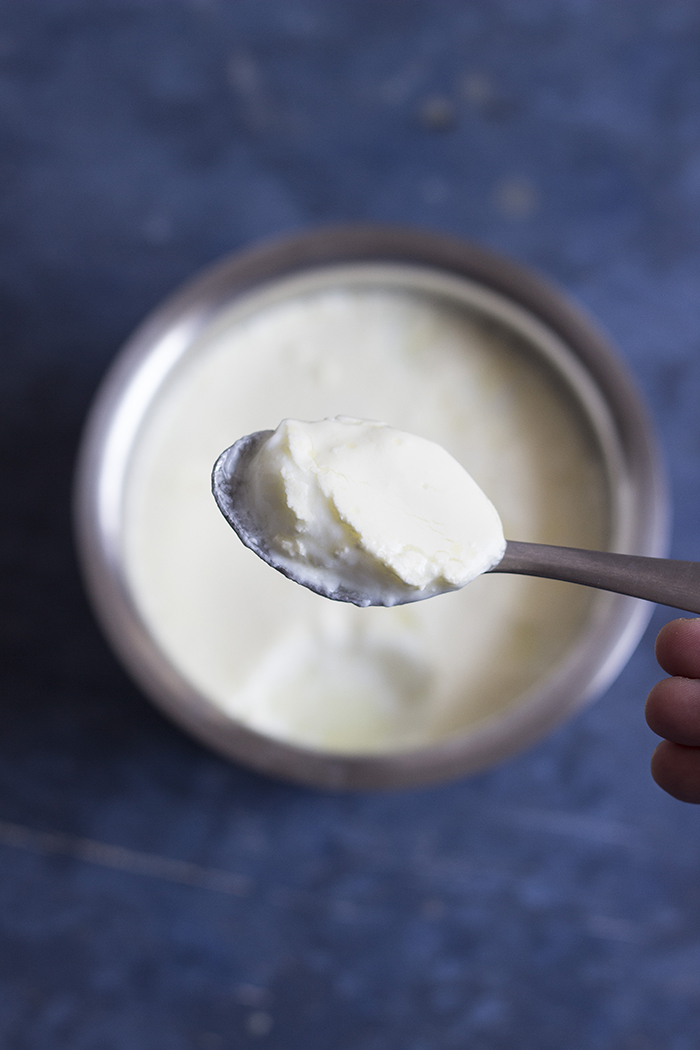
Making yogurt at home is easier than you think. Follow the recipe to make thick creamy plain yogurt at home.

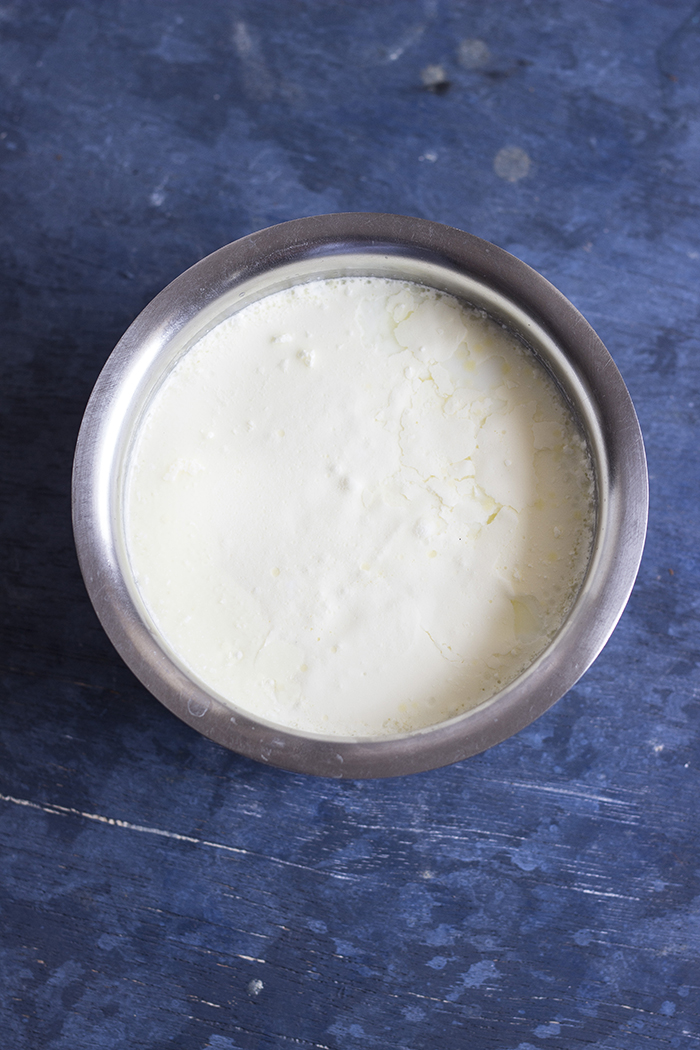
Creamy thick homemade yoghurt or dahi


Creamy thick homemade yoghurt or dahi


Yogurt forms an integral part of the Indian cuisine. No meal in South India is complete without a serving of yogurt or curd rice and North Indians love for the Lassi needs no explanation. Yogurt is used in raita (salad with yogurt), kebabs, chaats, beverages, biryanis and so many more ways out here.

Pretty much every house in India makes a fresh batch ever so often. I remember times, when if you wanted yogurt, you had to make it at home or borrow from your neighbor. It was never packaged and  promoted as a super food with so many health benefits. It is only in recent times, I see the market flooded with flavored yogurts. While flavored yogurts may be the go to snack over chips, it is still high in sugar and not as healthy as it is probably perceived to be. The best yogurt out there is still the humble plain one which is made with just milk and no other additives.

A lot of people who think making yogurt is actually difficult, but believe me once you see the video below, you'll know it is the easiest thing in the world. And once you see how easy it is, you'll never (probably) buy another jar of yogurt, unless of course, you are using it as a starter or a mother.

Advantages of making Yogurt at home:
  • Zero adulteration - Some manufacturers add corn starch to get a thicker yogurt. Making at home will ensure that the yogurt is pure.
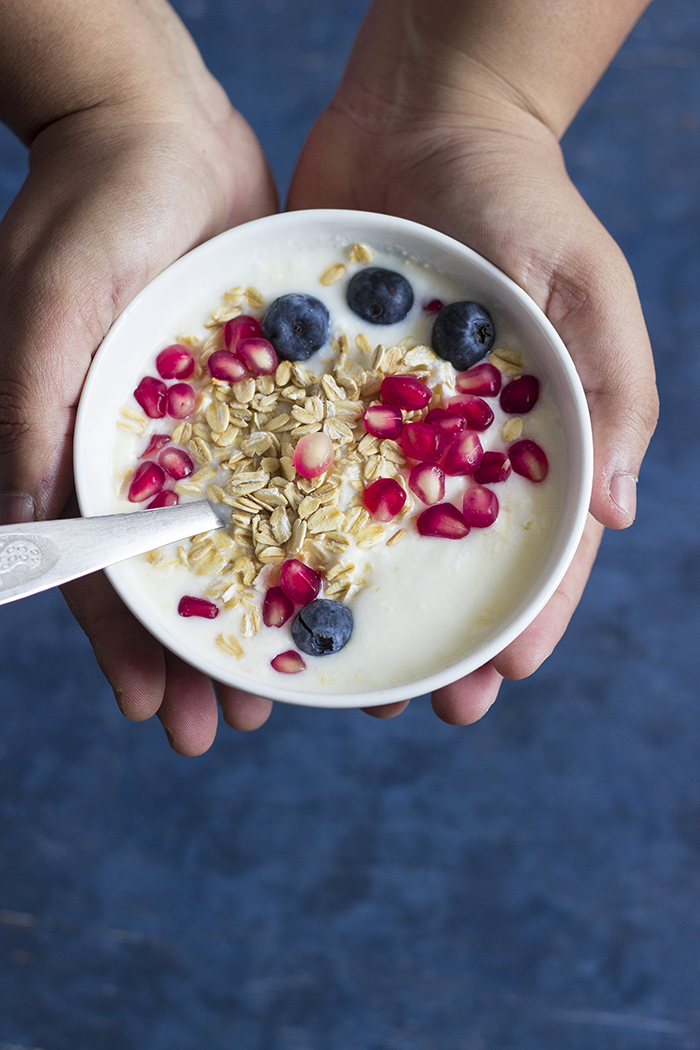
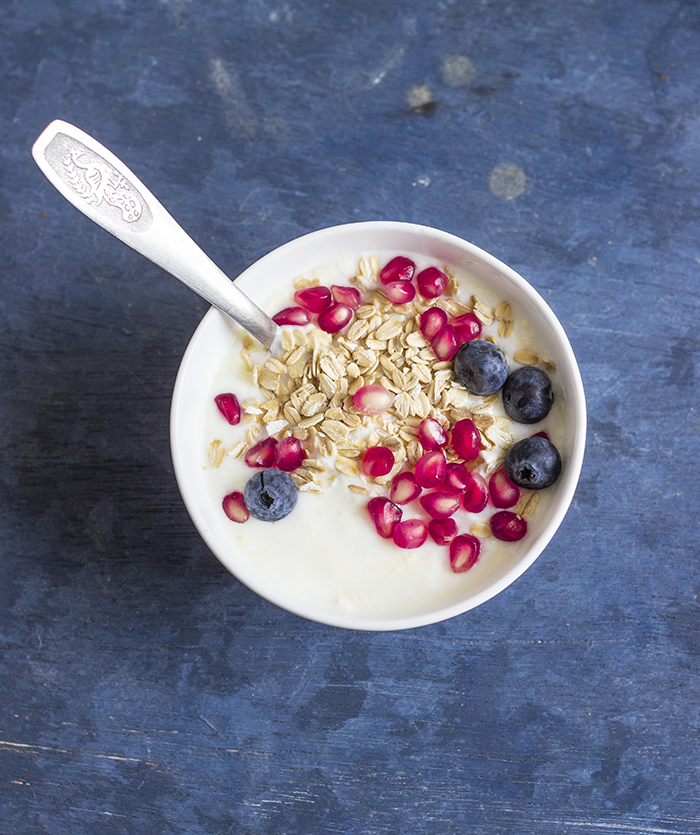
  • Less calories - Since plain yogurt, it just that, plain, it is up to you to decide if you want to add any sweetener and how much of it. Top it up with fresh fruits and a spoonful of honey for a healthy snack.
  • Pure happiness - Happiness on a job well done. A thick set yogurt can make you very very happy.
  • Less plastic for the world to digest - Make yogurt in stainless steel boxes or glass and rid the world of unnecessary small plastic jars.
  • No additives - A lot of manufacturers add food coloring to flavored yogurt to make it appealing. Zero coloring in the homemade version.
  • And so many more.... just google around
Yogurt is a good source of probiotics that aid in digestion. It is considered to cool the body and hence, is extremely popular in a hot tropical region like India. It is full of calcium, vitamins and is a decent source of protein.

Creamy thick homemade yoghurt or dahi


Creamy thick homemade yoghurt or dahi

Follow these tips to make the PERFECT batch of yogurt:
  • Use the best quality milk - Use milk with a higher fat content to make a thicker yogurt. I use milk with around 3% fat and I still get thick yogurt (not as thick as Greek yogurt).
  • Use a clean vessel to make the yogurt to prevent the milk from curdling. Use a stainless steel or a glass jar to set yogurt.
  • Never ever insert a spoon or any foreign object into the vessel while the yogurt is still setting, it will cause the yogurt to split into curds and it will not set well. Instead, gently tilt the vessel, if the milk is still liquid, then it needs more time. If the milk has set, it will be solid.
  • At room temperatures of around 25-28 degrees Celsius, it takes around 8 to 10 hours for the yogurt to set. If the temperature is lower, you have to find a warm spot to rest the vessel in. Either keep it in sunlight, or preheat the oven to around 40 degree Celsius and turn it off and keep the vessel in the oven and check on it in 5-6 hours. If the temperature is higher than 28 degrees Celsius, check if the yogurt is set within 6-8 hours.
  • Yogurt tends to get sour, the longer it stays at room temperature. To make a really sour yogurt (excellent for making buttermilk), keep it at room temperature longer. To make a blander yogurt, keep it in the fridge as soon as it sets.
  • Always store at least one teaspoon of yogurt aside to use as the starter/mother for the next batch. If you are a first timer, just use a spoon of store bought plain yogurt as the starter.
If it doesn't set right the first time, don't fret. It takes a little practice to get the technique right.


If you made this recipe, let me know! Leave a comment here or on Facebook, tag your tweet with @oneteaspoonlife on Twitter and don't forget to tag your photo #oneteaspoonoflife on Instagram. You can also email me at onetspoflife@gmail.com. I'd love to see what you are upto. 

If you like this recipe, do not forget to share it with your friends and family! 

You can follow One Teaspoon Of Life on Facebook, Twitter, Instagram, Pinterest and Google+ or you can subscribe to One Teaspoon Of Life and receive all the latest updated via Email

Video Recipe


---------------------------------------------------------------------------------------------------------------------------


Homemade Yogurt Recipe


Thick creamy homemade yoghurt (dahi)How to make thick creamy yogurt or dahi at home.

Recipe Type:  Side
Cuisine:            International
Prep Time:     0 minutes
Cook time:     5 minutes
Total time:     8 hours
Yield:                500 ml

Ingredients:


500 ml Pasteurized Milk (boiled and cooled)
1 Tbsp Yogurt

Method:


1. Heat milk until lukewarm. When you dip your finger in it, the milk should feel slightly warm.
2. Remove milk from heat and add the old yogurt culture. Mix well.
3. Cover and leave undisturbed in a warm place for 8-10 hours.
4. Check out the tips above to make the perfect yogurt.
5. After 8-10 hours, the yogurt is set.
6. Save the leftovers in the fridge.

If you liked this, you may also like:


rose yogurt beverage smoothie curd flavored drink Indian Punjabi
Rose Lassi

How to make overnight oats, overnight oats recipe, bircher muesli with apple juice recipe, how to make bircher muesli with apple juice, rolled oats recipe, how to make rolled oats, cold breakfast recipe at www.oneateaspoonoflife.com
Bircher Muesli
Dahi Kebab Yogurt Kebab kabab kebob hung curd punjabi besan chickpeas snacks
Dahi Kebab
Read more ...

One Pot Corn Spinach Pilaf | Corn Palak Pulao Recipe [Video Recipe]


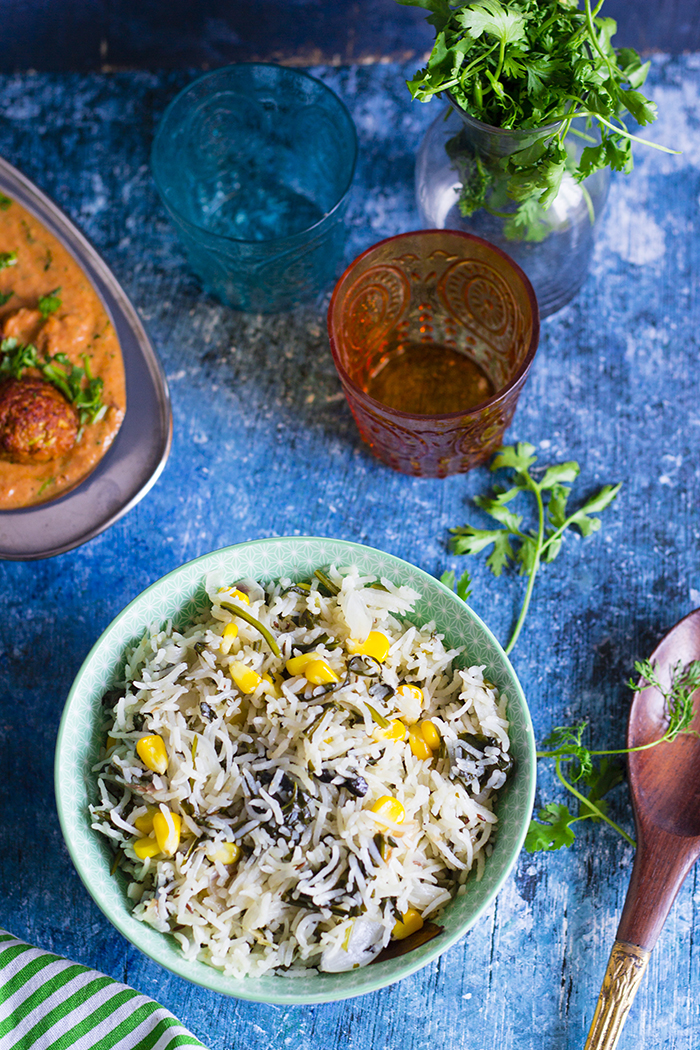
Corn Spinach Pulao - Delicately spiced Indian pilaf made with fresh spinach, sweet corn and whole spices.

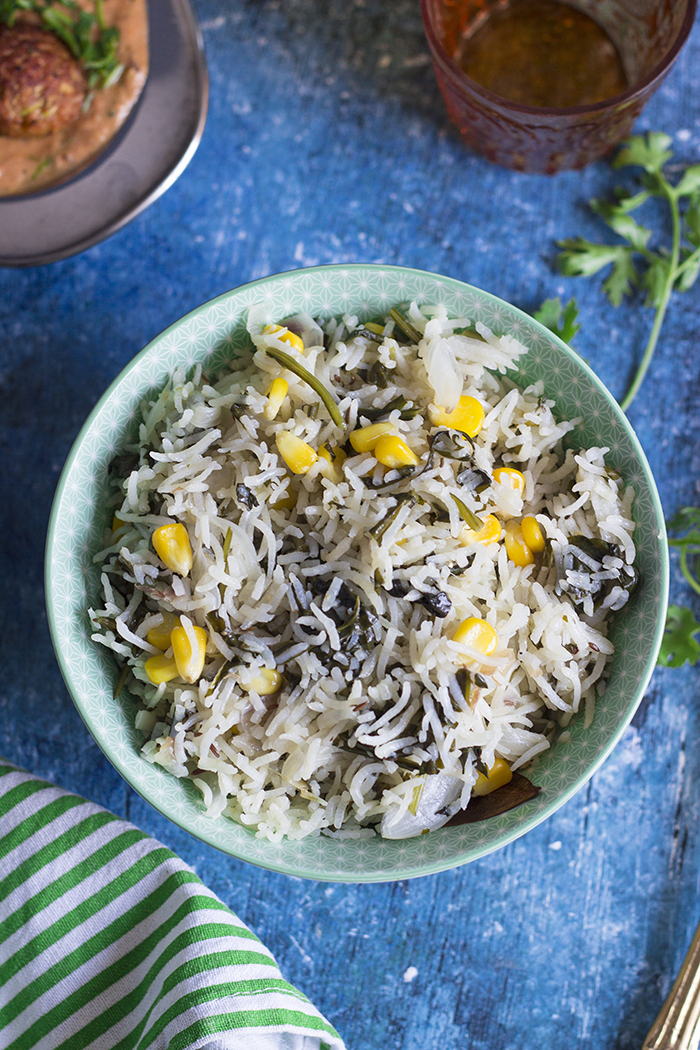
Indian rice pilaf made with corn, spinach and whole spices


This Corn Spinach Pilaf / Corn Palak Pulao was long in the making.

To those who are new..ish here, we have a small balcony garden where weve been growing a few greens and vegetables. I love eating what we grow, I know it is genuinely organic. There is no pleasure greater than knowing that the food you eat is as healthy as it should be. We feed our plants with compost that we make at home again. Around 1.5 years ago, we started composting our kitchen waste and have not looked back since. Again, that is one soul satisfying venture that lets us keep garbage out of land fills while making enriching compost for our own garden and all it takes is 10 minutes of our time daily.


Indian rice pilaf made with corn, spinach and whole spices


A few weeks ago, I planted spinach in one of the grow bags out there. If you are just starting out in gardening, spinach is the first thing you should grow. It grows so easily. You plant it and water it once a day and you will see those tiny green leaves popping out in no time. And you now have a fresh supply of baby spinach ready to pluck when you want.

When I have home grown vegetables, I usually make a salad or something similar to let my veggies shine. This Corn Spinach Pulao is exactly that. It is simple, delicate, fragrant and so super easy to make. This is a classic OPOS dish - One Pot One Shot. 

To make the perfect Corn Spinach Pulao, use the best quality ingredients. This is a very simple dish, so there is nothing much to hide behind. Select the best Basmati Rice, preferably something that is long grain and aged. You can use either fresh or frozen corn. And definitely, use the freshest spinach you can get. 

Indian rice pilaf made with corn, spinach and whole spices

If you made this recipe, let me know! Leave a comment here or on Facebook, tag your tweet with @oneteaspoonlife on Twitter and don't forget to tag your photo #oneteaspoonoflife on Instagram. You can also email me at onetspoflife@gmail.com. I'd love to see what you are upto. 

If you like this recipe, do not forget to share it with your friends and family! 

You can follow One Teaspoon Of Life on Facebook, Twitter, Instagram, Pinterest and Google+ or you can subscribe to One Teaspoon Of Life and receive all the latest updated via Email

Video Recipe


---------------------------------------------------------------------------------------------------------------------------

Corn Spinach Pilaf | Corn Palak Pulao Recipe


Indian rice pilaf made with corn, spinach and whole spicesCorn Spinach Pulao is a delicately spiced Indian pilaf made with fresh spinach, sweet corn and whole spices. Vegan and gluten free.

Recipe Type:  Main
Cuisine:            Indian
Prep Time:     30 minutes
Cook time:     30 minutes
Yield:                Serves 2-3

Ingredients:


1 cup Basmati Rice
2 cups loosely packed Spinach leaves
0.5 cup Sweet Corn kernels
1 large Onion
1 tsp Ginger Garlic Paste
2 Tbsp Oil
0.5 tsp Cumin seeds
0.5 tsp Caraway seeds
1-2 Cloves
1-2 Green Cardamom
1 strand Mace
1 Bay leaf
0.5 inch Cinnamon
1.5 cup Water
Salt to taste

Method:


1. Wash the basmati rice 4-5 times until the water runs clear. Soak and keep aside for 20 minutes.
2. Slice the onions. Wash the spinach thoroughly and chop it.
3. Drain the rice and keep aside.
4. In a large thick bottomed pan, heat oil.
5. Once the oil is hot, add bay leaf and cinnamon.
6. Add all the other whole spices and fry on low heat for 1 minute.
7. Add sliced onions and fry for 1-2 minutes
8. Add ginger-garlic paste and fry until the onions turn golden brown.
9. Add chopped spinach and sweet corn. Stir fry for 1-2 minutes until the spinach wilts.
10. Add the basmati rice and water.
11. Add salt as per taste. The water should be salty when you taste it.
12. Cover and cook on low heat until the rice is cooked. It should take around 15-20 minutes.
13. Serve hot.


If you liked this, you may also like:

How to make ghee rice recipe at One Teaspoon Of Life www.oneteaspoonoflife.com
Ghee Rice

Raw Mango Rice
How to make methi rice recipe at www.oneteaspoonoflife.com How to make Fenugreek Pilaf recipe How to make Methi Pulao recipe at One Teaspoon Of Life
Methi Rice

Read more ...

Spicy Guava Cooler | Peru Panna | Guava Panna Recipe


Indian summer cooler (mocktail) made with Guava and spices!

Indian mocktail made with guava and spices

If there was another fruit, other than the mango, that screams Summer to me, it is the guava. A better part of our childhood summers was spent on guava trees. They are some of the easiest trees to climb, if you are into that stuff. We would be tree hopping all morning until it was time for lunch. Mango, guava, and so many more tree. Me not so much as Gee and my cousin.

If you've had  pleasure of plucking a fruit right from the tree and eating it then and there, you know how that feels. That fruit is so much more sweeter than what we buy outside.

After moving to Bangalore, I'm yet to spot a guava tree, but that doesn't stop me from buying and eating them. After all, it brings on nostalgia, and who doesn't love that?

This is the first time I did something other than directly eating the fruit. I made us a summer drink. Guava Panna!

Indian mocktail made with guava and spices

Panna is a spicy summer drink most commonly made from raw mangoes. Check out that recipe here.

I've used fresh guavas to make the juice, but feel free to use your favorite Guava Juice to make the same. I added a little twist to the regular guava juice to make the Guava Panna. The juice is spiced with roasted cumin powder, red chilli powder or paprika, black salt, regular salt and some sort of sweetener if the guava isn't sweet enough. I used jaggery to sweeten up my drink, hence, the slightly brownish tinge to the drink.

Use the quantity of the ingredients in the following recipe as a guiding value and adjust them according to your taste. You can add mint, lime and/or sparkling water or soda to create your own version of the Guava Panna.


Indian mocktail made with guava and spices

If you made this recipe, let me know! Leave a comment here or on Facebook, tag your tweet with @oneteaspoonlife on Twitter and don't forget to tag your photo #oneteaspoonoflife on Instagram. You can also email me at onetspoflife@gmail.com. I'd love to see what you are upto. 

If you like this recipe, do not forget to share it with your friends and family! 

You can follow One Teaspoon Of Life on Facebook, Twitter, Instagram, Pinterest and Google+ or you can subscribe to One Teaspoon Of Life and receive all the latest updated via Email

---------------------------------------------------------------------------------------------------------------------------


Indian mocktail made with guava and spicesSpicy Guava Cooler | Peru Panna | Guava Panna Recipe


Guava Panna is an Indian summer drink made with guava and spices.

Recipe Type:  Drink
Cuisine:            Indian
Prep Time:     10 minutes
Cook time:     0 minutes
Yield:                Serves 3

Ingredients:


3 glasses Guava Juice or juice of 1 large Guava
1 tsp Red Chilli Powder
2 tsp roasted Cumin Powder
1 tsp Black Salt
2-3 tsp Sugar or Jaggery (Add sugar only if juice is not sweet enough)
Squeeze of lime (Optional)
Crushed mint leaves (Optional)

Method:


1. Mix all the ingredients in a large jug.
2. Adjust the spices and sugar according to your taste.
3. Chill and serve.


Indian mocktail made with guava and spices


If you liked this, you may also like:

rose yogurt beverage smoothie curd flavored drink Indian Punjabi
Rose Lassi

Panaka
Aam Panna
Raw Mango Panna
Read more ...

Instant Mango Pickle [Video Recipe]


Quick and easy to make Indian mango pickle with video instructions. Simple and flavorful!

Instant Indian spicy pickle made with raw mangoes recipe

It's been long that we spoke about Mangoes. They are making their presence felt in the market and it's time to start giving them the attention they deserve.

I am all for enjoying the succulent sweet ripe fruit as is. But I LOVE cooking with the tart raw mango. The tartness of the raw mango is so different from that of lime or tamarind. I just find it fresher, don't you? It may be my love for the fruit talking.

Read more ...

Ram Navami special Panaka recipe | Panakam Recipe


Panaka or Panakam is a traditional Indian cooler popular during Summers in South India!!


Traditional South Indian summer cooler


Traditional South Indian summer cooler

Panaka or Panakam is a traditional Indian cooler popular during Summers in South India. It is served along with spice buttermilk and a lentil salad called kosambri during the festival of Ram Navami.

This was one of those posts with a writer's block. I did not want to write about the weather, I did not want to write about my memories or childhood. Nothing special happened this week either. So I was kind of lost.  I started to write, then deleted it at least 3 times!!

So now I have settled on just talking about the ingredients that make up this mocktail like drink called Panaka.

Traditional South Indian summer cooler

Traditional South Indian summer cooler

Panaka is sweet, mildly tangy, warm with the ginger, earthy because of tulsi or holy basil and fragrant from the freshly ground cardamom. It is very similar to a lemonade but with different proportions.

One of the main ingredients in Panaka is jaggery. Jaggery is unrefined cane sugar. The closest in texture is Muscovado sugar. Jaggery has a complex flavor profile as compared to regular refined sugar. The darker the jaggery, the more complex the flavor. Dark jaggery is the least refined and purified, while the yellow jaggery has less impurities. With people looking for more organic stuff these days, the organic brown jaggery has become very popular.

Ginger is added for its health benefits. It is known to cleanse the body of toxins. If you cannot find fresh ginger, you can substitute it with dry ginger powder. Ginger also adds an earthy flavor to the drink while making it mildly hot.

Traditional South Indian summer cooler


Cardamom is the main flavoring agent. I used fresh cardamom pods that I lightly crushed with a mortar and pestle. You can use a store bought cardamom powder, but I highly recommend making it yourself.

Tulsi or Holy Basil leaves are added for health reasons again. I did not have any readily available, so I substituted with home grown mint leaves.

The squirt of lime is optional, but recommended. Some folks use a tamarind juice instead. You can add any souring agent, just don't let it get overpowering. Panaka is much milder than a regular lemonade. The predominant flavor is from jaggery and the cardamom.

Traditional South Indian summer cooler


Traditional South Indian summer cooler


If you made this recipe, let me know! Leave a comment here or on Facebook, tag your tweet with @oneteaspoonlife on Twitter and don't forget to tag your photo #oneteaspoonoflife on Instagram. You can also email me at onetspoflife@gmail.com. I'd love to see what you are upto. 

If you like this recipe, do not forget to share it with your friends and family! 

You can follow One Teaspoon Of Life on Facebook, Twitter, Instagram, Pinterest and Google+ or you can subscribe to One Teaspoon Of Life and receive all the latest updated via Email

---------------------------------------------------------------------------------------------------------------------------

Ram Navami special Panaka recipe | Panakam Recipe


Traditional South Indian summer coolerPanaka or Panakam is a traditional Indian cooler popular during Summers in South India.

Recipe Type:  Beverage
Cuisine:            South Indian
Prep Time:     10 minutes
Cook time:     0 minutes
Yield:                Serves 6-8

Ingredients:


1.5 litres Water
1.5 cups powdered Jaggery
6-8 green Cardamoms
2-3 Tbsp grated Ginger
1 lime
A handful of Tulsi or Mint leaves

Method:


Crush the seeds of the cardamom until fine.
Add the cardamom, grated ginger, powdered jaggery and juice of 1 lime to the water and stir until the jaggery has dissolved.
Add the tulsi leaves or mint leaves.
Refrigerate until serving.
Strain before serving. Serve chilled


Traditional South Indian summer cooler


If you liked this, you may also like:

rose yogurt beverage smoothie curd flavored drink Indian Punjabi
Rose Lassi

Pudina Majjige Soda
Pudina lemon juice limonana chia basil seeds sabze ka beej
Mint Lime Cooler
Read more ...

Onion Stalk and Brinjal Curry | Eerulli Kaavu Badnekai Palya


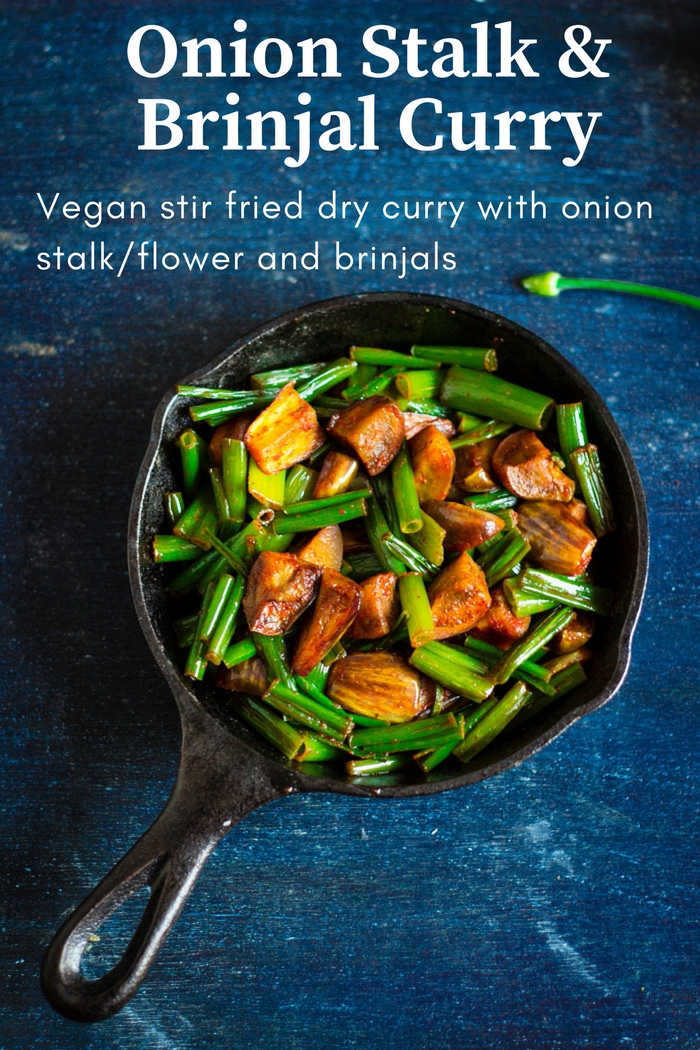
Simple vegan stir fried dry curry made from Onion stalks and brinjals. Ready in less than 30 minutes!

Vegan stir fried dry curry made of fresh onion stalks or flowers and brinjals, Eerulli huvina palya, eerulli kaavu palya


Vegan stir fried dry curry made of fresh onion stalks or flowers and brinjals, Eerulli huvina palya, eerulli kaavu palya

Ever walked by a vegetable aisle wondering what "that" vegetable is and how one cooks it? 

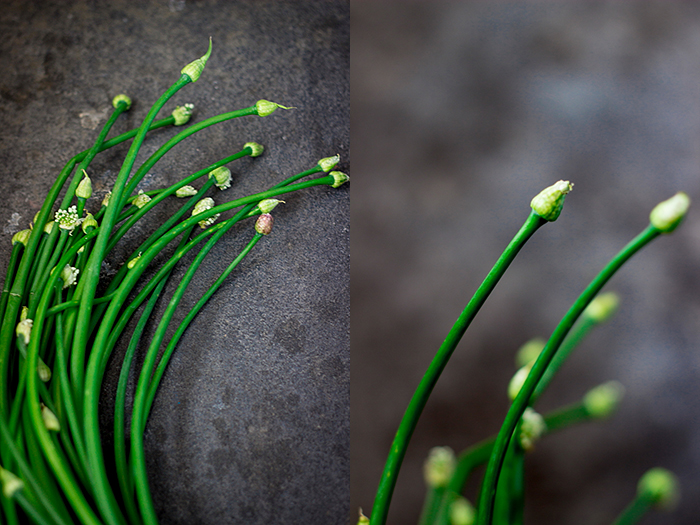
Happened to me a few years ago when I saw a lot of vegetable carts on the road side stocking up on green stalks with a tiny white bulb at the end. Curiosity made me ask what it was. And I was introduced to the "Onion Stalk / Flower" or "Eerulli Kaavu"/"Eerulli Hoovu" as they call it in Bangalore. The green stalk is the onion plant with the flower at the end. If you have never seen it or tasted it, the closest thing to it would be green onions or spring onion stalks. It is never sold with the onion bulb attached. While sometimes, it can be pungent like onions, most often it is simply sweet and crunchy.

Vegan stir fried dry curry made of fresh onion stalks or flowers and brinjals, Eerulli huvina palya, eerulli kaavu palya

Vegan stir fried dry curry made of fresh onion stalks or flowers and brinjals, Eerulli huvina palya, eerulli kaavu palya

And the good news is, it is right now in season in Bangalore and you will see it stocked all over the local markets and supermarkets. 

I love cooking with seasonal vegetables. They taste so much better and are fresher than those annually available veggies. The first time I saw these onion stalks, I asked the vendor how one cooks it. He told me just stir fry it in oil and add spices. That's it! His recipe was so simple and it was tasty, if you like onions a lot. I do like onions, but I'm not a fan of a bowl full of them. So I went looking for different ways to cook it and I chanced upon this recipe by Chandrima . She added stir fried brinjals or eggplant to the fried onion stalks. Adding brinjal added some substance and texture to this dry curry. 

These onion stalks are versatile, I added them to "Thalipeeth" and it tasted really nice. I made this same curry with potatoes instead of brinjals and everyone loved that too. 

Vegan stir fried dry curry made of fresh onion stalks or flowers and brinjals, Eerulli huvina palya, eerulli kaavu palya

Vegan stir fried dry curry made of fresh onion stalks or flowers and brinjals, Eerulli huvina palya, eerulli kaavu palya


If you made this recipe, let me know! Leave a comment here or on Facebook, tag your tweet with @oneteaspoonlife on Twitter and don't forget to tag your photo #oneteaspoonoflife on Instagram. You can also email me at onetspoflife@gmail.com. I'd love to see what you are upto. 

If you like this recipe, do not forget to share it with your friends and family! 

You can follow One Teaspoon Of Life on Facebook, Twitter, Instagram, Pinterest and Google+ or you can subscribe to One Teaspoon Of Life and receive all the latest updated via Email

If you liked this, you may also like:


---------------------------------------------------------------------------------------------------------------------------


Onion Stalk and Brinjal Curry | Eerulli Kaavu Badnekai Palya


Vegan stir fried dry curry made of fresh onion stalks and brinjals. 
Vegan stir fried dry curry made of fresh onion stalks or flowers and brinjals, Eerulli huvina palya, eerulli kaavu palya


Recipe Type:  Side
Cuisine:            Indian
Prep Time:     10 minutes
Cook time:     15 minutes
Yield:                Serves 2


Ingredients:


8-10 Onion Stalks
5-6 small Brinjals
4 tsp Oil
1 tsp Turmeric Powder
1 tsp Red Chilli Powder
Salt to taste

Method:


Chop the brinjal into chunks.
Heat 2 tsp oil in a kadhai / pan.
Add the brinjals and cook on low heat until done.
Add in a little salt, turmeric powder and stir fry for 1 minute.
Chop the onion stalks into 1" pieces.
Heat the remaining oil in the kadhai and add the onion stalks.
Add salt and turmeric powder. Mix well.
Cover and cook until done. I left mine crunchy, cook longer for a softer texture.
Add in the cooked brinjal and red chilli powder.
Mix well and stir fry for 2-3 minutes.
Serve hot with rice and dal or with rotis.

Vegan stir fried dry curry made of fresh onion stalks or flowers and brinjals, Eerulli huvina palya, eerulli kaavu palya

Read more ...

Vegetable Souvlaki Rolls


Vegetable Souvlaki Rolls - Greek flavored grilled vegetables and a zingy yogurt sauce, rolled in your favorite bread

How to make vegetable souvlaki recipe, souvlaki gyros, vegetarian souvlaki recipe, vegan souvlaki recipe at www.oneteaspoonoflife.com


I've been MIA for a while, I know. I've been super busy at work doing things I never did UNTIL last week. I was super excited and tired at the same time. I'm used to sitting uber low in my chair at office, getting up only to get a cup of tea or a drink of water (which is a lot of trips). But last week was nothing like that, I got to go to out in the field. So the trips for water and tea were much longer than in office and all that walking around and working from 8am to 7pm kinda got me tired and in no mood to blog.

The little free time I had, I was planning a vacation. It's been 6 months since our amazing last vacation to Cambodia and I'm now ready for more. I'm thinking July, but the weather is kind of deterring me right now. The monsoons will be full swing in India and surroundings, so it has been quite a challenge to pick a destination as of now. I am all open to suggestions, if you have any.

While I don't have a vacation planned, I definitely have a recipe planned for you. I have a wonderful super healthy recipe - Vegetable Souvlaki Rolls that will take you to Greece, at least temporarily. Souvlaki is generally grilled meat with a few vegetables, but I tell you, you are missing nothing when you go all veggies. It is healthy and so quick to make. And so colorful, don't you think so?

How to make vegetable souvlaki recipe, souvlaki gyros, vegetarian souvlaki recipe, vegan souvlaki recipe at www.oneteaspoonoflife.com


I thought about calling it Grilled Vegetable Rolls, but Souvlaki sounded so fancy and the marinade had oregano and Olive Oil, so Souvlaki it was!! The recipe isn't even really a recipe, all you need to do is dice vegetables, the more variety you have, the better. And I would say use all the colors you can get, a bright vibrant dish has more takers. Once you are done dicing, marinate the vegetables in good quality extra virgin olive oil, garlic paste, lime juice, oregano, salt and pepper. Leave it aside for 30 minutes, while you make the yogurt sauce to go with it.

Just whisk together yogurt, salt and pepper. I made the saucy zingy by adding the marinade leftover at the bottom of the bowl after the vegetables were grilled. It made the sauce taste all Greek... Grill the vegetables until they are slightly soft and they develop a char.

You can eat the Vegetable Souvlaki just like this, dip the vegetables in that zingy Yogurt sauce and you have a cool and refreshing meal right there. But I love rolls!! So does Raj. I went all Indian and used Naan bread for the rolls, you can be traditional and use Pita. I upped the healthiness by adding a simple salad of julienne cabbage and coriander leaves. Veggie Power!! Then put the Souvlaki and drizzle the yogurt sauce, roll the bread and your Vegetable Souvlaki Rolls are ready to eat.

How to make vegetable souvlaki recipe, souvlaki gyros, vegetarian souvlaki recipe, vegan souvlaki recipe at www.oneteaspoonoflife.com

How to make vegetable souvlaki recipe, souvlaki gyros, vegetarian souvlaki recipe, vegan souvlaki recipe at www.oneteaspoonoflife.com


If you made this recipe, let me know! Leave a comment here or on Facebook, tag your tweet with @oneteaspoonlife on Twitter and don't forget to tag your photo #oneteaspoonoflife on Instagram. You can also email me at onetspoflife@gmail.com. I'd love to see what you are upto. 

If you like this recipe, do not forget to share it with your friends and family! 

You can follow One Teaspoon Of Life is there on Facebook, Twitter, Instagram, Pinterest and Google+ or you can subscribe to One Teaspoon Of Life and receive all the latest updated via Email (How convenient!!)


If you liked this, you may also like:


Vegetable Souvlaki Rolls


How to make vegetable souvlaki recipe, souvlaki gyros, vegetarian souvlaki recipe, vegan souvlaki recipe at www.oneteaspoonoflife.comVegetable Souvlaki rolls are Greek flavored Pita/Naan bread rolls with grilled vegetables and a yogurt sauce. 

Recipe Type:  Main
Cuisine:            Greek
Prep Time:     30 minutes
Cook time:     30 minutes
Yield:                Makes 4 Rolls


Ingredients:


For the Vegetable Souvlaki:


1 Zucchini
0.5 Green Pepper / Capsicum
0.5 Yellow Pepper / Capsicum
0.5 Red Pepper / Capsicum
1 small Onion
2 Tbsp extra virgin Olive Oil
1.5 tsp dried Oregano
1 tsp Garlic paste
Juice of half a lime
Salt to taste
Pepper to taste

For the Yogurt Sauce:


1 cup thick Yogurt
Salt to taste
Pepper to taste
2 Tbsp Marinade

For Assembling the Vegetable Souvlaki Rolls:


Naan bread or Pita bread
1 cup julienne Cabbage
1 Tbsp chopped Coriander leaves
Salt to taste

Method:


To make the Vegetable Souvlaki:


Mix together the extra virgin olive oil, garlic paste, oregano, lime juice, salt and pepper to make the marinade.
Dice the vegetables into chunks and mix them in with the marinade. Keep aside for 15-30 minutes.
If using bamboo skewers, soak them in water until ready to grill to prevent the skewers from burning later.
Skewer the vegetables, mixing and matching as you please.
Heat a grill pan and when hot, place the skewers. You can grill these on charcoal or in the oven too.
Once one side is charred, flip the skewers until the other side is done too.
Remove from heat when done and keep aside.


To make the Yogurt Sauce:


Whisk together the yogurt, salt and pepper.
Spoon in the marinade leftover at the bottom of the bowl after grilling the vegetables, and mix well.


To assemble the Vegetable Souvlaki Rolls:


Heat the naan or pita bread.
Mix together the cabbage and coriander leaves with salt and add some over the bread.
Remove the vegetables from the skewer and place over the cabbage.
Drizzle some yogurt sauce and roll the bread.


How to make vegetable souvlaki recipe, souvlaki gyros, vegetarian souvlaki recipe, vegan souvlaki recipe at www.oneteaspoonoflife.com


Read more ...