Showing posts with label Breakfast. Show all posts

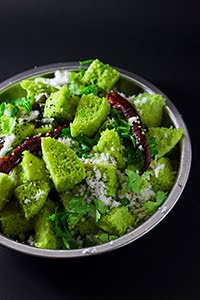
Instant Cucumber Dhokla | Cucumber Chickpea Steamed Cakes


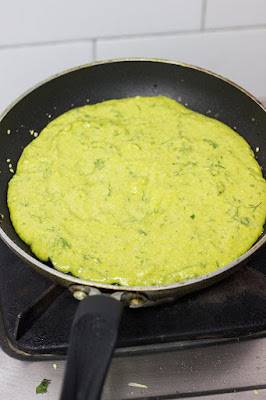
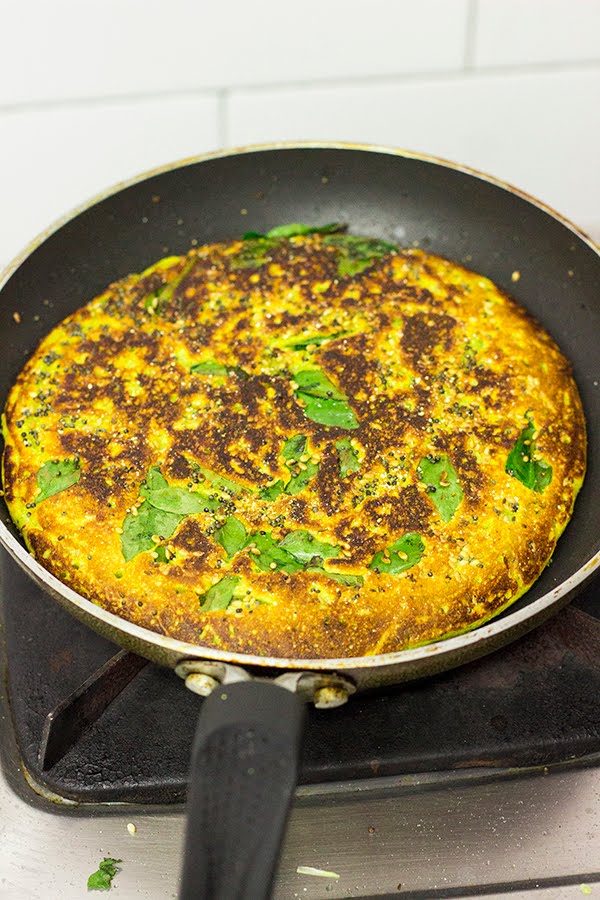
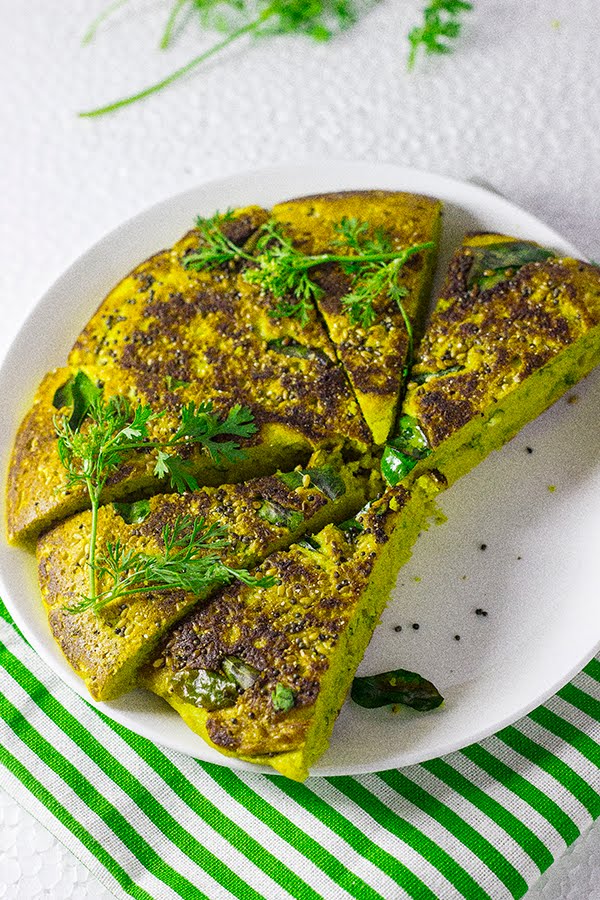
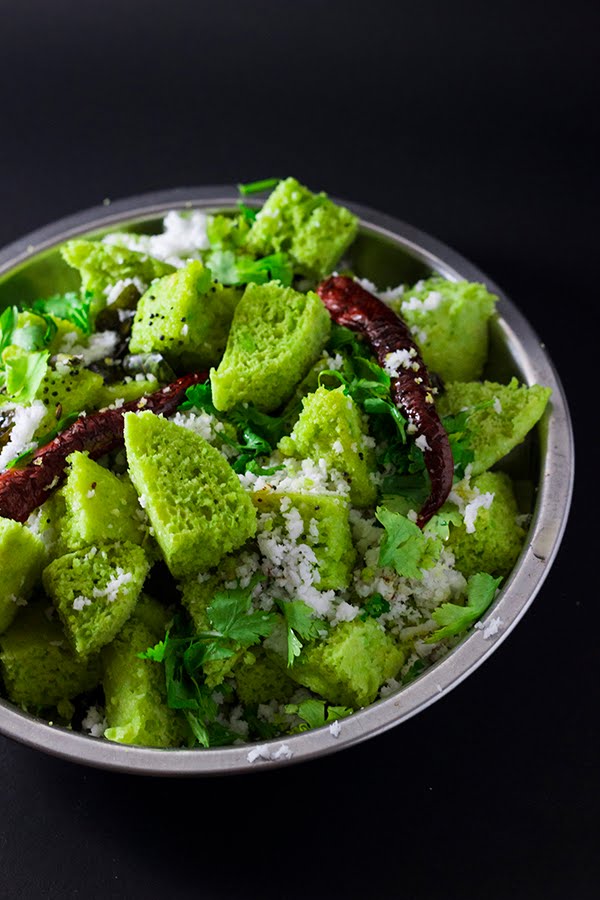
Cucumber Dhokla is a savory steamed chickpea flour and semolina cake with added cucumber that is perfect for breakfast or as a tea time healthy snack.

How to make instant khira dhokla recipe at www.oneteaspoonoflife.com


I've been missing around the blog for 2 weeks now. I've been busy cooking up an amazing spread that will soon appear here. Now that's what I would love to say. But that's not what I have been doing. Everyone at home has been under the weather and what I have been cooking has been just soup and regular dal rice. and my taste buds totally ditched me too. I could barely make out what the food tasted like. 

I can finally taste the food and I'm SOO happy about it. 

I've recently gotten obsessed with one particular fruit and one particular vegetable - the water melon and the cucumber. And today is all about the Cucumber. I've been adding cucumber to almost everything - Upma, Akki Rotti, Sambar etc. What I love about adding Cucumber to any dish is that it ends up giving it that moistness along with a very subtle flavor. That is exactly what it did to this Dhokla.

How to make instant khira dhokla recipe at www.oneteaspoonoflife.com


Cucumber Dhokla is my own concoction that is inspired from the traditional Dhokla. I recently had a cucumber pakoda (Seriously!!!) and it tasted good (Really!). I never would have guessed that cucumber that besan (chickpea flour or gram flour) would go so well together. So when I set out to make dhokla this time, I got a little creative, I added in a grated cucumber and a bit more. I also added in a little bit of grated carrot, a few frozen peas, and finely chopped capsicum. Although technically, I should be calling it a mix vegetable Dhokla. I prefer calling it the Cucumber Dhokla, cause that flavor it had in the end was all fresh Cucumber.

You can skip the remaining vegetables and just stick to the cucumber and it will taste just as good - I promise.


Instant Cucumber Dhokla | Cucumber Chickpea Steamed Cakes


How to make instant khira dhokla recipe at www.oneteaspoonoflife.comInstant Cucumber Dhokla is a savory steamed chickpea flour and semolina cake with added cucumber that is perfect for breakfast or as a tea time healthy snack.

Recipe Type:  Breakfast
Cuisine:            Indian
Prep Time:     15 minutes
Cook time:     20 minutes
Yield:                Serves 2-3

Ingredients:


For the Cucumber Dhokla:


3/4 cup Chickpea Flour or Besan
3/4 cup Semolina or Rava
1 grated Cucumber
1 tsp of Ginger- Garlic Paste
1 crushed Green Chilli
1 grated Carrot (Optional)
1 Tbsp Green Peas (Optional)
2 Tbsp chopped Capsicum
1.5 tsp Fruit Salt or Eno
1/4 tsp Asafoetida or Hing
2 Tbsp Yogurt or Curd
1 cup Water
Salt to taste
Oil to grease the steamer

For the Tempering:


3-4 tsp Oil
1 tsp Mustard Seeds
8-10 Curry Leaves
1-2 tsp of Lemon juice
1/2 tsp of Sugar or Jaggery

For Garnish:


2 Tbsp fresh grated Coconut
2 Tbsp finely chopped Coriander leaves

Method:


Preparing the Steamer:


1. You can steam in an Idli steamer or a pressure cooker or a large deep saucepan. If using a pressure cooker, remove the whistle.
2. Pour around 2-3 cups of water in it and cover it and allow the water to come to a boil.
3. Place a small upturned  flat bottomed bowl or vessel at the bottom of the steamer.

Preparing the Dhokla:


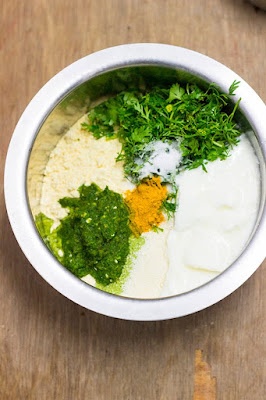
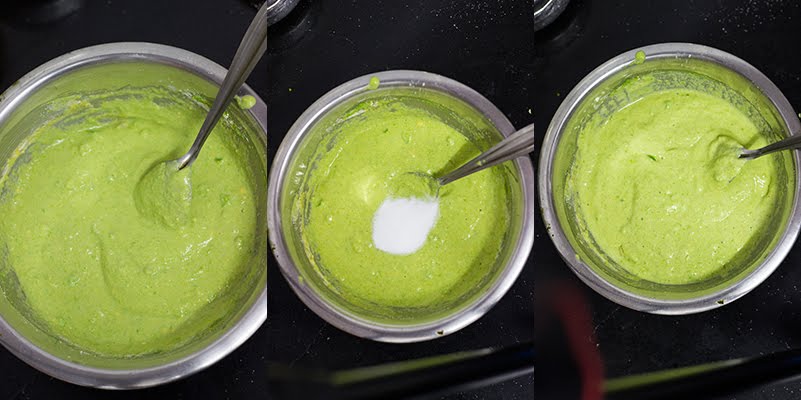
4. Mix together all the ingredients except the water, oil and the fruit salt.
5. Add 3/4 cup of water and mix well. Add more water if required. The dough should be thick yet pourable. Almost like a cake or idli batter. The quantity of water depends on the type of rava and besan.
6. Once your steamer is ready, grease a flat vessel that will fit into your steamer with oil. 
7. Now add the fruit salt and the remaining water and mix well. The fruit salt should cause the batter to start foaming and become light.
8. Pour the batter into the greased vessel and place it in the steamer.
9. Allow it to steam for 10-15 minutes. Depending on the depth of your vessel, you may need to keep it in longer. The Cucumber Dhokla is ready when a skewer or knife comes out clean.
10. Allow it to cook and remove from the vessel. 

Preparing the Tempering:

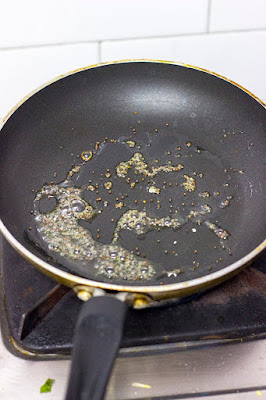
11. Heat oil in a pan and add the mustard seeds.
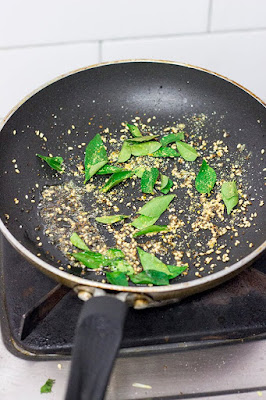
12. Once the seeds splutter, add the curry leaves.
13. Remove it off the heat and add the sugar and the lemon juice.

Assembling the Cucumber Dhokla:

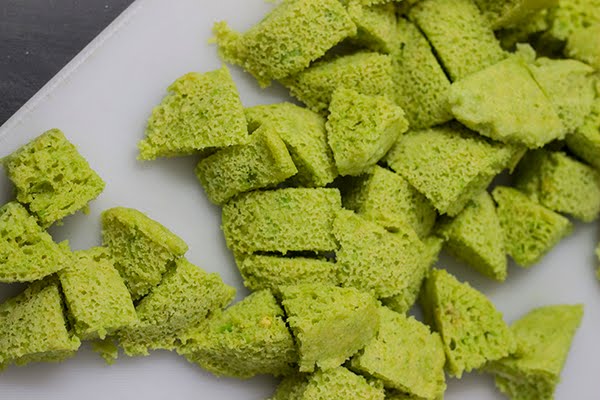
14. Cut into bite sized pieces.
15. Pour the tempering over the Cucumber Dhokla.
16. Garnish with the coconut and the coriander.
17. Serve warm with coriander chutney or sweet and spicy yogurt.



Read more ...

Gojju Avalakki | Tamarind Beaten Rice


gojju puliogare puliyogare avalakki tamarind beaten rice khatta poha


Some things get better with time - wine, cheese, wounds are some. I am inclined towards believing this Gojju Avalakki is one of them too. 

I made it for breakfast yesterday, and I thought it was good. But was it good enough to surpass all those Drafts I have and immediately make it to the blog? I wasn't so sure. May be it could wait a week? This was the first time I made it. I've eaten it before but never cooked it myself, so I overestimated the quantity and made enough for breakfast and more. So when I had my 5pm hunger pangs, I took it out of the fridge and microwaved it. One spoon down and I was thinking, this is good... Second spoon and I was like this IS GOOD and I have to take photos before I finish this entire bowl.

gojju puliogare puliyogare avalakki tamarind beaten rice khatta poha

Then it was a rush to catch the last few rays of natural light and no time to think about composition or background or anything, just click click click and hope they turned out good enough. I'm happy with the clicks. 

Gojju Avalakki or Huli Avalakki is a simple and quick dish from Karnataka that is made with beaten rice or poha or avalakki and tamarind. It is flavored with Sambar or Rasam powder. 

I searched online for recipes and found so many different versions. A lot of them powdered the beaten rice and somehow that did not appeal to me. I like the texture of the beaten rice flakes, so I skipped that step. A lot of the recipes also used both rasam and sambar powders, so did I since I had both at home. You can use either one or both depending what is stocked in your house. I used store bought ready made powders. 

gojju puliogare puliyogare avalakki tamarind beaten rice khatta poha

There were many complicated recipes, but I made my own that is extremely simple. All you need to do is squeeze out the juice of tamarind and add all spices to it. Add it to the tempering and then add washed beaten rice to it. Very simple and easy - I guarentee you.

Have I mentioned how much I love fresh coconut? I love to garnish anything and everything with coconut. I was super generous with it, I definitely used 1-2 Tbsp more that what I have in the recipe, but I listed down what any normal person without my fetish for coconut would add. I always believe the more the coconut the tastier the dish. I even used coconut oil. 

I have mentioned 2 Tbsp for peanuts too, but then you can go all NUTS over peanuts and add more. 

gojju puliogare puliyogare avalakki tamarind beaten rice khatta poha


Gojju Avalakki | Tamarind Beaten Rice


gojju puliogare puliyogare avalakki tamarind beaten rice khatta poha
Gojju Avalakki or Huli Avalakki is a simple and quick dish from Karnataka that is made with beaten rice or poha or avalakki and tamarind. It is flavored with Sambar or Rasam powder. 

Recipe Type:  Breakfast
Cuisine:            South Indian
Prep Time:     15 minutes
Cook time:      15 minutes
Yield:                 Serves 3


Ingredients:

3 cups of Beaten Rice or Poha or Avalakki (Use the medium or thick variety, not the paper thin one)
1/2 cup warm Water
1 big lemon sized ball of Tamarind
2 tsp of Rasam Powder
1 tsp of Sambar Powder (Replace with 1 tsp of Rasam powder if you don't have sambar powder)
1 tsp of Red Chilli Powder (Optional)
A pinch of Hing or Asafoetida
2 Tbsp of Peanuts
2 Tbsp of fresh grated Coconut
3-4 tsp of Coconut Oil or vegetable oil
1 tsp of Mustard seeds
1 sprig of Curry Leaves
1 tsp of Jaggery Powder or Sugar
2 Tbsp of finely chopped Coriander Leaves
Salt to taste

Method:

Method:


Soak the tamarind in 1/2 cup warm water and keep it aside for 10 mins.
Squeeze the tamarind pulp into the water to get tamarind juice.
Add the rasam powder, sambar powder, hing, red chilli powder, jaggery powder or sugar and 1 tsp of salt and mix well.
Wash the avalakki twice and drain the water completely and keep aside.
Heat oil in a kadhai or pan and add the mustard seeds.
Once they splutter, add the peanuts and fry until the peanuts turn slightly dark.
Add the curry leaves and the tamarind juice.
Cook on medium low heat for 2-3 minutes.
Add the avalakki and mix well. Add salt as needed.
Cook for 4-5 minutes on low heat.
Garnish with fresh grated coconut and finely chopped coriander leaves and serve.
Read more ...

Breakfast Bruschetta Duo - Tomato & Onion and Avocado & Olives


Vegan Tomato Onion Avocado Olive Mint Coriander Italian Sourdough Baguette Bread Sandwich

Saturday.... Finally... What is your PERFECT Saturday?? Leave me a comment...

Mine is waking up late, a hearty breakfast, a good cup of ginger tea and the morning paper. 

I got all of that today with these Breakfast Bruschetta Duo. Soooo PERFECT....

Vegan Tomato Onion Avocado Olive Mint Coriander Italian Sourdough Baguette Bread Sandwich

I like to keep breakfasts as simple as possible. Usually, breakfast is my simplest meal of the day. On weekdays, I snooze and snooze my alarm until I have to wake up ( Don't you just love the SNOOZE button? ) and then there is a whirlwind in the house as I rush around to get ready to go to work. I definitely don't have time for a fancy breakfast. So something quick that I can whip up is the solution. 

I make BreakFEAST only on weekends. But after an extremely hectic week, I really did not fancy any more hard work on Saturday!!! So today was the day to keep it simple yet hearty and TASTY.

Vegan Tomato Onion Avocado Olive Mint Coriander Italian Sourdough Baguette Bread Sandwich

I woke up at 9 and bam! it's 9.30 and I was plonked on the bean bag in front of the TV watching the latest season of MasterChef and eating my oh-so-easy-yet-delicious Breakfast Bruschetta Duo. Don't they look AMAZING?? 

I love love LOVE colorful food. Makes me wanna eat it immediately. I had to control my urge, until I could finish taking photos. The idea of Breakfast Bruschetta Duo is inspired from the Goddess of TV cooking - Nigella. I did not follow her exact recipe though, I changed the topping to my liking.

Vegan Tomato Onion Avocado Olive Mint Coriander Italian Sourdough Baguette Bread Sandwich

I could have these Bruschetta for lunch, snacks, tea and dinner... I could pretty much have them all day long. I cannot get enough of them. So FRESH and so EASY. All I had to do was find the freshest sourdough bread in the supermarket yesterday. And today morning, all I did was chop chop chop as Raj made ginger tea for us. And then just toast the bread, top with the chopped veggies, sprinkle salt and pepper... a drizzle of some extra virgin Olive Oil and we're DONE.

I don't know anything that could be easier than that and look that GOOD. Do you?

I used a sourdough loaf. I've made these before using Baguette. They taste just as good with regular bread. Use what you have and it'll still taste just as delicious. 

Vegan Tomato Onion Avocado Olive Mint Coriander Italian Sourdough Baguette Bread Sandwich

The first Bruschetta is topped with chopped fresh tomato, red onion and coriander, while the second one is topped with sliced avocado, green olives and fresh mint leaves. I also made a third kind - the Tomato and Avocado one. But they were eaten before I could get a single photo. You see, it started out as may be 3 bruschettas per person. Then Raj saw them and I saw them and both were tempted, so we were like let's just make it even so we both get 2 of both. By the time we were done with 3, we wanted MORE.... So he was on toasting bread duty, while I went to chopping. And we had a third variety. 

Vegan Tomato Onion Avocado Olive Mint Coriander Italian Sourdough Baguette Bread Sandwich

That's the best thing about these Breakfast Bruschettas, you can mix and match the toppings. Put what you love. Someday, when I have all the time in the world, I'm gonna make my other favorite bruschetta - the caramelized onion and mushroom one... yummmm.... Until then, back to the simple life.

Vegan Tomato Onion Avocado Olive Mint Coriander Italian Sourdough Baguette Bread Sandwich


Breakfast Bruschetta Duo - Tomato & Onion and Avocado & Olives


Vegan Tomato Onion Avocado Olive Mint Coriander Italian Sourdough Baguette Bread Sandwich
A duo of bruschettas perfect for breakfast - one topped with tomato and onion and the other with avocado and olives. 

Recipe Type:  Breakfast
Cuisine:         International
Prep Time:    20 minutes
Cook time:     5 minutes
Yield:             8 Bruschettas

Ingredients:


1 Sourdough loaf or Baguette
1 large Tomato
1 red Onion
A handful of fresh Coriander leaves
1/2 Avocado
8-10 green Olives
A handful of fresh Mint leaves
2 Tbsp of extra virgin Olive Oil
Salt
Freshly cracked Pepper
Lime

Method:


Slice the bread into thick slices.
Toast them on a griddle or tava for 3-4 mins. Remove onto a plate.
In the meanwhile, finely chop the tomato, red onion and coriander leaves and mix well.
Slice the avocado and the green olives.
Top half the slices with the tomato mix and half with the avocado and olives one. Add Mint to the avocado and olive bruschetta.
Sprinkle salt and pepper.
Drizzle the olive oil. Squeeze lime on the bruschetta.
Serve immediately.


Read more ...

Churmuri Soosla | Puffed Rice Breakfast

I LOVE ___ This is usually how I start my posts. You must think I love practically everything that I can eat (i.e. Vegetarian). I do hate some food. Well, hate may be a strong word. More like dislike. And I dislike something that more than half the world loves - Breakfast Cereals.

susla oggarne murmura kadle puri puffed rice breakfast vegan


I'll replay a usual breakfast discussion between me and my hubby dearest Raj.

Me (crestfallen, yet optimistically looking for answers) - "I don't know what to make for breakfast"

Raj - "Don't worry, lets eat cornflakes"

Me - "Nooooo... I'll make something, give me 10 minutes"

He loves it, I dislike it (at least the ones currently in the market). All those cereal lovers out there, please FORGIVE me for my next statement. I somehow feel Cereals are just loaded with sugar and offer nothing health wise. And I'm somehow not a big fan of sweet breakfast.

So this promise of 10 minutes isn't always upheld, but then, he's out there with the Newspaper and doesn't really keep track of time.

Isn't a girl allowed plus or minus 10 minutes? I'm sure she is. This wonderfully light breakfast of puffed rice (Churmuri or murmura or mandakki or kadle puri. Whew! that's a lot of "or"s) is done and on your plate in less than 20 minutes. And no - I'm not exaggerating at all.

susla oggarne murmura kadle puri puffed rice breakfast vegan


Puffed rice is exactly what the name says - it is puffed up rice. It is basically Rice Popcorn (more like popRICE). There are varieties in it - salted and unsalted. They both differ slightly texture wise. I've always used the salted variety.

This Churmuri Soosla as I call it, it my goto breakfast when I'm short of time. It's light, quick and it has the sweetness from the onions, tartness from the tomatoes and the lime, the heat from the green chillies and freshness from the coriander leaves. Basic spices like cumin seeds (jeera) and turmeric (haldi) just make it all the more delicious. You can skip the roasted gram, but I highly recommend it. If you cannot find it, I'd say try replacing it with powdered roasted peanuts and that should do.


Churmuri Soosla | Puffed Rice Breakfast


susla oggarne murmura kadle puri puffed rice breakfast veganA light South Indian breakfast made with puffed rice.

Recipe Type:  Breakfast
Cuisine:          South Indian
Prep Time:     10 minutes
Cook time:     15 minutes
Yield:              Serves 2-3

Ingredients:


150 gms of Puffed Rice / Churmuri
1 small Onion
1 medium sized Tomato
1-2 Green Chillies
1/2 tsp Turmeric Powder
1/2 Lemon / Lime
1/3 cup of Roasted Gram / Puthani
3 tsp of Oil
1 tsp of Cumin seeds
6-8 Curry leaves
1 Tbsp of finely chopped Coriander leaves
Salt to taste

Method:


Heat oil in a pan or kadhai.
Add the cumin seeds and allow them to brown slightly.
Add finely chopped onions, curry leaves and slit green chillies. Cook until the onions turn translucent.
Add chopped tomatoes and fry them for around 2 minutes until the tomatoes are soft.
Add the turmeric powder and mix well.
Wash the puffed rice and squeeze out the water.
Add to the pan and mix well.
Now add salt and lemon juice.
Grind the roasted gram into a fine powder and add to the pan. Mix well.
Garnish with coriander leaves and serve.
Read more ...

Matar Dhokla


Steamed Gujarati Green peas Snacks

Dhokla is a steamed savory cake that is a favorite of western India. They are usually made of semolina and chickpea flour. They are light and fluffy and taste delicious with a tangy green chutney.

I never knew there was so much variety in something this simple.

I was browsing through cookery books in the library when I glanced upon Tarla Dalal’s Non-Fried Snacks. I’m a big fan of non-fried snacks. The book has some good recipes, majorly it has different types of dhoklas and muthias. And this Matar Dhokla or Green Peas Dhokla was a featured recipe.

It is still just as simple to make as the regular dhokla, but now has the added goodness of green peas. You can use either fresh or frozen peas, according to what you have available. 

The addition of peas gives it that lovely vibrant green colour and the slight sweetness of peas. 

Some people like to soak their dhoklas in a diluted syrup of sugar and lime juice, while some enjoy it with creamy yogurt. It tastes awesome with both.

Step-by-step Instructions:

Steamed Gujarati Green peas Snacks

1) Puree the green peas with a little water.

Steamed Gujarati Green peas Snacks

2) Mix together the chickpea flour, semolina, pea puree, salt, ginger- chilli paste, yogurt and salt into a smooth batter.
3) Now add the fruit salt or eno to  the batter. Pour the remaining water over it and mix well. It should start getting frothy.

Steamed Gujarati Green peas Snacks

4) Grease a shallow vessel that fits inside the steamer and add the batter to it.
5) Place the vessel in the steamer and steam on medium flame for 12-15 mins. Insert a knife in the middle and if it comes out clean, it is done.

Steamed Gujarati Green peas Snacks

6) Turn off the stove and allow it to rest for around 2-4 mins.
7) Then remove slowly and cut into desired shape.

Steamed Gujarati Green peas Snacks

8) Heat the oil in a pan and add the mustard seeds.
9) Once they splutter, add the curry leaves and chilli and fry for 20-30 seconds.
10) Pour over this tempering on the dhoklas. 
11) Garnish with the fresh coconut and the coriander leaves. I also sprinkled a few pomegranate seeds to add some freshness.


Matar Dhokla

Steamed Gujarati Green peas Snacks

Steamed savory cake made with green peas and chickpea flour.

Recipe Type:  Snacks
Cuisine:          Indian / Gujarati
Prep Time:     15 minutes
Cook time:     30 minutes
Yield:              Serves 3-4

Ingredients:

Dhokla


1 cup Fresh or Frozen Green Peas
1.5 cups of Chickpea Flour / Besan
4 Tbsp Fine Semoline / Chiroti Rava
1 tsp of Ginger-Green Chilli Paste
2 Tbsp of Yogurt / Dahi
1/2 cup of Water
1.5 tsp Fruit Salt (Eno)
2 tsp of Oil for greasing
Salt to taste

Tempering


4 tsp of Oil
½ tsp of Mustard Seeds
10-15 Curry Leaves
1-2 Slit Green / Red Chillies

Garnish


2-3 Tbsp of grated Fresh Coconut
2 Tbsp finely chopped Coriander Leaves

Method:


Puree the green peas with a little water.
Mix together the chickpea flour, semolina, pea puree, salt, ginger- chilli paste, yogurt and salt into a smooth batter.
Prepare the steamer. (see note)
Now add the fruit salt or eno to  the batter. Pour the remaining water over it and mix well. It should start getting frothy.
Grease a shallow vessel that fits inside the steamer and add the batter to it.
Place the vessel in the steamer and steam on medium flame for 12-15 mins. Insert a knife in the middle and if it comes out clean, it is done.
Turn off the stove and allow it to rest for around 2-4 mins.
Then remove slowly and cut into desired shape.
Heat the oil in a pan and add the mustard seeds.
Once they splutter, add the curry leaves and chilli and fry for 20-30 seconds.
Pour over this tempering on the dhoklas. 
Garnish with the fresh coconut and the coriander leaves.

Notes:


STEAMER - I used an idli steamer. You can use a pressure cooker without the whistle or any deep saucepan with a lid. 
1) To prepare it, add around 2-3 cups of water to the steamer and cover and cook on high flame until the water boils. 
2) Next place a small flat bottomed vessel or bowl upside down in the steamer. The top of this bowl should be above the level of water.
3) Place the plate / vessel with the dhokla over this upturned bowl. The purpose of the bowl is that the dhokla plate / vessel does not touch the boiling water directly and is slightly higher than the water level.
Read more ...

Sabudana Chana Vada | Sago Pearls and Chickpea Patty [Vegan & GF]


Sabudana Chana Vada Sago Chickpea patty burger garbanzo fritter wada pakoda bonda sabakki

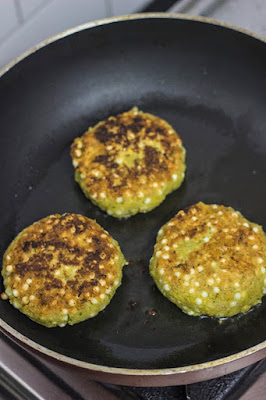
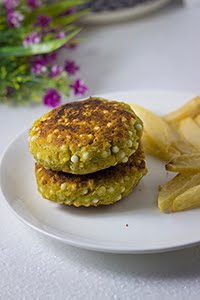
Sabudana vada is a traditional Maharastrian snack eaten during fasting / upvas. I was trying to avoid potatoes in my diet, so I replaced it with chickpeas or kabuli chana. This vada (patty) is a fusion between the traditional Sabudana Vada and the Middle Eastern Falafel. Although both the original snacks are deep fried, I shallow fried. 

Deep frying definitely makes them tastier, but then, doesn't it always do it? I watched an older episode of Eat Street on TV, where they showed a truck that deep fried Cup cakes. I wonder how that tastes. 

The chickpea in the vada increases the protein content of the vada. It also adds a nuttiness to it. You can eat it just as it is or add it in a burger like I did. I used the dry chickpeas that I soaked overnight, you can replace this with canned chickpeas as well. The sabudana or the sago pearls sold in supermarket are dried. They need to be soaked to fluff up and become spongy. You can add spices to enhance the flavor.

All the work in this recipe is during the preparation stage, the cooking is actually a no brainer - grind, mix and fry. That's it! 

This vada is vegan and gluten free.

Step by Step Instructions:

Sabudana Chana Vada Sago Chickpea patty burger garbanzo fritter wada pakoda bonda sabakkiSabudana Chana Vada Sago Chickpea patty burger garbanzo fritter wada pakoda bonda sabakki


1) Soak the kabuli chana or chickpeas in 3 cups of water overnight.Drain the water and keep aside.
You can use canned chickpeas as well. Skip the above steps if using canned chickpeas. Wash and drain the canned chickpeas. Use 2 cups of canned chickpeas.
2) Soak the sabudana in 2 cups of water and leave aside for 1/2 hour.Drain the water and cover and keep it aside for 2 hours.If you plan on making this for breakfast, then after draining the water, cover and keep it aside overnight.
3) Grind the peanuts into a coarse powder.
4) Grind together the chickpeas and green chillies coarsely.
5) Add the ground peanuts, sabudana, curry leaves, coriander leaves and salt and mix well.
6) Shape into patties / vadas.

Sabudana Chana Vada Sago Chickpea patty burger garbanzo fritter wada pakoda bonda sabakkiSabudana Chana Vada Sago Chickpea patty burger garbanzo fritter wada pakoda bonda sabakki

7) Heat around 2 Tbsp of oil in a shallow pan for shallow frying. You can decide to deep fry it too.
8) Once the oil is hot, add the vadas to the pan and cook on medium heat.
9) Flip the vadas when the first side is browned and cook it until the other side browned.
10) Serve hot with coriander chutney or ketchup.


Sabudana Chana Vada | Sago Pearls and Chickpea Patty


Sabudana Chana Vada Sago Chickpea patty burger garbanzo fritter wada pakoda bonda sabakki Pan fried patties/ vada made with sabudana (sago pearls) and kabuli chana (chickpeas). Vegan and gluten free.

Recipe Type:  Snacks /Breakfast
Cuisine:          Indian
Prep Time:     8 hours (Including soaking time) or 3 hours (If using canned chickpeas)
Cook time:     30 minutes
Yield:              7-8 vadas

Ingredients:


1 cup dry Kabuli Chana / Chickpeas
1.5 cups of dry Sabudana / Sago Pearls
1/2 cup of roasted Peanuts
1-2 Green Chillies
7-8 Curry Leaves
2 Tbsp of chopped Coriander Leaves
Salt
Water
Oil for frying

Method:


Soak the kabuli chana or chickpeas in 3 cups of water overnight.
Drain the water and keep aside.
You can use canned chickpeas as well. Skip the above steps if using canned chickpeas. Wash and drain the canned chickpeas. Use 2 cups of canned chickpeas.
Soak the sabudana in 2 cups of water and leave aside for 1/2 hour.
Drain the water and cover and keep it aside for 2 hours.
If you plan on making this for breakfast, then after draining the water, cover and keep it aside overnight.
Grind the peanuts into a coarse powder.
Grind together the chickpeas and green chillies coarsely.
Add the ground peanuts, sabudana, curry leaves, coriander leaves and salt and mix well.
Shape into patties / vadas.
Heat around 2 Tbsp of oil in a shallow pan for shallow frying. You can decide to deep fry it too.
Once the oil is hot, add the vadas to the pan and cook on medium heat.
Flip the vadas when the first side is browned and cook it until the other side browned.
Serve hot with coriander chutney or ketchup.
Read more ...

Kothimbir Vadi | Pan Fried Coriander and Chickpea Cake


Kothimbir Vadi Coriander Chickpea Cake cilantro garbanzo steamed baked savory maharastrian vada wada pancake vegan

A lot of my food cravings are thanks to the magazines I read. Recently, in one of them, there was this delicious looking Kothimbir Vadi or Coriander Vada photo. It had the traditional recipe following the photo where the vadas are deep fried after being steamed. I love deep fried vadas but they are a big bane to my weight loss program, so I try to modify the recipe to make it healthier.

Kothimbir Vadi Coriander Chickpea Cake cilantro garbanzo steamed baked savory maharastrian vada wada pancake vegan

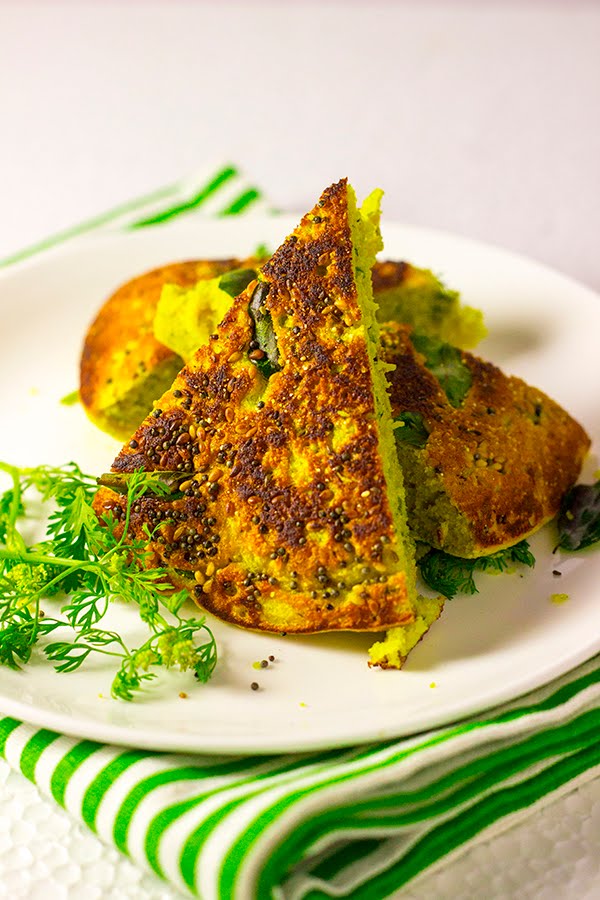
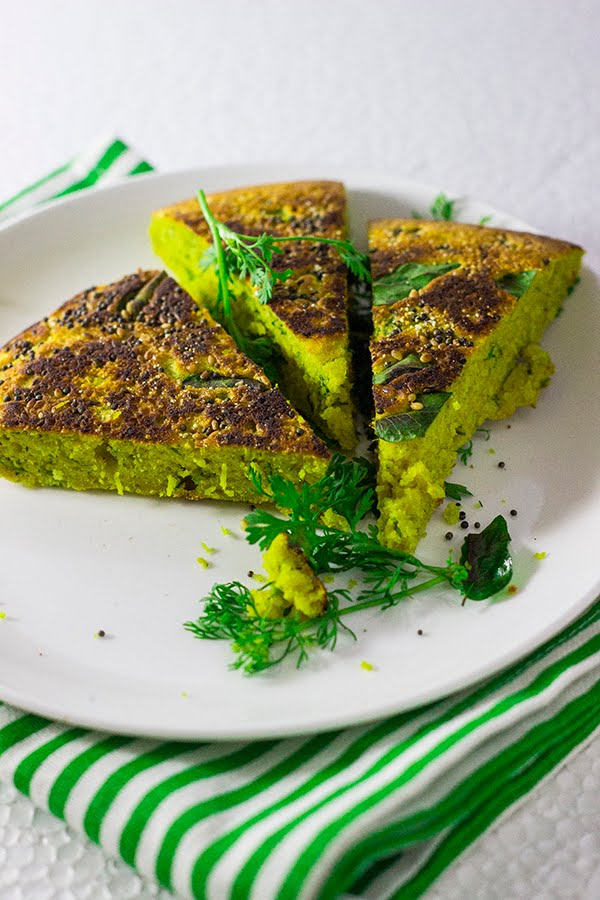
Recently, I had made the Gujrati Handvo which is a pan fried thick cake, very similar to the recipe in this post. Bells went off in my head! I could try the same with this kothimbir vadi. And to my delight, it turned out very well. Everyone loved it at home and they went missing in minutes.

It tastes the best with some coriander and mint chutney, but goes equally well with tomato ketchup. It is a very good option for a packed lunch as it carries well in boxes. It is versatile, you can have it for breakfast or as a tea time snack.

Step by Step recipe:

Kothimbir Vadi Coriander Chickpea Cake cilantro garbanzo steamed baked savory maharastrian vada wada pancake veganKothimbir Vadi Coriander Chickpea Cake cilantro garbanzo steamed baked savory maharastrian vada wada pancake veganKothimbir Vadi Coriander Chickpea Cake cilantro garbanzo steamed baked savory maharastrian vada wada pancake vegan

1) Blend the ginger, garlic,green chillies and half the coriander leaves into a paste along with a little water.
2) Add it to the chickpea flour along with the semolina, yogurt, coriander leaves, turmeric powder, salt and baking soda.
3) Add a little water to loosen the batter, I added around 1/4 cup.
4) Mix well and keep aside for 10-15

Kothimbir Vadi Coriander Chickpea Cake cilantro garbanzo steamed baked savory maharastrian vada wada pancake veganKothimbir Vadi Coriander Chickpea Cake cilantro garbanzo steamed baked savory maharastrian vada wada pancake vegan

5) Heat a small non stick pan or a kadhai.
6) Add around 2 tsp of oil to it.
7) Once the oil is hot, add the half the mustard seeds.
8) Once they splutter, add half the sesame seeds, half the carom seeds, half the asafoetida and half the curry leaves.

Kothimbir Vadi Coriander Chickpea Cake cilantro garbanzo steamed baked savory maharastrian vada wada pancake veganKothimbir Vadi Coriander Chickpea Cake cilantro garbanzo steamed baked savory maharastrian vada wada pancake vegan

9) Now pour in half the batter.
10) Cover and cook on low heat for around 10-12 mins.

Kothimbir Vadi Coriander Chickpea Cake cilantro garbanzo steamed baked savory maharastrian vada wada pancake vegan

11) Now with the help of 2 spatulas, carefully flip the thick pancake.

Kothimbir Vadi Coriander Chickpea Cake cilantro garbanzo steamed baked savory maharastrian vada wada pancake vegan

12) Allow it to cook until the second side browns.

Kothimbir Vadi Coriander Chickpea Cake cilantro garbanzo steamed baked savory maharastrian vada wada pancake vegan

13) Remove from heat and cut into pieces. Serve hot with chutney or ketchup.


Kothimbir Vadi Coriander Chickpea Cake cilantro garbanzo steamed baked savory maharastrian vada wada pancake vegan

Kothimbir Vadi


Pan Fried Coriander and Chickpea Cake.

Recipe Type:  Snacks
Cuisine:          Indian
Prep Time:     30 minutes
Cook time:     45 minutes
Yield:              6-8 servings

Ingredients:


2 cups Besan / Chickpea Flour
1/2 cup Fine Semolina / Chiroti Rava
1/2 cup Yogurt / Curd
1 cup chopped Coriander Leaves
3-4 cloves of Garlic
1" piece of Ginger
2-3 Green Chillies
1/2 tsp of Baking Soda
1 tsp of Carom seeds / Ajwain
2 tsp of Sesame seeds / Til
1 tsp of Mustard seeds
1/2 tsp of Asafoetida/ Hing
1 tsp of Turmeric Powder
2 sprigs of Curry Leaves
4-5 tsp of Oil
Salt to taste
Water

Method:


Blend the ginger, garlic,green chillies and half the coriander leaves into a paste along with a little water.
Add it to the chickpea flour along with the semolina, yogurt, coriander leaves, turmeric powder, salt and baking soda.
Add a little water to loosen the batter, I added around 1/4 cup.
Mix well and keep aside for 10-15 mins.
Heat a small non stick pan or a kadhai.
Add around 2 tsp of oil to it.
Once the oil is hot, add the half the mustard seeds.
Once they splutter, add half the sesame seeds, half the carom seeds, half the asafoetida and half the curry leaves.
Now pour in half the batter.
Cover and cook on low heat for around 10-12 mins.
Now with the help of 2 spatulas, carefully flip the thick pancake.
Allow it to cook until the second side browns.
Remove from heat and cut into pieces.
Serve hot with chutney or ketchup.


Read more ...

Menthe Pathrode | Methi Pathrode


I never knew gardening could be so much fun. My heart swells with pride every time a seed I sowed, breaks the mud barrier and rises up to face the earth. Those two little green leaves soaking in the sunlight, fill me with hope and love. Some of the easiest things to grow have never worked with me - tomatoes & chillies. For some reason these just refuse to bear fruit in my garden no matter what I do or how much nutrition I give them :( But there are some others which ask for nothing and just give give and give. Spinach is one of them and the other is Fenugreek or Methi or Menthe. I had my own fresh bunch of methi leaves, so I decided to make something special.


I love Pathrode. Traditionally, pathrode is made by rubbing a paste of rice, lentils, coconut and spices onto 
Colocasia leaves/ Kesavina ele, rolling and steaming them. Colocasia leaves are a little difficult to find in Bangalore, they are more common along the Konkan coast of India. In their absence, Methi makes for a good substitute. Here instead of rubbing the leaves with the spice paste, the leaves are chopped and added to the paste and steamed wrapped in banana leaves. If you cannot get banana leaf, do not worry, you can just just steam them in greased bowls.


Clockwise L-R: Ground rice, Spice paste, Steamed pathrode, Pathrode to be steamed


Once they are cooked and cooled, crumble them and stir fry with a tempering of mustard and curry leaves. And don't forget to garnish with desiccated fresh coconut.


Menthe Pathrode | Methi Pathrode


Methi PathrodeA traditional Mangalore snack made by steaming rice and fenugreek/methi leaves together with a spice paste

Recipe Type:  Snacks / Appetizer
Cuisine:          South Indian / Mangalorean
Prep Time:     8 Hours (Includes soaking of rice)
Cook time:     90 minutes
Yield:              3-4 Servings

Ingredients:

1/2 cup White Rice
1/2 cup Red Rice
2 cups chopped or 1 bunch Methi
2-3 Tbsp Coriander seeds
1 tsp Tamarind paste
3-4 dry Red Chillies (I used 3 red chillies and added 1/2 tsp of chilli powder)
1/2 tsp Jaggery (You can use sugar instead)
1/2 Tbsp Urad dal
2-3 cloves Garlic
4 Tbsp dessicated Coconut
2-3 Tbsp Water
3 tsp Oil
8-10 Curry leaves
1/2 tsp Mustard seeds
Salt

Method:


  • Soak rice overnight.
  • Drain out all the water and grind it. It should not be fine, it should remain coarse. It will attain a sticky consistency.
  • Dry roast the urad dal and coriander seeds until they are slightly brown.
  • Add 1 tsp of oil and fry the red chillies until they are crisp.
  • Allow them to cool and then grind into a powder along with the coriander seeds and urad dal.
  • Add the coconut, jaggery, garlic and tamarind and grind into a paste along with 1-2 tbsp of water.
  • Add this masala to the rice and mix well. Preferably just mix in the mixer.
  • Add salt.
  • Add the chopped methi leaves and mix well.
  • You now need to steam this.
  • If using a cooker or an idli steamer, allow it to heat up and produce steam before placing the pathrode in it.
  • It is better to steam it wrapped in banana leaves, but if you don't have it steam in bowls. Grease the bowls before you spoon in the pathrode.
  • Steam on medium flame for 18-20 mins until it is cooked. Depending on the size of the parcels or the bowl, you may need more or less time. If using banana leaf, the change in colour is a good indication that it is cooked.
  • Allow it to cool and then crumble it using your fingers.
  • Heat the remaining oil in a pan. Add the mustard seeds once the oil is hot.
  • After they splutter, add the curry leaves and pour this tempering into the crumbled pathrode.
  • Add dessicated fresh coconut and mix well.
  • Serve hot as a snack/ appetizer.
Read more ...