Baked Papdi | Carom and Cumin Crackers


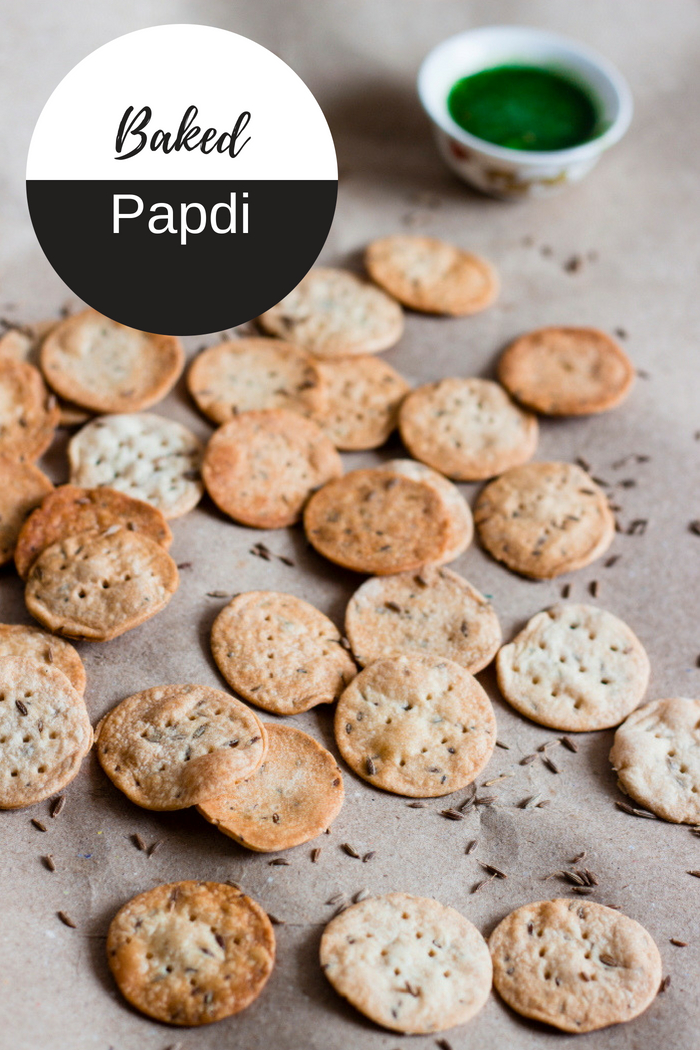
Guilt free baked popular Indian snack made from wholewheat flour and spices...

popular Indian snack - baked flat discs made of four and spices

Hiya folks!!

This is my first outstation post in a long time. As you must have read here, I am not in Bangalore, but at my in-laws place near Mangalore on the West Coast. I've been enjoying my time off but definitely not the heat. We can feel the full effect of summer out here. I'm just thankful for the bursts of rain at night which make it cool enough for me to sleep.

And of course, the ice creams!! If you have come to Mangalore and missed the ice creams here, you have missed out on a lot of deliciousness. From when I can remember, Mangalore had the best ice creams ever!! I never miss a chance to hog on those when I'm out here.

While the ice creams are tempting, this post is not even remotely related to ice creams, but I could really not get them out of my head. This post is about a much healthier snack - Papdis, that have been baked. Papdi are just flat discs made from wholewheat flour and flavored with some spices. Traditionally these are deep fried, but I baked them, just to keep them guilt free. And they tasted just as delicious, but now I can eat a lot more without worrying.

popular Indian snack - baked flat discs made of four and spices


Papdis can either be eaten as a tea time or mid day snack or can be added to other dishes, most popularly - Chaats. Chaat is a collection of Indian street food and many of them use papdis as the building blocks for them. They are the crunch element of the dish. They are added to Masala Puri, Papdi Chaat, Sev Puri etc. You can either make plain papdi, where you don't add any spices but personally I like ajwain (carrom) and jeera (cumin) a lot, so I never skip them out.

Also, I suggest get on to making papdis fast and log onto the blog soon. I have a new recipe planned that uses these crunchy papdis in a simple yet fabulously delicious dish.

Until then, goodbye from the West Coast!


popular Indian snack - baked flat discs made of four and spices

popular Indian snack - baked flat discs made of four and spices


popular Indian snack - baked flat discs made of four and spices

popular Indian snack - baked flat discs made of four and spices


popular Indian snack - baked flat discs made of four and spices

popular Indian snack - baked flat discs made of four and spices


If you made this recipe, let me know! Leave a comment here or on Facebook, tag your tweet with @oneteaspoonlife on Twitter and don't forget to tag your photo #oneteaspoonoflife on Instagram. You can also email me at onetspoflife@gmail.com. I'd love to see what you are upto. 

If you like this recipe, do not forget to share it with your friends and family! 


You can follow One Teaspoon Of Life on Facebook, Twitter, Instagram, Pinterest and Google+ or you can subscribe to One Teaspoon Of Life and receive all the latest updated via Email


---------------------------------------------------------------------------------------------------------------------------


Baked Papdi


popular Indian snack - baked flat discs made of four and spicesFlat round discs made with flour and spices, a popular vegan Indian snack.

Recipe Type:  Snacks
Cuisine:            Indian
Prep Time:     60 minutes
Cook time:     20 minutes
Total time:     80 minutes
Yield:                75 papdi


Ingredients:


0.5 cup Wholewheat Flour (50 gms)
0.5 cup All Purpose Flour (50 gms)
0.5 tsp Carrom seeds
0.5 tsp Cumin seeds
3 tsp Oil
0.5 tsp Salt
0.75 cup Water
Oil for brushing
Wholewheat flour for dusting

Method:


1. Take wholewheat flour, all purpose flour, carrom seeds and cumin seeds in a large bowl.
2. Add the oil and salt. You may need less/more salt, so add it little by little.
3. Start by adding half the water and knead the dough. Add more water by the spoonful as required.
4. The dough should have a stiff consistency.
5. Cover and rest the dough for 20-30 minutes.
6. Divide the dough into 2 balls and roll one of them out until it is 1 millimeter thick.
7. Use a cookie cutter to cut the dough into papdis. You can also use a bottle /box cover to do the same. 
8. Do the same with the second ball of dough.
9. Preheat the oven to 180 degree Celsius.
10. Grease a baking sheet and place the papdis on it in one layer. They should not overlap.
11. Using a fork, prick holes into the papdis.
12. Brush oil over them and bake until golden.
13. Mine took 14-15 minutes to bake. If the papdis are rolled out thin they will start burning, so I suggest checking on them after 12 minutes.
14. Allow the papdis to cool completely before storing in an air tight box.


popular Indian snack - baked flat discs made of four and spices


If you liked this, you may also like:

Baked whole wheat nachos
Baked Chapati Chips

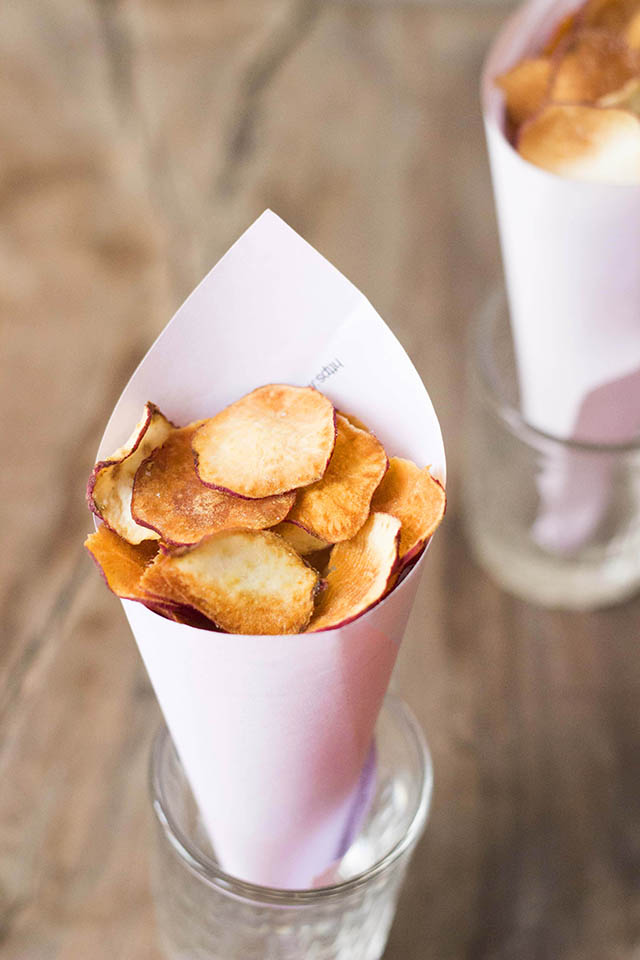
baked chips sweetpotato
Baked Sweetpotato Chips
How to make sun dried potato chips recipe, batate sandige recipe, aloogadde sandige recipe, aloo chips, aloo sandge recipe, how to make aloo papad recipe, potato chips recipe at www.oneteaspoonoflife.com
Sun dried Potato Chips
Read more ...

Mushroom Palak Recipe | Spinach Mushroom Curry


Delicious vegan spinach and mushroom curry that can be cooked up in no time at all. Healthy and tasty!

Mushrooms cooked in a vibrant spinach curry


How has the week been for you guys? Remember, when I told you how awesome last week was? Well, this week's been kinda okay in comparison. I've been alone at home this week with Raj on a long forced vacation. He had to take 2 weeks off work as per company policy and so he did. He is right now spending time with his parents and sis at their house and I'm all set to travel there today. So while he's away I've been watching endless reruns of "Small Wonder". You remember that show? The show is literally as old as me. But I'm loving the simplicity of the show and it is just plain cute. I miss TV of the 90's. Right now there is barely a series on TV that I can watch without wanting to flip channels.

Back to today's recipe. So when Raj is away or skipping a meal, I only have one thing on my mind - Mushrooms!! The man won't eat mushrooms and it is super boring when I have to cook different things for him and me. So I use the few chances I get to hoard up on Mushrooms. I love Mushrooms and I love Spinach, so what's not to love in a marriage of the two.

While I'm utterly disappointed with my photos for this recipe, I really could not seem to get a good delicious picture. I know I tried, I added props, removed props, changed backgrounds, but nothing seemed to work. But I did not want to keep myself from sharing this recipe, so forgive the photos. It tastes much better than it looks.


Mushrooms cooked in a vibrant spinach curry


So this is actually a very simple vegan curry. It starts by making the spinach puree. There are no filters in the photos, the spinach gravy is really that green. And I'm going to share my secret of How to make the vibrant green gravy

  • Never ever cover spinach while it is cooking or while it is hot. That's it! Cook spinach in a open pan always. 
  • First boil the water, add the spinach and let it bubble for 4-5 minutes, then remove the pan from heat and let it rest for another 3-4 minutes.
  • Drain out the spinach and dunk it immediately in cold water. The spinach has to cool down before you move on.
  • Once the spinach is at room temperature or cooler, puree it. You can add ginger, garlic or green chillies while pureeing the spinach.
  • Now you have the vibrant green gravy. You will be cooking the spinach again, along with the mushrooms in this case, keep in mind to never cover the spinach, else you will lose the vibrancy. 
  • Also to store this curry, allow the spinach to cool to room temperature before closing the pan/box, so that the color is retained.

Mushrooms cooked in a vibrant spinach curry

If you made this recipe, let me know! Leave a comment here or on Facebook, tag your tweet with @oneteaspoonlife on Twitter and don't forget to tag your photo #oneteaspoonoflife on Instagram. You can also email me at onetspoflife@gmail.com. I'd love to see what you are upto. 

If you like this recipe, do not forget to share it with your friends and family! 

You can follow One Teaspoon Of Life on Facebook, Twitter, Instagram, Pinterest and Google+ or you can subscribe to One Teaspoon Of Life and receive all the latest updated via Email


---------------------------------------------------------------------------------------------------------------------------


Mushroom Palak | Spinach Mushroom Curry


Mushrooms cooked in a vibrant spinach curryCurry made by cooking button mushrooms in a vibrant green spinach gravy.

Recipe Type:  Side
Cuisine:            Indian
Prep Time:     30 minutes
Cook time:     30 minutes
Total time:     60 minutes
Yield:                Serves 2


Ingredients:


150 gms Button Mushrooms
300 gms Spinach (3 cups)
2 tsp Oil
0.5 tsp Cumin seeds
1 tsp finely chopped Garlic
1-2 finely chopped Green Chillies
Salt to taste
Water as required

Method:


1. Heat water in a large pot or pan.
2. Once the water comes to a rolling boil, add washed spinach to it.
3. Allow the water to bubble for 4-5 minutes without covering the pan.
4. Remove from heat and allow to rest for 3-4 minutes.
5. Drain the spinach and submerge it in cold water or wash it with cold water until the spinach comes to room temperature or cooler.
6. Grind the spinach into a puree along with the garlic and green chillies. Keep aside.
7. Clean and halve the mushrooms.
8. Heat oil in a pan and add the mushrooms.
9. Add a little salt and allow the mushrooms to sweat.
10. Once the mushrooms are cooked to your liking, add the spinach puree and simmer for 5 minutes.
11. Add salt to taste and mix well.
12. Serve hot with phulka or rotis.
13. To store the Mushroom Palak for later and not lose the vibrant color of the spinach, allow the curry to cool to room temperature and only then cover it and store in fridge


Mushrooms cooked in a vibrant spinach curry


If you liked this, you may also like:

how to make chhole palak recipe, chana palak recipe, spinach and chickpea recipes, vegan curry recipe, vegan chickpea curry at www.oneteaspoonoflife.com
Chhole Palak

Palak Paneer
How to make vegan Goan Portuguese Mushroom Cafreal curry at www.oneteaspoonoflife.com
Mushroom Cafreal
Read more ...

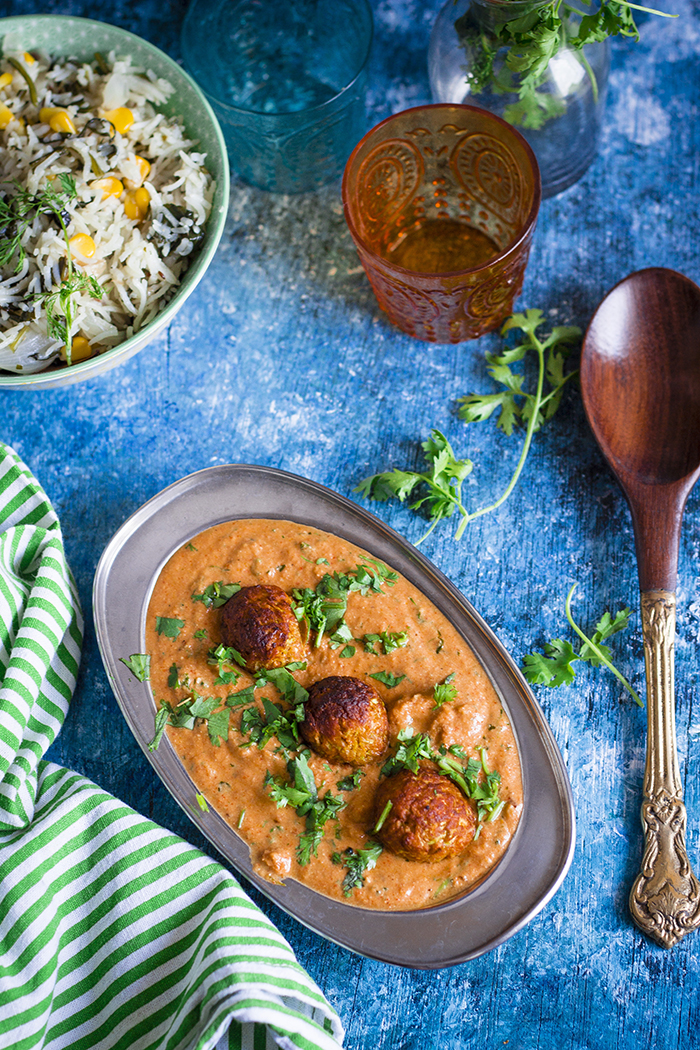
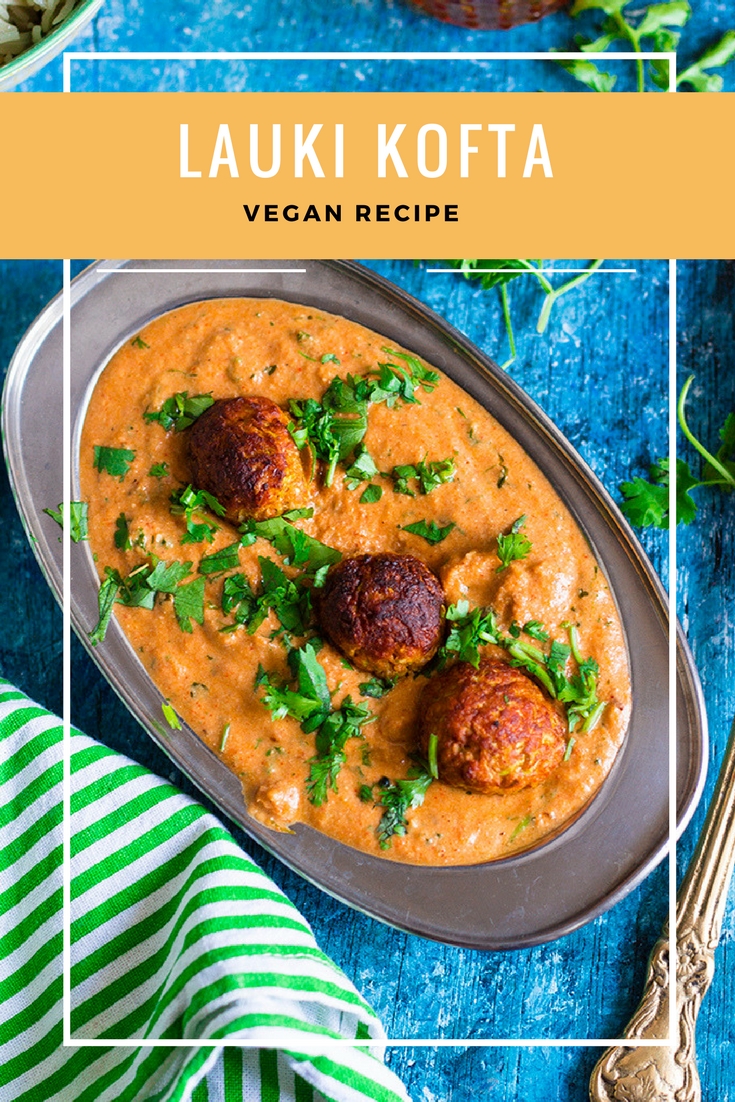
Lauki Kofta Recipe [Video]


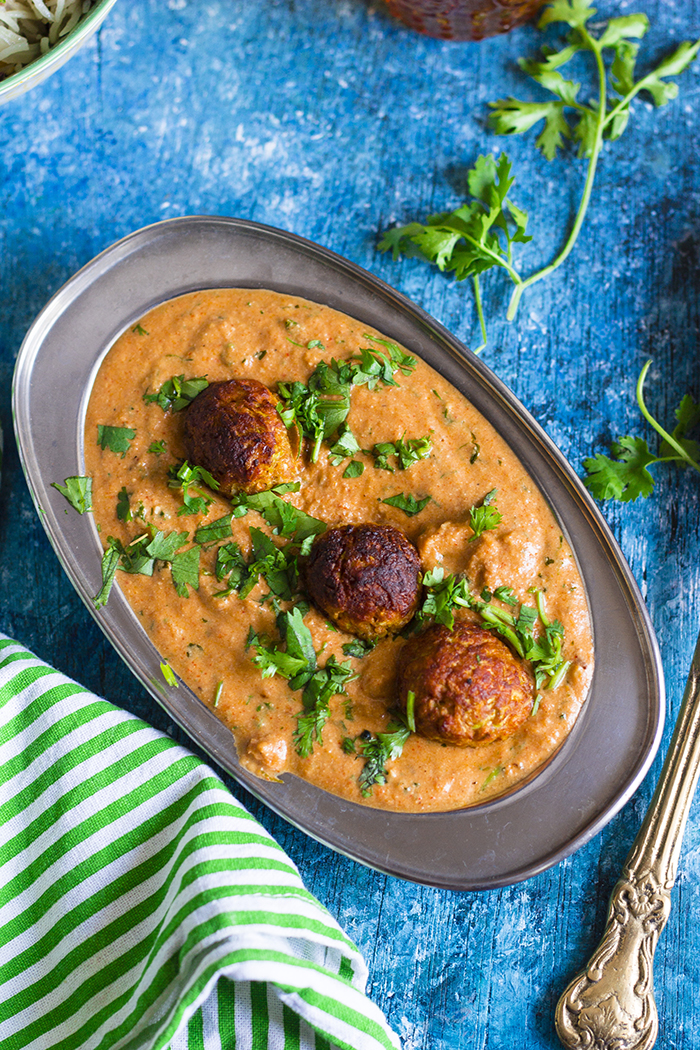
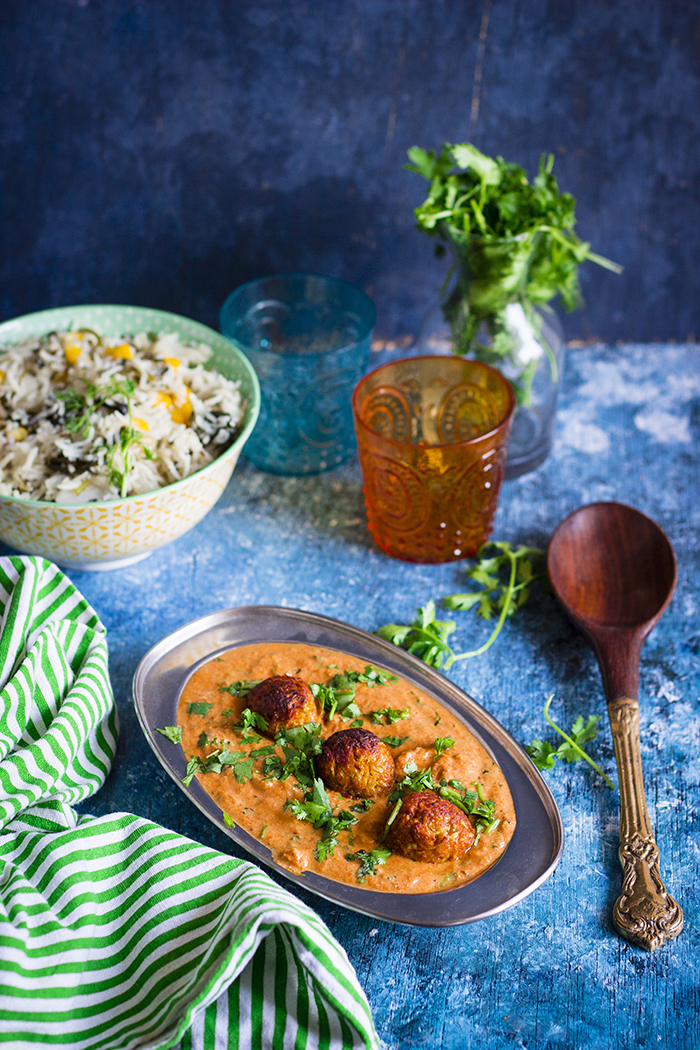
Dumpling made from Bottle Gourd and simmered in a creamy tomato and nut based vegan gravy. 

Bottle gourd dumplings in a tomato based gravy

So I've had a good last week. My bestie flew in on Sunday and we had one of those "Shop-till-you-drop" evenings, where we managed to fill her empty bag with all sorts of stuff and our tummies with some guilty goodness. She even got me juicy ripe sweet Mankurad Mangoes, a variety only available in Goa and cherished by all back home. I'd forgotten how delicious they tasted. Thank you Nammu!

And then there was a very slow monday at work, which was just fine with me.

Tuesday was Labor Day, so we took full advantage of the holiday and went out to meet more friends.

That's how the week looked like, meeting friends and eating delicious mangoes that reminded me of my seaside state of Goa. And yes, the rains!!!

It's also been raining heavily at nights with strong winds. The kind of nights you want to sit near the window with a cup of hot tea and feel the occasional spray of water on your face. I've been enjoying those.

A good mood also makes me want to cook good food. So I've been whipping up some delicious indulgent treats. Did you check out my last post on Eggless Blueberry Muffins? They are a winner and definitely not to be missed!

Bottle gourd dumplings in a tomato based gravy

While I was onto to cooking good food, I made this Lauki Kofta in a creamy spicy tomato based gravy too. One more into the indulgent basket. The only reason I feel a little less guilty about this one is because of the Bottle Gourd or Lauki - it is super healthy. Bottle Gourd is full of water and fiber and is perfect for summers. It is known to cool down your body plus help you reduce weight.

Although I know it is good for me, I am not particularly fond of bottle gourd. But this is one of the only ways I really enjoy it. It is also a sneaky way to make your kids / family eat this bundle of health.

Traditionally, koftas are dumplings made of meat, but this is a vegan version of the same. Also, koftas are usually deep fried. I tried to make it slightly healthier by shallow frying them in a Paddu Tava. You can bake them or shallow fry them in a regular pan too.

Bottle gourd dumplings in a tomato based gravy


Bottle gourd dumplings in a tomato based gravy
Shallow frying in a paddu tava

Bottle gourd dumplings in a tomato based gravy

If you made this recipe, let me know! Leave a comment here or on Facebook, tag your tweet with @oneteaspoonlife on Twitter and don't forget to tag your photo #oneteaspoonoflife on Instagram. You can also email me at onetspoflife@gmail.com. I'd love to see what you are upto. 

If you like this recipe, do not forget to share it with your friends and family! 

You can follow One Teaspoon Of Life on Facebook, Twitter, Instagram, Pinterest and Google+ or you can subscribe to One Teaspoon Of Life and receive all the latest updated via Email


Video Recipe


---------------------------------------------------------------------------------------------------------------------------

Lauki Kofta

Bottle gourd dumplings in a tomato based gravy
Bottle gourd dumplings in a tomato based gravy 

Recipe Type:  Main
Cuisine:          Indian
Prep Time:     30 minutes
Cook time:     45 minutes
Yield:              2-3 Servings

Ingredients:


For the Lauki Kofta


1 whole or 2.5 cups grated Lauki or Bottle gourd
3-4 Tbsp Besan / Gram flour
1 tsp Ginger Garlic Paste
1 tsp Red Chilli Powder
0.5 tsp Garam Masala
1 tsp Salt
Oil to fry the Kofta

For the Creamy Tomato Gravy


2 medium Onions
2 medium Tomatoes
0.25 cup Cashews
0.5 tsp Garam masala
1 tsp Red Chilli powder
1 tsp Cumin Seeds
2 Tbsp Oil
Salt to taste
Water as required
Coriander leaves for garnishing

Method:


To make the Lauki Kofta


1. Peel and grate the lauki. Squeeze out as much water as you can from the lauki and keep the water aside to use later.
2. Add the garam masala, red chilli powder, ginger-garlic paste, besan and salt.
3. Mix well. If the dough is too stiff, add a little of the water set aside. If the dough is too watery, add more besan.
4. Shape the dough into koftas.
5. At this point, you can choose how to cook the koftas, you can deep fry them until golden brown or shallow fry them. I fried in a paddu tava. You can use a regular pan to shallow fry, however you may need to flatten the koftas a little bit. You can also bake or deep fry the koftas.
6. Fry them until golden brown and crisp. Keep the kofta aside.

To make Creamy Tomato Gravy


7. Soak cashews in warm water and keep aside. You can use almonds instead.
8. Grind together the onion, tomato and ginger-garlic paste with a little water until smooth.
9. Heat oil in a pan and add the cumin seeds.
10. Once the cumin seeds brown, add the onion-tomato paste and cook on low flame until the water evaporates.
11. In the meanwhile, grind the cashew or almonds into a fine paste using a little water.
12. Once the gravy thickens, add the red chilli powder, garam masala and cashew paste. Mix well.
13. Add the squeezed lauki water as required. Add more water for a thinner consistency.
14. Add salt and mix well.
15. Simmer for 4-5 minutes on low heat.
16. Add the koftas and garnish with finely chopped coriander leaves.
17. Serve hot with rice or roti.


Bottle gourd dumplings in a tomato based gravy


    If you liked this, you may also like:


    baby corn masala tomato gravy north indian curry
    Babycorn Masala

    restaurant dal fry dhal tadka toor tuvar pigeon pea split lentil
    Dal Fry
    How to make gujarati undhiyo recipe at One Teaspoon Of Life. How to make vegan mix vegetable curry recipe at www.oneteaspoonoflife.com
    Gujrati Undhiyu
    Read more ...

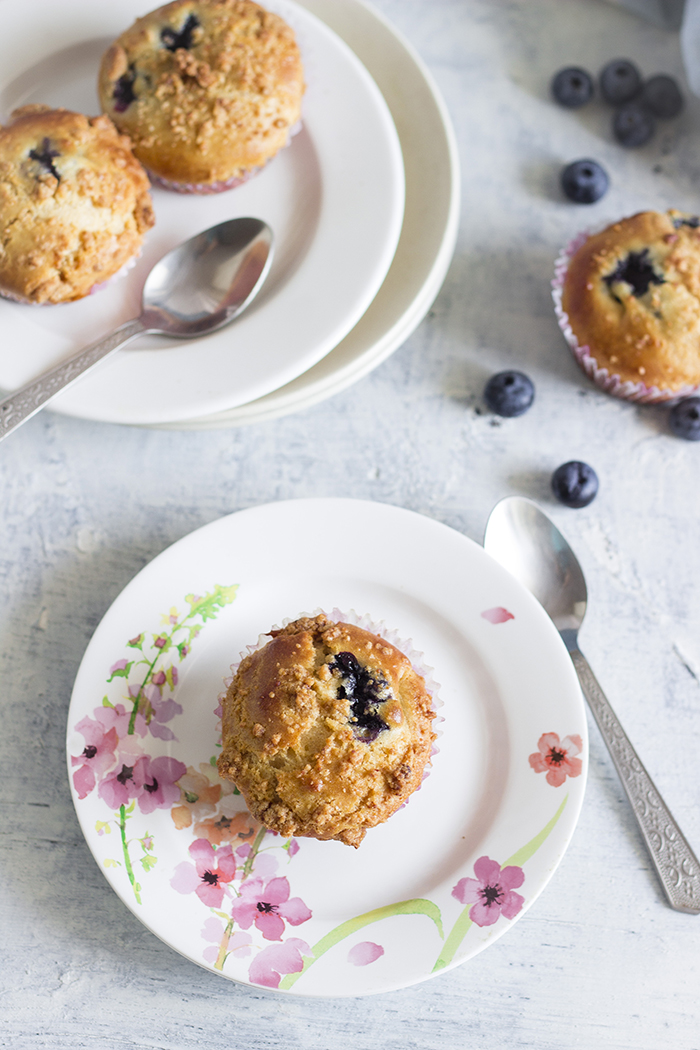
    Eggless Blueberry Muffin Recipe [Video Recipe]


    This is the ONLY recipe you will ever need for Eggless Blueberry Muffins! Moist, dense and basically just perfect, these Blueberry muffins will win over your loved ones.


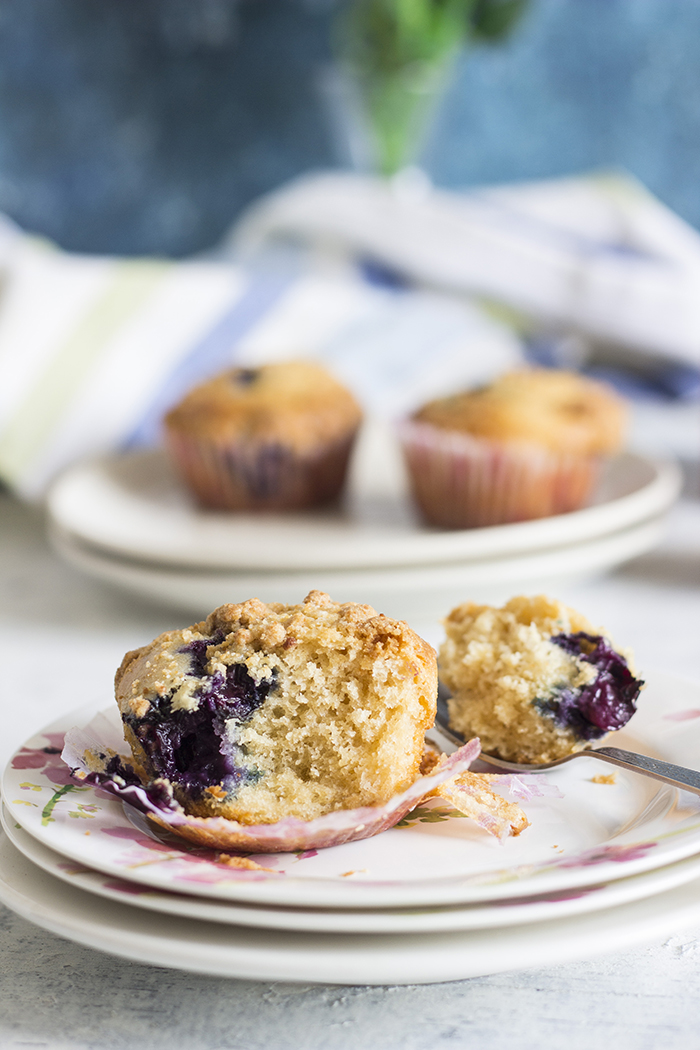
    Eggless Blueberry Muffins with streusel topping


    Eggless Blueberry Muffins with streusel topping


    These Blueberry Muffins got voted Number 1!!! Seriously!! By my biggest food critic, my sister.

    I've got a perfect sister. Don't get me wrong, I'm not calling her perfect (after all only one of us can be perfect, and I'm the "one"), but that she plays her part of being the older sister perfectly. When we were younger, the 5 year age gap between us seemed so wide. I annoyed her incessantly -  I followed her around, I copied her all the time. I had to have the exact same dress she bought. I loved using her stuff. I basically just wanted to be her. Then we moved to a phase where I think neither could stand the other very long - we had millions of wars, some could pass off as world wars. And then overnight, we became the best of friends. Just like that. We knew what the other was thinking, we did not even have to finish our sentences. The age gap seems non existent now. 

    Back to the perfect sister bit - she smothers me with love, she's always been protective but she's also annoyingly critical. So when she ate these Blueberry Muffins and she ranked number 1 on her list of favorite baked desserts, I was super excited. And I knew I had to share it with you guys. Wouldn't you want to try my number ONE Blueberry Muffins?

    Eggless Blueberry Muffins with streusel topping


    And it is the perfect season for these muffins. Spring is in the air, the freshest and plumpest of the berries are making their way to the markets.

    This isn't really a new recipe. I actually made these muffins for the first time 5 years ago and then for some reason, never made it again. I've had it on the blog for the past 5 years with sad little photos that did not make justice to the deliciousness of these Blueberry Muffins. Back then I had used canned blueberries as I could not find fresh ones. But this time it was all fresh fruit in my muffins. I have to say, the fresh ones triumph over the canned ones any day. I got these wonderful berries for a steal at Namdhari's Fresh. They were on sale for almost half the price. So if you are based in Bangalore, check out your closest outlet and they may still be available at that price. 


    Eggless Blueberry Muffins with streusel topping

    These muffins are vegetarian and are baked without using egg or egg replacer, yet they were moist and perfectly dense, just as muffins are meant to be. I topped these muffins with a simple streusel made from butter, vanilla, white and brown sugar which is totally optional but definitely recommended. 

    Also, in the video recipe, you will see a small difference in color in the wet ingredient mix, this is because I made these muffins twice, once with melted butter and once with oil. And I kinda messed up a part of my video when I made them with butter, so I had to re-shoot that part of the video when I remade the muffins with oil. You can use either butter or oil, but I highly recommend butter, as it adds more richness to the muffins.

    Psst... Want to know what else made it to Gee's list? This Persian Love Cake and then the Almond brownies.

    Eggless Blueberry Muffins with streusel topping


    One of my pics from 5 years ago

    If you made this recipe, let me know! Leave a comment here or on Facebook, tag your tweet with @oneteaspoonlife on Twitter and don't forget to tag your photo #oneteaspoonoflife on Instagram. You can also email me at onetspoflife@gmail.com. I'd love to see what you are upto. 

    If you like this recipe, do not forget to share it with your friends and family! 

    You can follow One Teaspoon Of Life on Facebook, Twitter, Instagram, Pinterest and Google+ or you can subscribe to One Teaspoon Of Life and receive all the latest updated via Email


    Video Recipe


    ---------------------------------------------------------------------------------------------------------------------------

    Blueberry Muffin


    Eggless Blueberry Muffins with streusel toppingEggless Blueberry muffins made using fresh blueberries and wholewheat flour. Streusel topped Blueberry muffins.

    Recipe Type:  Dessert / Breakfast
    Cuisine:          International
    Prep Time:     20 minutes
    Cook time:     25 minutes
    Yield:              12


    Ingredients:


    0.75 cup Blueberries (about 80 gms)
    0.75 cup All Purpose Flour (about 100 gms)
    0.75 cup Whole wheat flour (about 100 gms)
    0.75 cup Milk powder or Dairy whitener (about 80 gms)
    0.75 cup Powdered sugar (about 100 gms)
    75 gms Butter
    1.25 cups Milk (about 125-150 ml)
    2 tsp Baking powder (about 8 gms)
    0.5 tsp Baking soda
    1 tsp Vanilla extract
    1 tbsp Apple Cider Vinegar
    0.25 tsp Salt 
    3-4 tbsp Streusal topping


    To make Streusal Topping:


    2 tbsp Cold Butter
    1.5 tbsp All purpose Flour
    2 tsp Jaggery powder or Brown Sugar
    1 tsp Powdered Sugar

    Method:


    1. Mix together all purpose flour, whole wheat flour, milk powder, salt, baking powder and baking soda until combined. You can sift these too.
    2. Whisk together melted butter, vanilla extract and 0.5 cups milk until combined. Add the apple cider vinegar and mix well.
    3. Add in half the dry ingredients and whisk until combined without any lumps.
    4. Add in the remaining flour and milk and mix until you have a smooth batter.
    5. Fold in the blueberries.
    6. Line a muffin tray with paper liners.
    7. Spoon the batter into the liners until they are 3/4th full.
    8. If making the streusal, mix together cold butter, flour, brown sugar and powdered sugar with your fingers until it forms a coarse mixture like powdered cookies.
    9. Sprinkle the muffins with about 0.5 tsp each.
    10. Bake for 22-25 minutes in a preheated oven at 180 degree C
    11. Serve warm.


    P.S: This is a winner everywhere. It is a top post on IndiBlogger :)
    Top post on IndiBlogger, the biggest community of Indian Bloggers

    Eggless Blueberry Muffins with streusel topping


    If you liked this, you may also like:


    rose flavored almond ans semolina cake
    Persian Love Cake

    How to make eggless almond chocolate brownie recipe at www.oneteaspoonoflife.com
    Almond Chocolate Brownies
    Bangalore Iyengar bakery style honey cake
    Honey Cake
    Read more ...

    Homemade Yogurt Recipe | How to make thick creamy yoghurt at home [Video Recipe]


    Making yogurt at home is easier than you think. Follow the recipe to make thick creamy plain yogurt at home.

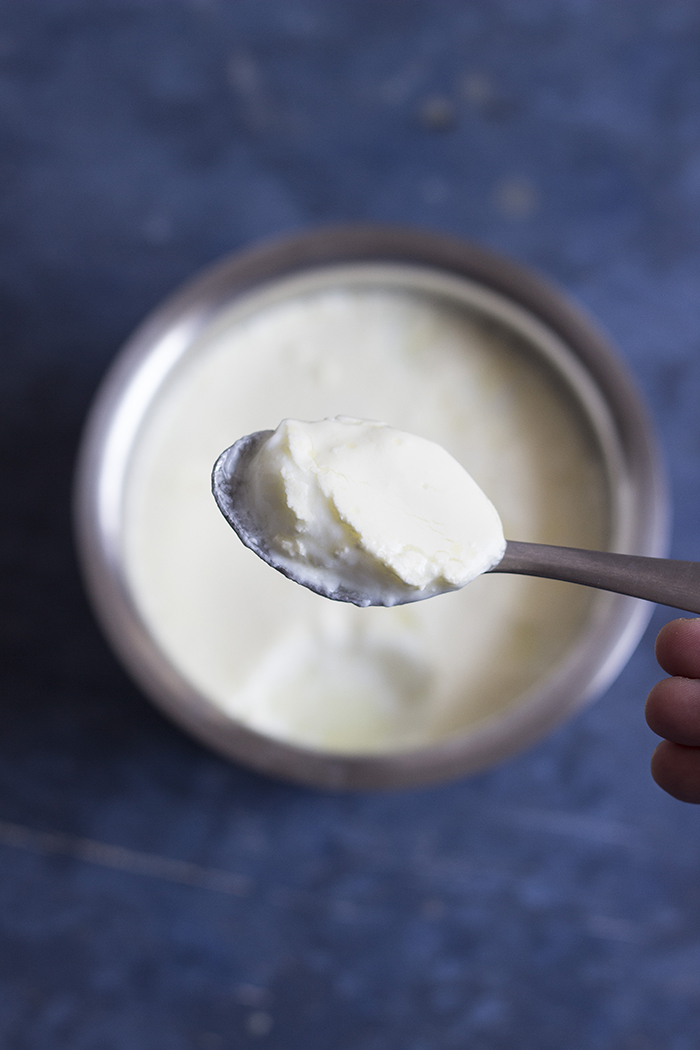
    Creamy thick homemade yoghurt or dahi


    Creamy thick homemade yoghurt or dahi


    Yogurt forms an integral part of the Indian cuisine. No meal in South India is complete without a serving of yogurt or curd rice and North Indians love for the Lassi needs no explanation. Yogurt is used in raita (salad with yogurt), kebabs, chaats, beverages, biryanis and so many more ways out here.

    Pretty much every house in India makes a fresh batch ever so often. I remember times, when if you wanted yogurt, you had to make it at home or borrow from your neighbor. It was never packaged and  promoted as a super food with so many health benefits. It is only in recent times, I see the market flooded with flavored yogurts. While flavored yogurts may be the go to snack over chips, it is still high in sugar and not as healthy as it is probably perceived to be. The best yogurt out there is still the humble plain one which is made with just milk and no other additives.

    A lot of people who think making yogurt is actually difficult, but believe me once you see the video below, you'll know it is the easiest thing in the world. And once you see how easy it is, you'll never (probably) buy another jar of yogurt, unless of course, you are using it as a starter or a mother.

    Advantages of making Yogurt at home:
    • Zero adulteration - Some manufacturers add corn starch to get a thicker yogurt. Making at home will ensure that the yogurt is pure.
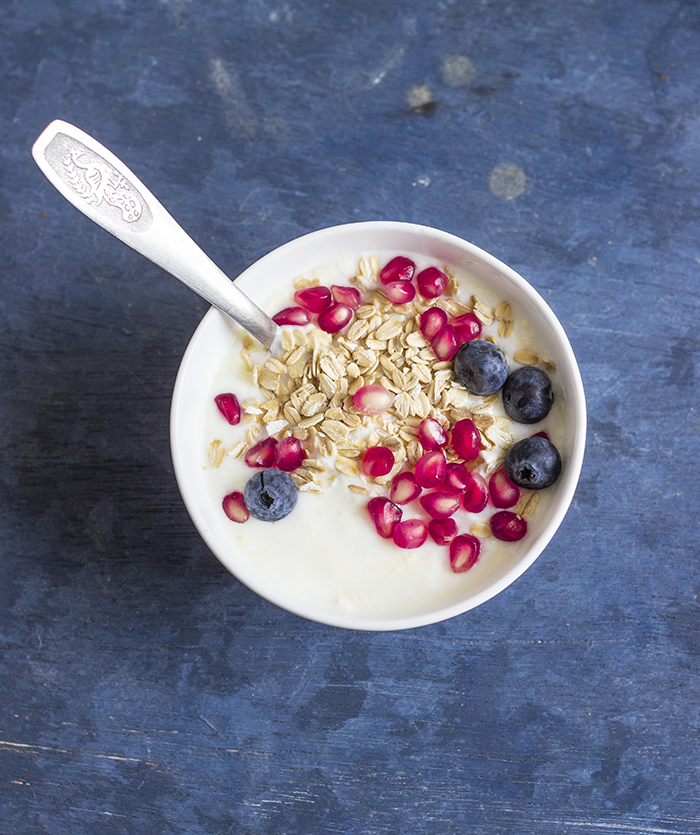
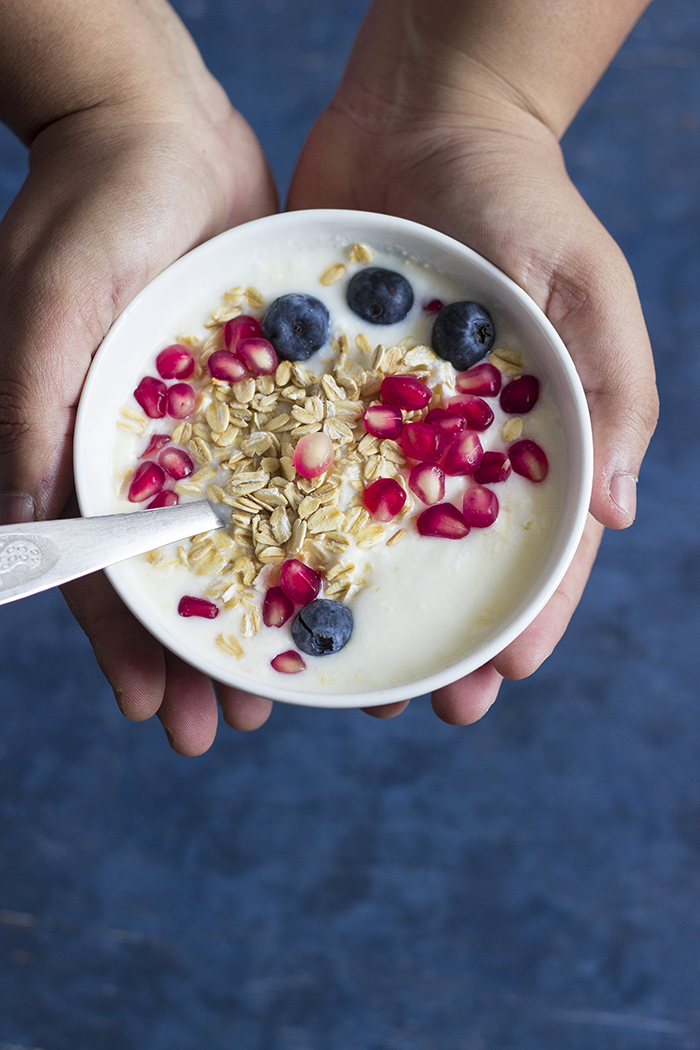
    • Less calories - Since plain yogurt, it just that, plain, it is up to you to decide if you want to add any sweetener and how much of it. Top it up with fresh fruits and a spoonful of honey for a healthy snack.
    • Pure happiness - Happiness on a job well done. A thick set yogurt can make you very very happy.
    • Less plastic for the world to digest - Make yogurt in stainless steel boxes or glass and rid the world of unnecessary small plastic jars.
    • No additives - A lot of manufacturers add food coloring to flavored yogurt to make it appealing. Zero coloring in the homemade version.
    • And so many more.... just google around
    Yogurt is a good source of probiotics that aid in digestion. It is considered to cool the body and hence, is extremely popular in a hot tropical region like India. It is full of calcium, vitamins and is a decent source of protein.

    Creamy thick homemade yoghurt or dahi


    Creamy thick homemade yoghurt or dahi

    Follow these tips to make the PERFECT batch of yogurt:
    • Use the best quality milk - Use milk with a higher fat content to make a thicker yogurt. I use milk with around 3% fat and I still get thick yogurt (not as thick as Greek yogurt).
    • Use a clean vessel to make the yogurt to prevent the milk from curdling. Use a stainless steel or a glass jar to set yogurt.
    • Never ever insert a spoon or any foreign object into the vessel while the yogurt is still setting, it will cause the yogurt to split into curds and it will not set well. Instead, gently tilt the vessel, if the milk is still liquid, then it needs more time. If the milk has set, it will be solid.
    • At room temperatures of around 25-28 degrees Celsius, it takes around 8 to 10 hours for the yogurt to set. If the temperature is lower, you have to find a warm spot to rest the vessel in. Either keep it in sunlight, or preheat the oven to around 40 degree Celsius and turn it off and keep the vessel in the oven and check on it in 5-6 hours. If the temperature is higher than 28 degrees Celsius, check if the yogurt is set within 6-8 hours.
    • Yogurt tends to get sour, the longer it stays at room temperature. To make a really sour yogurt (excellent for making buttermilk), keep it at room temperature longer. To make a blander yogurt, keep it in the fridge as soon as it sets.
    • Always store at least one teaspoon of yogurt aside to use as the starter/mother for the next batch. If you are a first timer, just use a spoon of store bought plain yogurt as the starter.
    If it doesn't set right the first time, don't fret. It takes a little practice to get the technique right.


    If you made this recipe, let me know! Leave a comment here or on Facebook, tag your tweet with @oneteaspoonlife on Twitter and don't forget to tag your photo #oneteaspoonoflife on Instagram. You can also email me at onetspoflife@gmail.com. I'd love to see what you are upto. 

    If you like this recipe, do not forget to share it with your friends and family! 

    You can follow One Teaspoon Of Life on Facebook, Twitter, Instagram, Pinterest and Google+ or you can subscribe to One Teaspoon Of Life and receive all the latest updated via Email

    Video Recipe


    ---------------------------------------------------------------------------------------------------------------------------


    Homemade Yogurt Recipe


    Thick creamy homemade yoghurt (dahi)How to make thick creamy yogurt or dahi at home.

    Recipe Type:  Side
    Cuisine:            International
    Prep Time:     0 minutes
    Cook time:     5 minutes
    Total time:     8 hours
    Yield:                500 ml

    Ingredients:


    500 ml Pasteurized Milk (boiled and cooled)
    1 Tbsp Yogurt

    Method:


    1. Heat milk until lukewarm. When you dip your finger in it, the milk should feel slightly warm.
    2. Remove milk from heat and add the old yogurt culture. Mix well.
    3. Cover and leave undisturbed in a warm place for 8-10 hours.
    4. Check out the tips above to make the perfect yogurt.
    5. After 8-10 hours, the yogurt is set.
    6. Save the leftovers in the fridge.


    If you liked this, you may also like:


    rose yogurt beverage smoothie curd flavored drink Indian Punjabi
    Rose Lassi

    How to make overnight oats, overnight oats recipe, bircher muesli with apple juice recipe, how to make bircher muesli with apple juice, rolled oats recipe, how to make rolled oats, cold breakfast recipe at www.oneateaspoonoflife.com
    Bircher Muesli
    Dahi Kebab Yogurt Kebab kabab kebob hung curd punjabi besan chickpeas snacks
    Dahi Kebab
    Read more ...