Showing posts with label Baked. Show all posts

Eggless Banana Bread Recipe | How to make Banana Bread Without Eggs


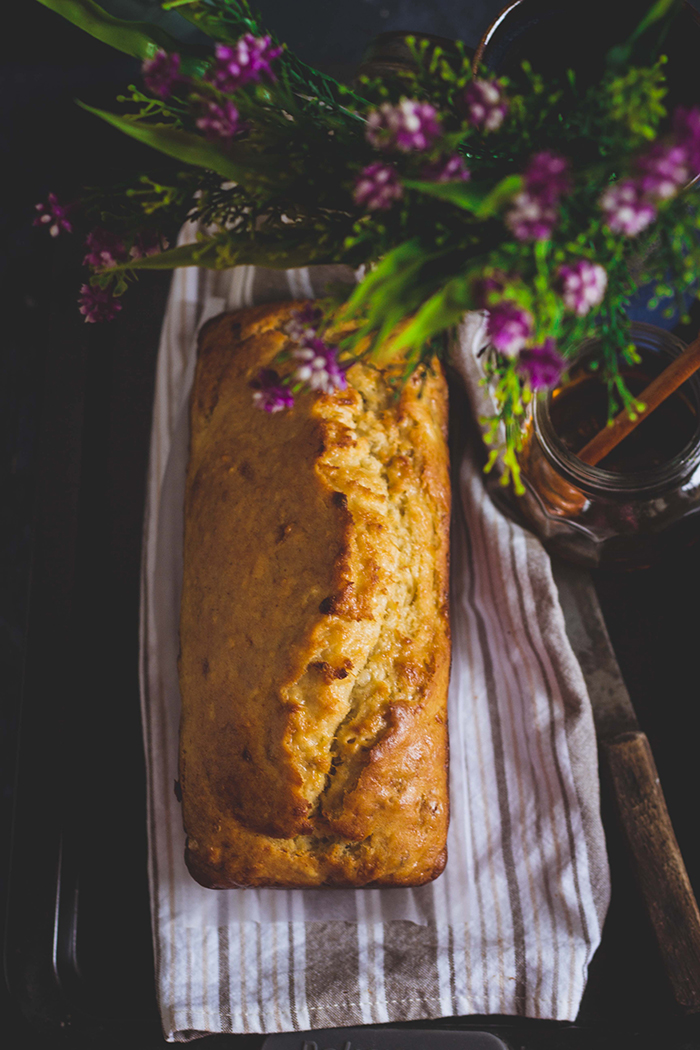
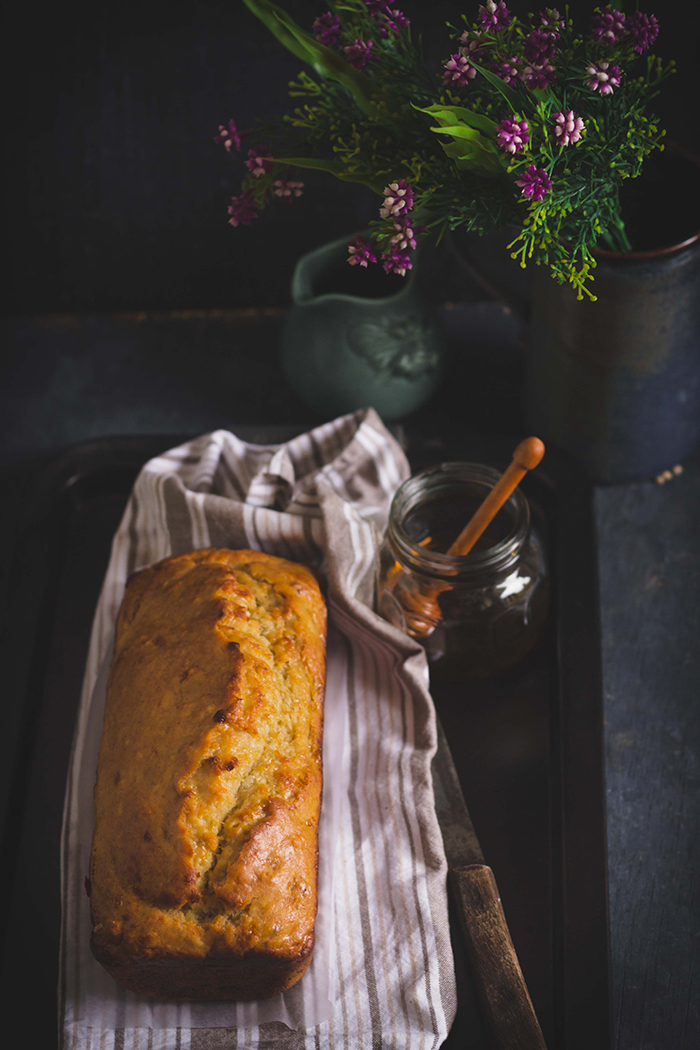
Banana Bread recipe without eggs. This banana bread is a dense cake made from ripe bananas and without eggs. It is perfect as a breakfast or a tea time cake.

In a hurry? Jump to Video or Jump to Recipe


Banana Bread without Eggs


This time, my weekend has begun, unlike last week when I had to work a Saturday to make up for an unexpected holiday. I wish every night could be a Friday night when I get to lie down on the sofa and watch TV all night. I rarely cook elaborate meals on Friday night. Bare minimum to stop me from being hungry. So it is usually some kind of pressure cooker rice dish like Mint Pulao or Vangi Bhaat. I don’t like doing dishes either on Friday nights.

Banana Bread without Eggs

This week though, I have an added treat to my Friday night. We bought these large bananas on Sunday that were starting to go all black on the outside and ripe on the inside. I felt my whole house had begun smelling bananas. Usually, overripe banana means making Mangalore Banana Buns for me. But this time, I tried a new way of using them up in this zero effort Banana Bread. It takes like 10 minutes to whip up the batter and then just put it in the oven and allow it to cook while you continue with your other work.

This Banana Bread is dense and moist as any good banana bread is meant to be. It is perfect to eat at tea time as isn’t too sweet. I pretty much ate it for tea, snacks and dessert. So there isn’t a time when it isn’t the right time to eat this Banana Bread.

Banana Bread without Eggs

The Banana Bread has a slight hint of vanilla. I used condensed milk to add liquidity and sugar, and hence did not use sugar in the bread. If you want to skip the condensed milk, just use more of regular milk and sugar. You can also add maple syrup instead.

If you have never baked a cake in your life, then I’d suggest starting out with this Banana Bread, it is a no fail and zero effort recipe.

Banana Bread without Eggs


If you made this recipe, let me know! Leave a comment here or on Facebook tag your tweet with @oneteaspoonlife on Twitter and don't forget to tag your photo @oneteaspoonoflife on Instagram. You can also email me at onetspoflife@gmail.com I'd love to see what you are up to.

If you like this recipe, do not forget to share it with your friends and family! 


You can follow One Teaspoon Of Life on FacebookTwitterInstagramPinterest or you can subscribe to One Teaspoon Of Life and receive all the latest updated via Email


Video Recipe


--------------------------------------------------------------------------------------------------------------------------


Eggless Banana Bread Recipe | How to make Banana Bred Without Eggs


Banana Bread without EggsMoist Eggless Banana Bread made using ripe bananas, condensed milk and all purpose flour. 

Recipe Type:  Dessert
Cuisine:            International
Prep Time:     20 minutes
Cook time:     40 minutes
Yield:                1 loaf


Ingredients:


3 ripe Banana
1.5 cups All Purpose Flour (Maida)
100gms sweetened Condensed Milk
1/3 cup Butter (melted and cooled)
1/2 cup powdered Sugar
1/4 cup Milk
1 tsp Vanilla Extract
1 tsp Baking Powder
1/4 tsp Baking Soda
1/4 tsp Salt
1/2 tsp Cinnamon Powder (Optional)

Method:


1. Preheat the oven to 180 degree Celsius.
2. Brush the bottom and sides of a loaf tin with butter and dust with flour. I used a 9"x 3"x 2.5" loaf tin.
3. In a large bowl combine the flour, salt, baking powder and baking soda and keep aside.
4. Mash the bananas.
5. Add the condensed milk, melted butter or oil, milk and vanilla extract to the mashed bananas and mix until combined.
6. With a wooden spoon or a spatula, fold in the dry ingredients gently into the wet ingredients until you get a thick batter. Do not over mix, else the bread will become hard.
7. Taste the batter and if you feel it needs more sweetness, add in powdered sugar as desired.
8. Scrape the batter into the greased loaf tin.
9. Bake for 35-40 minutes until the top is golden brown and a toothpick inserted in the middle comes out clean.
10. Remove the bread from the pan after 5-8 minutes. Cool on a wire rack.
11. Allow it to cool and then slice it.
12. Serve at room temperature or warm.


Banana Bread without Eggs


If you liked this, you may also like:

how to make honey cake recipe,how to make bangalore honey cake recipe, how to make iyengar bakery honey cake recipe, eggless cake recipe, eggless baking at www.oneteaspoonoflife.com
Honey Cake

Vegan cake made with dates and walnuts
Vegan Date Walnut Cake
Mangalore Banana Buns
Banana Buns / Mangalore Buns


Read more ...

Gobi Manchurian Pizza


You heard that right! Gobi Manchurian Pizza!!!

Your favorite starter "Gobi Manchurian" as a Pizza topping. Dinner does not get better than this!!!

cauliflower gobi manchurian pizza whole wheat italian indian chinese fusion

I try to cook healthy an eat healthy most of the times. My regular lunch or dinner is chapati with some vegetables. But then, there are some days (or nights) that all I want to do is indulge. Friday night was just that - Indulgence Night. 

This Pizza was a product of circumstances. Seriously, I had no choice. Na ah. 
I had (still have) lots of cauliflower. I had Mozzarella left over from my UBER-ly delicious Stuffed Potato Skins. Remember those? And I had a small little Capsicum growing in my pot. TA-DA - Gobi Manchurian Pizza.

I love LOVE Gobi Manchurian. The chef that invented it was pure Genius. What a perfect starter to any meal! At any given time, in a restaurant, I believe at least 50% of the people order Gobi Manchurian as a starter. Except in those fancy fine-dines. I wonder what people order there.


cauliflower gobi manchurian pizza whole wheat italian indian chinese fusion

I've been told this dish - the Gobi Manchurian Pizza is not my invention (Darn those eye-opener friends!!). To my credit, this Gobi Manchurian Pizza recipe is totally mine. I made Gobi Manchurian the way I always make it, the only difference being I did not simmer the cauliflower with the sauce, instead I just layered them on the Pizza base.

The Pizza was a super hit. This Gobi Manchurian Pizza brings together the best of 2 cuisines (or is it 3) - Indo-Chinese and Italian.

I'm sure everyone knows about Italian Cuisine and Pizzas. No intro needed there. 

Now, the Gobi Manchurian is a purely Indian take on Chinese cuisine. It consists of batter coated cauliflower florets that are deep fried until they are crispy golden brown (I suggest you make extra, they taste awesome just like that). If that wasn't enough of BANG, there is the sauce. The sauce is soy-based and is full of flavors of soy sauce, chilli, ginger and garlic. Getting an idea?


To make the Gobi Manchurian Pizza, I made a whole wheat and honey pizza base. That is 100% whole wheat, nothing else. I have not followed the traditional way of making a pizza base - 2 rises, then either rolling or stretching. I have done it more like - rise, roll, rise. This gave me a nice thick base. If you plan on making a thin crust, then you may need to adjust the dough quantities to match that and your pan size. My directions below are for a 10" thick base Pizza. You can also freeze part of the dough for a later day.

After making the base, I then layered with that delicious spicy sauce and dropped the cauliflower all around. Grated some cheese and VOILA! the Gobi Manchurian Pizza is already ready to be devoured.

I know this does not sound like a weekday kinda meal, when you come back from office battling all that traffic and the rains. The number of ingredients and the number of steps sound daunting. When you start making it you will see that the number of unique ingredients isn't really much. And I've written a very detailed recipe to make your cooking easier. I assure you, there is a time and a place to make this Pizza. I actually made it in like 2 hrs on a Friday night. And the 2 hrs was all rising of the base. The actual cooking took way less.


This Gobi Manchurian Pizza is perfect for you:

If you like quirky fusion food that is delicious.

If you love Asian or Indo-Chinese flavors

If you love Pizza


Gobi Manchurian Pizza


cauliflower gobi manchurian pizza whole wheat italian indian chinese fusionFusion pizza topped with fried cauliflower and Manchurian sauce. 

Recipe Type:  Main
Cuisine:            Fusion
Prep Time:     2 Hours
Cook time:     50 minutes
Yield:                Serves 2

Ingredients:


For the Pizza Base:


2 cups Whole wheat flour or Atta
1 tsp Active Dry Yeast
1 Tbsp Honey
1 Tbsp + 2 tsp Olive Oil
2-3 cups warm Water
1 tsp Salt

For the Gobi / Cauliflower:


2.5 cups Cauliflower florets
4-5 Tbsp Cornflour
1.5 tsp Soy Sauce
1 tsp Ginger Garlic Paste
1 tsp Chilli Sauce
1/2 tsp Tomato Ketchup
1/2-1 cup Water
Salt to taste
Oil to fry

For the Manchurian Sauce:


Leftover batter from the Gobi / Cauliflower
1 Onion
1/2 Capsicum
1 Tbsp finely chopped Garlic
1 tsp Ginger Garlic Paste
1 tsp Soy sauce
1 tsp Chilli sauce
2 tsp Oil
1 cup Water
Salt to taste

For assembling:


Pizza Base
Fried Gobi / Cauliflower
Manchurian Sauce
2 Tbsp Olive Oil
1 Tbsp chopped Coriander
Mozzarella or Pizza cheese

Method:


To make the Pizza Base:


Add the active dry yeast to 1 cup of warm water along with the honey. Allow it to rest for 5-10 minutes.
Once it is foamy, add it to the whole wheat flour along with 1 Tbsp olive oil and salt and knead into a smooth dough. Knead for around 5-10 minutes.
Now coat the dough with the remaining olive oil and place in a clean bowl. Cover the bowl loosely with a plate of a towel and keep in a warm place to rise. It should double up in size. Mine took around 1 hour.
Once it is doubled in size, punch it down, and roll it into a pizza base. Roll according to if you want a thick base or a thin base. I made a thick 10" base.
Oil the pan in which you will cook the base, and place the rolled out base, prick it with a fork. Cover and keep it in a warm place for its 2nd rise for 30 minutes.
Preheat the oven to 200 degree Celsius and bake the base for 12-15 minutes.

To make the fried Gobi / Cauliflower:


This can be made when the base is kept for rising.
In a large bowl, mix together the cornflour, ginger garlic paste, soy sauce, chilli sauce, tomato ketchup, salt and add water by the spoonfuls. We need a medium consistency batter that can coat the cauliflower. I did not need the full cup of Water.
Heat oil in a frying pan. I shallow fried the florets, you can deep fry them.
Once the oil is hot, dip the cauliflower in the batter and drop them in the oil.
Fry until golden brown and crispy on the outside and the cauliflower is cooked on the inside.

To make the Manchurian Sauce:


Heat oil in a pan and add sliced onions and chopped garlic. Fry until the onions are translucent.
Add the sliced capsicum and fry for another 1-2 minutes.
Add the leftover batter from the cauliflower. If there is none leftover, mix together 1 Tbsp cornflour in 1/4 cup of water and add it. You may need to increase the quantity of the sauces accordingly.
Add the ginger garlic paste, soy sauce, tomato ketchup, chilli sauce, salt and 1/4 cup of water and mix well. Add more sauce if required.
Allow it to cook 3-4 minutes. You may need to add more water in as cornflour thickens on cooking.

To make the Pizza:


Spread the sauce on the base.
Place the fried cauliflower all on top of the sauce.
Sprinkle the chopped coriander leaves.
Grate cheese to cover the pizza.
Drizzle over the Olive Oil.
Bake in a 200 degree Celsius preheated oven for 5-8 minutes until the cheese melts.
Serve hot.


Read more ...

Stuffed Potato Skins

Crispy potato, crunchy green Capsicum, punchy tomato sauce and oozy mozzarella cheese. That’s what this whole blog post it about.

 Baked Stuffed Potato Skins Capsicum Tomato Mozzarella Cheese Olive oil gluten free


I’ve never baked a potato. Or rather, until last week, I had never baked a potato. And now that I have, I feel I’ve opened a door with many many possibilities.

This recipe is a result of entering a competition that asked contestants to cook with 5 ingredients – Potato, Tomato, Capsicum, Cheese and Olive Oil. You couldn’t leave out an ingredient.
I thought of a few options but decided I really wanted to stuff something. Stuffed capsicum or stuffed tomato may be? But when I mentioned stuffed potato skins, I saw Raj’s eye light up. It’s no secret he loves Potato. That was it then – Baked Potato Skins.

 Baked Stuffed Potato Skins Capsicum Tomato Mozzarella Cheese Olive oil gluten free


Now there is a lot you can do with these Potato Skins, I myself had a dozen ideas, but then I was restricted by the competition rules. Not that I regret that, they were AWESOME just like that.

These little boats to taste-bud-heaven have some lightly stir fried capsicum and an easy-to-make awesome INSTANT super punchy tomato sauce. Apart from the 5 ingredients mentioned above, all you need is oregano or any pizza seasoning, garlic, salt and loads of pepper. This sauce goes amazingly well with pasta and pizza. So increase the quantity and freeze it for rainy days if you wish.

Baked Stuffed Potato Skins Capsicum Tomato Mozzarella Cheese Olive oil gluten free

Step one: Crisping up the potato skins. You want them crisppyyyy:
Wash and scrub those potatoes clean. This is how you build muscles working at home. Exercise for today – DONE. Dry them and rub olive oil all over them. Watch out for those slippery ones that go bouncing all over your counter. Use a fork and prick them all over.
Bake them for 1 hour at 200 C of 400 F. In the meanwhile, move on to steps 2 & 3 and come back to one later.

Step two: Making the AWESOME Tomato sauce.
Chop those tomatoes roughly and fry along with some garlic in a pan with some olive oil. Once the tomatoes are soft, add in the oregano, salt and pepper. If you are like me, pepper == lots and lots of pepper.
Blend it into a coarse sauce. This is a thick sauce. If you plan on using it for pasta, you may want to thin it a little.

Step three: Crunchy crunchy Capsicum.
Chop the capsicum into small pieces. Stir fry in some olive oil until it is slightly cooked. Don’t let it mush up. Sprinkle some salt and keep aside.

Baked Stuffed Potato Skins Capsicum Tomato Mozzarella Cheese Olive oil gluten free

Step one again: Crispy skin dreams come true here.
Once the potatoes have cooled enough to handle, slice them lengthwise into  half. Using a sharp edged spoon, scoop out the potato gently. Leave around ¼ inch or 0.5 cm of potato still in the skin so it holds it’s shape. Brush generously with olive oil on the inside and outside. Rub some salt.
Now bake it skin side down for 5 mins @ 220 degree C and then flip them over and bake again for 5 mins until the skins are crispy.

Step four: Let’s get the cheese BUBBLING
Assembly is all that it left before oozy cheese. Spoon in the capsicum and the sauce. Then grate over some mozzarella or any stringy melty cheese. This is what my food dreams are made of! Back into the oven for 4-5 mins until the cheese melts and it all bubbly.

Step five: Finish them off immediately!!!

Let’s face it, step five isn’t really a cooking step, but it is the most important step in the process.

 Baked Stuffed Potato Skins Capsicum Tomato Mozzarella Cheese Olive oil gluten free


I did not use the scooped out potato in this recipe. You can stuff it back in. I used it up to make some buttery Aloo Paratha.


Stuffed Potato Skins


 Baked Stuffed Potato Skins Capsicum Tomato Mozzarella Cheese Olive oil gluten freeBaked potato skins stuffed with an instant tomato sauce, fried green Capsicum and Mozzarella cheese.

Recipe Type:  Appetizers / Snacks
Cuisine:            International
Prep Time:     20 mins
Cook time:     1 hour 45 minutes
Yield:                6 skins

Ingredients:


3 large Potatoes
2 Tomatoes
1 Capsicum
2-3 Tbsp Olive Oil
5-6 Tbsp Mozzarella Cheese
2 Garlic Cloves
1 tsp Oregano
1-2 tsp Pepper
Salt to taste

Method:


Preheat the oven to 200 degree C.
Wash, scrub and dry the potatoes.
Rub with olive oil and Ppick them with a fork all over.
Bake in the oven for 1 hour.
Heat 1/2 Tbsp of Olive oil and add crushed garlic and chopped tomato to it. Cook until the tomatoes have become soft and mushy
Add salt, pepper and oregano. Mix well.
Allow it to cool and then grind to a coarse sauce.
Heat 1/2 Tbsp of Olive oil and fry chopped capsicum in it.
Slice the potatoes lengthwise and with a spoon gently scoop out the potato. Leave at least 1/4 inch of potato with the skin.
Rub olive oil and salt on the inside of the potato and outside.
Increase the temperature of the oven to 220 degree C.
Bake the potato skins in oven for 10 minutes, turning the potatoes after 5 minutes.
Remove the potatoes from the oven and when they are cool enough to handle, stuff them with capsicum, tomato sauce and top with cheese.
Bake for 4-5 minutes until the cheese has melted.


Read more ...

Roasted Chickpeas with Spices

I miss last week. It was a short week with a long weekend and I was on vacation. Being back at work is soooo boring. I’ve barely had the time to cook anything this week. It’s been work all the way. But I did make this crunchy yummy spicy roasted Chickpeas. Who knew they were so easy to make at home, and here we were spending money to buy the packaged version at super markets. Not gonna happen anymore, na ah.


I started off with dried chickpeas, you can use canned if you are short of time. Dried just results in more prep time but the cooking time is hardly different. It only involves soaking the chickpeas overnight and then pressure cooking them for like 10 mins max. I cooked them until they were just about done, just one whistle in the pressure cooker. Mushy ones will not work well, but hey, mushy chickpeas make good Hummus. So waste nothing my friend.


I always soak a little more than required, as leftover chickpeas can always be used to make this amazing flavor packed salad. Recipe found here - it is perfect for an evening snack.

The best part about this recipe is you can customize it to suit your taste. I added cumin or jeera powder and garam masala. You can add all sorts of things like chaat masala or curry powder. It’s all up to you, after all, YOU are the chef.


Roasted Chickpeas with Spices


Chickpeas marinated in spices and baked in the oven 

Recipe Type:  Snacks
Cuisine:          International
Prep Time:     8 hours (Including soaking chickpeas)
Cook time:     90 minutes (Including boiling chickpeas)
Yield:              2 cups / 1 tin

Ingredients:

1 cup dried or 1 tin Chickpeas
1 Tbsp Olive oil
1 tsp Cumin/Jeera powder
A pinch Garam Masala
1 tsp Red Chilli powder
½ tsp Turmeric powder/ Haldi
Salt to taste

Method::

If using dried chickpeas, soak them for 8-10 hours in water.
Drain out the water.
Take enough water to cover the chickpeas in a cooker, add 1 tsp of salt in it and pressure cook it until they are just done. I cooked them in a pressure cooker for 1 whistle. This may change depending on your cooker and the amount of water. You can cook it in a sauce pan as well, but it may take longer.
Once they are done, drain out all the water and place them on a kitchen towel and pat them dry.
If you are using tinned chickpeas, here is where your work begins. Drain and wash the chickpeas and dry them on a kitchen towel.
Preheat the oven to 200 degree Celsius.
Mix the dry chickpeas with the oil and the spices.
Place them on a baking sheet in one layer and bake for 45-60 mins until they are nice and crunchy. I baked for almost 60 mins, but I started checking on them after 45 mins, you don’t want to burn them.
Read more ...

Eggplant Pizza

Yessss..... you heard it right.. rather you read it right - Eggplant Pizza. An awesome combination of grilled eggplants with a hearty tomato sauce and loads of cheese.


And guess where am I blogging from? Ooty - the queen of hills. We've been holidaying here over the long labor day weekend. After the heat and thunderstorms of Bangalore, we needed a good weather break. And Ooty lived up to its promise, ah! what weather. Mild sunlight with a slightly chilly air. Perfect!!! This is how summers should be.

Ooty from Doddabetta

We started early on 1st and reached here after a 7 hour long fueled by some healthy Med Veg sandwiches and packets of processed junk food. What fun is a road trip without loads of food, right?
We are staying at the Willow Hill on Havelock road - the hotel is high up on the hill and offers some beautiful views.

On friday evening, as we went to the market to stock up on some homemade Ooty chocolate - dark with nuts, rum & raisins, fruit and nuts etc etc, we also made it a point to eat at the Sidewalk Cafe (it featured on Highway On My Plate - I absolutely love the show). We had french fries and a Chettinad pizza. The place did not live up to its expectations :( I was not so fond of their food.

On the way from Doddabetta

Saturday was total touristy day. We went pedal boating at the lake full Maine Pyar Kiya style singing Dil Deewana... Only the yellow shirt and saree were missing. We almost trekked up to Doddabetta after deciding to park the car pretty low. The hour long traffic jam on our way back was a blessing in disguise, it gave me plenty of time to stock up on fresh vegetables that was being sold on the street side. Expect a yummy salad recipe soon :)

Fresh vegetables on the roadside

Next stop was Botanical gardens - it looked like a fair was going on, I think there were at least 200+ ppl in there. Rain interrupted our sight seeing and sent every one running for covers.

But before that, we managed to get a few clicks...

India Map at Botanical Garden

Beautiful flowers at Botanical Garden

Let's get back to the blog post - Eggplant Pizza.


It did not really start off as it ended up eventually… Sis has been after me to make Eggplant Parmigiana for her after she read the recipe somewhere…

Grill the Eggplant Slices

On the day she enjoyed her pot luck, I thought I would make it and use hubby dearest as the guinea pig. But I don’t know if the lords of food listened or turned a blind ear to me, I could not find fresh basil or parmesan anywhere nearby. So I decided to go with dry basil and use the processed cheese I had at home. Instead of making the layered parmigiana, I settled for individual starter sized pizzas.

Spread the sauce

They are so easy to make. They cut out the calories of the carb filled bread and add freshness to the food - plus they take so little time to make with so few ingredients. And if you skip the semolina, it is gluten free too.

Oooo... cheesy


Eggplant Pizza


Pizza made with Eggplant as the base and topped with homemade tomato basil sauce and cheese. 

Recipe Type:  Snacks
Cuisine:          Italian
Prep Time:     5 minutes
Cook time:     45 minutes
Yield:              7-8 Pizzas


Ingredients:

1 large Eggplant /Bharta baingan
2-3 Tomato
1 Onion
2 cloves Garlic
1 tsp dry Oregano
1 tsp dry Basil
1 tsp Pepper powder
2-3 Tbsp Olive oil
½ cup Cheese(grated)
2-3 Tbsp Semolina / Bread crumbs (Optional)
Salt

Method:

Slice the eggplant into 1cm thick slices and grill on a hot tava/griddle with litte oil until they are soft and done.
Heat 2 tbsp of olive oil in a kadhai and add chopped onion, garlic and oregano. Fry until the onions are translucent.
Remove the seeds of the tomato and chop the tomatoes. Add this to the kadhai and cover and cook on low flame for 12-15 mins.
Add salt, pepper and basil and fry for another 2-3 mins.
Allow it to cool and then blend into a fine sauce.
Preheat the over to 180 degrees Celsius.
Place the eggplants on a baking sheet, spread the sauce on them.
Add the grated cheese.
Mix 1/2 tsp of oil with the semolina and sprinkle on top of the eggplant. This step can be skipped.
Bake until the cheese melts or for 10-12 mins.


Read more ...

Baked Bread Rolls

I am blank! Just like a paper. 

There are times when you want to write but you don’t know what to write. It is called a writer’s block. Most of the times I am blank, but not about writing, but about cooking. What is that called? Cooking block? Chef’s block? Cooking lunch and dinner is pretty easy for me. 

I am a chapatti/roti lover so most days it is chapatti with some vegetables that are there at home. But I hate thinking about what to make for breakfast. And then start the calls. I call up my mom and my sister and ask the same question “What should I make for Breakfast?” and I get the same answer “Please don’t ask me, I’m confused too” :(


May be the women in office face the same issue everyday too. The women’s association in office started an online competition for quick and healthy breakfast recipes. I was extremely excited, I thought with at least the 200+ women in office, I’ll get many recipes. I, myself, submitted the recipe for my oats idlis. I must say though, that competition did not do much more than flooding my inbox with emails. I barely got any new recipes. Some were not healthy, some were not quick, some I would not even call breakfast. I did win the third prize though :).


I got the idea for this breakfast recipe when on a hungry weekday evening we went to a tiny shop to eat Vada Pao and Break pakoda and my sister remarked that she prefers break roll. The idea stayed in my head and from that seed grew a tree, that tempted me to make bread rolls. As I have mentioned before, I try to avoid deep frying, so I baked it. I stuffed with a combination of potato, carrot, cauliflower, spices and cheese. Stuff it with anything that takes your fancy, the bread is your stage… :) You can have it as a snack with nice hot cup of tea on a rainy evening….*slurp* or as a breakfast.


Definitely, a kid friendly recipe. I can vouch for that. What’s not to like? Bread, potatoes and cheese :) The only suggestion I have is: have it hot, it loses its crispness once it is cold. Dunk it in some cool mint chutney or some tangy ketchup. Or like us, just have it on its own. But have it, for sure :)


Baked Bread Rolls


Bread stuffed with a vegetable mixture, rolled and baked to make a roll.

Recipe Type:  Snacks/ Appetizer
Cuisine:          International
Prep Time:     15 minutes
Cook time:     60 minutes
Yield:              12 rolls

Ingredients:


12 Bread slices
2 small or 1 large Potatoes
1 Carrot
1/4 – 1/2 cup chopped Cauliflower
1 small Onion
1 Green chilli
1-2 cloves of Garlic
1 Tbsp Coriander leaves (chopped)
2 cubes or 3-4 Tbsp Cheese (Grated)
2 Tbsp Butter
½ tsp Cumin seeds
3 tsp Oil
½ tsp Turmeric powder / Haldi
A pinch of Garam Masala
A pinch of Dry Mango Powder / Amchur
Salt
Water

Method:


1. Boil and peel the potatoes. Mash them roughly.
2. Finely chop the onion, garlic, carrot, green chilli and the cauliflower.
3. Heat oil in a pan, add the cumin seeds.
4. Once the seeds brown, add the onion, chilli and the garlic.
5. Once the onion is slightly browned, add the carrot and cauliflower.
6. Cover and cook until the vegetables are done. They should still have a bite in them, don’t overcook them.
7. Add the spices and the mashed potatoes and mix well.
8. Add the coriander leaves.
9. Remove from heat and keep aside.
10. Cut the edges of the bread slices.
11. Using a rolling pin flatten out the bread.
12. In the center of the flattened bread, add a spoonful of the mixture and the cheese.
13. Wet the sides of the bread and join them.
14. Apply butter on the roll from outside
15. Preheat the oven to 200 degree Celsius.
16. Place the rolls on a cookie sheet in one layer and cook for 10 mins.
17. After 5 mins, flip the rolls.
18. Depending on the power of your oven you may need to keep it in for more or less time.
19. It should be crisp and golden brown.


    P.S: Don't throw out the edges. You can use it to thicken gravies and soup. You can also use it as a binding agent in tikkis and patties. For a soup which uses bread edges, watch out for my next post :)
    Read more ...

    Baked chapati chip | Baked wholewheat nachos

    Chips are irresistible, and of those, I love Nachos. Loaded with beans and cheese or with simple guacamole, they are simply my favorite kind of chips. I made these cause I really wanted to eat nachos. I searched far and wide for masa harina, the flour from which tortillas are made in Mexico. But nobody carries it here. In fact, I cannot even find makki ka atta in Bangalore to make makki roti :( So I stuck to what I had. I always have chapatti atta at home. Chapati is essentially Indian flatbread that resemble tortillas. You can deep fry the chips or bake them. I baked them and they turned out crisp and equally tasty. And incidentally I had a nice ripe butterfruit / avocado in the fridge to make some yummy guacamole. 1 chapati makes around 25-30 chips.


    Baked chapati chip | Baked wholewheat nachos


    Baked whole wheat chips/nachos
    Baked whole wheat nachos
    Recipe Type:  Snacks
    Cuisine:          Mexican
    Prep Time:     30 minutes
    Cook time:     30 minutes
    Yield:              75-100

    Ingredients:

    1 cup Whole wheat flour/ atta (This may make 3-4 chapatis)
    Whole wheat flour for dusting
    1 tsp Olive oil per chapati
    A pinch Salt
    Water

    Method:

    • Take the whole wheat flour in a large bowl. Add water by the tbsp. and start kneading. Knead until you get a soft smooth dough. The dough should not be shaggy and stick to your hands.
    • Preheat the oven to 180 degree Celsius.
    • Take a small lemon sized dough ball.
    • Dust the counter surface with whole wheat flour and roll out the chapati as thin as you can. I suggest making a fresh chapati instead of using a leftover one. You can use leftover dough though.
    • Heat a tava/griddle on the gas stove, reduce the flame once the tava is hot. Put the chapati on the tava and cook until small bubbles appear on one side.
    • Flip the chapati and cook on the other side.
    • Remove from heat. Allow it to cool for 5 mins.
    • Cut into triangles.
    • Place on a baking sheet. Do not let them overlap each other. Drizzle olive oil and sprinkle the salt.
    • Bake for 6-8 mins until browned and crisp.
    • Enjoy with guacamole or salsa.
    Read more ...

    Eggless Butter Cookies

    “Sometimes me thinks, what is a friend?
    And then me say.
    Friend is someone to share last cookie with.”

    ~Cookie monster


    How true is the wisdom of the little Muppet called Cookie monster. We should share our cookies with our friends, but when cookies are as tasty as these butter cookies, sharing becomes really really difficult. I am an absolute cookie/biscuit lover. Ah! The pleasure of dunking a biscuit into tea or milk. As kids, we could eat up entire packets of biscuits in a single go. My sister recently remembered that there was a time when she was given tea but there were no biscuits and she was confused on as how to have tea without any biscuits to accompany it. This was apparently the reason why my mom ended up restricting out biscuit consumption to 4 a day. My love story with cookies has come a long way now, instead of just eating them, I’ve moved on to baking them.


    I saw some awesome cookie recipes recently and really wanted to try them out. But they all contained eggs, and as I am an eggless baker I had to improvise. I did take the basic recipe and modify it a little to come up with what’s below. Previously, when I made cookies, I added some leavening agents to it. The difference here is, there is no leavening agent whatsoever. This makes the cookies crisp and they don’t end up being cakey. The only advice I have is do not skimp on the butter. The butter is essential to give the cookies their correct texture.


    Eggless Butter Cookies


    Eggless Butter Cookies"Light and crunchy Butter Cookies made without using Eggs"

    Recipe Type:  Dessert
    Cuisine:          International
    Prep Time:     30 minutes
    Cook time:     2 Hours (Considering 6 batches)
    Yield:              40-50

    Ingredients:

    120 gms unsalted Butter
    80 gms Sugar (powdered or icing)
    30 gms Corn flour
    120 gms Flour / Maida
    ½ tsp Vanilla essence
    ½ tsp Salt
    2 Tbsp Milk

    Method:


    • The butter needs to be very soft. I left it out on the counter overnight. 
    • Preheat the oven to 170 degree Celsius. 
    • Add the sugar and salt to the butter. Start with around 60 gms and then add more depending on the sweetness of the sugar and your taste. I like my cookies sweet and the sugar I had was very mild, so I used up all the sugar. 
    • Beat/ whisk it until it is almost 4-5 times the volume. This will take around 10 mins with a hand mixer. 
    • Sift the corn flour and the flour together. 
    • Add the flour in 3 additions to the butter mix along with the vanilla essence and milk, and beat until just mixed. Do not over-mix this. 
    • Line a cookie sheet with butter paper. 
    • Fill the cookie dough in a piping bag with a star nozzle and pipe out swirls. 
    • Space them at least 1-1.5 cm apart as they will flatten and spread out while baking. 
    • Bake for around 13-15 mins until the sides of the cookies are slightly brown. Mine took 14 mins. Wait for around 5 mins and then move them to a wire rack as they are very fragile when you remove them from the oven. 
    • The recipe made many many cookies :) Somewhere around 50 (I really did not count) but I have a tiny oven and I had to pipe out 6 batches. Don’t be overwhelmed by the number and decide to cut down the recipe to make less, cause they are sooo delicate and melt-in-your-mouth cookies that you won’t even realize where the 50 or so just disappeared :) 


    Notes:

    I made 4 batches of regular butter cookies. To the remaining dough I added 2.5 tbsp of dried desiccated coconut. If you plan to do so, add a little more milk, else the dough becomes very hard and difficult to pipe. You can top it with dry fruits like raisins or almonds.
    Read more ...