Dill and Caramelized Onion Bread Rolls [Video]


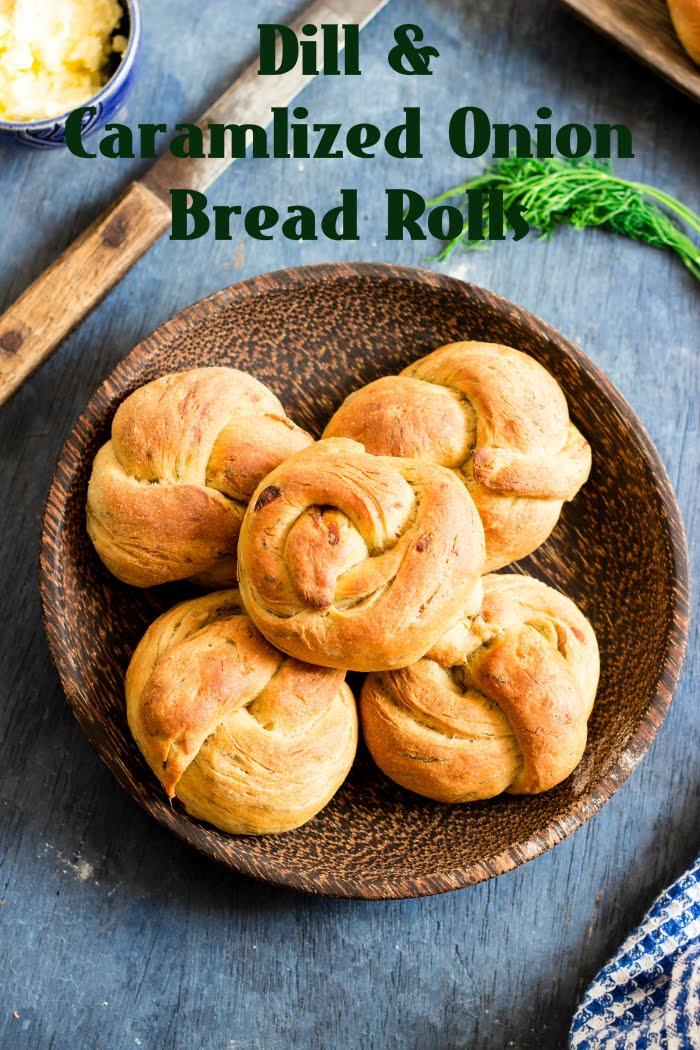
These Dill and Caramelized Onion Bread Rolls are sooo good, this is the ONLY recipe you will ever need for flavored bread rolls

How to make dill bread recipe, dill and onion bread recipe, eggless dill and onion bread recipe, how to bake bread rolls recipe, how to bake bread at www.OneTeaspoonOfLife.com


How to make dill bread recipe, dill and onion bread recipe, eggless dill and onion bread recipe, how to bake bread rolls recipe, how to bake bread at www.OneTeaspoonOfLife.com

Happy Sunday Guys!!

These Bread Rolls... YUMMMMMM....

If you take it from me, these Dill and Caramelized Onion Bread Rolls are the ONLY flavored bread rolls recipe you will ever need. I made this twice in one week. TWICE!!

I first made them on Sunday, last Sunday, and it was more of a trial batch. And then again on Wednesday. Never done that before. I'm more of a buy-bread-from-store types than bake bread from scratch person. I surprised myself by making it twice in a week. See, the thing was, Raj did not get to eat any on Sunday as he wasn't around. I had nice fresh warm bread from the oven and I had just made butter at home. Yes, I make butter at home almost every week, I just love fresh homemade butter so much. And among Gee and I, we wiped off the entire lot of 7 bread rolls. It was soooo GOOD!! Then I just felt bad that he did not get to even taste one, so I made it again in the week.

How to make dill bread recipe, dill and onion bread recipe, eggless dill and onion bread recipe, how to bake bread rolls recipe, how to bake bread at www.OneTeaspoonOfLife.com

I'd first seen a Dill and Onion bread roll recipe in an airline magazine. It used dill seeds and raw onions. Fresh Dill is so much easier to find than dill seeds here in Bangalore, so I swapped that. I love caramelized onions. They are soft, and brown and sweet. Yum! I never miss a chance to use them in a recipe and I always make extra to eat along in the week. This week, I stuffed some flatbread rolls with them. But if you are short of time, just saute the onions for 2-3 minutes and add them in the bread. I don't want you to miss out on eating this bread just because caramelizing onions takes time.
Or like me, you can make them in advance and keep them in the fridge, they stay good for one week in there.

There is one more cheat to save time here - Buy Paneer or Cottage cheese from the store. If buying frozen, let it thaw completely before using. Making Paneer at home can seem daunting, but it is the easiest cheese you can make at home. This recipe does not require you to make paneer completely, just the curds. Drain the curds and blend them into a smooth puree for this recipe. You can also replace with cream cheese.

How to make dill bread recipe, dill and onion bread recipe, eggless dill and onion bread recipe, how to bake bread rolls recipe, how to bake bread at www.OneTeaspoonOfLife.com

You know what's the best thing about these rolls? Taste, of course, but the aroma that fills your house when a fragrant herb like Dill is cooking is so heavenly. I just love Dill, and its sharp earthiness, it is my favorite green, right from childhood. 

Now that I've made these twice is such quick succession, I'm confident that this is my go to recipe for dinner rolls. They taste great with any gravy, but they taste BEST just by themselves. Slather on some butter and that's IT!! Soft, buttery, fragrant, salty rolls with that little hint of sweetness when you bite into a caramelized onion slice. What more do you really need?

How to make dill bread recipe, dill and onion bread recipe, eggless dill and onion bread recipe, how to bake bread rolls recipe, how to bake bread at www.OneTeaspoonOfLife.com

P.S - I have a bonus for you, a VIDEO recipe!!

Video Recipe


If you made this recipe, let me know! Leave a comment here or on Facebook, tag your tweet with @oneteaspoonlife on Twitter and don't forget to tag your photo #oneteaspoonoflife on Instagram. You can also email me at onetspoflife@gmail.com. I'd love to see what you are upto. 

If you like this recipe, do not forget to share it with your friends and family! 

You can follow One Teaspoon Of Life is there on Facebook, Twitter, Instagram, Pinterest and Google+ or you can subscribe to One Teaspoon Of Life and receive all the latest updated via Email (How convenient!!)


If you liked this, you may also like:


Dill and Caramelized Onion Bread Rolls


How to make dill bread recipe, dill and onion bread recipe, eggless dill and onion bread recipe, how to bake bread rolls recipe, how to bake bread at www.OneTeaspoonOfLife.comDill and Caramelized Onion Bread Rolls are fragrant flavorful bread rolls made with fresh cottage cheese, dill leaves and sweet caramelized onions.

Recipe Type:  Bread
Cuisine:            International
Prep Time:     3 Hours
Cook time:     1 Hour
Yield:                Makes 14 rolls

Ingredients:


For Caramelized Onions:


3 Onions
2 Tbsp Olive Oil
1 tsp Sugar or Jaggery
1-2 tsp Balsamic Vinegar
1 Tbsp Water
Pinch of salt

For Cottage Cheese / Paneer:


1 litre Milk
2 Tbsp Lime Juie
3-4 Tbsp Water

For the Dill and Caramelized Onion Bread Rolls:


2 cups Wholewheat flour (Atta)
1 cup All purpose flour (Maida)
1.25 cups Water
3-4 Tbsp chopped Dill leaves
2 tsp Active Dry Yeast
2 Tbsp Oil
Salt to taste

Method:


To make Caramelized Onions:


Heat oil in a pan and add sliced onions.
Sprinkle a pinch of salt and mix well.
Allow the onions to cook on medium to low heat until they are slightly brown.
Add sugar or jaggery and balsamic vinegar.
Add little water to prevent the onions from sticking to the pan.
Remove from heat once the onions are dark brown and sweet. This takes around 30-40 minutes.

To make Cottage Cheese / Paneer:


Boil the milk until it comes to a rolling boil.
Turn off the heat and immediately add the lime juice and mix well.
Once the milk curdles, strain it and keep aside for 15 minutes allowing the water to drain from the cheese curds.
Once the cheese cools, blend it along with a little water to a smooth puree.

To make the Dill and Caramelized Onion Bread Rolls:


Heat 1.5 Tbsp Oil in a pan and add 1/4 cup water.
Add the cheese puree, chopped dill and caramelized onions. Mix well.
Simmer on low heat for 3-4 minutes. Remove from heat and keep aside to cool.
Heat 3/4 cup of water until lukewarm. Add the active dry yeast to it and allow the yeast to bloom.
Once the cheese mixture is cool, pour it into a clean bowl and add the yeast.
Add salt, 1.5 cups whole wheat flour and the all purpose flour.
Knead until combined. Add more whole wheat flour if the dough is very sticky.
Take another large clean bowl and grease it slightly. Move the dough to it. Rub the dough with oil. Cover and allow it to rise for 1-2 hours until doubled.
Once the dough has risen, divide the dough into 14 equal balls.
Grease a baking tray. Shape the rolls and place on the baking tray leaving at least 1" gap between rolls.
Cover and allow it to rise a second time for around 45 mins to 1 hour.
Preheat the oven to 250 degree C.
Bake the rolls for 12-15 minutes until browned.

How to make dill bread recipe, dill and onion bread recipe, eggless dill and onion bread recipe, how to bake bread rolls recipe, how to bake bread at www.OneTeaspoonOfLife.com
Read more ...

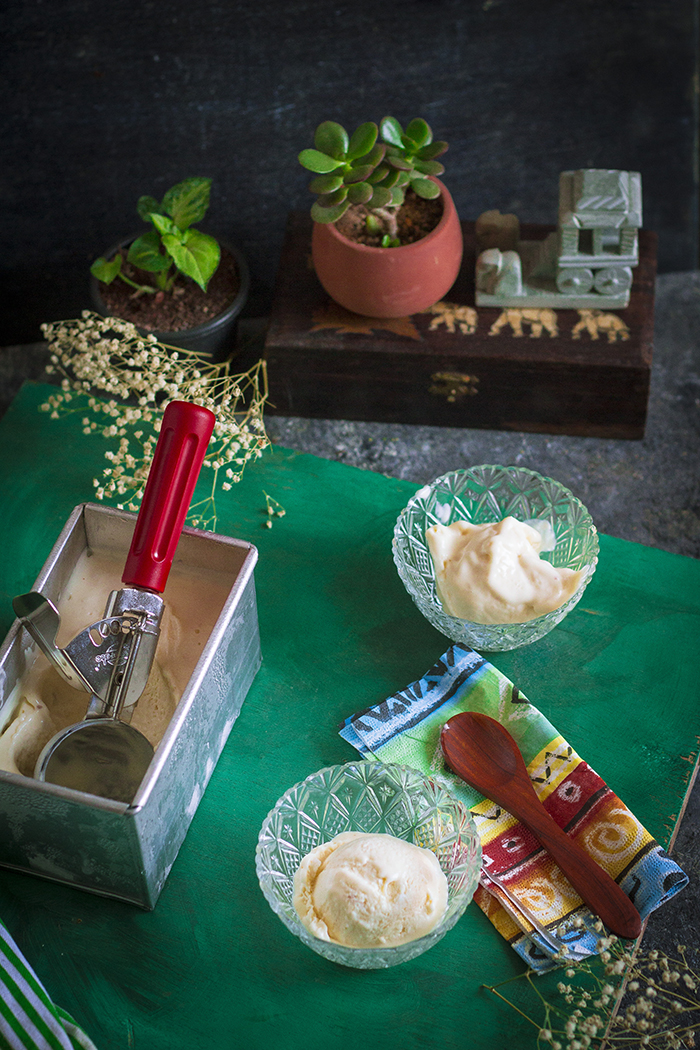
Natural's style Tender Coconut Ice Cream (without ice cream maker)


Tender Coconut Ice Cream recipe with step by step video instructions. This Naturals style Tender Coconut Ice Cream is made with only 4 ingredients and WITHOUT an ice cream maker!!! Tender Coconut Ice Cream is glutenfree and fits a Jain diet.

In a hurry? Jump to Video or Jump to Recipe


How to make coconut ice cream, coconut ice cream recipe, how to make ice cream without eggs, how to make ice cream without ice cream maker, naturals tender coconut ice cream recipe at www,oneteaspoonoflife.com

Heat Wave ALERT!! Bangalore is reeling under a heat wave right now and temperatures are soaring to mid thirty degrees C. Time to wallow in ice cream!

I have half the mind to move on to a chilled liquid diet until the heat wears off. But you know me, I wouldn't last a day without any food. So I'm doing the next best thing, well... not the next, but the BEST best thing, and that is loading up on ice cream. Chilled sweet perfection.

Tender coconut icecream

Everyone who's anyone in a town which has a Natural's Ice Cream Parlour has definitely tried their signature flavor - Tender Coconut. It's even in their logo. My family's favorite flavor. I personally die for their Custard Apple flavor but Gee and Raj love the Tender Coconut. You have to cook what the family will eat. Well, there is no cooking involved here, just like my last recipe of Bircher Muesli (Overnight Oats), which was also chilled, keeping in the spirit of Summer. 

Cut to last Saturday, while we were walking back home from one of our ridiculously long weekend walks, we picked up 4 tender coconuts from a local seller. Tender Coconut water is supposed to cool the body, and this heat definitely necessitates cooling. So the plan was to keep the coconut water in the fridge and drink it over the next few days so that we do not reach for any sugary sodas or drinks. 

I was then left with the meat or flesh of 4 coconuts. I don't mind eating it just like that or with a little jaggery, but 4 is a little too much for us to eat in a day. Light bulb moment!! Why don't I try making Tender Coconut Ice Cream! and the idea was born. I've made pop-sickles before, but never an ice cream. We usually just drive down to Natural's and buy a scoop of our favorite flavor. But Sunday was a first in my recipe book. I made Tender Coconut Ice Cream.... 

How to make coconut ice cream, coconut ice cream recipe, how to make ice cream without eggs, how to make ice cream without ice cream maker, naturals tender coconut ice cream recipe at www,oneteaspoonoflife.com

How to make coconut ice cream, coconut ice cream recipe, how to make ice cream without eggs, how to make ice cream without ice cream maker, naturals tender coconut ice cream recipe at www,oneteaspoonoflife.com

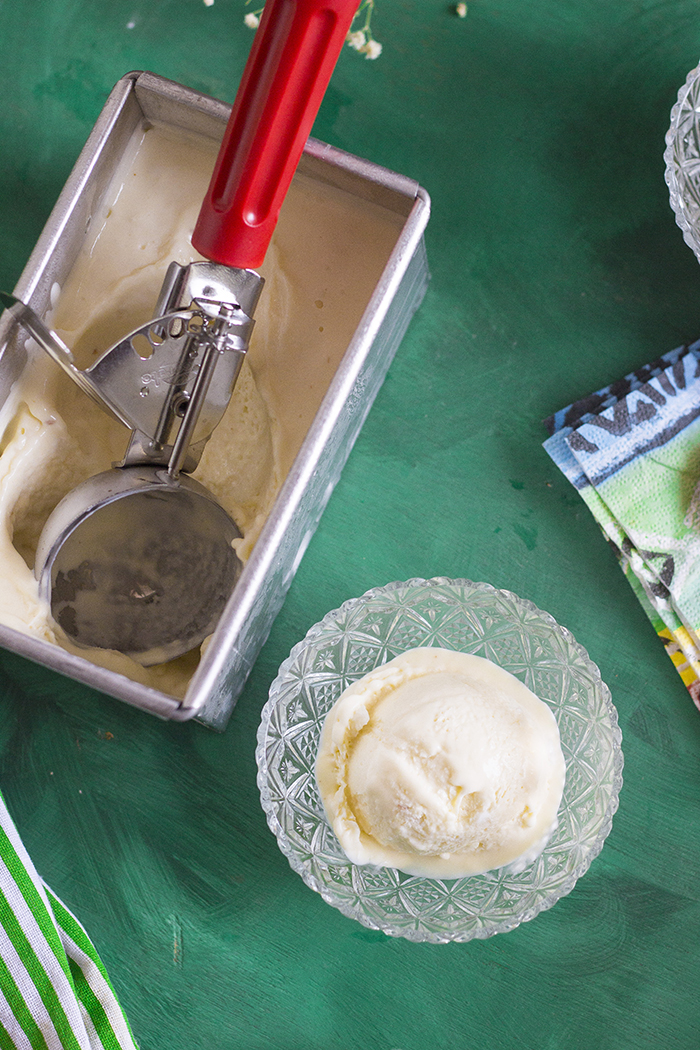
I don't own an ice cream maker and I don't know anyone who does, so this ice cream is something anyone can whip up. All you need is a whisk or a spatula. If you have a hand mixer, then you have all the power you need. This ice cream needs only 4 ingredients. Yup, that's it - FOUR!! Cream, Sugar, Coconut Meat and Coconut Water. Since there are only 4 ingredients, make sure you use fresh and the best quality you can find. 

I used fresh medium fat cream. Low fat cream may not work well. The cream needs to be chilled before use, else you may end up with butter instead of whipped cream.Whip the chilled cream until you have soft peaks. Blend a part of the coconut meat with 1/2 cup of coconut water. Fold in with the cream along with powdered sugar and chopped coconut meat. Pour in a freezer safe container and cover loosely with aluminium foil. Every 45-60 minutes for the first 3 hours, remove the ice cream from the freezer and whisk once completely and refreeze. This will prevent it from getting icy in places.
Tender coconut icecream

If you made this recipe, let me know! Leave a comment here or on Facebook, tag your tweet with @oneteaspoonlife on Twitter and don't forget to tag your photo #oneteaspoonoflife on Instagram. You can also email me at onetspoflife@gmail.com. I'd love to see what you are upto. 

If you like this recipe, do not forget to share it with your friends and family! 

You can follow One Teaspoon Of Life is there on Facebook, Twitter, Instagram, Pinterest and Google+ or you can subscribe to One Teaspoon Of Life and receive all the latest updated via Email (How convenient!!)


Video Recipe


--------------------------------------------------------------------------------------------------------------------------

Tender Coconut Ice Cream


How to make coconut ice cream, coconut ice cream recipe, how to make ice cream without eggs, how to make ice cream without ice cream maker, naturals tender coconut ice cream recipe at www,oneteaspoonoflife.comNaturals inspired Tender Coconut Ice Cream made with only 4 ingredients without an ice cream maker.

Recipe Type:  Dessert
Cuisine:            Indian
Prep Time:     30 minutes
Cook time:     0 minutes
Total time:     6 Hours 30 Minutes
Yield:                Serves 7-8


Ingredients:


400ml medium-fat Cream (chilled)
4 Tender Coconuts Meat
0.5 cup Tender Coconut Water
400gms sweetened Condensed Milk or 6-7 Tbsp Powdered Sugar

Method:


1. Blend the meat of 3 tender coconuts along with the tender coconut water to a smooth paste.
2. Chop the remaining tender coconut meat finely.
3. Whisk the chilled cream until you have soft peaks. Be careful not to over whisk, the cream will curdle into butter. If you feel the cream is getting warm, chill it for 10 minutes in the fridge and restart whisking.
4. Fold in the coconut paste, condensed milk or powdered sugar and the coconut pieces until combined.
5. Pour into a freezer safe box or baking pan. Cover with aluminium foil and place in the freezer.
6. After every hour for the first 3 hours, remove the ice cream from the freezer and whisk it again with the handheld mixer or with a spatula to prevent formation of ice crystals.
7. Leave it in the freezer until completely frozen.
8. Scoop and serve.


How to make coconut ice cream, coconut ice cream recipe, how to make ice cream without eggs, how to make ice cream without ice cream maker, naturals tender coconut ice cream recipe at www,oneteaspoonoflife.com


If you liked this, you may also like:

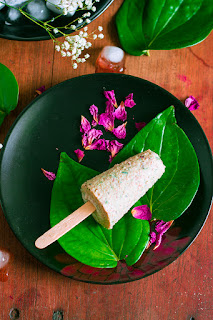
Meetha paan kulfi
Paan Kulfi

Coconut Laddoo
Blueberry Litchi Coconut Mocktail

Read more ...

Bircher Muesli | Overnight Oats


When temperature soars, a cold breakfast is welcome. This Bircher Muesli or Overnight Oats made with rolled oats, apple juice and yogurt is exactly what a cold breakfast should taste like...

How to make overnight oats, overnight oats recipe, bircher muesli with apple juice recipe, how to make bircher muesli with apple juice, rolled oats recipe, how to make rolled oats, cold breakfast recipe at www.oneateaspoonoflife.com


How to make overnight oats, overnight oats recipe, bircher muesli with apple juice recipe, how to make bircher muesli with apple juice, rolled oats recipe, how to make rolled oats, cold breakfast recipe at www.oneateaspoonoflife.com


I'll be completely honest, I was never one for a cold breakfast. Hot hot breakfast is what I am used to, and sometimes, I'll satisfy myself with food that is at room temperature. But chilled, just out of the fridge was something that never tempted me. Those rare times I eat cereal, I eat it with warm milk. But a couple of years ago when I went for a training to Hyderabad and was served cold Muesli in the buffet breakfast, I may have just converted a little bit. I still cannot eat cold breakfast every single day but when temperatures soar the way they have begun soaring, a cold breakfast is a relief!!

The first weekend I was back from the training, all I wanted to try was this Bircher Muesli... I couldn't wait to go out and buy rolled oats. I did go out, only to realize that the market is flooded with quick cooking oatmeal but there was no rolled oats anywhere. Gourmet super markets carried imported brands but they were super expensive. Finally, I tried making the muesli with oatmeal. While the taste was spot on, the texture really wasn't. Soaking oatmeal overnight gives it this pasty soft texture that is a total turn off. So if you really do make it with oatmeal, I highly recommend a shorted soaking time, maybe 2-3 hours.

How to make overnight oats, overnight oats recipe, bircher muesli with apple juice recipe, how to make bircher muesli with apple juice, rolled oats recipe, how to make rolled oats, cold breakfast recipe at www.oneateaspoonoflife.com


How to make overnight oats, overnight oats recipe, bircher muesli with apple juice recipe, how to make bircher muesli with apple juice, rolled oats recipe, how to make rolled oats, cold breakfast recipe at www.oneateaspoonoflife.com

Then I found this super affordable brand of Rolled Oats here. And luckily for me, just last week I found it stocked in an Organic store in Bangalore. Bircher Muesli it had to be.

This Bircher Muesli is till date the ONLY cold breakfast I eat. This muesli is all apple-y and yogurt-y, a flavor combination that tastes fresh and warm while being cold, um huh, you understand? If you are not a yogurt person, just replace it with milk and if you are looking for a vegan option, Almond milk goes great, but for me, it has to be fresh slightly sour yogurt.

This is a simple, no-cook recipe. But then, simple food always tastes the best, doesn't it?

To make this Bircher Muesli, soak the oats overnight in apple juice. In the morning add yogurt, lots of chopped nuts and lots and lots of chopped fruits. Sugar or honey for sweetness. Now this is something you can add or skip and it won't change the taste one bit - Basil Seeds. Basil seeds are the same family as Chia but are much more economical to purchase. They swell up when soaked in water just like chia seeds. You may know them as Falooda Seeds or Sabze ka beej. I soaked a few tablespoons of it in a cup of water and allowed it to swell while I cut fruits and chopped nuts. Once they had swelled up, I added them to the muesli. 

Use this recipe as a guide to make your perfect Bircher Muesli or Overnight Oats. I added fruits that my family loves and what are in season here - Apples, Pears, Bananas and Pomegranate (of course, pomegranate). You can use whatever you have. I'm a total "nut" case too, so I always have a variety of nuts and dry fruit stocked up to snack on. Use what is locally available to you.

How to make overnight oats, overnight oats recipe, bircher muesli with apple juice recipe, how to make bircher muesli with apple juice, rolled oats recipe, how to make rolled oats, cold breakfast recipe at www.oneateaspoonoflife.com

How to make overnight oats, overnight oats recipe, bircher muesli with apple juice recipe, how to make bircher muesli with apple juice, rolled oats recipe, how to make rolled oats, cold breakfast recipe at www.oneateaspoonoflife.com
If you made this recipe, let me know! Leave a comment here or on Facebook, tag your tweet with @oneteaspoonlife on Twitter and don't forget to tag your photo #oneteaspoonoflife on Instagram. You can also email me at onetspoflife@gmail.com. I'd love to see what you are upto. 

If you like this recipe, do not forget to share it with your friends and family! 

You can follow One Teaspoon Of Life is there on Facebook, Twitter, Instagram, Pinterest and Google+ or you can subscribe to One Teaspoon Of Life and receive all the latest updated via Email (How convenient!!)


Bircher Muesli | Overnight Oats


How to make overnight oats, overnight oats recipe, bircher muesli with apple juice recipe, how to make bircher muesli with apple juice, rolled oats recipe, how to make rolled oats, cold breakfast recipe at www.oneateaspoonoflife.comBircher Muesli or Overnight Oats is a cold breakfast made by soaking rolled oats in apple juice overnight and adding yogurt, nuts and fruits in the morning.

Recipe Type:  Breakfast
Cuisine:            International
Total Time:     20 minutes (excludes soaking time)
Yield:                Serves 5-6


Ingredients:


2 cups Rolled Oats
2 Tbsp Basil Seeds 
400 ml Apple Juice
3-4 Tbsp chopped Nuts (Almonds, Pistachios, Walnuts)
4 cups whisked Yogurt
3 Apples
2 Bananas
1 Pear
1/2 cup Pomegranate seeds
1 cup Water
Powdered sugar to taste

Method:


Soak the rolled oats in apple juice overnight.
In the morning, peel and grate 2 apples and add to the oats.
Add whisked yogurt and powdered sugar to taste.
Soak the basil seeds in 1 cup of water and allow them to swell up and then add to the muesli.
Top with chopped fruits and nuts and serve.


How to make overnight oats, overnight oats recipe, bircher muesli with apple juice recipe, how to make bircher muesli with apple juice, rolled oats recipe, how to make rolled oats, cold breakfast recipe at www.oneateaspoonoflife.com
Read more ...

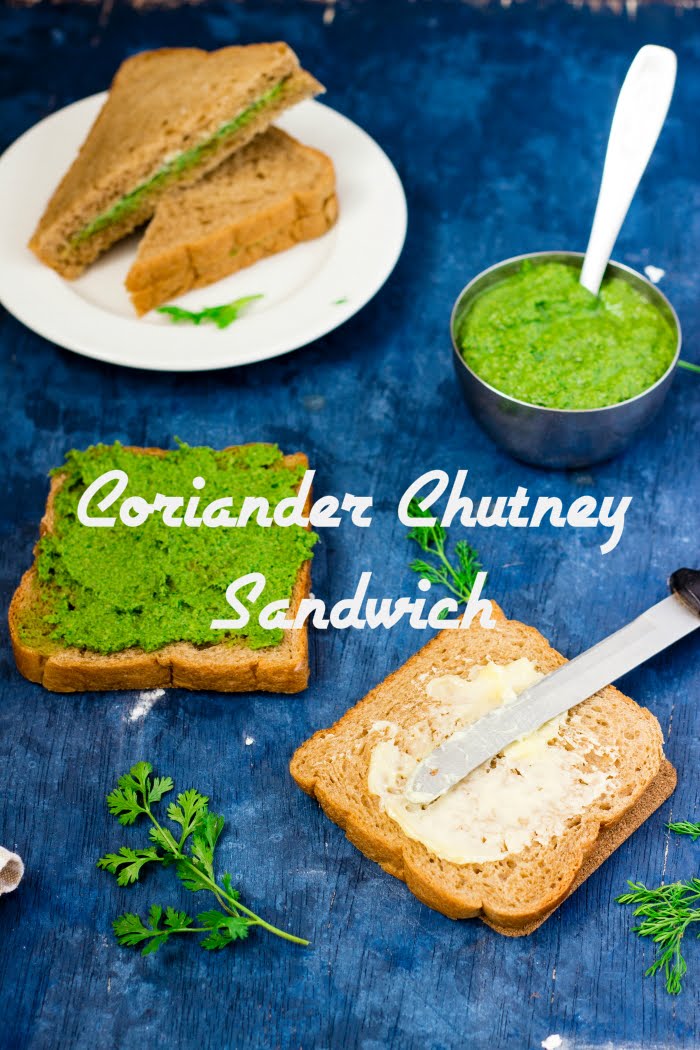
Coriander Chutney Sandwich


Picnics, Trips, Breakfast, Lunch - Eat this Coriander Chutney Sandwich anytime you want! Making it is child's play and it makes a great travel companion...

How to make chutney sandwich recipe, coriander chutney recipe, vegan sandwich, easy sandwich recipe

I was almost embarrassed to blog about this Coriander Chutney Sandwich. This is one of the simplest, basic recipe I have ever blogged about. I have been arguing with myself - should I or shouldn't I, for weeks now. Finally, the "should I" won. Winning arguments - I love simple recipes, and I'm sure so do you folks. No dish is too basic when it has all the right flavors. Flavor triumphs everything else

And there was also the fact, that this has been a favorite family Picnic meal forever. Literally, forever, as long as I can remember!! We don't go on picnics anymore, although I think we totally should. But in my head, you can only go for picnic to the beach. You can remove the girl from Goa, but not the Goa from the girl !! I miss that deep blue sea, the white sand and the shade of coconut trees under which we spread our bedsheets and picniced. While all my cousins and Gee swam without fear of the big bad ocean, I safely sat on the shore and built sand castles. They may think they enjoyed more, but I was closer to the food. Ha!!

How to make chutney sandwich recipe, coriander chutney recipe, vegan sandwich, easy sandwich recipe

I like Bangalore, but my only complain is it is only flanked by land on all sides, no beaches in site anywhere, the closest one is at least 400kms away. I can go to the gardens, but let's face it a garden is no beach and once you have tasted the sea, there is just no satisfying the soul with anything else!! So no picnics in sight anywhere, but we do take a lot of road trips. Not as many as I would like off late, but hey, something is better than nothing. And our little triangular Chutney Sandwich still accompanies us on these road trips along with bags of chips and bottles of soft drinks and chocolates. Of course chocolates!!!

Sometimes this Coriander Chutney Sandwich becomes my Saturday breakfast. I make the Coriander Chutney at night and store it in the fridge, so Saturday breakfast is a breeze. No one has to wait for me to wake up and make breakfast - slapping on some butter and chutney onto 2 slices of bread is definitely child's play. So I get to sleep in. And I myself don't need to worry about "what to cook for breakfast", the most tiresome question I ask myself most days.

How to make chutney sandwich recipe, coriander chutney recipe, vegan sandwich, easy sandwich recipe

How to make chutney sandwich recipe, coriander chutney recipe, vegan sandwich, easy sandwich recipe

This Coriander Chutney is made by blending / grinding together fresh grated coconut, fresh coriander leaves, green chillies for the heat, tamarind for sourness and salt with a little bit of water. A regular coconut chutney that is eaten with Dosa or Idli usually has a lot more of coconut than coriander, but here the quantity of coriander is far more than the coconut. The coconut is there just to add body to the chutney and perhaps, a little sweetness, but otherwise the Coriander steals the show. Add a little mint and sugar to make this chutney extra special.

This is one of "those" recipes which does not follow a recipe. Just take the quantity of the ingredients below as a guideline and change it to suit your palate. There is no right or wrong in making a chutney. The only thing I'd be cautious about is the quantity of water, start small and increase as you go. A watery chutney will lead to a soggy sandwich and no one likes a soggy sandwich, am I right? Except Gee, of course, how can sibling ever agree on anything, I wonder!!!

How to make chutney sandwich recipe, coriander chutney recipe, vegan sandwich, easy sandwich recipe


If you made this recipe, let me know! Leave a comment here or on Facebook, tag your tweet with @oneteaspoonlife on Twitter and don't forget to tag your photo #oneteaspoonoflife on Instagram. You can also email me at onetspoflife@gmail.com. I'd love to see what you are upto. 

If you like this recipe, do not forget to share it with your friends and family! 

You can follow One Teaspoon Of Life is there on Facebook, Twitter, Instagram, Pinterest and Google+ or you can subscribe to One Teaspoon Of Life and receive all the latest updated via Email (How convenient!!)

If you liked this, you may also like:


Coriander Chutney Sandwich


How to make chutney sandwich recipe, coriander chutney recipe, vegan sandwich, easy sandwich recipeCoriander Chutney Sandwich is made using a simple coconut and coriander chutney, bread and butter.

Recipe Type:  Sandwich
Cuisine:            Indian
Total Time:     15 minutes
Yield:                Serves 3-4


Ingredients:


For the Coriander Chutney:


1/2 cup freshly grated Coconut
1.5 cups loosely packed Coriander leaves
1/2 tsp Tamarind pulp
1-2 Green Chillies
2-3 Tbsp Water
1/4 tsp Sugar
Salt to taste

To assemble the Sandwich:


Bread
Butter

Method:


Grind/ blend together all the ingredients to get a smooth chutney.
Add the water by the spoonful to get a thick chutney. Do not add all the water in the beginning, the coriander and coconut will leave their own juices and the chutney may end up being runny.
Spread one slice of bread with butter and the other with the coriander chutney.
Stick the 2 slices together and cut into triangles to make Coriander Chutney Sandwich.


How to make chutney sandwich recipe, coriander chutney recipe, vegan sandwich, easy sandwich recipe


Read more ...

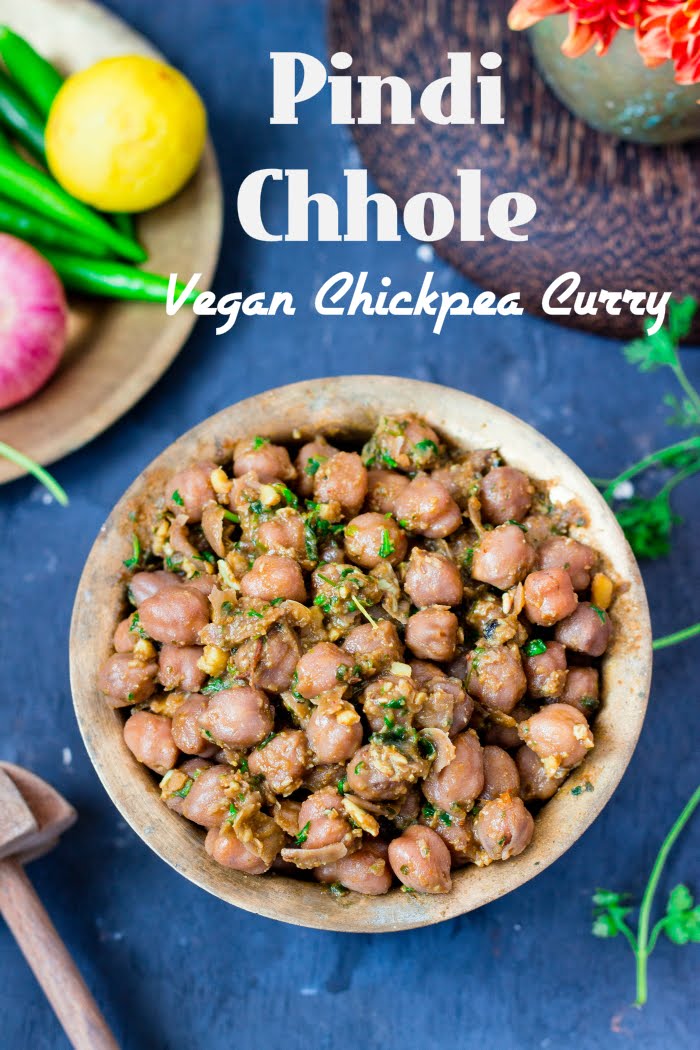
Pindi Chhole


My second recipe with tea and chickpeas. Pindi chhole is a simple vegan chickpea curry made with chickpeas (kabuli chana /chhole) cooked with tea and tempered with spices.

How to make Pindi Chhole, pindi chhole recipe, vegan chickpea recipe, vegan garbanzo curry recipe, how to make chhole, chhole recipe

So who had fun over the weekend? Did you try my Sunday lunch special? In case you missed, you should try out this Jackfruit Biryani / Kathal Biryani. It even has a vegan option. Don't you just love me!

I had a fun/busy weekend as usual. I had all plans of going for a movie, but the disappointing reviews left me with a big 3 hour gap in my weekend. Sad and Yay!! No movie, but at least 3 more hours of just doing nothing. I could fit in one long walk this weekend. Since we lazy people barely workout in the week, we make it a point to go for these ridiculously long walks on the weekend. All Gee's fault really. This trend was totally started by her!! Although our walks usually end up in a plate of Pani Puri or Tomato Puri, but hey, at least we get some fresh air. Just some, with all the pollution around.

How to make Pindi Chhole, pindi chhole recipe, vegan chickpea recipe, vegan garbanzo curry recipe, how to make chhole, chhole recipe

Back to my Pindi Chhole recipe....

This is my second recipe of Tea+Chickpeas. While this Amritsari Chhole was made with an onion-tomato based masala, this one is different. Simpler, actually!! Double YAY!!

As far as your chhole or chickpeas have been boiled, this is an instant recipe. Ready in less than 15 minutes. Now that is what I call Healthy Fast Food!

This recipe starts exactly like the Amritsari Chhole, with the dried chickpeas being soaked overnight. You can make this with canned chickpeas that have already been cooked, but then you miss out on the cooking-with-tea part and I somehow feel that is what makes this recipe so good. So if you are looking for an instant option, you can probably just simmer the canned chickpeas in a tea decoction for a while, but I'm not sure it would taste the same.

So after it has soaked and you have cooked the chickpeas with spices and tea, all you really need to do it heat oil, fry a lot of mince or paste of ginger and garlic. This is what gives it most of the flavor. Then add the spice powders. Some sort of souring agent, traditionally dried pomegranate seeds (anardana)  are used, but you can use dried mango powder (amchur) or tamarind juice. Lime juice can also be used. Keep aside a little bit of the chickpeas and add the remaining to the pan. The chickpeas that you have kept aside, need to be mashed and then added. This helps in giving you a thicker gravy in the absence of tomato and onions. 

How to make Pindi Chhole, pindi chhole recipe, vegan chickpea recipe, vegan garbanzo curry recipe, how to make chhole, chhole recipe


How to make Pindi Chhole, pindi chhole recipe, vegan chickpea recipe, vegan garbanzo curry recipe, how to make chhole, chhole recipe

If you made this recipe, let me know! Leave a comment here or on Facebook, tag your tweet with @oneteaspoonlife on Twitter and don't forget to tag your photo #oneteaspoonoflife on Instagram. You can also email me at onetspoflife@gmail.com. I'd love to see what you are upto. 

If you like this recipe, do not forget to share it with your friends and family! 

You can follow One Teaspoon Of Life is there on Facebook, Twitter, Instagram, Pinterest and Google+ or you can subscribe to One Teaspoon Of Life and receive all the latest updated via Email (How convenient!!)

If you liked this, you may also like:


Pindi Chhole


How to make Pindi Chhole, pindi chhole recipe, vegan chickpea recipe, vegan garbanzo curry recipe, how to make chhole, chhole recipe Pindi Chhole is a vegan chickpea curry made by cooking chickpeas or kabuli channa along with tea and later adding a tempering of ginger-garlic and spices.

Recipe Type:  Main Course
Cuisine:          North Indian
Prep Time:     8 Hours (Includes chickpea soaking time)
Cook time:     45 minutes
Yield:              Serves 2-3

Ingredients:


1.5 cups dried Chickpeas / Kabuli Chana
1 Bay leaf
2-3 Cloves
1 Green Cardamom
1 Black Cardamom
5-6 Peppercorns
1” piece Cinnamon
1 Tea Bag or 1 tsp tea powder tied in muslin cloth pouch
2 tsp Ginger-Garlic Paste (Preferably freshly ground)
1-2 tsp Coriander Powder
1 tsp Cumin Powder
½ tsp Red Chilli Powder
½ tsp Turmeric Powder
1 tsp Kasuri Methi
½ tsp Carom seeds / Ajwain
½ tsp Black Salt / Kala Namak
1 tsp Anardana Powder or 1 tsp Amchur or 1 Tbsp Tamarind Juice or Lime juice
4-5 tsp Oil
Salt to taste
Water as required
Coriander leaves for garnish

Method:


Soak the chickpeas in water overnight or for 8-10 hours.
Cook the chickpeas in 2 cups of water along with the tea bag, bay leaf, cloves, cinnamon, peppercorns, green cardamom, black cardamom and ½ tsp salt until the chickpeas are cooked. I pressure cook them, and it takes me around 2-3 whistles or 8-10 minutes for the chickpeas to be cooked. The chickpeas should be well cooked but not mushy.
Heat oil in a kadhai or pan and add the carom seeds.
Once the carom seeds brown, add the ginger-garlic paste and sauté until fragrant.
Keep aside ¼ to ½ cup of chickpeas aside and add the rest along with 1 cup of the water it was cooked in.
Add coriander powder, cumin powder, red chilli powder, turmeric powder and black salt.
For sourness, add any one of the following – anardana (dried pomegranate seeds) powder or amchur (dried mango powder) or tamarind juice or lime juice. Use what is available with you.
Crush the chickpeas that were reserved aside and add to the pan.
Add kasuri methi and simmer for 4-5 minutes until thick. Adjust salt and spices as per taste. Add more of the cooking water if you would like a thinner consistency.
Garnish with chopped coriander leaves.
Serve hot with Puri or Roti.


How to make Pindi Chhole, pindi chhole recipe, vegan chickpea recipe, vegan garbanzo curry recipe, how to make chhole, chhole recipe
Read more ...