Showing posts with label gluten free. Show all posts

Medu Vada Recipe | Uddina Vada Recipe [Video]


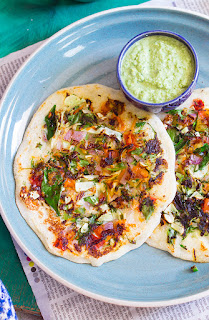
Uddina Vada or Medu Vada is a popular South Indian breakfast item. Medu vada is a savory donut made from urad dal or black lentils. Medu vadas are crispy and golden brown on the outside and soft and spongy on the inside. They taste best when served with fresh coconut chutney or dunked in a spicy hot sambar.


In a hurry? Jump to Video or Jump to Recipe

medu vada medhu vada with chutney

It's raining!!!! and I'm pretty sure it is a crime to not eat crispy fried food when it rains. It isn't? Well, it should be. 

I recently mentioned in my Instagram post that Bangalore weather is as unpredictable. Summer unofficially started in early March this year and it's been blazing hot, hotter than ever, out here. Every year when it gets slightly hot, rains come and it cools off. Last year, when I tried to make a second batch of these sun dried potato chips, they caught mold due to the humidity. But this year there was no sight of rain or even a little cloud to shade us from the sun. Until now. The weather has been pretty unpredictable this week, just like Bangaloreans are used to. Heavy rains caught us off guard this week. And the evening rains are cooling down the city. And when it rains, eat all the fried food you can. 

Frankly, Bangaloreans don't need a reason to eat this scrumptious crispy vada. Vada is eaten for breakfast, snacks, and may be lunch and dinner too. A plate of idli with one vada and a piping hot cup of traditional filter coffee, a simple soul satisfying breakfast for any South Indian. But the lazy me definitely needs a reason to make them at home.

medu vada medhu vada with chutney

Uddina Vada or Medu Vada is a quintessential item on the breakfast scene of South India, not just Bangalore. The vadas are crispy golden brown on the outside, soft and spongy on the inside. When they are served piping hot with a bowl of fresh coconut chutney and a spicy bowl of sambar, one just stops talking and digs in. Contrary to popular belief, making these vadas at home is not difficult. But what can be challenging is to make that hole in the center. You cannot cut it as you would with a donut. But there are a few simple tricks to making the perfect uddina vada, hole and all.

Firstly, the batter has to be thick. As thick as it can be. The urad dal or black lentils, have to be soaked for just the right amount of time. 3-4 hours at max. More than 4 hours, and you will get a soggy batter that cannot be shaped. After soaking, completely drain the lentils and grind with as little water as possible until you have a smooth creamy batter. 

Secondly, for a crispy vada, you need to add in a little rice flour and a pinch of cooking or baking soda. Too much of the soda and you will have a very crispy vada that won't go well with the purists.

Third, the flavor givers. Add in what you like to flavor the vada. Popular ingredients include cumin, pepper, curry leaves, coconut pieces, green chillies and coriander leaves. Add what you like in them. Also, add salt at the very end, just when about to make the vada, else the batter may turn soggy.

Fourth, the hole. Making the hole isn't as complicated as it sounds. All you need is a thick batter and wet hands. Yup. Wet your hands properly and then take a dollop of the batter, use your wet fingers to make a hole and then gently drop it in the oil. If you are unable to make the hole for any reason, don't worry too much, just drop the batter in oil using a spoon. The hole is just for visual appeal and doesn't impact the taste or the texture.

Five, the frying. To get a nice crispy exterior, fry for the first one minute of high flame. Then lower the heat and allow the vada to cook on the inside. Once the vada is the golden brown, it is ready to be served.

Six, make extra. Well, this isn't a trick or tip, as much as an advise. Vadas are irresistible, always make extra.

Wishing you a vada happy weekend!!

P.S - This recipe has been reposted. The recipe was originally published in 2014. Images have been updated and a video has been added. The recipe remains the same.

medu vada medhu vada with chutney


If you made this recipe, let me know! Leave a comment here or on Facebook tag your tweet with @oneteaspoonlife on Twitter and don't forget to tag your photo @oneteaspoonoflife on Instagram. You can also email me at onetspoflife@gmail.com I'd love to see what you are upto.


If you like this recipe, do not forget to share it with your friends and family! 


You can follow One Teaspoon Of Life on FacebookTwitterInstagramPinterest or you can subscribe to One Teaspoon Of Life and receive all the latest updated via Email


Video Recipe


--------------------------------------------------------------------------------------------------------------------------

Medu Vada Recipe | Uddina Vada Recipe


medu vada medhu vada with chutneyMedu Vada is an Indian deep fried savory donut made from lentils. A popular South Indian breakfast along with Idli.

Recipe Type:  Snacks / Breakfast
Cuisine:          South Indian
Prep Time:     3-4 Hours (Including lentil soaking time)
Cook time:     20 minutes
Yield:              12 small Vada

Ingredients:


1 cup Urad Dal
1 Tbsp Rice Flour
6-8 Curry leaves, finely chopped
1 Green Chilli, finely chopped
0.5 tsp Pepper, freshly crushed
A pinch of baking soda
Salt to taste
Oil to fry
Water as required

Method:


1. Wash the urad dal and soak the dal in water for around 3-4 hours.
2. Drain the dal and grind into a fine batter. Use as less water as possible. The batter should be thick.
3. Heat oil in a kadhai to deep fry the vadas.
4. While the oil heats, add in the rice flour, green chilli, pepper, baking soda and salt. Mix well until combined. IF the dough feels watery, add a little more rice flour.
5. Once the oil is hot enough, wet your hands and take a spoonful of batter onto your fingers. Using the wet finger of the other hand, make a hole in the center. Watch the video for help on how to do this.
6. Gently drop the vada in the oil.
7. Fry on high heat for 1 minute, then lower the heat slightly and continue to cook until the vada becomes golden brown.
8. Now gently slide this batter into the oil. Stir the vada occassionally and flip it, so that it cooks evenly. Cook until golden brown on both sides.
9. Serve the vada hot with coconut chutney or sambar.


See the notes mentioned above the Video for tips on making the perfect Medu Vada.


If you liked this, you may also like:

steamed idli made from oats, instant oats idli
Oats Idli

Mangalore Banana Buns
Mangalore Buns
instant mix vegetable uttappa dosa made from rava
Instant Mix Veg Uttappa


Read more ...

Sweet Potato Kebabs Recipe | Shakarkand Tikki Recipe [Video]


Sweet Potato Kebabs are shallow fried vegan fritters or tikkis made from boiled sweet potato, nuts, herbs and spices. They are perfect to be served as snacks at tea time. This recipe is vegan and glutenfree.

In a hurry? Jump to Video or Jump to Recipe

Sweet Potato Kebabs

SNACKS! It is FRY-day after all.

Sometime last year I posted a poll on Facebook, asking what you would like to see, and snacks got the highest vote. And I knew, you guys are just like me.

Raj loves sweet potatoes, and I'm just kinda okay okay about it. At this time of the year, the markets are flooded with sweet potatoes, well, because it is the season. So while we went out for our regular Sunday night dinner to eat Benne Dose or Butter Dosa, he tricked me into buying a lot of sweet potato from a farmer. Turns out, he wasn't a farmer.

Sweet Potato Kebabs

Sweet Potato Kebabs


Anyway, with a lot of sweet potatoes in my bag, and knowing that this lazy man won't even boil it for himself to eat, I had to think of something that I could cook and we both could eat.

Sweet Potato Kebabs or Tikkis are delicious and easy finger food, that will just prove to your family, how sweet you really are. Ok, bad jokes aside. They really are delicious and easy to make. Just boil sweet potatoes, add in all the other nice things, roll into shape, any shape you like, and fry it. Coz fry-day. Ok, no more jokes!

I'm keeping this post short for today. CYA on the other side of the weekend. Love you all.

Sweet Potato Kebabs


If you made this recipe, let me know! Leave a comment here or on Facebook tag your tweet with @oneteaspoonlife on Twitter and don't forget to tag your photo #oneteaspoonoflife on Instagram. You can also email me at onetspoflife@gmail.com I'd love to see what you are upto.


If you like this recipe, do not forget to share it with your friends and family! 


You can follow One Teaspoon Of Life on FacebookTwitterInstagramPinterest and Google+ or you can subscribe to One Teaspoon Of Life and receive all the latest updated via Email


Video Recipe


--------------------------------------------------------------------------------------------------------------------------

Sweet Potato Kebabs Recipe


Sweet Potato KebabsSweet Potato Kebabs are shallow fried vegan fritters or tikkis made from boiled sweet potato, nuts, herbs and spices. They are perfect to be served as snacks at tea time. This recipe is vegan and gluten free.

Recipe Type:  Snacks
Cuisine:            Indian
Prep Time:     10 minutes
Cook time:     20 minutes
Total time:     30 minutes
Yield:                14-15

Ingredients:


500gms boiled Sweet Potato
1 tsp Cumin Seeds
3-4 Walnuts, chopped
1 Green Chilli
1 large Tomato
2 Tbsp Green Onions or Spring Onion Greens
1 tsp Amchur Powder (dried mango powder)
1 tsp Turmeric Powder
1 tsp Garam Masala
2 Tbsp chopped Coriander Leaves
3 Tbsp Buckwheat Flour (Kuttu ka atta) or any other flour
Salt to taste
Oil to fry
1 tsp Chat Masala (optional)

Method:


1. Mash the boiled sweet potato until smooth.
2. Lightly crush the cumin seeds and add to the sweet potato.
3. Add in finely chopped green chilli, chopped walnuts, chopped green onions, amchur powder, turmeric powder, garam masala powder, chopped coriander leaves, buckwheat flour and salt to taste.
4. Mix well until combined and shape into kebabs.
5. Heat oil in a pan and fry the kebabs until browned evenly on all sides.
6. Sprinkle with chat masala before serving (optional).


If you liked this, you may also like:

Shallow fried fritters made from broccoli and zucchini stacked together
Broccoli Zucchini Fritters

vegan pan fried turnip chops
Shalgam Kebab
How to make banana flower cutlets recipe at www.oneteaspoonoflife.com
Banana Blossom Cutlets


Read more ...

Raw Banana Kofta Curry Recipe [Video]


Raw Banana Kofta Curry is a spicy, sweet and tangy coconut based curry with fried raw banana (plantain) dumplings. This curry is vegan and gluten free.

In a hurry? Jump to Video or Jump to Recipe

Raw banana plantain koftas in a coconut milk based spicy tangy gravy


We are mid way through January already!! I must say, time literally flies. It feels like just yesterday it was December and I was getting all excited for the New Year, and today we are already well into it. So did you start all that you planned to do in 2019? I'm still dragging my feet on my checklist. 

In other news, I've been at home an awful lot lately, mainly because of some trade union strikes last week that stopped public transport and we were all forced to work from home, and I had some personal commitments that made me still work from home for a few days here and there. While you would think being home and cutting out all that stress of travel, I'd be more productive in the kitchen. But the truth is, when I'm home I'm super lazy. Sometimes, I make instant noodles or just buy bread to mop up leftover curry. 

I finally decided it was time to stop being lazy and cook up this amazing Raw Banana Kofta Curry that I had in my mind for so long. I found this recipe in a magazine at the doctor's. I actually dread doctor visits. I can probably count the number of visits I've made in the last 2 years on the fingers of one hand. Raise you hand if you dread doctor visits like me! While I waited for my turn for my annual checkup, I leafed through a magazine on the coffee table and this recipe kind of jumped at me. I made Raj take a quick photo and stored it away. Finally I got around to making it, thankfully.

Raw banana plantain koftas in a coconut milk based spicy tangy gravy

Raw banana plantain koftas in a coconut milk based spicy tangy gravy

This Raw Banana Kofta Curry is spicy, sweet and tangy! Flavor explosion in your mouth.

The curry or the gravy is what gives all the flavor. Tomato and Tamarind impart the sourness to the curry, the jaggery adds sweetness, the high count of red chillies gives the curry heat and color and the coconut milk just mellows down everything with it's rich creaminess. My mouth still waters when I reminisce about this curry, it was SO delicious. This curry really had the balance of sweetness, sourness and heat. Take the ingredients below as more of a direction than rigid quantities. Your palate may prefer the curry being less sweet and more tart. Adjust the ingredients to your liking. Start with less jaggery and tamarind and add more as you go along. The red chillies are deseeded so that the curry is not too hot but still has the vibrant color. You can leave the seeds in for a spicier curry.

The Raw Banana Koftas are really easy to make. They taste good just by themselves too. So you can make more and serve them as snacks at tea time. The original recipe called for raisins but I replaced them with cashew nuts. Add any nuts you like into the koftas. I also added in grated Tofu instead of the grated Paneer, because I had tofu in the fridge. The koftas can be either shallow fried or deep fried. You may even try to bake it. Add the koftas just before serving to retain the crispness of the koftas.

Raw Banana Kofta Curry is best served hot with naan or rotis.

Raw banana plantain koftas in a coconut milk based spicy tangy gravy


If you made this recipe, let me know! Leave a comment here or on Facebook tag your tweet with @oneteaspoonlife on Twitter and don't forget to tag your photo #oneteaspoonoflife on Instagram. You can also email me at onetspoflife@gmail.com I'd love to see what you are upto.


If you like this recipe, do not forget to share it with your friends and family! 


You can follow One Teaspoon Of Life on FacebookTwitterInstagramPinterest and Google+ or you can subscribe to One Teaspoon Of Life and receive all the latest updated via Email


Video Recipe


--------------------------------------------------------------------------------------------------------------------------

Raw Banana Kofta Curry


Raw banana plantain koftas in a coconut milk based spicy tangy gravyRaw Banana Kofta Curry is a spicy, sweet and tangy coconut based curry with fried raw banana (plantain) dumplings. This curry is vegan and gluten free.

Recipe Type:  Main
Cuisine:            Indian
Prep Time:     10 minutes
Cook time:     40 minutes
Total time:     50 minutes
Yield:                Serves 3-4

Ingredients:


For the curry:


10-12 Dry Red Chillies
1 tsp Turmeric Powder
0.5 tsp Peppercorns
2-3 tsp Jaggery or Sugar
1 large Tomato
1 tsp Tamarind Pulp
1 cup thick Coconut Milk
2 Tbsp Kasuri Methi
2 Tbsp chopped Coriander Leaves
3 tsp Oil
1 tsp Mustard Seeds
Salt to taste
Water as required

For the Koftas:


2 raw Bananas or Plantain
10-12 Cashew Nuts, chopped
1 cup grated Tofu or Paneer
1 Tbsp chopped Coriander Leaves
Salt to taste
Oil to fry koftas

Method:


1. Cut the edges of the raw bananas and dice them roughly. Boil them with a pinch of salt until soft.
2. Peel the bananas and keep aside.
3. Deseed the dry red chillies and add to a mixer/blender. You can keep the seeds in if you want the curry to be very spicy.
4. Add turmeric powder and black peppercorns to the mixer and grind until you get a coarse powder.
5. Add 2 tsp of jaggery or sugar along with the tamarind pulp and chopped tomato to the blender.
6. Add a little water and blend until you get a smooth paste.
7. Heat oil in a pan and add in the mustard seeds.
8. Once they splutter, add the masala paste and cook for 7-8 minutes until the raw smell disappears.
9. Add 1 cup of water and a little salt and allow the curry to boil.
10. Once the water has evaporated, add in the thick coconut milk and allow it to come to a boil.
11. Adjust salt and sugar as required.
12. Once the curry has reached a rolling boil, add in the dried kasuri methi.
13. Allow it to simmer for 3-4 minutes.
14. Remove from heat and add in chopped coriander leaves and keep aside.
15. Mash the boiled raw bananas and add in the chopped cashew nuts, grated tofu or paneer, chopped coriander leaves and salt.
16. Mix well until combined and shape into koftas.
17. Heat oil in a shallow pan for frying koftas.
18. Add the koftas to the pan and fry until all sides are browned. You can also deep fry the koftas.
19. Add the koftas to the curry and mix well.
20. Serve hot with rotis or naan.


Raw banana plantain koftas in a coconut milk based spicy tangy gravy


If you liked this, you may also like:

Bottle gourd dumplings in a tomato based gravy
Lauki Kofta Curry

Raw Banana Fry
How to make banana flower cutlets recipe at www.oneteaspoonoflife.com
Banana Blossom Cutlets


Read more ...

Mint Rice Recipe | How to make Pudina Rice | Pudina Pulao Recipe [Video]


Mint Rice or Pudina Pulao or Pudina Rice is a simple vegan one pot dish of fragrant Basmati rice cooked along with a fresh mint puree, vegetables and spices. Perfect for weeknights when you are short of time.

In a hurry? Jump to Video or Jump to Recipe


pudina pulao, mint rice, mint pulao

Monday blues came in early this week. I had a one day weekend. Just Sunday… Sigh! I technically had a Saturday, but that was spent attending an event at Office and all my usual Saturday stuff landed into my Sunday and I was left with no rest day.

Between my load of laundry and dusting the house, I have absolutely no idea where that Sunday just disappeared into thin air. Literally, I blinked and my weekend was over.

I’m a planner, at least I try to be most of the times. Not necessarily execute all that I planned but plan I do. My weekly meals are all well planned on Saturday. I buy all the groceries and vegetables over the weekend and chalk out a small menu on a post it and stick it onto my fridge. This way I don’t need to stress out on weekdays wondering what to cook next. I still fret around about what to cook, but that fretting is now limited to Saturdays. I also wash all my vegetables and fruits on the weekend and sometimes chop them and store them in the fridge to make my weeknights easier. With my erratic work schedule, I need all the prep I can do.

Guess what happens when the planner loses one day of prep time. She panics!!!

pudina pulao, mint rice, mint pulao

That’s when come out simple recipes that can be whipped up in a jiffy. And so I made this evergreen Mint Rice or Pudina Rice. I did not have to go out and buy anything. Well… at least not the hero of the dish – the Mint. I’ve spoken a lot about my little Mint patch many times before, so I won’t bore you with that once again. 

This Mint Rice requires no prep in advance at all. It also uses exactly 2 vessels – the blender or mixer and the pressure cooker. Just blend together the mint, coriander leaves, spices, ginger and garlic and cook it along with the rice and some optional vegetables in the pressure cooker. You can use your rice cooker or even a deep saucepan to make this Mint Rice.

I added potato, tomato and green peas. You can skip them or go ahead and add vegetables like green beans or broccoli. I assure you it will taste amazing. 

Mint Rice tastes great with mixed vegetable Raita or plain yoghurt.

pudina pulao, mint rice, mint pulao

If you made this recipe, let me know! Leave a comment here or on Facebook tag your tweet with @oneteaspoonlife on Twitter and don't forget to tag your photo #oneteaspoonoflife on Instagram. You can also email me at onetspoflife@gmail.com I'd love to see what you are upto.


If you like this recipe, do not forget to share it with your friends and family! 


You can follow One Teaspoon Of Life on FacebookTwitterInstagramPinterest and Google+ or you can subscribe to One Teaspoon Of Life and receive all the latest updated via Email


Video Recipe


--------------------------------------------------------------------------------------------------------------------------


Mint Rice | Pudina Rice | Pudina Pulao


pudina pulao, mint rice, mint pulaoMint Rice is a one pot dish of rice cooked along with a mint puree, vegetables and spices.

Recipe Type:  Main
Cuisine:            Indian
Prep Time:     15 minutes
Cook time:     20 minutes
Total time:     35 minutes
Yield:                Serves 2-3

Ingredients:


1 cup chopped Mint leaves
0.5 cup chopped Coriander Leaves
0.75 cup Basmati Rice
1 Onion
1 Tomato
1 Potato
0.25 cup Green Peas
1-2 Green Chilli
1 Tbsp chopped Ginger
1 Tbsp chopped Garlic
1 tsp Coriander Powder
1 tsp Cumin Powder
0.25 tsp Garam Masala
1 tsp Cumin Seeds
2 Cloves
1" Cinnamon stick
1 Bay Leaf
0.5 Lime
3-4 tsp Oil
1.5 cups Water
Salt to taste

Method:


1. Wash the basmati rice until the water runs clean. Drain and keep aside.
2. Slice the onions and chop the tomato. Peel and dice the potato.
3. In a blender or mixer, blend together the mint leaves, coriander leaves, green chilli, ginger, garlic, coriander powder, cumin powder and juice of half a lime along with 1-2 Tbsp water to a smooth paste.
4. Heat oil in a pressure cooker and add the cumin seeds, cloves, cinnamon and the bay leaf.
5. Fry for 1 minute on medium heat or until fragrant.
6. Add the onions and fry until browned slightly.
7. Now add the green peas, potato and tomato and fry for 30 seconds.
8. Add the mint-coriander paste and mix well.
9. Add in the rice and mix well.
10. Add 1.25 cups of water, garam masala and salt to taste.
11. Cover and pressure cook for 2-3 whistles or 5-8 minutes after the pressure builds up.
12. Serve hot with raita.


Read more ...

Ghugni Masala | Kala Chana Masala [Video]


Ghugni Masala is a vegan and healthy curry made from black chickpeas or kala chana. The chickpeas are simmered in a masala made from pureed onions, tomatoes and spices. A perfect gluten free accompaniment to roti or naan bread.

In a hurry? Jump to Video or Jump to Recipe

Black Chickpea Curry


What's a better way to start of a week than with a healthy meal? And this Ghugni Masala or Kala Chana Masala is as healthy as it gets.

Kala Chana or Ghugni are desi black chickpeas. If you aren't Indian, there is a possibility you haven't seen the black chickpeas. Black chickpeas are smaller, denser and have a rougher skin than their cousin, the more popular, white chickpeas. Black chickpeas have more fiber and a lower glycemic index and make it perfect for someone trying to lose weight or just lead a healthier life. 

Also, I just love them!

Black Chickpea Curry

I enjoy eating the black chickpeas way more than the lighter variety, also known locally as Kabuli Chana. And what I love even more than the black chickpeas? the water it is cooked in or the aqua faba. The black chickpeas release a lot of umami into the water that they were boiled in, making it perfect for using in curries. Which is why in this curry, we don't use regular water, we use the water in which the chickpeas were boiled. The water adds color as well as an oomph to the curry. 

Ghugni Masala is a very simple curry to make and stores brilliantly in the fridge. 

The curry is simply made by simmering boiled black chickpeas in a masala made from pureed onions and tomatoes that have been flavored with 4 simple spice powders - coriander powder, turmeric powder, red chilli powder and garam masala. Whole spices are also used in the recipe to make the dish even more fragrant. If you don't have all the whole spices, just use what you have.

Kala Chana Masala fits right into the vegan diet as well as a gluten free diet. To make the dish fit the plant based diet, just replace the oil with water.

Kala Chana Masala tastes best when served with Naan bread or Roti, but you can also serve it with rice. In case serving with rice, adjust the consistency of the gravy.

Black Chickpea Curry

If you made this recipe, let me know! Leave a comment here or on Facebook tag your tweet with @oneteaspoonlife on Twitter and don't forget to tag your photo #oneteaspoonoflife on Instagram. You can also email me at onetspoflife@gmail.com I'd love to see what you are upto.


If you like this recipe, do not forget to share it with your friends and family! 


You can follow One Teaspoon Of Life on FacebookTwitterInstagramPinterest and Google+ or you can subscribe to One Teaspoon Of Life and receive all the latest updated via Email


Video Recipe


--------------------------------------------------------------------------------------------------------------------------

Ghugni Masala | Kala Chana Masala


Black Chickpea CurryGhugni Masala is a vegan and healthy curry made from black chickpeas or kala chana. The chickpeas are simmered in a masala made from pureed onions, tomatoes and spices. A perfect gluten free accompaniment to roti or naan bread.

Recipe Type:  Main
Cuisine:            Indian
Prep Time:     8 hours
Cook time:     30 minutes
Total time:     8 Hours 30 Minutes
Yield:                2-3

Ingredients:


1 cup Black Chickpeas or Kala Chana
2 medium Onions
2 medium Tomatoes
1 tsp Ginger Garlic Paste
0.5 tsp Mustard Seeds
0.5 tsp Cumin Seeds
1 Bay leaf
2 Cloves
1 Mace
1" Cinnamon
1 tsp Coriander Powder
0.5 tsp Turmeric Powder
1 tsp Red Chilli Powder
0.5 tsp Garam Masala
1 Tbsp Coriander leaves (finely chopped)
1 Tbsp Kasuri Methi (Optional)
2 Tbsp Vegetable Oil
Salt to taste
Water as required

Method:


1. Soak the dried black chickpeas overnight. Pressure cook them the next day with 0.5 tsp salt until they are cooked.
2. Puree the onion and tomatoes separately.
3. Heat oil in a pan and add mustard seeds.
4. Once the mustard seeds splutter, add the bay leaf, cloves, mace, cinnamon and cumin seeds.
5. Add the ginger garlic paste and saute until fragrant.
6. Add the onion paste and saute until slightly browned.
7. Now add the tomato paste and all the spice powders and cook on low heat for 5-7 minutes while stirring frequently.
8. Add 1 cup of water in which the chickpeas were cooked.
9. Add salt to taste.
10. Cover and cook on low heat for 5-7 minutes.
11. Add kasuri methi and mix well.
12. Garnish with the chopped coriander leaves.
13. Serve hot with roti or naan bread.


If you liked this, you may also like:

How to make goan bhaji pao, pav bhaji, alsanyache tondak at One Teaspoon Of Life www.oneteaspoonoflife.com
Alsane Tonak

North Karnataka kaalu palya made with alsande kaalu. Black eyed peas curry.
Lobia Masala
double beans tomato masala gravy sabzi
Double Beans Masala

Read more ...

North Karnataka Jolada Rotti Oota - Part 1 - How to make Jolada Rotti | Jowar Bhakri Recipe [Video]


Jolada Rotti Oota is a North Karnataka Thali that has jowar roti, spicy curries and condiments along with salads and sweets. Jolada rotti or Jowar Roti is an oil less, vegan, healthy, gluten free flatbread made from jowar millet or sorghum.

jowar roti with curries or jolada rotti oota


If you have never been to North Karnataka or never eaten the food, you are in the right place, because I'm taking you there!!

Karnataka is a state with various cultures, dialect and cuisines all mixed into one. While the coastal belt is huge on growing and eating rice, the drier northern regions eat more of flatbread or rottis made from wholewheat or millet like jowar. And today, I'm taking you through the cuisine of North Karnataka in the first post of a four part series.

A typical vegetarian meal or Jolada Rotti Oota in the region is centered around the Jolada Rotti or the Jowar Roti (flatbread). Jolada Rotti is accompanied by spicy curries, jhunka, spiced peanut and fried gram powder (chutney pudi), sliced onions, fresh fenugreek leaves (methi), buttermilk and fried pakodas.

Going clockwise from the Jolada Rotti, I have the following on my plate - Karachi Kai fry - a baby bitter gourd type of vegetable native to the region, lightly fried in oil with red chilli powder and garlic,  Kaalu Palya (Lobia) or Cowpeas curry, Soppina Palya or a curry made with leafy greens, Yennegai or baby eggplants cooked in a peanut sauce, Chutney Pudi or spicy powder made with peanuts and fried gram. Outside my plate I have pickle, water, a tempered radish salad or kochhidu moolangi salad and rava ladoo or semolina fudge ball.

jowar roti with curries or jolada rotti oota

The Jowar flatbread is made of only 3 ingredients - jowar flour, salt and water. It is cooked without oil or any type of fat, making it a very healthy type of bread. A well made jolada rotti is soft and just melts in your mouth. Jolada Rotti is vegan, gluten-free and plant based and easily fits into various diets.

The recipe of Jolada Rotti that I have here is slightly different from the traditional one, but it produces the same results - a soft, heavenly rotti. Traditionally, the flour is made by adding hot water to the flour and kneading it until you have a pliable dough. In my recipe, I add the flour to hot water, this tends to increase the elasticity of the dough making it easier for you to roll it out. Also, traditionally, a jolada rotti is patted out thin using your fingers or palm. It requires a lot of practice and expertise to be able to pat out a thin rotti. Here, I'm demonstrating the easier option of rolling out the rotti using a rolling pin.

Since jowar is a gluten free millet, making the rotti is a little trickier than making chapatis, naan or rotis that are typically made from gluten rich wheat flour and hence the deviations from the traditional recipes. Additionally, I am giving you a few tips so that you don't fail, however, only practice can make you perfect in the art of making jolada rotti.

  • Firstly, the flour - Buy the best quality jowar flour you can, preferably, organic and unadulterated. I usually buy jowar and get it powdered at a local mill and I found this works best for me over pre-packaged flours. If you have the option, try it out, you won't regret it.
  • As Jowar is gluten free, you cannot make the dough in advance and the rottis later. You have to roll out the rottis when the dough is warm for best results. So make the dough only when you plan to make the rottis. You can store the rottis for later though. So make all the rottis and keep aside. 
  • Roll the rottis on your kitchen counter or slab. I've tried to roll it out on a wooden board like I do for wheat rotis, but jowar seems to get stuck to the wood, so preferably roll it out on your granite kitchen slab or use marble slab.
  • Roast the rottis on an oil free tava or griddle. 

There is a crisper version of the rotti called "kataka rotti" that you will find for sale in a lot of North Karnataka shops. Kataka rotti is jowar rotti cooked on very low heat until it becomes dry and crisp like a papad. It is usually made for travel or if one wants to store the rotti for weeks.

Come back for my next post - Yennegai or Baby eggplant curry - a perfect accompaniment to the Jolada Rotti.

jowar roti with curries or jolada rotti oota


If you made this recipe, let me know! Leave a comment here or on Facebook tag your tweet with @oneteaspoonlife on Twitter and don't forget to tag your photo #oneteaspoonoflife on Instagram. You can also email me at onetspoflife@gmail.com I'd love to see what you are upto.


If you like this recipe, do not forget to share it with your friends and family! 


You can follow One Teaspoon Of Life on FacebookTwitterInstagramPinterest and Google+ or you can subscribe to One Teaspoon Of Life and receive all the latest updated via Email


Video Recipe


--------------------------------------------------------------------------------------------------------------------------

Joladda Rotti Recipe | How to make Jowar Bhakri


jowar roti with curries or jolada rotti ootaJoladda Rotti or Jowar Bhakri is an oil-free, vegan and gluten free Indian flatbread made from jowar millet or sorghum.

Recipe Type:  Bread
Cuisine:            South Indian
Prep Time:     15 minutes
Cook time:     30 minutes
Total time:     45 minutes
Yield:                16

Ingredients:


3.25 cups Jowar Flour
3 cups Water
1 tsp Salt
Jowar flour to dust
Water to cook the rottis

Method:


1. Add the water to a kadhai or a deep pot and allow it to come to a boil.
2. Add salt to the water.
3. Reduce the heat, and add 3 cups of jowar flour to the water and mix well with a wooden spoon.
4. Once the flour is well mixed, cover and cook on low heat for 4-5 minutes.
5. Turn off the heat and keep covered for 2 more minutes.
6. Remove the dough from heat and transfer to a clean plate. Spread it out a little and allow to cool slightly.
7. While the dough is still warm, knead it until smooth. If it is wet, add a little dry flour. If it is dry, then add a little water to help you knead.
8. Take out a lemon sized piece of dough and roll it into a ball and flatten it. Keep the rest of the dough covered with a kitchen towel.
9. Dust your kitchen counter with dry flour and dip the ball of dough in it.
10. Using a rolling pin, roll it into a thin rotti or flatbread. Make it as thin as you can.
11. Dust with dry flour while rolling to prevent the dough from sticking to the rolling pin and the counter.
12. Heat a clean ungreased tava or griddle on medium heat and put the rotti counter side up on the tava.
13. Wipe the rotti with a wet cloth.
14. Flip the rotti when one side has brown spots. Cook until the rotti puffs up a little.
15. All rottis may not puff up completely, but do not worry, they are still cooked.
16. Serve the rottis hot/warm with curry.


If you liked this, you may also like:

curry made with chickpea flour and tomatoes
Jhunka

fresh red chilli chutney
Ranjaka
Akki Rotti

Read more ...

How to make Tofu recipe [Video Recipe] | Make Tofu without Nigari | Soya Paneer Recipe


Make Tofu at home with Soy Milk or from scratch using dried Soya Beans

homemade fresh tofu made from soy milk and lime juice

There are some things you think you will never make in your life. It is time to strike off Tofu from that list.

There are two kinds of people in the world - one that LOVE Tofu and one that hate Tofu. You can either love it or hate it, but you cannot ignore it. For a long long time Tofu ruled over all the vegan cuisine. You just had to say vegan and tofu would magically appear on your plate. Today, with so many more options like tempeh, seitan and mock meats that are readily available, tofu's dominance may have reduced a little. But for me, Tofu will always rule. I've tried the others and unfortunately my adventurous palate did not find a liking to them.

Last week I shared a recipe on How to make Soy Milk from dried Soya Beans aka from scratch. I got an overwhelming response to that post, Thank you guys!! So this week I am taking it one step forward from there - Making Tofu at home from Soy Milk.  Making Soy milk wasn't difficult, making Tofu is even easier!!


FIRST, you need warm Soy Milk. Make your own or buy it from the store. Fresh soy milk will curdle easier than store bought as it has no stabilizers. But I'm sure you can work with the store bought one too, only, you may need a little more acid to get it to work.

SECOND, we will now curdle the milk. Traditionally Nigari or Magnesium Chloride is used to curdle the milk. While this gives a better texture, it is not something that is readily available to me. So I used the next best coagulant which works perfectly when I make paneer - Lime juice. The coagulant is mixed with water and added to the warm Soy milk and stirred until the milk curdles or splits. You should continue to stir until you see the milk solids. Then just cover and rest for a while until the coagulant does its magic.

THIRD, straining the curds. Use a clean cotton cloth like a muslin cloth. Strain out all the liquid and tie the curds up in the cloth.

FOURTH, pressing the Tofu. If you are a regular tofu maker, buy a Tofu Press. Or you can follow my video for a DIY way to make tofu press with readily available plates and boxes at home.

Tofu is READY!!

Tofu made with lime juice is slightly more crumbly than the one made with nigari. It is also firmer and not silken. You can scramble this tofu, bake this tofu or fry this tofu. While the other two are healthier, my personal favorite has always been fried Tofu. What is you favorite way to eat tofu? Leave me a comment.

Watch out for my next post, I have a fantastic recipe to use this beautiful tofu we just made.

homemade fresh tofu made from soy milk and lime juice

If you made this recipe, let me know! Leave a comment here or on Facebook, tag your tweet with @oneteaspoonlife on Twitter and don't forget to tag your photo #oneteaspoonoflife on Instagram. You can also email me at onetspoflife@gmail.com. I'd love to see what you are upto. 

If you like this recipe, do not forget to share it with your friends and family! 

You can follow One Teaspoon Of Life on Facebook, Twitter, Instagram, Pinterest and Google+ or you can subscribe to One Teaspoon Of Life and receive all the latest updated via Email


Video Recipe


---------------------------------------------------------------------------------------------------------------------------


How to make Tofu | Making tofu without Nigari | Soya Paneer Recipe


homemade fresh tofu made from soy milk and lime juiceRecipe on how to make Tofu from fresh soy milk without using nigari. Making tofu using lime juice as coagulant. 

Recipe Type:  Main
Cuisine:            Asian
Prep Time:     5 minutes
Cook time:     45 minutes
Total time:     50 minutes
Yield:                250 gms

Ingredients:


1 litre Soy Milk
4 Tbsp Lime Juice
1 cup Water

Method:


1. Heat the soy milk in a pot until bubbles appear.
2. Mix the lime juice in the water.
3. Add half of the lime juice water and stir in a figure of 8 for 8-10 times.
4. Remove from heat and add the remaining lime juice water and continue to stir in figure of 8 until the milk curdles and you can see the milk solids.
5. Cover and rest for 15 minutes.
6. Strain using a clean muslin cloth.
7. Place in a tofu press and add weight. Keep it pressed for 15-20 minutes.
8. If you don't have a tofu press, you can make it yourself at home as shown in the video.


If you liked this, you may also like:

Soya milk made from dried soya beans
Homemade Soy Milk

How to make vegan thai green curry recipe, asian curry recipe, how to make thai curry without fish sauce, vegan green curry recipe at www.oneteaspoonoflife.com
Vegan Thai Green Curry
Thick creamy homemade yoghurt (dahi)
Homemade Creamy Yogurt
Read more ...