Showing posts with label gluten free. Show all posts

How to make Tofu recipe [Video Recipe] | Make Tofu without Nigari | Soya Paneer Recipe


Make Tofu at home with Soy Milk or from scratch using dried Soya Beans

homemade fresh tofu made from soy milk and lime juice

There are some things you think you will never make in your life. It is time to strike off Tofu from that list.

There are two kinds of people in the world - one that LOVE Tofu and one that hate Tofu. You can either love it or hate it, but you cannot ignore it. For a long long time Tofu ruled over all the vegan cuisine. You just had to say vegan and tofu would magically appear on your plate. Today, with so many more options like tempeh, seitan and mock meats that are readily available, tofu's dominance may have reduced a little. But for me, Tofu will always rule. I've tried the others and unfortunately my adventurous palate did not find a liking to them.

Last week I shared a recipe on How to make Soy Milk from dried Soya Beans aka from scratch. I got an overwhelming response to that post, Thank you guys!! So this week I am taking it one step forward from there - Making Tofu at home from Soy Milk.  Making Soy milk wasn't difficult, making Tofu is even easier!!


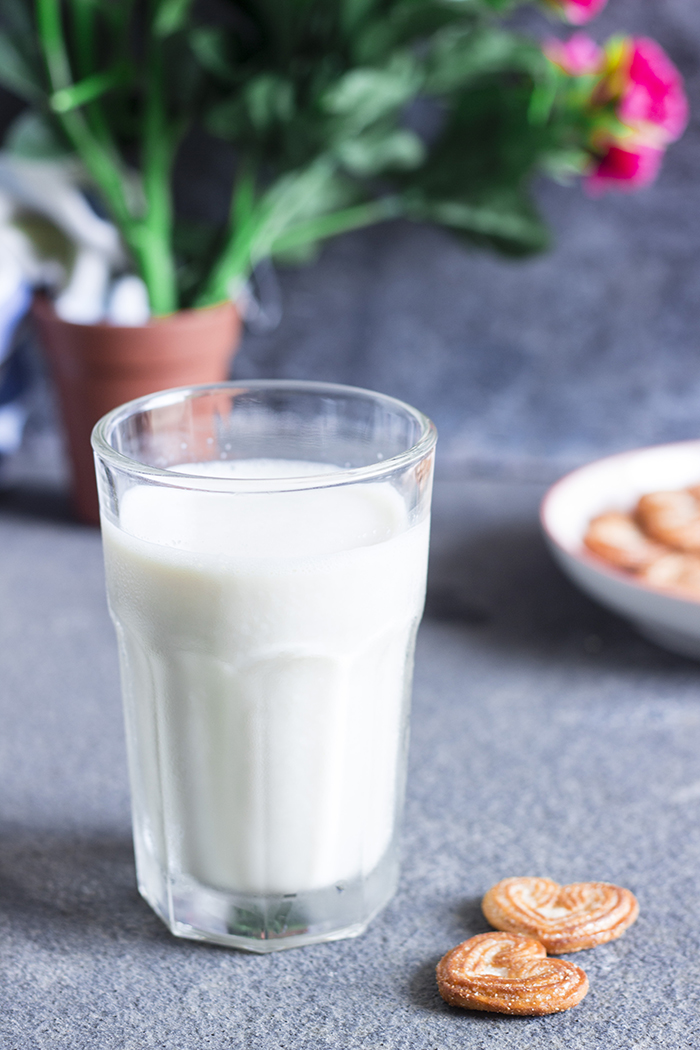
FIRST, you need warm Soy Milk. Make your own or buy it from the store. Fresh soy milk will curdle easier than store bought as it has no stabilizers. But I'm sure you can work with the store bought one too, only, you may need a little more acid to get it to work.

SECOND, we will now curdle the milk. Traditionally Nigari or Magnesium Chloride is used to curdle the milk. While this gives a better texture, it is not something that is readily available to me. So I used the next best coagulant which works perfectly when I make paneer - Lime juice. The coagulant is mixed with water and added to the warm Soy milk and stirred until the milk curdles or splits. You should continue to stir until you see the milk solids. Then just cover and rest for a while until the coagulant does its magic.

THIRD, straining the curds. Use a clean cotton cloth like a muslin cloth. Strain out all the liquid and tie the curds up in the cloth.

FOURTH, pressing the Tofu. If you are a regular tofu maker, buy a Tofu Press. Or you can follow my video for a DIY way to make tofu press with readily available plates and boxes at home.

Tofu is READY!!

Tofu made with lime juice is slightly more crumbly than the one made with nigari. It is also firmer and not silken. You can scramble this tofu, bake this tofu or fry this tofu. While the other two are healthier, my personal favorite has always been fried Tofu. What is you favorite way to eat tofu? Leave me a comment.

Watch out for my next post, I have a fantastic recipe to use this beautiful tofu we just made.

homemade fresh tofu made from soy milk and lime juice

If you made this recipe, let me know! Leave a comment here or on Facebook, tag your tweet with @oneteaspoonlife on Twitter and don't forget to tag your photo #oneteaspoonoflife on Instagram. You can also email me at onetspoflife@gmail.com. I'd love to see what you are upto. 

If you like this recipe, do not forget to share it with your friends and family! 

You can follow One Teaspoon Of Life on Facebook, Twitter, Instagram, Pinterest and Google+ or you can subscribe to One Teaspoon Of Life and receive all the latest updated via Email


Video Recipe


---------------------------------------------------------------------------------------------------------------------------


How to make Tofu | Making tofu without Nigari | Soya Paneer Recipe


homemade fresh tofu made from soy milk and lime juiceRecipe on how to make Tofu from fresh soy milk without using nigari. Making tofu using lime juice as coagulant. 

Recipe Type:  Main
Cuisine:            Asian
Prep Time:     5 minutes
Cook time:     45 minutes
Total time:     50 minutes
Yield:                250 gms

Ingredients:


1 litre Soy Milk
4 Tbsp Lime Juice
1 cup Water

Method:


1. Heat the soy milk in a pot until bubbles appear.
2. Mix the lime juice in the water.
3. Add half of the lime juice water and stir in a figure of 8 for 8-10 times.
4. Remove from heat and add the remaining lime juice water and continue to stir in figure of 8 until the milk curdles and you can see the milk solids.
5. Cover and rest for 15 minutes.
6. Strain using a clean muslin cloth.
7. Place in a tofu press and add weight. Keep it pressed for 15-20 minutes.
8. If you don't have a tofu press, you can make it yourself at home as shown in the video.


If you liked this, you may also like:

Soya milk made from dried soya beans
Homemade Soy Milk

How to make vegan thai green curry recipe, asian curry recipe, how to make thai curry without fish sauce, vegan green curry recipe at www.oneteaspoonoflife.com
Vegan Thai Green Curry
Thick creamy homemade yoghurt (dahi)
Homemade Creamy Yogurt
Read more ...

Battalu Kadabu Recipe | Steamed Rice Cups [Video Recipe]


Steamed bowl shaped dumplings made from rice semolina. Vegan and gluten free!

Steamed cups made from rice semolina

Does Breakfast excite you? Are you a cereal from a box person or someone who likes to cook an elaborate first meal of the day? Or a mix of both?

I believe I am a mix of both. There are days when I prefer just bread butter or a simple Coriander Chutney Sandwich, and there are others where I like to put in my love and effort into my favorite meal of the day. Especially on weekends. And this "Battalu Kadabu" has usually been on my weekend breakfast menu, because I believed it took time to make it, until now. I made this on a weekday and actually timed it. And it took me 50 minutes from start to finish to make this and it fed 4 people. And I believe I even ended up taking 50 minutes because I attempted to shoot a video while cooking it. But I don't believe I will make this on a weekday again because I never have that much time to spare on a regular weekday morning, but I definitely don't mind eating them.

Steamed cups made from rice semolina

So what is this Battalu Kadabu. "Battalu" means bowl in Kannada and "Kadabu" is usually a steamed dumpling. So this dumpling is called so cause it is shaped like a bowl. I learnt this recipe from my mother in law.  It took me a few tries to get it right. 

This dumpling is made with rice semolina. It can also be made with rice flour, but I prefer the rice semolina version that I am sharing. Rice semolina is cooked in boiling water to make the dough. The dough should be slightly sticky and pliable. It should not crumble, if you want to shape the kadabus. If you are struggling to shape it like a bowl, just shape them like little discs. The taste will not differ with the shape.

I love this Battalu Kadabu because it is light. It does not fill me up to the brim and make me sluggish all day. It is vegan and gluten free. Serve it warm with a good spicy coconut chutney like this tondekai chutney made from ivy gourds or heerekai sippe chutney made from ridge gourd. If you are not vegan, fill up these rice cups with some golden ghee, it is delicious.

Steamed cups made from rice semolina

If you made this recipe, let me know! Leave a comment here or on Facebook, tag your tweet with @oneteaspoonlife on Twitter and don't forget to tag your photo #oneteaspoonoflife on Instagram. You can also email me at onetspoflife@gmail.com. I'd love to see what you are upto. 

If you like this recipe, do not forget to share it with your friends and family! 


You can follow One Teaspoon Of Life on Facebook, Twitter, Instagram, Pinterest and Google+ or you can subscribe to One Teaspoon Of Life and receive all the latest updated via Email


Video Recipe


---------------------------------------------------------------------------------------------------------------------------


Battalu Kadabu


Steamed cups made from rice semolinaSteamed dumpling made of rice semolina (rava), eaten as a breakfast in Mangalore along with Ghee and coconut Chutney.

Recipe Type:  Breakfast
Cuisine:          South Indian / Mangalorean
Prep Time:     5 minutes
Cook time:     50 minutes
Yield:              28-30

Ingredients:


2 cups Rice Semolina (Akki Tari)
4 cups Water
0.5 tsp Salt
2 Tbsp desiccated Coconut
2 tsp Oil (to grease steamer)

Method:


1. Heat the water in a kadhai or deep pan.
2. Add the salt and coconut. Allow the water to come to a rolling boil.
3. Slowly add the rice semolina while stirring continuously to avoid forming lumps.
4. Keep stirring and cook it until everything comes together as one mass. This may take 5-6 minutes.
5. Remove from heat onto a dry plate and allow it to cool slightly.
6. Knead it for 3-4 mins, if it feels dry, add a little water and knead.
7. Pull out a small lemon sized ball and flatten it. Using your fingers make a small depression in the center and continue to gently press the edges to make a bowl shape. See video for reference.
8. If you are struggling to make the shape, just flatten them into little discs.
9. Grease the steamer plate.
10. Place them in a steamer and steam for 5-7 mins
11. Enjoy it while its hot with some spicy coconut chutney.


Steamed cups made from rice semolina


If you liked this, you may also like:

Paddu - Dumpling made with fermented rice and urad dal
Paddu

How to make MTR style instant rava idli at www.oneteaspoonoflife.com
Rava Idli
how to make crisp rava dosa recipe, how to make instant rava dosa, sooji dosa recipe, semolina pancake recipe at www.oneteaspoonoflife.com
Rava Dosa
Read more ...

Soy Milk Recipe | How to make Soya Milk from Soya Beans [Video Recipe]


Make your own vegan Soya milk from scratch using dried soya beans!

Soya milk made from dried soya beans

I'll be honest, I'm not a vegan and even less of a milk drinker, but even I love the idea of making my own Soy Milk

Last year, Gee decided to try out veganism for a short while, and she kept buying these little cartons of Soy milk to add to her tea. Almost every soy milk out there is flavored for direct consumption and we had to look high and low for a plain natural one with no flavors. While we did find them eventually, they still had stabilizers to increase the shelf life of the soy milk. And that got me searching for recipes to make soy milk at home, so she wouldn't need to consume all those chemicals. That is when I first made Soy milk. 

I am a cook-from-scratch kind of person, and I like knowing all the ingredients that go into my food. It also gives me a lot of perspective on the effort that it takes to make a certain item that I may have not even a fleeting thought to before. And add to that making Soy Milk is so easy. If you are lactose intolerant or vegan and use Soy Milk regularly, then I highly recommend making it at home.

Soya milk made from dried soya beans

Why you should make your own Soy Milk:

  • It is additive free
  • It is so much cheaper. Oh yes, the Soy Beans cost me Rs.16 for 200gms and it yielded one liter of Soy Milk. That is actually much cheaper than the regular cow's milk I buy. 
  • You can flavor it how you like it
  • You can keep it sugar free or add sugar depending on your liking
  • It is FRESH...
You can use this Soy milk in your coffee, in your cereal and for baking vegan dishes. It can be used to make Tofu too. I will be posting the recipe to make Tofu very soon, watch out for it. You can store this Soy milk in the fridge, however, I suggest consuming it within 2-3 days.  

Be warned, homemade fresh Soy Milk has a strong smell of soy unlike the packaged soy milk. You can add a teensy bit of vanilla to the milk if you find the smell overpowering. 

Soya milk made from dried soya beans

If you made this recipe, let me know! Leave a comment here or on Facebook, tag your tweet with @oneteaspoonlife on Twitter and don't forget to tag your photo #oneteaspoonoflife on Instagram. You can also email me at onetspoflife@gmail.com. I'd love to see what you are upto. 

If you like this recipe, do not forget to share it with your friends and family! 

You can follow One Teaspoon Of Life on Facebook, Twitter, Instagram, Pinterest and Google+ or you can subscribe to One Teaspoon Of Life and receive all the latest updated via Email


Video Recipe


---------------------------------------------------------------------------------------------------------------------------


Soy Milk Recipe


Soya milk made from dried soya beansHow to make Soy Milk from Soy Beans. Vegan milk. Recipe to make soya milk from scratch.

Recipe Type:  Beverage
Cuisine:            Asian
Prep Time:     8 hours
Cook time:     30 minutes
Total time:     9 hours
Yield:                1 liter

Ingredients:


1 cup dried Soya Beans (200 gms)
10 cups Water

Method:


1. Soak the soya beans in 4 cups of water for 8 hours.
2. Drain out the water after 8 hours.
3. Add the soya beans to a blender with 2 cups of water and blend to a smooth paste.
4. Boil 4 cups or 500 ml of water in a large pot.
5. Add the soya bean paste to the water and allow it to come to a boil.
6. Lower the heat and simmer for 10 minutes.
7. Keep stirring with a wooden spoon in between. Keep an eye on the pot, because soy milk has a tendency to overflow.
8. After 10 minutes, remove the pot from heat and strain using a juice strainer or a muslin cloth.
9. Store in a clean vessel in the fridge for 2-3 days.

Soya milk made from dried soya beans


If you liked this, you may also like:

Thick creamy homemade yoghurt (dahi)
Homemade Creamy Yogurt

How to make vegan thai green curry recipe, asian curry recipe, how to make thai curry without fish sauce, vegan green curry recipe at www.oneteaspoonoflife.com
Vegan Thai Green Curry
Vegan healthy soup made with white miso, wholewheat noodles and fresh vegetables
Miso Noodle Soup
Read more ...

South Indian Chana Masala


Fragrant chickpea curry made in South Indian style with fresh coconut and whole spices. 

South Indian Chickpea Curry with coconut


That South Indian blood in me, is 50% coconut. I'm sure! 

Everything tastes a little better with some coconut in it, do you agree?

Now, that we have established ourselves as fans of that brown fruit or nut, lets move on. So who like chickpeas? I know I do. 

If you are still here, then you will love this South Indian style of making Chana Masala.

South Indian Chickpea Curry with coconut

Chana Masala is a curry made with Kabuli Chana or Chickpeas or Chhole. South Indians make it differently from the North Indians. The North Indian curry is heavy on tomatoes, while the South Indian one uses coconut. If you were looking for the North Indian curry, you will like these:
Amritsari Chhole, Pindi Chhole or this slightly different Chhole Palak.

While I'm super lucky to be in the tropics, where coconuts are easily available and not very expensive, you can replace the fresh coconut here with frozen coconut or with coconut milk.
If using coconut milk, just expect a paler color as you will not be roasting the coconut.

Now, back to the dish, it is actually very simple to make. You really don't need to be a chef. But you have to know your spices. Here, I have used whole spices that I dry roasted on low heat for a few minutes and then ground along with the coconut. You can use garam masala or chhole masala, but I highly recommend grinding those whole spices, just this one time. Grated fresh coconut is also roasted on low flame until it turns a golden brown. If you are using coconut milk, you don't have to do this step. Grind the spices and the coconut. Fry it for a while, then add the chickpeas and simmer. Garnish generously with coriander leaves. 

And this Chana Masala goes so well with crusty bread, some rice or light fluffy naans. You can make this curry and serve it right away, I think it tastes better the next day. A day or so in the fridge allows the chickpeas to soak in all the flavor. 

South Indian Chickpea Curry with coconut


South Indian Chickpea Curry with coconut


If you made this recipe, let me know! Leave a comment here or on Facebook, tag your tweet with @oneteaspoonlife on Twitter and don't forget to tag your photo #oneteaspoonoflife on Instagram. You can also email me at onetspoflife@gmail.com. I'd love to see what you are upto. 

If you like this recipe, do not forget to share it with your friends and family! 

You can follow One Teaspoon Of Life on Facebook, Twitter, Instagram, Pinterest and Google+ or you can subscribe to One Teaspoon Of Life and receive all the latest updated via Email


---------------------------------------------------------------------------------------------------------------------------


South Indian Chana Masala Recipe


South Indian Chickpea Curry with coconutSouth Indian Chana Masala is a spicy curry made with chickpeas, fresh coconut and whole spices.
Recipe Type:  Main
Cuisine:            Indian
Prep Time:     15 minutes
Cook time:     60 minutes
Yield:                Serves 2-3


Ingredients:


1 cup dried Chana or 1 can Chickpeas
0.75 cups grated fresh Coconut or 1 cup thick Coconut Milk
5-7 dry Red Chillies
1 small Onion
1 Tbsp Coriander seeds
1 tsp Fennel Seeds (Saunf)
0.5 tsp Cumin Seeds (Jeera)
1-2 Cloves (Lawang)
0.5" Cinnamon (Dalchini)
1 green Cardamom (Elaichi)
4-5 Black Peppercorns (Kali mirch)
0.5 tsp Turmeric Powder
1 tsp grated Ginger
1 tsp Tamarind pulp
4 tsp Oil
A handful of fresh coriander leaves to garnish
Salt to taste
Water as required

Method:


1. Soak the dried chickpeas in water for 8-10 hours.
2. Pressure cook with a 0.5 tsp of salt until completely cooked. Do not overcook them.
3. Dry roast the coriander seeds, fennel seeds, cumin seeds, cloves, cinnamon, cardamom and pepper on low heat until fragrant. That should take around 3-5 minutes. Remove from heat and keep aside.
4. Heat 1 tsp of oil in the same pan and on medium to high heat, roast the dry red chillies until they puff up. Remove from heat and keep aside.
5. Lower the heat, and add the grated coconut (if using) to the pan and on low heat, roast the coconut until it turns a golden brown.
6. Remove from heat and allow to cool.
7. Grind together the roasted whole spices, red chillies, roasted coconut, grated ginger, tamarind, turmeric powder and chopped onion along with a little water to a smooth paste. If using coconut milk, just grind together the spices, red chillies, ginger, tamarind, turmeric powder and onion.
8. Heat the remaining oil in a pan, and add the ground paste.
9. Fry on low heat for 2-3 minutes.
10. Add the cooked chickpeas, 1 cup of water and salt. Allow to come to a boil and simmer for 8-10 minutes.
11. If using coconut milk, then add it after 5 minutes of simmering and continue to simmer until the curry reaches the desired consistency.
12. Garnish with the chopped coriander leaves.
13. Serve warm/hot with rice, bread, or flatbread of your choice.


If you liked this, you may also like:

How to make vegan thai green curry recipe, asian curry recipe, how to make thai curry without fish sauce, vegan green curry recipe at www.oneteaspoonoflife.com
Vegan Thai Green Curry

How to make goan bhaji pao, pav bhaji, alsanyache tondak at One Teaspoon Of Life www.oneteaspoonoflife.com
Goan Alsane Tonak
How to make Amritsari Chhole recipe at www.oneteaspoonoflife.com How to cook pindi chhole with tomato at One Teaspoon Of Life Vegan Chickpea Recipes
Amritsari Chhole
Read more ...

Vegan Thai Green Curry


Fragrant, creamy and vibrant vegan Thai Green Curry made with fresh ingredients!!


Happy 2018 guys!!! I know I’ve been AWOL for way too long from the blog and I feel extremely guilty. It may be a new year but my excuses are the same – work, home and travelling took up so much time that I could not devote enough to my one passion – my blog. I’ve missed blogging much more than anything last year and I don’t wish to repeat that again. So hopefully, you’ll see more of me and more consistently in 2018. Cheers!!

If you’re following me on Instagram, then you know what I’ve been eating and where. No? What are you waiting for, go follow me here or search for @oneteaspoonoflife on Instagram.
How to make vegan thai green curry recipe, asian curry recipe, how to make thai curry without fish sauce, vegan green curry recipe at www.oneteaspoonoflife.com

Just to catch you up a little, I spent the last week in Chicago freezing myself. I went from a comfortable 20 degrees C (Positive) and to -20 degrees C (negative) for one week. My fingers froze when they weren’t in the coat pockets and my ear hurt when it errantly slipped out of the cap. I applaud those who brave this weather regularly, but I’m not made for that chill. While it was an a nice to experience just how that cold feels, I’m happy to be back to warm weather where I don’t need even a light jacket and I can roam around in open sandals.

I am one of those weirdos who actually likes airline food. I look forward to meals on planes. But after 8 meals in a span of one week plus a week of eating in restaurants, I’m just simply glad to be back to eat warm clean food at home. A touch of spice, a lot less cheese and a lot of health – that’s how I like my everyday food.

So my first recipe of 2018, is this warm flavorful Thai Green Curry with lots of vegetables that is perfect for cold winters. Did I tell you how much I love it? It is simply delicious plus it is hearty, healthy, vegan, gluten-free and full of fiber. Serve it with a bowl of brown rice for a healthier meal. I also had so much fun making this curry. I found all the fresh ingredients in the market and they were such a colorful bunch. I enjoyed shooting this recipe, all those colors popped beautifully.

How to make vegan thai green curry recipe, asian curry recipe, how to make thai curry without fish sauce, vegan green curry recipe at www.oneteaspoonoflife.com

Back to the recipe, one might be discouraged by the number of ingredients, but I ask you to look beyond it. The number may be more, but the effort is really not too much. The prep here is more time consuming than the actual cooking. And this is the perfect recipe to engage your family – ask your partner or kids to help out in peeling, chopping and slicing. Make it a family recipe and you won’t be so daunted. 

How to make vegan thai green curry recipe, asian curry recipe, how to make thai curry without fish sauce, vegan green curry recipe at www.oneteaspoonoflife.com

If you made this recipe, let me know! Leave a comment here or on Facebook, tag your tweet with @oneteaspoonlife on Twitter and don't forget to tag your photo #oneteaspoonoflife on Instagram. You can also email me at onetspoflife@gmail.com. I'd love to see what you are upto. 

If you like this recipe, do not forget to share it with your friends and family! 

You can follow One Teaspoon Of Life on Facebook, Twitter, Instagram, Pinterest and Google+ or you can subscribe to One Teaspoon Of Life and receive all the latest updated via Email

If you liked this, you may also like:


---------------------------------------------------------------------------------------------------------------------------

Thai Green Curry (Vegan)


How to make vegan thai green curry recipe, asian curry recipe, how to make thai curry without fish sauce, vegan green curry recipe at www.oneteaspoonoflife.comEasy to make vegan Thai green curry that is made with a fresh green curry paste and creamy coconut milk along with lots of stir fried vegetables.

Recipe Type:  Main
Cuisine:            Thai or Asian
Prep Time:     10 minutes
Cook time:     30 minutes
Yield:                Serves 2-3

Ingredients:


For the Green Curry Paste:


3 Lemongrass Stalks
2 Tbsp chopped Ginger
4-5 cloves Garlic
1 small Onion
2-3 green Onions (spring onions)
2-3 green Chillies
1 Tbsp fresh Turmeric or 0.5 tsp Turmeric Powder
Handful of Basil leaves
Handful of Coriander leaves
2 tsp Coriander seeds
1 tsp Cumin seeds
0.5 tsp Peppercorns
Zest of 1 Lime
1-2 Tbsp Lime juice
1 Tbsp Palm Sugar (Jaggery/Sugar)
Water as required
Salt to taste

For the vegan Thai Green Curry:


1 cup thick Coconut Milk
1 cup thin Coconut Milk
3 Tbsp fresh Green Curry Paste
75 gms firm Tofu (cubed)
0.5 diced Capsicum
1 cup Broccoli florets
0.5 cup sliced Zucchini
1 small Carrot sliced
4-5 Mushrooms sliced
0.5 cups cubed Sweet Potato (boiled)
1 diced Bokchoy or handful of Spinach
3-4 Tbsp Oil
Salt to taste
Water as required

Method:


To make the Green Curry Paste:

1. Powder the coriander seeds, cumin seeds and peppercorns coarsely. I hand pounded these in a mortar with a pestle.
2. Remove the outer later of the lemongrass stalk and chop into slices.
3. Roughly chop the green chillies, onions, green onions and garlic.
4. Add the pounded spices, lemongrass, green chillies, onions, green onions, garlic, chopped ginger, chopped turmeric, coriander leaves, basil leaves, lime zest, lime juice, sugar/jaggery and 1 tsp of salt to the food processor or a mixer and give it a whizz.
5. Scrape the sides of the jar and grind again. Add water by the spoonful to get a smooth paste.
6. Adjust salt, sugar and lime as per your taste.
7. Fill in sterilized glass jars and store in the refrigerator for up to 2 weeks.
8. This recipe makes approximately 1.5 cups of curry paste.

To make the vegan Thai Green Curry:


1. Heat oil in a wok or kadhai.
2. Drain the excess water from the tofu using a kitchen towel. Add the tofu to the wok and fry until golden.
3. Remove the tofu and keep aside.
4. Add the carrots, mushroom, zucchini, broccoli, bokchoy stems and capsicum and stir fry them for 3-4 minutes.
5. Add the bokchoy leaves or spinach and stir until they are wilted.
6. Cook until the vegetables are cooked to your liking and remove it from the wok and keep aside. Preferably, the vegetables should be crunchy and not overcooked and mushy.
7. Heat the remaining oil and add the green curry paste. Stir fry it for 1-2 minutes until fragrant.
8. Add the stir fried vegetables along with the boiled sweet potato to the wok.
9. Add the thin coconut milk and cook it for 3-4 minutes.
10. Add the thick coconut milk and salt and cook for another 3-4 minutes.
11. Add the tofu before serving. Serve the curry hot with steamed white rice.

How to make vegan thai green curry recipe, asian curry recipe, how to make thai curry without fish sauce, vegan green curry recipe at www.oneteaspoonoflife.com


Read more ...

Sun dried Potato Chips | Aloo Chips | Aloogadde Sandige [Video]


Sun dried Potato Chips - potato slices that are dried in the sun and then deep fried and tossed in seasoning. Highly addictive!!

In a hurry? Jump to Video or Jump to Recipe

How to make sun dried potato chips recipe, batate sandige recipe, aloogadde sandige recipe, aloo chips, aloo sandge recipe, how to make aloo papad recipe, potato chips recipe at www.oneteaspoonoflife.com


The Sun dried Potato Chips are the BEST, seriously guys!!!

Who doesn't love potato chips? I'm sure even the Victoria Secrets models who are eternally on a diet wouldn't mind sneaking one in, once in a while. There are so many varieties of potato chips or crisps or whatever else you might want to call them, but I assure you, this is the best. Cause of course, you will make them yourself. And tell me if I'm wrong, but anything homemade tastes so much better than the preservative loaded air filled packet stuff. 

Recently, I was reading this really old article on Reddit about what surprised non Americans when they visited the USA, I was definitely surprised with the vastness of the country and the enormous food portions. But something that definitely got me crazy was the size of the Potato Chips packets. I think they are as tall as toddlers. Why are they so big? Are they meant to be family packs? If yes, how large is this family? Don't people get bored of the flavor after going through quarter of the packet? Or is it meant to last a month? I did not get that at all. I went a little nuts over the number of flavors though, you get every flavor under the sun.

How to make sun dried potato chips recipe, batate sandige recipe, aloogadde sandige recipe, aloo chips, aloo sandge recipe, how to make aloo papad recipe, potato chips recipe at www.oneteaspoonoflife.com


Back to the Sun, that's really the focal point today. Did I tell you how the Sun cheated us this year?We had the shortest summer ever, just ONE month. Just April. Summer came and went in the blink of an eye. Summer gets replaced by Monsoons in this part of the world and then everyday is just a dull cloudy day dotted with spells of rain. Usually, I'm a big fan of the rains, I simply love how everything turns bright green, and that fragrance when the rain hits the earth is simply divine. And rains, means deep fried deliciousness and loads of hot cups of chai. But this year I was a little disappointed. I had so many things planned for Summer, and I could barely scramble them in, in a month. But what I did manage to do , was sun dry some potatoes. 

You may have only heard of sun dried tomatoes, but believe me sun dried potatoes are even better!! And people have been doing it for ages, just not me though. This was my first and definitely not my last attempt. Potatoes barely take 3-4 days to dry and the drying makes them intense and all the more potatoey (if that were a word). 

So...

STEP 1 - Wash, peel, and slice the potatoes. 
STEP 2 - Soak the slices in salted boiling water until they are just about done.
STEP 3 - Lay them out on a cloth to dry in the sun.
STEP 4 - Deep fry them and toss them in salt and chilli powder.

Step 4 can be done months later. The chips can be stored for 3-4 months easily if stored in a clean dry air tight container. The good thing here is, you can decide how much to fry, you don't need to fry the entire batch at once and worry about them going soft, however, I assure you, that is not a problem, coz like all potato chips, these are irresistible.

How to make sun dried potato chips recipe, batate sandige recipe, aloogadde sandige recipe, aloo chips, aloo sandge recipe, how to make aloo papad recipe, potato chips recipe at www.oneteaspoonoflife.com

How to make sun dried potato chips recipe, batate sandige recipe, aloogadde sandige recipe, aloo chips, aloo sandge recipe, how to make aloo papad recipe, potato chips recipe at www.oneteaspoonoflife.com

Some tips to make sure your potato sun drying turns out to be the best...

1) Do not slice the potatoes very thin like you would for regular chips. These need to be around 2mm. 
2) As you slice the chips, put them in water so they don't darken due to oxidization.
3) The chips are soaked in boiling water until they are just about done. If you take them out too quickly, the chips will darken while drying. If you leave them in there too long, they will be completely cooked. So you need to drain them out in 5-8 minutes. Squeeze a chip in between your thumb and index finger and the chip should give when you apply a little pressure. If it does not, it still needs to be cooked, if it gives too soon, it is overcooked.
4) Dry on a cloth, not a tray or plate or paper. The chips will stick to whatever you have placed under it, and removing them from a tray or paper can be difficult. Preferably, use a white cloth or a light colored one as you don't want color running onto the chips.
5) If the chips turn black on the edges or in small spots, you can still use them, just make sure these are the ones you fry first.
6) If you don't have enough sun, place them in the shade, they will dry there as well, but will take much longer.

And last, you can flavor these chips with whatever flavor you like - curry, mint, oregano etc. Just do it immediately after frying while the chips are still hot so the flavor sticks to them. Or you can just salt them and enjoy the potato flavor to its maximum.

How to make sun dried potato chips recipe, batate sandige recipe, aloogadde sandige recipe, aloo chips, aloo sandge recipe, how to make aloo papad recipe, potato chips recipe at www.oneteaspoonoflife.com

If you made this recipe, let me know! Leave a comment here or on Facebook tag your tweet with @oneteaspoonlife on Twitter and don't forget to tag your photo #oneteaspoonoflife on Instagram. You can also email me at onetspoflife@gmail.com I'd love to see what you are upto.


If you like this recipe, do not forget to share it with your friends and family! 


You can follow One Teaspoon Of Life on FacebookTwitterInstagramPinterest or you can subscribe to One Teaspoon Of Life and receive all the latest updated via Email

Video Recipe


--------------------------------------------------------------------------------------------------------------------------

Sun dried Potato Chips


How to make sun dried potato chips recipe, batate sandige recipe, aloogadde sandige recipe, aloo chips, aloo sandge recipe, how to make aloo papad recipe, potato chips recipe at www.oneteaspoonoflife.comPotato slices that are sun dried and then deep fried and tossed in seasoning.

Recipe Type:  Snacks
Cuisine:            Indian
Prep Time:     3 days
Cook time:     10 minutes
Yield:                Serves 4-5


Ingredients:


3-4 medium sized Potatoes
Salt to taste
Red Chilli powder to taste
Water as required
Oil for deep frying

Method:


Wash and peel the potatoes.
Slice the potatoes to about 2mm thickness and immerse in water to prevent them from browning.
Boil water in a large pot, add salt.
Once it comes to a rolling boil, lower heat and add the potato slices to it. Boil for 2-3 minutes then turn off the heat.
Let the potato slices soak for 5-8 minutes. Squeeze a slice between your thumb and index finger and it should give slightly after you apply a little pressure. If it does not, allow it to soak longer. If it gives too quickly, it has overcooked, remove from water immediately.
Drain the potato chips and lay them out on a white cloth in the sun. Cover with a light muslin cloth to prevent dust from settling on to the chips. You can dry them in shade as well.
Leave it in the sun for 3-4 days or until completely dried.
Store in a clean dry air tight container. It can be stored for 3-4 months.
When you want to eat the chips, deep fry them and toss with salt and chilli powder immediately.


How to make sun dried potato chips recipe, batate sandige recipe, aloogadde sandige recipe, aloo chips, aloo sandge recipe, how to make aloo papad recipe, potato chips recipe at www.oneteaspoonoflife.com


If you liked this, you may also like:

Balekayi balekayee podi kelyachi kapa raw banana fry vegan snacks indian goan maharashtrian
Plantain Chips

Jeegujje Podi
popular Indian snack - baked flat discs made of four and spices
Baked Papdi


Read more ...