Showing posts with label Chickpeas. Show all posts

Vegan Zucchini Spinach Frittata


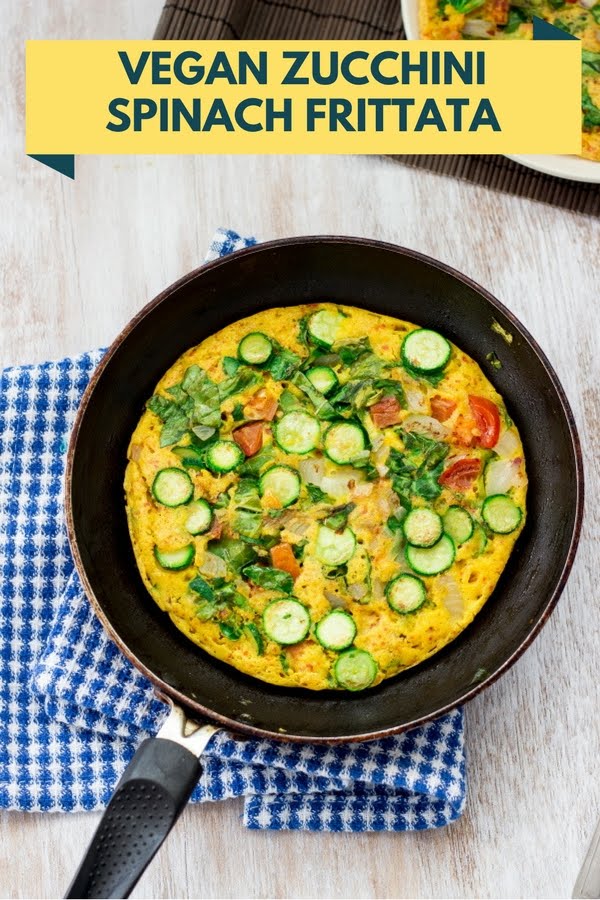
What's next on your breakfast table? How about this light and fluffy Vegan Zucchini Spinach Frittata made from chickpea flour, zucchini and spinach!

How to make vegan frittata recipe at One Teaspoon Of Life How to make vegetarian vegan omelet recipe at www.oneteaspoonoflife.com

Breakfast time!

I've been eating clean this week. I've got some annoying breakouts on my face and I have gotta get rid of them. By clean eating, I mean no sugar, no greasy fried food, no processed food, basically no giving into temptation. So HARD, especially when people in office are getting sweets and chocolates pretty much everyday.

Instead I'm eating lots of fresh fruits and vegetables. At the start of the week I had oranges, apples, pomegranates and strawberry. Yummm. So fresh. I'm also on my way to making my first ever all natural orange face pack. Hope it works...

How to make vegan frittata recipe at One Teaspoon Of Life How to make vegetarian vegan omelet recipe at www.oneteaspoonoflife.com

Even if you don't have any acne or other skin problems, just try this little trick my sister Gee taught me. Soak orange peels in a mug of water for 3 to 4 hours or overnight. Use that water to wash your face. Careful with your eyes though - keep them shut. That water has such a fresh fragrance of oranges, it will wake you up instantly and leave your skin smelling all orange-y for a good half hour. I'm not even a fan of oranges, but I definitely loved that fresh feel in the morning. If you have any such wonderful beauty rituals, leave me a comment.

Beauty tips aside for the moment. Let me get back to my clean green recipe - Vegan Zucchini Spinach Frittata. Frittata is usually a really thick omelet that is either baked or cooked in a deep pan on stovetop. This vegan zucchini spinach frittata is made from chickpea flour or gram flour (besan). lightness of the frittata is achieved by adding fruit salt (eno). If you don't find fruit salt, replace 1 tsp of fruit salt with 1/2 tsp of baking soda and 1/2 tsp of lime juice or citric acid. Allow it to rest for at least 10 minutes to let the baking soda react with the citric acid.

How to make vegan frittata recipe at One Teaspoon Of Life How to make vegetarian vegan omelet recipe at www.oneteaspoonoflife.com

You remember this wonderful Vegan Zucchini Kale Lasagna I made last week? I still had some baby zucchinis left over from it, that I sliced into thin slices and used here in this frittata. It is clean and it is green, One green ingredient down, more to go.

I wilted some spinach with garlic and chopped that roughly and added it to the frittata for my second and last green ingredient. Toss in some chopped onions and tomatoes and we are all set to make the frittata. Here's the fun part now, you can flavor this frittata however you like. I kept it minimal and only added a pinch of turmeric and half a teaspoon of chilli flakes. You can add anything from herbs like oregano, thyme, basil to spices like cumin, fennel or carom. After all, you are the CHEF!

How to make vegan frittata recipe at One Teaspoon Of Life How to make vegetarian vegan omelet recipe at www.oneteaspoonoflife.com


How to make vegan frittata recipe at One Teaspoon Of Life How to make vegetarian vegan omelet recipe at www.oneteaspoonoflife.com


If you made this recipe, let me know! Leave a comment here or on Facebook, tag your tweet with @oneteaspoonlife on Twitter and don't forget to tag your photo #oneteaspoonoflife on Instagram. You can also email me at onetspoflife@gmail.com. I'd love to see what you are upto. 

If you like this recipe, do not forget to share it with your friends and family! 

You can follow One Teaspoon Of Life is there on Facebook, Twitter, Instagram, Pinterest and Google+ or you can subscribe to One Teaspoon Of Life and receive all the latest updated via Email (How convenient!!)

If you liked this, you may also liked:


Vegan Zucchini Spinach Frittata


How to make vegan frittata recipe at One Teaspoon Of Life How to make vegetarian vegan omelet recipe at www.oneteaspoonoflife.comVegan Zucchini Spinach Frittata is a pan fried vegan frittata (thick omelet) made with chickpea flour (besan), zucchini and garlic wilted spinach

Recipe Type:  Breakfast
Cuisine:            Indian
Prep Time:     10 minutes
Cook time:     15 minutes
Yield:                Makes 2

Ingredients:


1 cup Chickpea flour or Besan or Gram Flour
2 cups chopped Spinach
2 baby Zucchini
1 small Onion
1 small Tomato
2 Garlic Cloves
1/2 tsp Chilli flakes
1/4 tsp Turmeric Powder
1 tsp Fruit Salt or Eno
1 cup Water
4-5 tsp Oil
Salt to taste

Method:


Mince the garlic. Finely chop the onion and tomato. Slice the zucchini.
Heat 2 tsp oil in a pan.
Add the minced garlic and fry for 20-30 seconds.
Add the chopped spinach and fry until wilted. It may take around 2-3 minutes.
Take the chickpea flour in a large bowl.
Add turmeric powder, chilli flakes, salt, fruit salt and 1/2 cup water. Add more water if required. The batter should be loose and light.
Heat a small non stick frying pan and grease it.
Spoon half the batter onto the pan.
Sprinkle half of the wilted spinach, zucchini, onion and tomato. Alternately, you can add all the vegetables to the batter before spooning the batter.
Cook on low to medium heat. Spoon oil on the sides.
Once the first side browns slightly, spoon 1 tsp of oil on the top and flip the frittata.
Cook until the second side browns slightly. Remove from heat.
Repeat the same steps with the other half of the batter.
Serve hot.

How to make vegan frittata recipe at One Teaspoon Of Life How to make vegetarian vegan omelet recipe at www.oneteaspoonoflife.com
Read more ...

Beetroot Chickpea Pancake


I was so tired last night that I did not do any preparation for breakfast. I did not even give a thought on what I should be making. Not a good thing considering my mornings are like "hurry"-canes. I'm in a hurry to do everything, all because I keep snoozing my alarm. Every day when I'm running to catch my bus, I decide that tomorrow I'll wake up just 10 minutes early, so I can walk gracefully to my bus stop well before the bus arrives and the very next day I'm again running down the stairs and the road, hoping the bus hasn't left me and gone.

How to make vegan beetroot besan dosa beetroot paratha recipe at www.oneteaspoonoflife.com

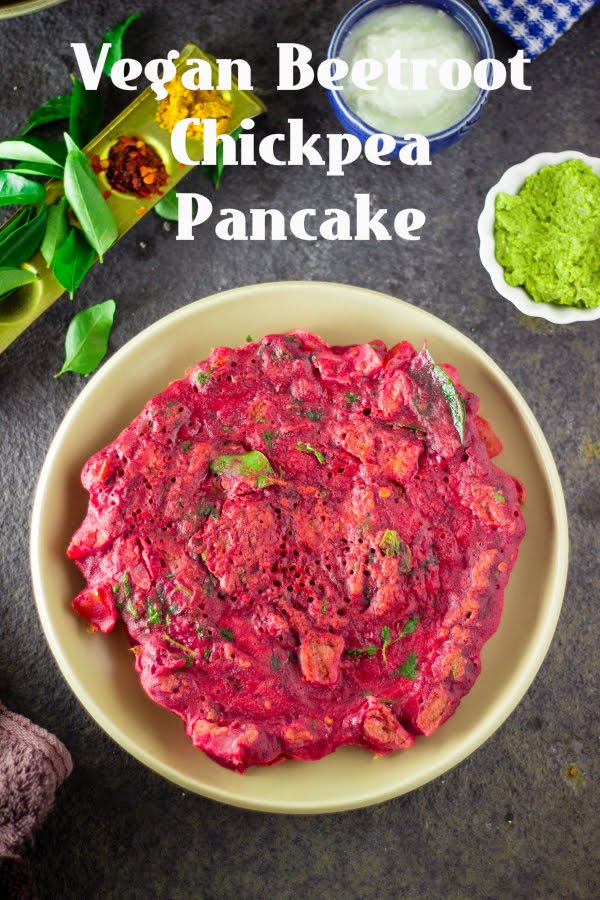
Luckily for me, I did not snooze my alarm till eternity and I woke up with enough time to actually cook something for breakfast. I made my quick-fix yet delicious Beetroot Chickpea Pancake.

I love beets, have done so forever. What's not to love, it is so earthy and vibrant and sweet. Although they are sweet, I've rarely ever made desserts with beet root, I'm more for adding them in savory dishes. I make beetroot sambar - a spicy South Indian curry made with beets, coconut and lentils or I make a dry grated beetroot curry that goes really well with roti.

I started making this Beetroot Chickpea Pancake when I used to have leftover beetroot in the fridge by the end of the week with no idea what to do with something as little as one single beetroot. Now I sometimes buy an extra beetroot just so I can make these Beetroot Chickpea Pancakes.

How to make vegan beetroot besan dosa beetroot paratha recipe at www.oneteaspoonoflife.com

I hate to say this, but this is such a Girly Breakfast... Nothing to do with the taste, the taste is nothing girly or boy-ey but look at that vibrant pink and tell me it does not make that little girl in you shout with joy. Pink was my favorite color as a kid, well, that's what I told others. Secretly, it was yellow. But Pink came a close second.

To make this vibrant quick breakfast, all you need is chickpea flour or besan, grated beetroot, chopped tomato, some greens like curry leaves and coriander, chilli flakes, cumin seeds, semolina, baking soda, salt and water. Mix everything well to remove any lumps. Spread on a greased hot griddle and flip when one side is cooked.

Serve it up with chutney, yogurt or plain butter. Tastes amazing when hot, but room temperature will do too.

If your heart beats for "beets", you'll love this one.

How to make vegan beetroot besan dosa beetroot paratha recipe at www.oneteaspoonoflife.com

If you liked this, you may also like:

  • Tomato Omelet - Instant pancake made from chickpea flour or besan and tomatoes.
  • Instant Wheat Dosa - Instant savory dosa or pancake made with whole wheat flour.


Beetroot Chickpea Pancake


How to make vegan beetroot besan dosa beetroot paratha recipe at www.oneteaspoonoflife.comBeetroot Chickpea Pancake is an instant vegan breakfast made from grated beets and chickpea flour or besan.

Recipe Type:  Breakfast
Cuisine:            Indian
Prep Time:     10 minutes
Cook time:     30 minutes
Yield:                Makes 6

Ingredients:


6 Tbsp Chickpea Flour (Besan)
1/2 cup Semolina
1 Beetroot, grated
1 large Tomato
1 to 1.5 cup Water
1/4 tsp Baking Soda
1/2 tsp Chilli flakes
1/2 tsp Cumin seeds
5-6 Curry leaves
1 Tbsp Coriander, chopped
4-5 tsp Oil
Salt to taste

Method:


In a large bowl mix together the chickpea flour, semolina, grated beetroot, finely chopped tomato, chopped coriander, chilli flakes, cumin seeds, curry leaves, salt, baking soda and 1 cup of water. Mix well until there are no lumps.
Add more water if required. The consistency of the batter should be thin enough to spread.
Heat a griddle / tava or a flat frying pan and grease it.
Pour a spoonful of batter onto the griddle and spread it out into circles.
Cook on low to medium heat until one side is slightly browned. Do not allow it to char or burn.
Spoon a little oil on the top and flip it. Cook the other side for 45-60 seconds or until cooked.
Serve hot with chutney, yogurt or butter.


How to make vegan beetroot besan dosa beetroot paratha recipe at www.oneteaspoonoflife.com


Read more ...

Grilled Eggplant and Coriander Hummus Rolls


My latest addition to Finger Food that is finger licking good - Grilled Eggplant and Coriander Hummus Rolls. Silky smooth garlicky coriander hummus rolled in thinly sliced grilled eggplant. This recipe is super quick to make and has all makings of a healthy snack.

How to make grilled aubergine or brinjal hummus rolls at www.oneteaspoonoflife.com

Who is a Hummus fan?? Obviously, Me, well so is Raj, there's Gee too... Well, the whole family is nuts about Hummus. The usual combination for hummus is Pita, but when you are bored to knead dough and roll out those light little pockets of Pita, I recommend trying this simple gluten free option to enjoy that amazing hummus.

As much as I like Hummus, I love Coriander or Cilantro just as much, or may be a little more. A sprinkle of coriander here, a tablespoon of coriander there. I literally, use it in everything I make. That vibrant fresh sprinkling of green, just brightens up any curry. It does the same to this Hummus. This Coriander Hummus is just one level above the regular Hummus in terms of flavor and color. I mean who does not find this lovely green appealing?

How to make Cilantro Hummus Recipe at www.oneteaspoonoflife.com

I can eat this Coriander Hummus with anything - crackers, chips, regular bread, chapati, roti, naan. I think I'm only yet to try it with rice. But on days that you are too bored to knead the dough and make your own light Pita pockets or you just fancy going gluten free, try this awesome combination of eggplant and hummus and tell me if you hear complains.

How to make grilled aubergine or brinjal hummus rolls at www.oneteaspoonoflife.com

Ever since I bought my AWESOME new grill pan, I've been grilling EVERYTHING. Paneer, Eggplant, Peppers... this is just a small list. Grilling is so much fun, I love that nice char marks that I get from my new pan. Check out this super delicious Grilled Paneer Sandwich I made using the same pan.

However, I think I should warn you, these rolls are addictive and may never be enough for your family. They are also quite filling.

If you don't want to make your own hummus, you can just use your favorite store bought hummus. Roasted Pepper Hummus will also go great with the Eggplant.

coriander cilantro chickpeas kothmir chutney dip kabuli chana Mediterranean

If you like this, you may also like:
How to make grilled aubergine or brinjal hummus rolls at www.oneteaspoonoflife.com


Grilled Eggplant and Coriander Hummus Rolls


How to make grilled aubergine or brinjal hummus rolls at www.oneteaspoonoflife.comThese Eggplant Rolls are made by grilling finely sliced eggplant and spreading coriander hummus on them before rolling them into bite sized rolls.

Recipe Type:  Appetizer
Cuisine:            Middle Eastern
Prep Time:     15 minutes
Cook time:     30 minutes
Yield:                Makes 13-15

Ingredients:


For Coriander Hummus:


1 cup cooked Chickpeas
1/2 cup Coriander leaves
2-3 Garlic cloves
2 Tbsp Water
3 Tbsp Olive Oil
Salt to taste

For Grilled Eggplant:


1 large Eggplant or Bharta Baingan
Water
Salt to taste
Pepper to taste
3-4 tsp of Oil

Method:


To make Coriander Hummus:


Chop the coriander leaves and garlic.
Blend together the chickpeas, coriander leaves, garlic and salt with water and Olive oil until it is a smooth creamy paste.
Add more Olive oil if required.

To make Grilled Eggplant:


Take a large bowl of water and add 1/2 tsp of salt to
Slice the eggplant into fine slices lengthwise and put them in the salted water. Leave them soaked for 10-15 minutes.
Pat the eggplant fry using a tea towel or kitchen napkins and rub them with oil, salt and pepper.
Heat a grill pan or a griddle. Once it is hot place the eggplant slices on it in a single layer without overlapping them.
Spoon oil on the eggplant if required. Grill for 2-3 minutes on each side until the eggplant is cooked.

To make the Rolls:


Spread the coriander hummus on the grilled eggplant slices and roll them to make Grilled Eggplant and Coriander Hummus rolls.


Read more ...

Cucumber Pakoda or Khire ka Pakoda

Cucumber Pakoda or Khira Pakoda is my latest offering in the junk-food-meets-healthy-food recipes.

Cucumber pakoda fritter sautekayee bonda khira khire kakdi

I've grown up on cooked cucumbers more than uncooked ones. I know, not a lot of you have heard of cooking cucumbers. But if you are from around Mangalore, you know your cucumbers well. My mom used cucumbers in sambar, palya, kadabu and my favorite -Akki Rotti.

I've recently started experimenting with cucumbers. I've made Cucumber Dhokla recently. But never in my wildest thoughts had I imagined I would be making Cucumber Pakodas and ENJOYING it too !!!

Cucumber pakoda fritter sautekayee bonda khira khire kakdi

I was introduced to them recently at a temple that refrains from using root vegetables. I was unaware of this fact and very unsuspectingly ate it assuming they were potato pakodas. I was pleasantly surprised that they were cucumber. I have been waiting to make them since then. Saturday was the perfect day. It was raining. Well, it'd been raining the whole last week, and heavily, I must add. Eating pakodas and sipping hot tea is my favorite thing to do when it rains.

Cucumber pakoda fritter sautekayee bonda khira khire kakdi

So on Saturday, I dragged my bean bag as close to the balcony, that little spray of rain on my face gets me all excited. Took my plate of cucumber pakodas and my steaming hot cup of tea and plonked on it. I also had this really exciting English Regency romance novel by Sophia Nash that made a perfect read considering the stormy weather outside. Ah! Simple pleasures of life. 

Cucumber pakoda fritter sautekayee bonda khira khire kakdi

Let's get back to the Cucumber Pakoda. This pakoda is made just like all the other pakodas, only this time instead of an onion or a potato, we dip sliced cucumber into the batter and fry it. I used regular cucumbers that we use in salads. Not the Mangalore Cucumber. Preferably, use something that has a lower water content to get an even tastier pakoda.

The batter is very simple. Take some gram flour or besan and add salt, red chilli powder, salt and water to get a smooth batter. The consistency of the batter should be thick enough to coat the cucumbers. I added ajwain or carom seeds as I love the flavor in pakodas. You can skip this or replace it with coriander powder or cumin seeds. I also added a pinch of baking soda, this can be avoided too. 

Cucumber pakoda fritter sautekayee bonda khira khire kakdi

Sprinkle chat masala while serving or serve it with some delicious mint coriander chutney.

Send me an email or leave me a comment on this Post or Facebook or Tweet to me if you tried these awesome pakodas. I love hearing from my readers, so write to me.

Cucumber Pakodas or Khire ka Pakoda


Cucumber pakoda fritter sautekayee bonda khira khire kakdi
Cucumber slices dipped in a batter made of besan or gram flour and spices and deep fried until golden brown.

Recipe Type:  Appetizer
Cuisine:            Indian
Prep Time:     10 minutes
Cook time:     20 minutes
Yield:                Serves 2-3

Ingredients:


1 Cucumber
4-5 Tbsp Besan or Gram Flour
1 tsp Red Chilli Powder
1/4 tsp Ajwain seeds or Carom seeds
1/2 cup Water
Salt to taste
Pinch of Baking soda
Oil to fry
1/2 tsp Chat Masala(Optional)


Method:


Slice the cucumber into thin slices.
Mix together the besan, red chilli powder, ajwain seeds, baking soda and salt.
Add water by the spoonfuls until you get a batter of desired consistency. The batter should be thick enough to coat the cucumbers.
Heat oil in a deep pan or kadhai. To test if the oil is hot enough, drop a small spoonful of batter in the oil. If it immediately rises to the top, then the oil is ready for frying the pakodas.
Dip the cucumbers in the batter and carefully drop them into the oil.
Cook them on medium heat until one side is golden brown. Flip the pakodas and cook until the other side is done.
It takes around 3-5 minutes per pakoda. Cook them in batches and do not crowd the pan.
Sprinkle some chat masala over them and serve hot with mint coriander chutney or ketchup.
Read more ...

Maggi Pakoda | Instant Noodle Fritters with Step by Step Photo Instructions


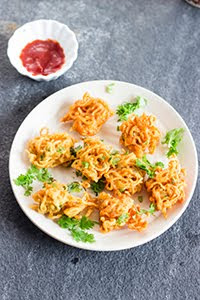
Maggi Pakoda recipe with step by step video instructions. Maggi Pakodas are deep fried fritters made using Maggi instant noodles, chickpea flour (besan) and a few spices. Maggi Pakoda are instant noodles fritters and any instant noodles can be used. Maggi Pakoda are perfect for snacking on a rainy evening. They go famously with a hot cup of chai.


In a hurry? Jump to Video or Jump to Recipe


maggi instant noodles fritters fried pakoda chickpeas besan

Every time it rains, I want something hot and spicy (and mostly fried). What I crave when it rains, I crave more when we are out on a long drive during rains. For all those health food eaters out there, this post is most definitely not for you, unless of course you occasionally binge on some DELICIOUS fried food. This is one of those one-time INDULGENCE recipes that just makes you wish it rains every day.

On a different note, has an idea gotten stuck in your head and grown into a tree until you can no longer resist it? Something like “Inception”? On one of these long-drive-in-rain, I imagined what would a “Maggi Pakoda” taste like. And after that, nothing tasted good enough on that drive. I wanted MAGGI PAKODA, that’s it! And I thought I was being very inventive and all with my idea of Maggi pakoda until I heard it has already been around in Delhi for a long time. Those Delhi-ites definitely know their fried food.

maggi instant noodles fritters fried pakoda chickpeas besan

Maggi is an instant noodle brand from Nestle. And since it was the first instant noodle brand in the Indian market and remained the sole one for many many years, instant noodles are synonymous with Maggi for most of us. So when I say Maggi, you can think of ANY instant noodles. Any noodles you like.

The first time I went to Rohtang Pass in the Himalayas to see snow, I was pleasantly surprised to find little shacks selling Maggi at that altitude. Absolutely loved eating Maggi while our teeth chattered with the chill in the air. The next time I went to Rohtang, I was actually looking forward to eating Maggi up there. Maggi, Chai, and the mountains felt like heaven.

maggi instant noodles fritters fried pakoda chickpeas besan

How many of you out there have had hot hot Maggi when you’ve gone to a cold cold place? Let me know your story.

These pakodas have that warmth of noodles and the crispiness of the pakodas all combined in one. Perfect for rainy evenings. You can use any instant noodles, Chinese flavored, Thai flavored, Chicken flavored, as I said anything. Just cook the noodles as usual, add the chickpea flour or besan, mix and deep fry.

maggi instant noodles fritters fried pakoda chickpeas besan


If you made this recipe, let me know! Leave a comment here or on Facebook tag your tweet with @oneteaspoonlife on Twitter and don't forget to tag your photo @oneteaspoonoflife on Instagram. You can also email me at onetspoflife@gmail.com I'd love to see what you are up to.

If you like this recipe, do not forget to share it with your friends and family! 


You can follow One Teaspoon Of Life on FacebookTwitterInstagramPinterest or you can subscribe to One Teaspoon Of Life and receive all the latest updated via Email


Video Recipe


--------------------------------------------------------------------------------------------------------------------------

Maggi Pakoda or Instant Noodle Fritters

maggi instant noodles fritters fried pakoda chickpeas besan
Maggi Pakodas are deep fried fritters made using Maggi instant noodles, chickpea flour (besan) and a few spices. Maggi Pakoda are instant noodles fritters and any instant noodles can be used. Maggi Pakoda are perfect for snacking on a rainy evening.

Recipe Type:  Snacks
Cuisine:            Indian
Prep Time:     10 mins
Cook time:     30 mins
Yield:                12 pakodas

Ingredients:


1 packets Maggi Instant Noodles
3 Tbsp Chickpea Flour or Besan
1 tsp Red Chilli Powder
1 tsp Garam MAsala (if not using the tastemaker)
2 Tbsp Coriander Leaves, finely chopped
1-2 tsp Chaat Masala (Optional)
Water as required
Salt to taste
Oil  to deep fry

Method:


1. Boil 2 cups of water in a sauce pan and add 1 tsp of Oil to it.
2. Add the instant noodles to the water and cook until the noodles are done. Do not add the taste maker to it.
3. Once the noodles are cooked, drain the water and rinse them with cold water to stop the cooking.
4. Mix in the taste maker or 1 tsp Garam Masala, red chilli pwoder, salt and coriander leaves.
5. Add the chickpea flour or besan and mix until combined.
6. Add more salt and chilli powder if required.
7. Heat Oil in a deep pan for frying.
8. Divide the noodles into small portions.
9. Once the oil is hot, carefully dump the portions in the oil.
10. Fry on medium to high heat. Flip the pakodas once the lower side is partially set. Keep stirring the pakodas until all sides are browned and cooked. Remove from heat once the pakodas are crisp and golden brown.
11. Sprinkle chaat masala (optional).
12. Serve hot with ketchup.


If you liked this, you may also like:

Cucumber pakoda fritter sautekayee bonda khira khire kakdi
Cucumber Pakoda

how to make vegetable cutlets recipe, aloo tikki recipe, vegan cutlet recipe, beetroot cutlet recipe at www.oneteaspoonoflife.com
Veg Cutlet
masala vada, ambode, chana dal vada recipe
Masala Vada
Read more ...

Instant Cucumber Dhokla | Cucumber Chickpea Steamed Cakes


Cucumber Dhokla is a savory steamed chickpea flour and semolina cake with added cucumber that is perfect for breakfast or as a tea time healthy snack.

How to make instant khira dhokla recipe at www.oneteaspoonoflife.com


I've been missing around the blog for 2 weeks now. I've been busy cooking up an amazing spread that will soon appear here. Now that's what I would love to say. But that's not what I have been doing. Everyone at home has been under the weather and what I have been cooking has been just soup and regular dal rice. and my taste buds totally ditched me too. I could barely make out what the food tasted like. 

I can finally taste the food and I'm SOO happy about it. 

I've recently gotten obsessed with one particular fruit and one particular vegetable - the water melon and the cucumber. And today is all about the Cucumber. I've been adding cucumber to almost everything - Upma, Akki Rotti, Sambar etc. What I love about adding Cucumber to any dish is that it ends up giving it that moistness along with a very subtle flavor. That is exactly what it did to this Dhokla.

How to make instant khira dhokla recipe at www.oneteaspoonoflife.com


Cucumber Dhokla is my own concoction that is inspired from the traditional Dhokla. I recently had a cucumber pakoda (Seriously!!!) and it tasted good (Really!). I never would have guessed that cucumber that besan (chickpea flour or gram flour) would go so well together. So when I set out to make dhokla this time, I got a little creative, I added in a grated cucumber and a bit more. I also added in a little bit of grated carrot, a few frozen peas, and finely chopped capsicum. Although technically, I should be calling it a mix vegetable Dhokla. I prefer calling it the Cucumber Dhokla, cause that flavor it had in the end was all fresh Cucumber.

You can skip the remaining vegetables and just stick to the cucumber and it will taste just as good - I promise.


Instant Cucumber Dhokla | Cucumber Chickpea Steamed Cakes


How to make instant khira dhokla recipe at www.oneteaspoonoflife.comInstant Cucumber Dhokla is a savory steamed chickpea flour and semolina cake with added cucumber that is perfect for breakfast or as a tea time healthy snack.

Recipe Type:  Breakfast
Cuisine:            Indian
Prep Time:     15 minutes
Cook time:     20 minutes
Yield:                Serves 2-3

Ingredients:


For the Cucumber Dhokla:


3/4 cup Chickpea Flour or Besan
3/4 cup Semolina or Rava
1 grated Cucumber
1 tsp of Ginger- Garlic Paste
1 crushed Green Chilli
1 grated Carrot (Optional)
1 Tbsp Green Peas (Optional)
2 Tbsp chopped Capsicum
1.5 tsp Fruit Salt or Eno
1/4 tsp Asafoetida or Hing
2 Tbsp Yogurt or Curd
1 cup Water
Salt to taste
Oil to grease the steamer

For the Tempering:


3-4 tsp Oil
1 tsp Mustard Seeds
8-10 Curry Leaves
1-2 tsp of Lemon juice
1/2 tsp of Sugar or Jaggery

For Garnish:


2 Tbsp fresh grated Coconut
2 Tbsp finely chopped Coriander leaves

Method:


Preparing the Steamer:


1. You can steam in an Idli steamer or a pressure cooker or a large deep saucepan. If using a pressure cooker, remove the whistle.
2. Pour around 2-3 cups of water in it and cover it and allow the water to come to a boil.
3. Place a small upturned  flat bottomed bowl or vessel at the bottom of the steamer.

Preparing the Dhokla:


4. Mix together all the ingredients except the water, oil and the fruit salt.
5. Add 3/4 cup of water and mix well. Add more water if required. The dough should be thick yet pourable. Almost like a cake or idli batter. The quantity of water depends on the type of rava and besan.
6. Once your steamer is ready, grease a flat vessel that will fit into your steamer with oil. 
7. Now add the fruit salt and the remaining water and mix well. The fruit salt should cause the batter to start foaming and become light.
8. Pour the batter into the greased vessel and place it in the steamer.
9. Allow it to steam for 10-15 minutes. Depending on the depth of your vessel, you may need to keep it in longer. The Cucumber Dhokla is ready when a skewer or knife comes out clean.
10. Allow it to cook and remove from the vessel. 

Preparing the Tempering:

11. Heat oil in a pan and add the mustard seeds.
12. Once the seeds splutter, add the curry leaves.
13. Remove it off the heat and add the sugar and the lemon juice.

Assembling the Cucumber Dhokla:

14. Cut into bite sized pieces.
15. Pour the tempering over the Cucumber Dhokla.
16. Garnish with the coconut and the coriander.
17. Serve warm with coriander chutney or sweet and spicy yogurt.


Read more ...

Matar Dhokla


Steamed Gujarati Green peas Snacks

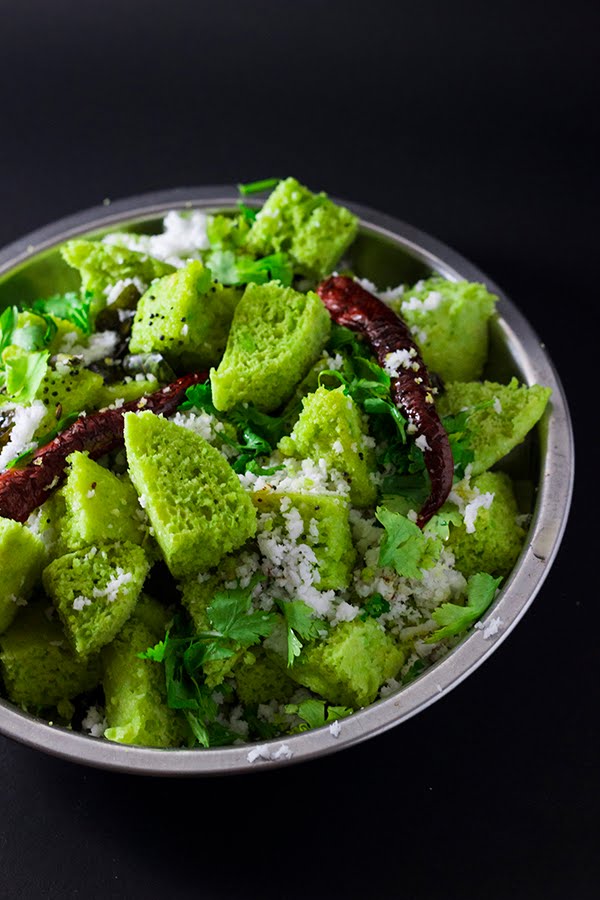
Dhokla is a steamed savory cake that is a favorite of western India. They are usually made of semolina and chickpea flour. They are light and fluffy and taste delicious with a tangy green chutney.

I never knew there was so much variety in something this simple.

I was browsing through cookery books in the library when I glanced upon Tarla Dalal’s Non-Fried Snacks. I’m a big fan of non-fried snacks. The book has some good recipes, majorly it has different types of dhoklas and muthias. And this Matar Dhokla or Green Peas Dhokla was a featured recipe.

It is still just as simple to make as the regular dhokla, but now has the added goodness of green peas. You can use either fresh or frozen peas, according to what you have available. 

The addition of peas gives it that lovely vibrant green colour and the slight sweetness of peas. 

Some people like to soak their dhoklas in a diluted syrup of sugar and lime juice, while some enjoy it with creamy yogurt. It tastes awesome with both.

Step-by-step Instructions:

Steamed Gujarati Green peas Snacks

1) Puree the green peas with a little water.

Steamed Gujarati Green peas Snacks

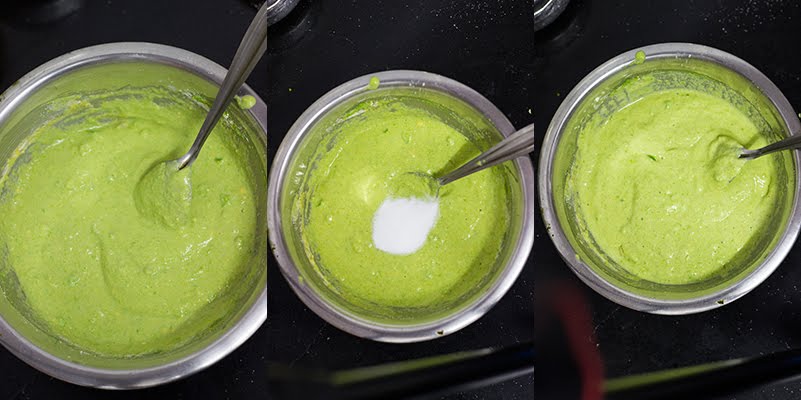
2) Mix together the chickpea flour, semolina, pea puree, salt, ginger- chilli paste, yogurt and salt into a smooth batter.
3) Now add the fruit salt or eno to  the batter. Pour the remaining water over it and mix well. It should start getting frothy.

Steamed Gujarati Green peas Snacks

4) Grease a shallow vessel that fits inside the steamer and add the batter to it.
5) Place the vessel in the steamer and steam on medium flame for 12-15 mins. Insert a knife in the middle and if it comes out clean, it is done.

Steamed Gujarati Green peas Snacks

6) Turn off the stove and allow it to rest for around 2-4 mins.
7) Then remove slowly and cut into desired shape.

Steamed Gujarati Green peas Snacks

8) Heat the oil in a pan and add the mustard seeds.
9) Once they splutter, add the curry leaves and chilli and fry for 20-30 seconds.
10) Pour over this tempering on the dhoklas. 
11) Garnish with the fresh coconut and the coriander leaves. I also sprinkled a few pomegranate seeds to add some freshness.


Matar Dhokla

Steamed Gujarati Green peas Snacks

Steamed savory cake made with green peas and chickpea flour.

Recipe Type:  Snacks
Cuisine:          Indian / Gujarati
Prep Time:     15 minutes
Cook time:     30 minutes
Yield:              Serves 3-4

Ingredients:

Dhokla


1 cup Fresh or Frozen Green Peas
1.5 cups of Chickpea Flour / Besan
4 Tbsp Fine Semoline / Chiroti Rava
1 tsp of Ginger-Green Chilli Paste
2 Tbsp of Yogurt / Dahi
1/2 cup of Water
1.5 tsp Fruit Salt (Eno)
2 tsp of Oil for greasing
Salt to taste

Tempering


4 tsp of Oil
½ tsp of Mustard Seeds
10-15 Curry Leaves
1-2 Slit Green / Red Chillies

Garnish


2-3 Tbsp of grated Fresh Coconut
2 Tbsp finely chopped Coriander Leaves

Method:


Puree the green peas with a little water.
Mix together the chickpea flour, semolina, pea puree, salt, ginger- chilli paste, yogurt and salt into a smooth batter.
Prepare the steamer. (see note)
Now add the fruit salt or eno to  the batter. Pour the remaining water over it and mix well. It should start getting frothy.
Grease a shallow vessel that fits inside the steamer and add the batter to it.
Place the vessel in the steamer and steam on medium flame for 12-15 mins. Insert a knife in the middle and if it comes out clean, it is done.
Turn off the stove and allow it to rest for around 2-4 mins.
Then remove slowly and cut into desired shape.
Heat the oil in a pan and add the mustard seeds.
Once they splutter, add the curry leaves and chilli and fry for 20-30 seconds.
Pour over this tempering on the dhoklas. 
Garnish with the fresh coconut and the coriander leaves.

Notes:


STEAMER - I used an idli steamer. You can use a pressure cooker without the whistle or any deep saucepan with a lid. 
1) To prepare it, add around 2-3 cups of water to the steamer and cover and cook on high flame until the water boils. 
2) Next place a small flat bottomed vessel or bowl upside down in the steamer. The top of this bowl should be above the level of water.
3) Place the plate / vessel with the dhokla over this upturned bowl. The purpose of the bowl is that the dhokla plate / vessel does not touch the boiling water directly and is slightly higher than the water level.
Read more ...

Sabudana Chana Vada | Sago Pearls and Chickpea Patty [Vegan & GF]


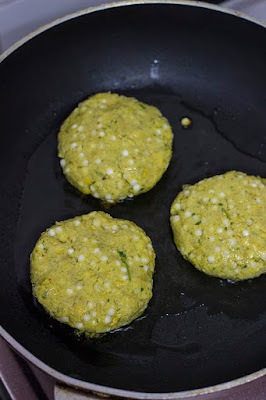
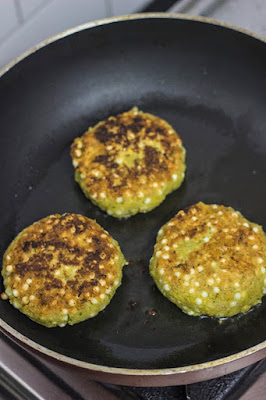
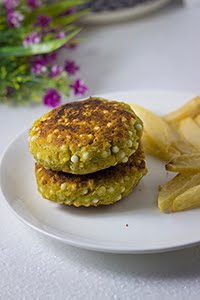
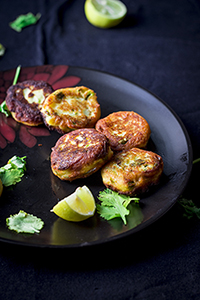
Sabudana Chana Vada Sago Chickpea patty burger garbanzo fritter wada pakoda bonda sabakki

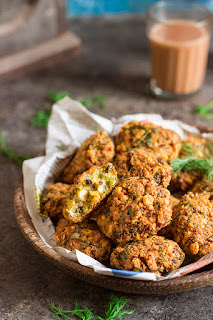
Sabudana vada is a traditional Maharastrian snack eaten during fasting / upvas. I was trying to avoid potatoes in my diet, so I replaced it with chickpeas or kabuli chana. This vada (patty) is a fusion between the traditional Sabudana Vada and the Middle Eastern Falafel. Although both the original snacks are deep fried, I shallow fried. 

Deep frying definitely makes them tastier, but then, doesn't it always do it? I watched an older episode of Eat Street on TV, where they showed a truck that deep fried Cup cakes. I wonder how that tastes. 

The chickpea in the vada increases the protein content of the vada. It also adds a nuttiness to it. You can eat it just as it is or add it in a burger like I did. I used the dry chickpeas that I soaked overnight, you can replace this with canned chickpeas as well. The sabudana or the sago pearls sold in supermarket are dried. They need to be soaked to fluff up and become spongy. You can add spices to enhance the flavor.

All the work in this recipe is during the preparation stage, the cooking is actually a no brainer - grind, mix and fry. That's it! 

This vada is vegan and gluten free.

Step by Step Instructions:

Sabudana Chana Vada Sago Chickpea patty burger garbanzo fritter wada pakoda bonda sabakkiSabudana Chana Vada Sago Chickpea patty burger garbanzo fritter wada pakoda bonda sabakki


1) Soak the kabuli chana or chickpeas in 3 cups of water overnight.Drain the water and keep aside.
You can use canned chickpeas as well. Skip the above steps if using canned chickpeas. Wash and drain the canned chickpeas. Use 2 cups of canned chickpeas.
2) Soak the sabudana in 2 cups of water and leave aside for 1/2 hour.Drain the water and cover and keep it aside for 2 hours.If you plan on making this for breakfast, then after draining the water, cover and keep it aside overnight.
3) Grind the peanuts into a coarse powder.
4) Grind together the chickpeas and green chillies coarsely.
5) Add the ground peanuts, sabudana, curry leaves, coriander leaves and salt and mix well.
6) Shape into patties / vadas.

Sabudana Chana Vada Sago Chickpea patty burger garbanzo fritter wada pakoda bonda sabakkiSabudana Chana Vada Sago Chickpea patty burger garbanzo fritter wada pakoda bonda sabakki

7) Heat around 2 Tbsp of oil in a shallow pan for shallow frying. You can decide to deep fry it too.
8) Once the oil is hot, add the vadas to the pan and cook on medium heat.
9) Flip the vadas when the first side is browned and cook it until the other side browned.
10) Serve hot with coriander chutney or ketchup.


Sabudana Chana Vada | Sago Pearls and Chickpea Patty


Sabudana Chana Vada Sago Chickpea patty burger garbanzo fritter wada pakoda bonda sabakki Pan fried patties/ vada made with sabudana (sago pearls) and kabuli chana (chickpeas). Vegan and gluten free.

Recipe Type:  Snacks /Breakfast
Cuisine:          Indian
Prep Time:     8 hours (Including soaking time) or 3 hours (If using canned chickpeas)
Cook time:     30 minutes
Yield:              7-8 vadas

Ingredients:


1 cup dry Kabuli Chana / Chickpeas
1.5 cups of dry Sabudana / Sago Pearls
1/2 cup of roasted Peanuts
1-2 Green Chillies
7-8 Curry Leaves
2 Tbsp of chopped Coriander Leaves
Salt
Water
Oil for frying

Method:


Soak the kabuli chana or chickpeas in 3 cups of water overnight.
Drain the water and keep aside.
You can use canned chickpeas as well. Skip the above steps if using canned chickpeas. Wash and drain the canned chickpeas. Use 2 cups of canned chickpeas.
Soak the sabudana in 2 cups of water and leave aside for 1/2 hour.
Drain the water and cover and keep it aside for 2 hours.
If you plan on making this for breakfast, then after draining the water, cover and keep it aside overnight.
Grind the peanuts into a coarse powder.
Grind together the chickpeas and green chillies coarsely.
Add the ground peanuts, sabudana, curry leaves, coriander leaves and salt and mix well.
Shape into patties / vadas.
Heat around 2 Tbsp of oil in a shallow pan for shallow frying. You can decide to deep fry it too.
Once the oil is hot, add the vadas to the pan and cook on medium heat.
Flip the vadas when the first side is browned and cook it until the other side browned.
Serve hot with coriander chutney or ketchup.
Read more ...

Dahi Kebab Recipe | Yogurt Kabab Recipe [Video]


Dahi Kebab Recipe with step by step video instructions. Dahi Kebab is a pan fried appetizer / snack made from thick yogurt or hung curd, chickpea flour and nuts. The kebab is crispy on the outside and creamy and soft on the inside. Dahi Kebab is gluten free and fits a Jain diet.

In a hurry? Jump to Video or Jump to Recipe


Dahi Kebab Yogurt Kebab kabab kebob hung curd punjabi besan chickpeas snacks

Dahi  kebab… sounds interesting, doesn’t it? That’s the very reason I ordered it in a food court and I was pleasantly surprised. It actually tasted delicious. And as though fate meant for me to make it, the recipe was showed on TV before I could even google it. It is so simple to make, and it is crowd pleaser. Most people I’ve served it to, haven’t heard of it and eat it out of intrigue. But there is no stopping after one, believe me. It even turned a “dahi hater” around.


Dahi Kebab Yogurt Kebab kabab kebob hung curd punjabi besan chickpeas snacks

It actually tastes a lot like paneer, but it is creamier and has that tang of dahi. It is pan fried, so up goes the healthiness factor.

You can add spice powders like cinnamon, cardamom, clove etc and zing it up. I preferred to keep it as simple as possible to let the dahi shine through.

You can either buy already hung curd or make it yourself. I made it myself. Hung curd is just regular yogurt with all the whey drained out. To make it at home, tie the yogurt into a muslin cloth and leave it hanging for 6-8 hours. I left it overnight in the fridge.


If you made this recipe, let me know! Leave a comment here or on Facebook tag your tweet with @oneteaspoonlife on Twitter and don't forget to tag your photo @oneteaspoonoflife on Instagram. You can also email me at onetspoflife@gmail.com I'd love to see what you are up to.

If you like this recipe, do not forget to share it with your friends and family! 


You can follow One Teaspoon Of Life on FacebookTwitterInstagramPinterest or you can subscribe to One Teaspoon Of Life and receive all the latest updated via Email


Video Recipe


--------------------------------------------------------------------------------------------------------------------------

Dahi Kebab Recipe | Yogurt Kebab Recipe

Dahi Kebab Yogurt Kebab kabab kebob hung curd punjabi besan chickpeas snacks
Dahi Kebab is a popular gluten free North Indian appetizer. Dahi Kebabs are pan fried Kebabs made with thick yogurt and chickpea flour.
Recipe Type:  Snacks
Cuisine:          North Indian
Prep Time:     8 Hours
Cook time:     20 minutes
Total time:     8 Hours 20 Minutes
Yield:                12-15 kebabs
Author:                Anupama

Ingredients:


3 cups Yogurt (Curd/Dahi)
2-3 Tbsp Chickpea Flour (Besan)
1-2 Green Chillies
2 Tbsp chopped Nuts (almonds, cashews, pistachios) (Optional)
1 Tbsp Coriander leaves
Salt to taste
Oil to fry

Method:


1. To make hung curd, place a muslin cloth on a strainer and add the yogurt. Tie the cloth and either leave in the strainer for 4-6 hours or tie the cloth over the sink. You can also leave this in the fridge overnight.
2. 3 cups of yogurt will yield 1 cup of hung curd. Take the hung curd in a large bowl.
3. Add all the ingredients except the oil and mix well.
4. Heat oil in a frying pan for shallow frying.
5. Wet your hands and take a small ball of batter and shape it as a kebab.
6. Gently place the kebab in the frying pan. If you are unable to shape the kebabs, you can use two spoons and spoon the kebabs into the frying pan.
7. Cook on medium heat.
8. Flip when the first side browns.
9. Cook until the second side is cooked too.
10. Serve hot with mint coriander chutney or ketchup.


If you liked this, you may also like:

Paneer Tikka

vegan pan fried turnip chops
Shalgam ke Kebab
Sweet Potato Kebabs
Sweet Potato Kebabs
Read more ...