Showing posts with label South Indian. Show all posts

Traditional Chakli Recipe | How to make Chakli [Video]


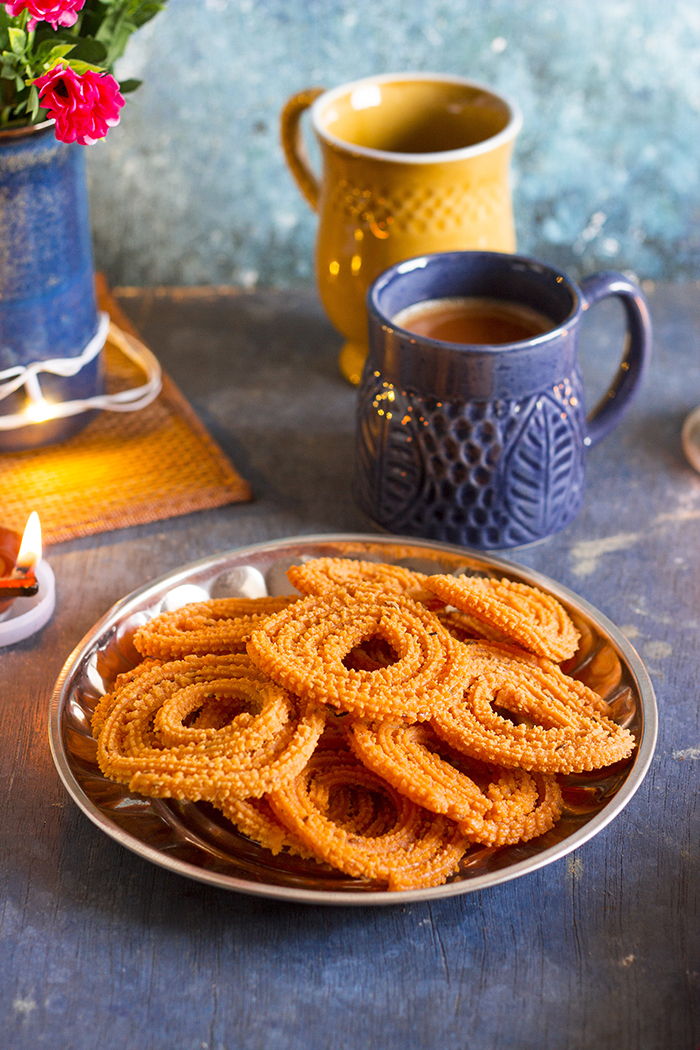
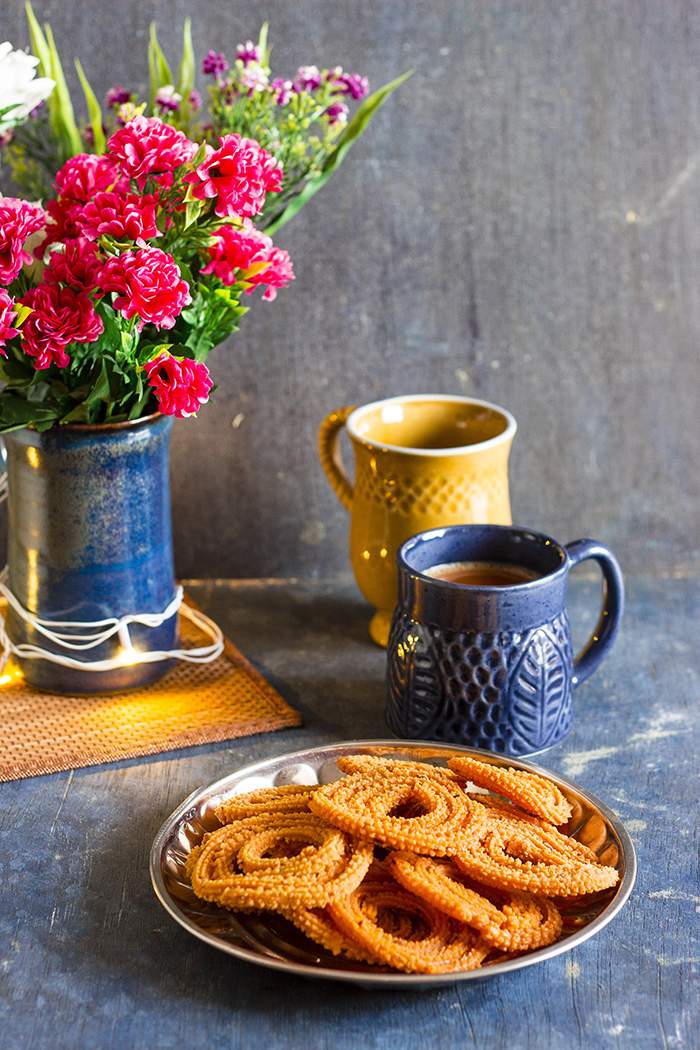
Chakli is a deep fried savory Indian snack that is popularly made for Diwali. Chakli is a spiral snack made from rice and black lentil (urad dal) flour and can be enjoyed in a gluten free diet. This recipe will show to how to make chakli from scratch along with a video tutorial.

In a hurry? Jump to Video or Jump to Recipe

traditional Indian chakli, savory deep fried snack

Soooo.... this post comes almost a month later than what it should have been posted. I had planned to post this Chakli recipe before Diwali, so you guys could try it for Diwali. But I totally missed it. I thought of waiting for next year to post it, but then who has the patience to wait another year. And I figured out, you don't need Diwali around to make Chakli, you can make it anytime you like. With cold weather coming our way, the demand for deep fried goodness is only going to go up. So here's the recipe for the crispy crunchy Chakli.

There are several variations of the Chakli - Palak Chakli, Butter Chakli and what my friend told me recently, there's even an Jalapeno Chakli out there. But this is the recipe for the traditional chakli.

traditional Indian chakli, savory deep fried snack

traditional Indian chakli, savory deep fried snack

Some background.

It’s been years that I have been planning to cook snacks and sweets for Diwali and restart our old tradition of visiting friends and family and sharing those delicacies with them. But for the last 2 years, I’ve been out of country for Diwali (visiting Bali and Cambodia). So while I made elaborate plans on what to cook and how to box them, it never materialized. But this Diwali was different, I was in country and better yet, I was in Goa. Gee and I split up the dishes and managed to put up two savory and two sweets on the plate. It was such a delight!

I had several ideas for the savory snack and while I had Chakli at the back of my mind, Gee picked it too. Chakli was what my mom made every Diwali when we were little and gave it to everyone in the apartment complex. And this year, I restarted that tradition.

I made Chakli several times in the last one month, I made trial batches and I made more batches for distributing. With all the Chakli making so fresh in my mind, I'm at my best to give you all the tips and tricks required to make the perfect Chakli. There are several small things that impact how your Chakli turns out, and I have included it in the Notes section at the bottom of the recipe. Who knew, that things like humidity and temperature could affect your Chakli?

There are different varieties of Chakli Press available in the market, you can buy:

  • Stainless Steel Ones -  
  • Brass ones -             
  • Wooden ones  from local markets.

traditional Indian chakli, savory deep fried snack


If you made this recipe, let me know! Leave a comment here or on Facebook tag your tweet with @oneteaspoonlife on Twitter and don't forget to tag your photo #oneteaspoonoflife on Instagram. You can also email me at onetspoflife@gmail.com I'd love to see what you are upto.


If you like this recipe, do not forget to share it with your friends and family! 


You can follow One Teaspoon Of Life on FacebookTwitterInstagramPinterest and Google+ or you can subscribe to One Teaspoon Of Life and receive all the latest updated via Email


Video Recipe


--------------------------------------------------------------------------------------------------------------------------

Traditional Chakli Recipe
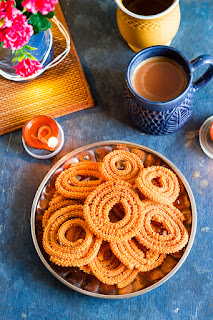

traditional Indian chakli, savory deep fried snackChakli is a savory deep fried Indian snack that is popularly made for Diwali. Chakli is a crispy spiral snack made from rice and lentil flour. It is a spicy crunchy vegetarian snack.

Recipe Type:  Snacks
Cuisine:            South Indian
Prep Time:     10 hours
Cook time:     60 minutes
Total time:     10 hours 40 minutes
Yield:                80-90

Ingredients:


3 cups or 570 gms raw Rice
1 cup or 190 gms Urad Dal
0.75 cup or 75 gms Ghee
0.5 cup Oil
5 tsp Cumin Seeds
2 tsp Red Chilli Powder
1 tsp Asafoetida (Hing) (Use gluten free hing to suit a gluten free diet)
2-4 tsp Salt
3-4 cups Water
Oil to fry
Water as required

Method:


To make the Chakli Flour:


1. Wash and drain the rice. Spread it on a dry muslin cloth in a single layer to dry overnight or for 8-10 hours.
2. Once the rice is dry, dry roast it in a kadhai until all the moisture evaporates and the rice turns bright white. Roast on low flame by stirring occassionally. Do not allow the rice to change color or burn. Remove from heat and allow to cool.
3. Dry roast the urad dal on low heat until it turns pinkish-brown. The dal will turn fragrant once roasted well. Stir occassionally and do not allow the dal to burn. Remove from heat and allow to cool.
4. Once the rice and urad dal have cooled, grind it into a smooth powder in batches. You can either do this at home in a mixer or get it powdered at a mill.
5. Sieve the flour to remove any unpowdered rice or dal.
6. With the quantities used in this recipe, you should get around 750-760gms of chakli flour.

To make the Chakli:


7. Grind 3 tsp of cumin seeds into a coarse powder. Alternately you can use roasted cumin powder.
8. Add the cumin seed powder to the chakli flour.
9. Next add in the red chilli powder, remaining cumin seeds, hing and 2 tsp of salt and mix it roughly. Hing or asafoetida may contain wheat and hence avoid it if making a gluten free version.
10. Add in melted ghee and rub it in the flour.
11. Add hot oil by the spoonfuls and rub it in the flour. Squeeze a bit of the flour in your palms, if it holds the shape, you can stop adding oil. If it crumbles away, add more oil and mix.
12. Once you have added all the oil, add in water slowly and start kneading until you have a smooth dough. Adjust seasoning or spices as you continue to knead.
13. Once you have a smooth dough, cover with a wet cloth and keep aside.
14. Grease the chakli press well.
15. Take a ball of dough and stuff it in the chakli press.
16. Press out the chaklis onto a smooth plastic sheet.
17. Heat oil in a kadhai for deep frying. Add a small piece of flour to test the oil. If the piece floats up, the oil is hot enough.
18. Once the oil is hot, carefully pick up the chakli and add it to the oil. Fry in batches and do not crowd the kadhai.
19. Once you have added the first batch of chaklis, lower the heat to a minimum and allow to cook for 4-5 minutes. Depending on the quantity of oil you have in the kadhai and the stove settings, you may require more or less time than what is mentioned. Try a test batch first to get the time and temperature of the stove correct. See notes for more tips.
20. Remove from oil and place it onto a absorbent kitchen towel to cool.
21. Once cool, store in an airtight box.
22. Serve at room temperature with tea.

Notes:


  1. To make the chakli gluten free, do not add hing or asafoetida.
  2. To make the chakli vegan, you can replace ghee with oil.
  3. To make the chakli richer tasting, the oil can be replaced with ghee or butter. Butter can also be used in place of ghee or oil completely.
  4. If you are making chakli for the first time, it is better to make the dough in small batches, so that you can correct the next batch if required. Humidity and temperature in your house may change the amount of ghee/oil required in your recipe, a trial batch will help get that quantity right.
  5. If the chaklis start breaking when you try to shape them, then add more water to the dough and try again. The water can be added to small batches of dough as you go along.
  6. If the chaklis start breaking in the oil while frying, that means the amount of ghee or oil added to the dough is more than required. Add it a little dry flour and knead again.
  7. The chakli flour can be stored for 1-2 months in a dry airtight container.
  8. The chakli dough cannot be stored and it is recommended to make chakli with fresh dough.
  9. Cooking the chakli is the trickiest part, make sure the oil is hot when you drop in the chaklis, after that set the stove to sim or minimum heat. Cook on a low temperature until crispy. The high temperature gives color to the chakli while the low temperature cooks it all the way through making it crispy. It is recommended to make a few trial batches so that you get the temperature and time required in your environment.
  10. Allow the chaklis to cool completely before storing, else they may get soft.

traditional Indian chakli, savory deep fried snack


If you liked this, you may also like:

How to make shakkarpara recipe, shankarpole recipe at www.oneteaspoonoflife.com
Shankarpole

Nippattu
popular Indian snack - baked flat discs made of four and spices
Baked Papdi


Read more ...

Instant Oats Idli Recipe [Video]


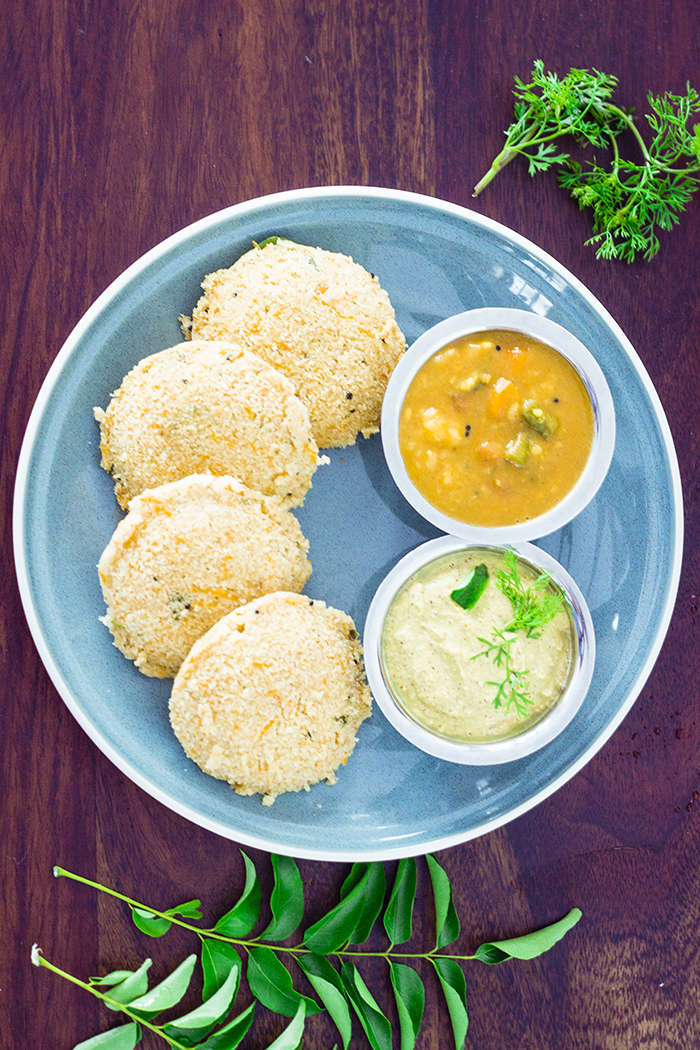
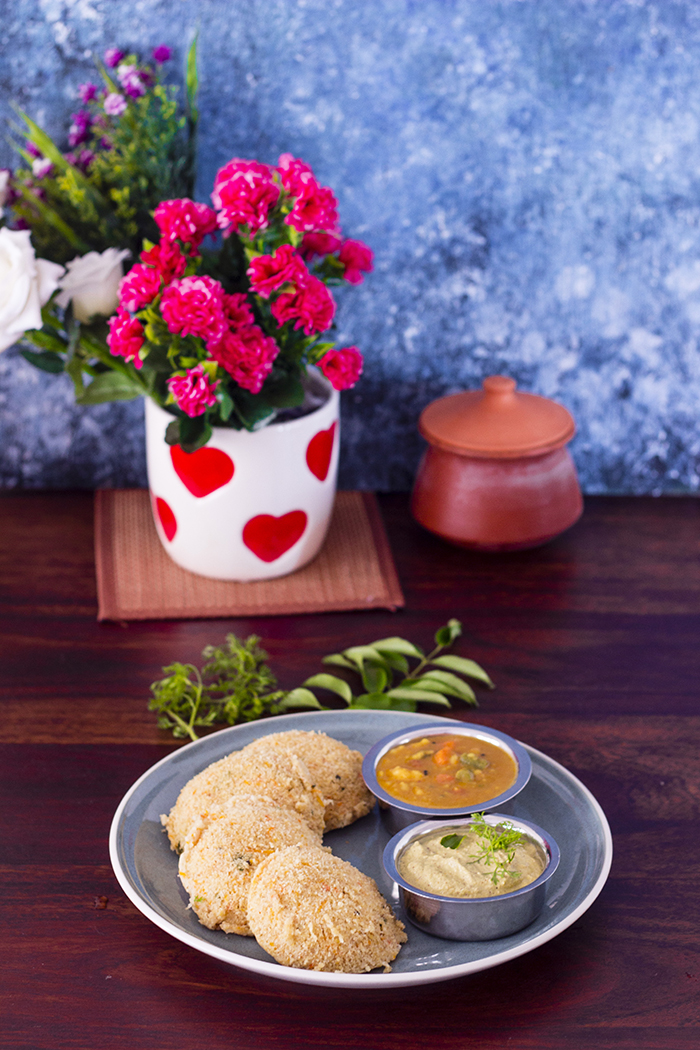
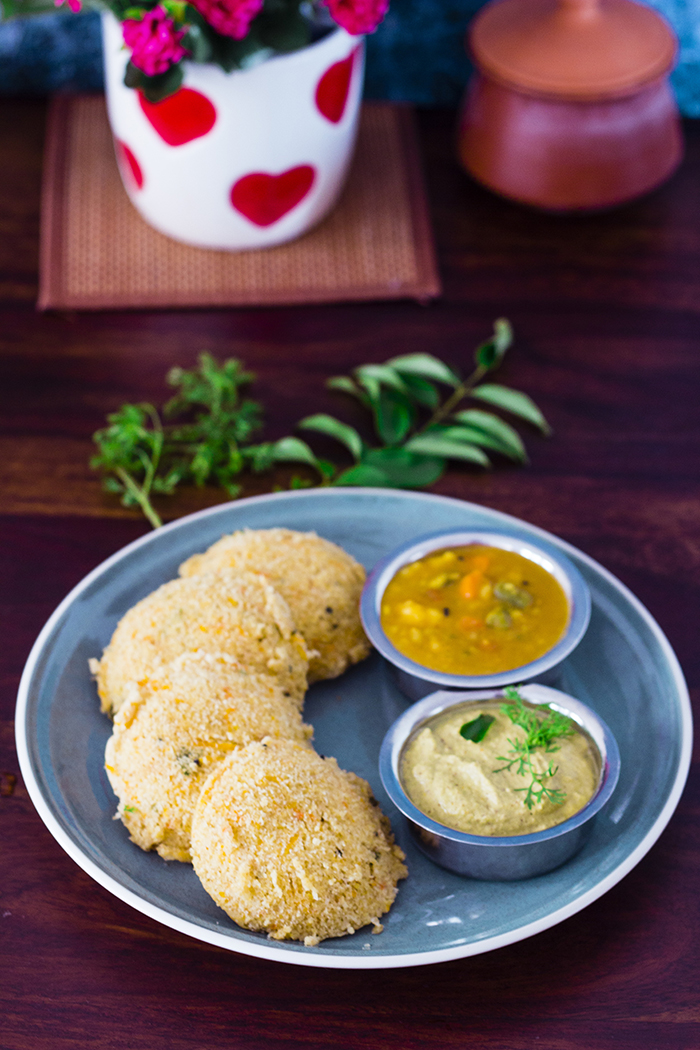
Oats Idli is a steamed cake made of oats and semolina. It is a healthy take on the popular South Indian breakfast of rice idli.

steamed idli made from oats, instant oats idli

So what have you guys been up to? I know I missed posting last week, but I won't make any excuses. I'm just happy I managed to get a post this week.

But in between we got a lot of new additions to the house. 

In came some mango wood wall shelves that helped us drag out all our travel memoirs. I'm so happy I now get to display all the souvenirs we've collected over the years. If you've missed reading about our recent travels, you can now read them here

We also finally got a dining table!!! Since we never ate at the table, I never missed having one. But now that I have one, I love it. We had so many discussions and measurements until we finalized on a teak rectangle four seater. I cannot believe we contradicted each other on pretty much everything about the table - the size, the color, the shape. I wonder how we ever buy anything!! Now all I have to ensure is that the table is clutter free.

steamed idli made from oats, instant oats idli

Straying back to our recipe of the day - Oats Idli. If you've ever been around a South Indian, you have to know how much we love our idlis. Idlis are light fluffy steamed rice cakes made by steaming a batter made from fermenting ground rice and black lentils. While that is healthy too, I now have a healthier version for you, and on the plus side, a quicker version too. 

Raise your hand if you hate oats but still want to include them in your diet for all the health benefits it gives you. That is exactly what inspired me to make these idlis. Raj hates oats, he'll only eat them if he doesn't know it is in the dish. So these oat idlis were the perfect place to hide them. These idlis are made with oats and semolina (cream of wheat) instead of the rice and lentils. Sour yogurt or curd is used to give it the slightly fermented taste. 

To make the idlis light and fluffy, I used Fruit Salt or Eno. To ensure that you don't end up with hard idlis, always have the steamer hot and ready for steaming before adding in the fruit salt to the batter. Once you add the fruit salt, don't over mix, just make sure it is combined and add it to the plate or bowl you want to steam the idlis in.

While I used rolled oats this time, I have made it in the past with oat meal too. Use either one of them to get the same results - Soft fluffy healthy Oats idlis. Serve them with traditional coconut chutney and piping hot sambar for best results.

steamed idli made from oats, instant oats idli


Psst... All the pics in this photo are clicked on our new table :)


If you made this recipe, let me know! Leave a comment here or on Facebook tag your tweet with @oneteaspoonlife on Twitter and don't forget to tag your photo #oneteaspoonoflife on Instagram. You can also email me at onetspoflife@gmail.com I'd love to see what you are upto.


If you like this recipe, do not forget to share it with your friends and family! 


You can follow One Teaspoon Of Life on FacebookTwitterInstagramPinterest and Google+ or you can subscribe to One Teaspoon Of Life and receive all the latest updated via Email


Video Recipe


--------------------------------------------------------------------------------------------------------------------------


Oats Idli Recipe


steamed idli made from oats, instant oats idliOats idli is a steamed cake made from oats and semolina. It is a healthier version of the popular south Indian breakfast of rice idli. This is an instant recipe and does not require any fermenting.

Recipe Type:  Breakfast
Cuisine:            South Indian
Prep Time:     30 minutes
Cook time:     15 minutes
Total time:     45 minutes
Yield:                10 idlis

Ingredients:


1 cup rolled Oats or Oat meal
0.5 cup fine Semolina (chiroti rava) or cream of wheat
1 cup sour Yogurt or curd
0.75 cup grated Carrot
2 Tbsp chopped Coriander leaves
10-12 Cashewnuts
1.5 Tbsp Oil
1 tsp Mustard seeds
1 finely chopped Green Chilli
1 Tbsp Chana Dal
1.5 tsp Fruit Salt or Eno
1 Tbsp chopped Curry leaves
Salt to taste
Water as required

Method:


1. Powder the oats until smooth.
2. Heat 1 Tbsp oil in a pan and add mustard seeds.
3. Once they splutter, add in chopped curry leaves and chana dal. Saute for 30-45 seconds.
4. Add in split cashew nuts and fry until the cashews brown slightly.
5. Add the semolina and saute for 4-5 minutes until the semolina is fragrant.
6. Add in the powdered oats and fry for 2-3 minutes.
7. Remove from heat and allow to cool completely.
8. Add grated carrot, chopped coriander leaves, salt and whisked yogurt to the dry ingredients.
9. Mix well and keep aside for 10-15 minutes. If the batter feels very dry, add a little water. The consistency of the batter is slightly thicker than usual idli batter.
10. Heat up the steamer and grease the idli plate or small bowls.
11. Add the fruit salt and a little water and mix well until combined.
12. Pour spoonful of batter onto the greased idli plate or bowls.
13. Steam for 10-12 minutes.
14. Demould and serve hot with chutney or sambhar.


If you liked this, you may also like:

Paddu - Dumpling made with fermented rice and urad dal
Paddu

How to make MTR style instant rava idli at www.oneteaspoonoflife.com
Rava Idli
Steamed cups made from rice semolina
Battalu Kadabu

Read more ...

North Karnataka Jolada Rotti Oota - Part 4 - Kaalu Palya Recipe | Cowpeas Curry | Lobia Masala [Video]


Jolada Rotti Oota is a North Karnataka Thali that has jowar roti, spicy curries and condiments along with salads and sweets. North Karnataka style kaalu palya is a vegan curry made with alsande kaalu (cowpeas / lobia/ black eyed peas). 

jowar roti with soppina palya or muddi palya, jolada rotti oota

The last part of my "North Karnataka Jolada Rotti Oota" series is here. Today I am sharing the recipe for Kaalu Palya ( Cowpeas Curry or Lobia Masala).

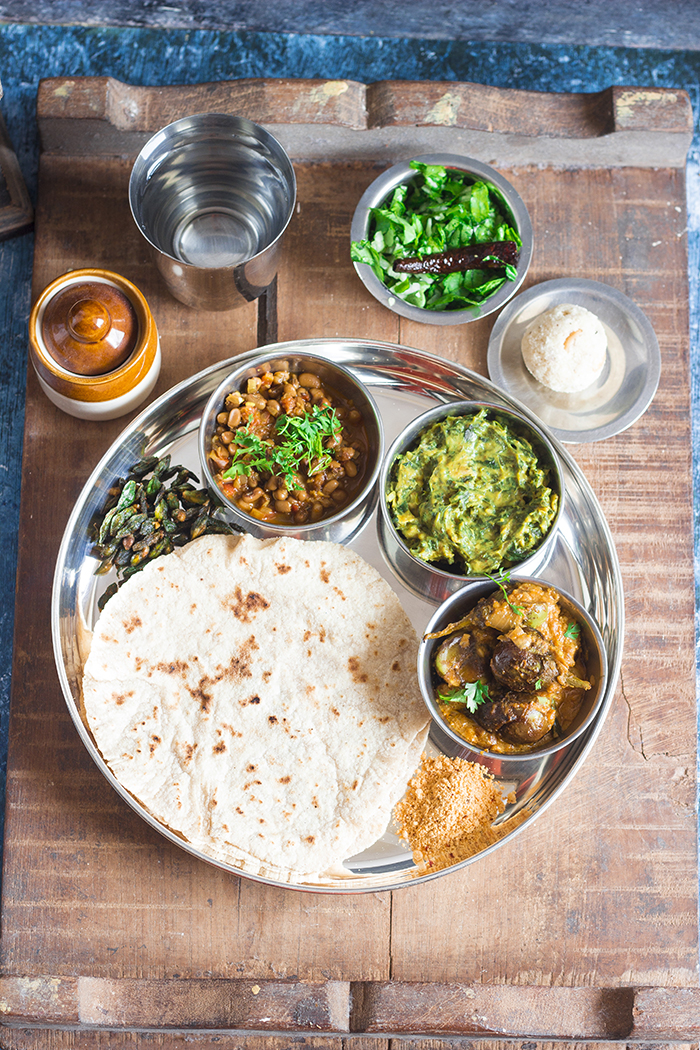
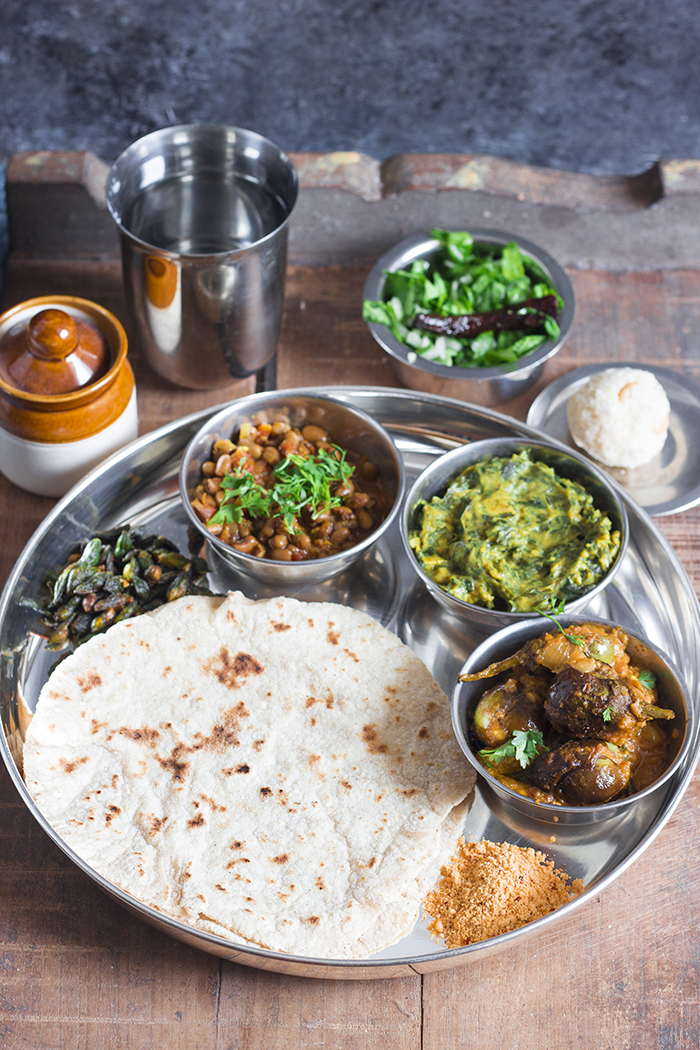
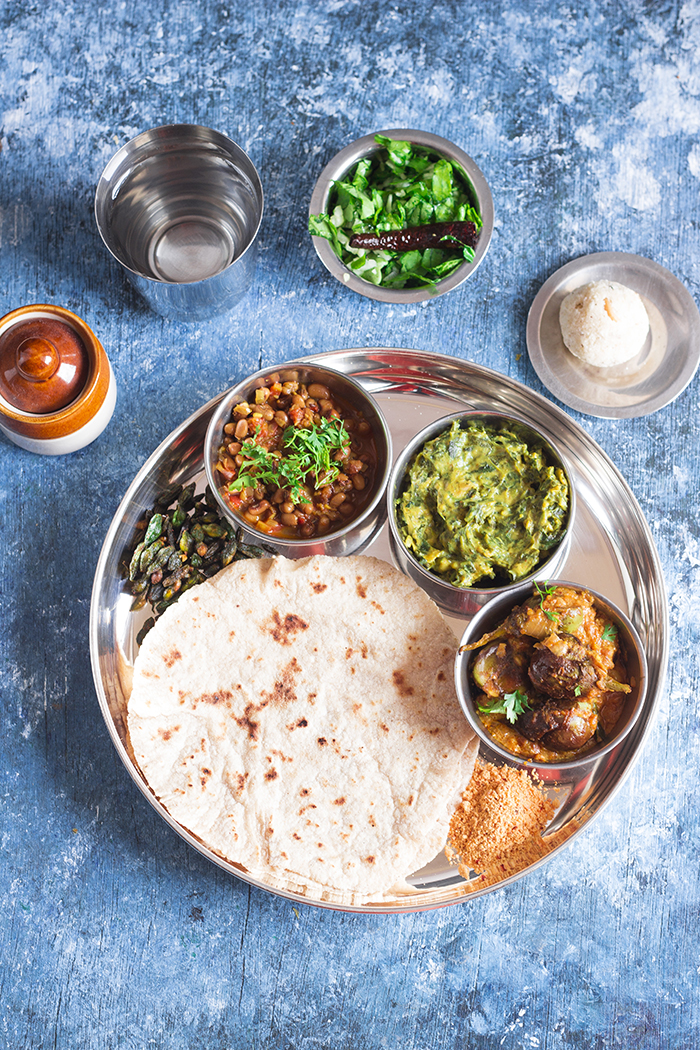
"North Karnataka Jolada Rotti Oota" refers to the "thali" or plate meal presented in the photo above. It is a popular meal in the northern regions of the state of Karnataka. The Jowar Roti or Jolada Rotti, that I shared earlier, is the star of the meal. These gluten free, vegan and oil free flatbreads are made from jowar or sorghum millet and if made well, totally melt in your mouth. The bland rotti is always served with spicy sides like Yennegai, Soppina Palya and Kaalu Palya.

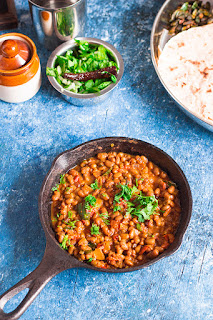
North Karnataka kaalu palya made with alsande kaalu. Black eyed peas curry.


Kaalu can refer to the contents of any legume pod in Kannada. This curry is made from alsande kaalu or cowpeas or lobia. Dried peas are used for this recipe. The peas are soaked overnight and then cooked in salted water. These peas are then simmered in a simple masala made from onions, tomatoes and spices. The same curry can be made with Mung beans or dried Green Peas. They both taste equally good.

This Kaalu Palya is vegan, gluten free and super healthy. It can also be made to fit plant-based diet by sauteing the vegetables in water instead of oil. I have made it in the past with zero oil and not felt the difference in taste.

This Kaalu Palya tastes fabulous with wholewheat rotis or naans too. 

You might also like the other recipes in the North Karnataka Series - 


If you made this recipe, let me know! Leave a comment here or on Facebook tag your tweet with @oneteaspoonlife on Twitter and don't forget to tag your photo #oneteaspoonoflife on Instagram. You can also email me at onetspoflife@gmail.com I'd love to see what you are upto.

If you like this recipe, do not forget to share it with your friends and family! 


You can follow One Teaspoon Of Life on FacebookTwitterInstagramPinterest and Google+ or you can subscribe to One Teaspoon Of Life and receive all the latest updated via Email

--------------------------------------------------------------------------------------------------------------------------

Kaalu Palya Recipe | Cowpeas Curry | Lobia Masala

North Karnataka kaalu palya made with alsande kaalu. Black eyed peas curry.
North Karnataka style kaalu palya is a curry made with alsande kaalu (cowpeas / lobia/ black eyed peas). It is traditionally served with Jolada Rotti or Jowar Roti.

Recipe Type:  Curry
Cuisine:            South Indian
Prep Time:     8 hours
Cook time:     40 minutes
Total time:     8 hours 40 minutes
Yield:               Serves 3-4

Ingredients:


1 cup dried Cowpeas
1 large Onion
1 large Tomato
1 tsp Garam Masala
0.5 tsp Turmeric Powder
1-2 tsp Red Chilli Powder
1 tsp Cumin seeds
6-7 Curry leaves
1 tsp Ginger Garlic Paste
3 tsp Oil
Water as required
Salt to taste
Handful of Coriander leaves

Method:


1. Soak the cowpeas overnight or for 8-10 hours.
2. Drain the water and cook them in mildly salted water until done. If pressure cooking, then only cook for 1 whistle, cowpeas cook very quickly.
3. Do not throw out the water in which the cowpeas were cooked. Reserve the water for use later.
4. Heat oil in a pan and add cumin seeds.
5. Once, they splutter, add curry leaves and ginger garlic paste. Saute until fragrant.
6. Add finely chopped onion and saute until translucent.
7. Add finely chopped tomato and cook until soft.
8. Now add salt, turmeric powder, red chilli powder and garam masala and mix well.
9. Add the cooked cowpeas and 1 cup of the water it was cooked in. Cook on medium to high heat for 7-8 minutes.
10. If you want a thinner gravy, add more water.
11. Garnish with chopped coriander leaves while serving. Serve hot with Jolada Rotti or roti.


If you liked this, you may also like:

mixed green curry with chickpea flour
Soppina Palya

jowar roti with stuffed eggplant curry or enne gai or jolada rotti oota
Yennegai
jowar roti with curries or jolada rotti oota
Jolada Rotti

Read more ...

North Karnataka Jolada Rotti Oota - Part 3 - Soppina Palya | Mixed Greens Curry | Muddi Palya [Video]


Jolada Rotti Oota is a North Karnataka Thali that has jowar roti, spicy curries and condiments along with salads and sweets. North Karnataka style soppina palya or muddi palya is a curry made with a single variety or mixed green leafy vegetables like amaranthus, spinach, methi or dill (sabasige).

jowar roti with soppina palya or muddi palya, jolada rotti oota

The third part of my "North Karnataka Jolada Rotti Oota" series is here. Today I am sharing the recipe for Soppina Palya or Muddi Palya. 

"North Karnataka Jolada Rotti Oota" refers to the "thali" or plate meal presented in the photo above. It is a popular meal in the northern regions of the state of Karnataka. The Jowar Roti or Jolada Rotti, that I shared on Tuesday, is the star of the meal. These gluten free, vegan and oil free flatbreads are made from jowar or sorghum millet and if made well, totally melt in your mouth. The bland rotti is always served with spicy sides like Yennegai, Soppina Palya and Kaalu Palya.

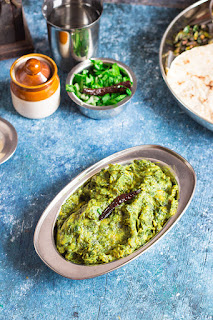
mixed green curry with chickpea flour

Soppu refers to any green leafy vegetable like spinach, amaranthus (harive soppu/ dantina soppu) , methi (fenugreek) or dill leaves (sabasige). This curry  can be made with either mixed greens or just a single type of greens. It is one of the simplest curries on the plate. To make the curry, you need to cook the greens until they are completely done, even overcooked works fine. You can pressure cook them too. It has minimal spices, just turmeric powder and red chilli powder. You can add garam masala or any other spice mix you want to enhance the taste.

There are different variations of the muddi palya, this recipe uses gram flour (besan) or chickpea flour in it. You can also use cooked toor dal (pigeon pea lentils) instead. The quantities in the recipe below are just guidelines, adjust them to your taste. Add more besan or dal if you want to increase the quantity of the curry or if you just enjoy the taste. Besan will make a thicker curry than dal. Add water as per your requirements.

My mom always added peanuts to the curry, so I continue to do so. If you are allergic or if you don't like peanuts, you can skip them. You can replace them with fresh tuvar also.

This Soppina Palya tastes fabulous with wholewheat rotis or naans too. 


Video Recipe


If you made this recipe, let me know! Leave a comment here or on Facebook tag your tweet with @oneteaspoonlife on Twitter and don't forget to tag your photo #oneteaspoonoflife on Instagram. You can also email me at onetspoflife@gmail.com I'd love to see what you are upto.

If you like this recipe, do not forget to share it with your friends and family! 


You can follow One Teaspoon Of Life on FacebookTwitterInstagramPinterest and Google+ or you can subscribe to One Teaspoon Of Life and receive all the latest updated via Email

--------------------------------------------------------------------------------------------------------------------------

Soppina Palya | Mixed Greens Curry | Muddi Palya Recipe


mixed green curry with chickpea flourNorth Karnataka style soppina palya or muddi palya is a curry made with a single variety or mixed green leafy vegetables like amaranthus, spinach, methi or dill (sabasige). It is traditionally served with Jolada Rotti or Jowar Roti.

Recipe Type:  Curry
Cuisine:            South Indian
Prep Time:     15 hours
Cook time:     30 minutes
Total time:     45 minutes
Yield:               Serves 3-4

Ingredients:


5 cups of mixed Green leafy vegetables (amaranthus, spinach, methi, dill)
1 large Onion
0.25 cup Peanuts
5-6 Tbsp Gram Flour(Besan) or 2 cups boiled Toor Dal
0.5 tsp Turmeric Powder
1-2 tsp Red Chilli Powder
3 tsp Oil
Water as required
Salt to taste

Method:


1. Heat the oil in a large pan and add finely chopped onions.
2. Once the onions have turned translucent, add the peanuts and saute for 1-2 minutes.
3. Add the chopped green leafy vegetables and 0.5 cup of water. Cover and cook until the greens are completely done. You can either use just one variety of greens or a mixture of what is available.
4. Add salt, turmeric powder and red chilli powder. For added taste, you can add garam masala too.
5. If using besan, mix the besan in 1 cup of cool water until there are no lumps and add to the curry. Stir immediately and add 1 cup more water as the besan will immediately thicken. Add more water if you want a thinner curry.
6. If using dal, add the dal and mix.
7. Adjust seasoning and spices as per taste.
8. Simmer on low heat until the raw taste of the besan is gone or for 5-8 minutes.
9. Serve hot with jolada rotti or wholewheat rotis.


If you liked this, you may also like:

curry made with chickpea flour and tomatoes
Jhunka

jowar roti with stuffed eggplant curry or enne gai or jolada rotti oota
Yennegai
jowar roti with curries or jolada rotti oota
Jolada Rotti

Read more ...

North Karnataka Jolada Rotti Oota - Part 2 - Yennegai Recipe | How to make Ennegai Badnekayi | Bharli Vangi Recipe [Video]


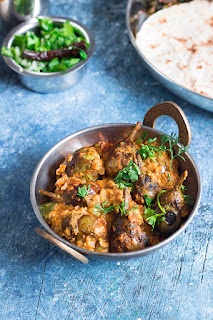
Jolada Rotti Oota is a North Karnataka Thali that has jowar roti, spicy curries and condiments along with salads and sweets. Yennegai is a spicy stuffed baby eggplant curry made by simmering eggplants in a peanut based gravy.

jowar roti with stuffed eggplant curry or enne gai or jolada rotti oota

It's Fabulous Friday, and I have a fabulous recipe for you!!

Continuing with my "North Karnataka Jolada Rotti Oota" series, today I am sharing the recipe for the spicy baby eggplant curry - Yennegai or Ennegai Badnekayo or Bharli Vangi. Many names, one dish!

"North Karnataka Jolada Rotti Oota" refers to the "thali" or plate meal presented in the photo above. It is a popular meal in the northern regions of the state of Karnataka. The Jowar Roti or Jolada Rotti, that I shared on Tuesday, is the star of the meal. These gluten free, vegan and oil free flatbreads are made from jowar or sorghum millet and if made well, totally melt in your mouth. The bland rotti is always served with spicy sides like this Yennegai.

jowar roti with stuffed eggplant curry or enne gai or jolada rotti oota

Yennegai is a curry that is made by stuffing eggplants with a spicy peanut mixture and slow cooking them until done in the peanut masala.

If you are lucky, you will find these baby eggplants or brinjals and you can stuff them directly. While using brinjals, always check for worms and discard those that have them. If you can't find baby eggplants, you can make the recipe by just dicing a big eggplant into bite sized chunks. In that case, you can skip the step of stuffing the eggplants with the spicy peanut mixture.

It tastes fabulous with wholewheat rotis or naans too. If you want to eat it with rice, you can make a thinner gravy.


Video Recipe


If you made this recipe, let me know! Leave a comment here or on Facebook tag your tweet with @oneteaspoonlife on Twitter and don't forget to tag your photo #oneteaspoonoflife on Instagram. You can also email me at onetspoflife@gmail.com I'd love to see what you are upto.

If you like this recipe, do not forget to share it with your friends and family! 


You can follow One Teaspoon Of Life on FacebookTwitterInstagramPinterest and Google+ or you can subscribe to One Teaspoon Of Life and receive all the latest updated via Email

--------------------------------------------------------------------------------------------------------------------------

Yennegai Recipe | How to make Ennegai Badnekayi | Bharli Vangi Recipe


jowar roti with stuffed eggplant curry or enne gai or jolada rotti ootaYennegai is a spicy stuffed baby eggplant curry made by simmering eggplants in a peanut based gravy.

Recipe Type:  Curry
Cuisine:            South Indian
Prep Time:     15 minutes
Cook time:     30 minutes
Total time:     45 minutes
Yield:               Serves 4-5

Ingredients:


16-18 baby Eggplants
1 cup roasted Peanuts
1 Tbsp Garam Masala
1 Tbsp Red Chilli Powder
0.25 tsp Turmeric Powder
0.5 tsp Jaggery or Sugar
1-2 Tbsp Tamarind Pulp
1 large Onion
1 sprig Curry leaves
4 tsp Oil
1 cup Water
2 Tbsp Coriander leaves
Salt to taste

Method:


1. Make two slits lengthwise on the eggplant. Do not cut all the way through.
2. Heat 2 tsp oil in a pan and saute the eggplants for 7-8 minutes until they are slightly soft.
3. Powder the peanuts and add garam masala, red chilli powder, turmeric powder, salt, tamarind pulp and jaggery and mix well. Taste and adjust spices and seasoning as required.
4. Stuff the sauteed eggplants with the peanut mixture. Keep the excess peanut mixture aside.
5. Add the remaining oil to the same pan and add in finely chopped onions and curry leaves. Fry until the onions turn golden brown.
6. Place the eggplants in the pan and add the remaining peanut mixture.
7. Add water and mix well. To get a thick gravy, add 1 cup of water. To get a thinner gravy, add more.
8. Simmer on low heat until the eggplants are done, stirring occasionally.
9. Dust your kitchen counter with dry flour and dip the ball of dough in it.
10. Adjust seasoning as per taste.
11. Remove from heat and garnish with chopped coriander leaves.
12. Serve hot with jolada rotti or wholewheat rotis.


If you liked this, you may also like:
curry made with chickpea flour and tomatoes
Jhunka

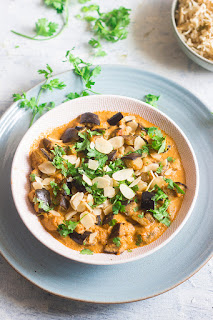
Vegan curry made with eggplant and coconut milk
Eggplant Coconut Curry
jowar roti with curries or jolada rotti oota
Jolada Rotti

Read more ...

North Karnataka Jolada Rotti Oota - Part 1 - How to make Jolada Rotti | Jowar Bhakri Recipe [Video]


Jolada Rotti Oota is a North Karnataka Thali that has jowar roti, spicy curries and condiments along with salads and sweets. Jolada rotti or Jowar Roti is an oil less, vegan, healthy, gluten free flatbread made from jowar millet or sorghum.

jowar roti with curries or jolada rotti oota


If you have never been to North Karnataka or never eaten the food, you are in the right place, because I'm taking you there!!

Karnataka is a state with various cultures, dialect and cuisines all mixed into one. While the coastal belt is huge on growing and eating rice, the drier northern regions eat more of flatbread or rottis made from wholewheat or millet like jowar. And today, I'm taking you through the cuisine of North Karnataka in the first post of a four part series.

A typical vegetarian meal or Jolada Rotti Oota in the region is centered around the Jolada Rotti or the Jowar Roti (flatbread). Jolada Rotti is accompanied by spicy curries, jhunka, spiced peanut and fried gram powder (chutney pudi), sliced onions, fresh fenugreek leaves (methi), buttermilk and fried pakodas.

Going clockwise from the Jolada Rotti, I have the following on my plate - Karachi Kai fry - a baby bitter gourd type of vegetable native to the region, lightly fried in oil with red chilli powder and garlic,  Kaalu Palya (Lobia) or Cowpeas curry, Soppina Palya or a curry made with leafy greens, Yennegai or baby eggplants cooked in a peanut sauce, Chutney Pudi or spicy powder made with peanuts and fried gram. Outside my plate I have pickle, water, a tempered radish salad or kochhidu moolangi salad and rava ladoo or semolina fudge ball.

jowar roti with curries or jolada rotti oota

The Jowar flatbread is made of only 3 ingredients - jowar flour, salt and water. It is cooked without oil or any type of fat, making it a very healthy type of bread. A well made jolada rotti is soft and just melts in your mouth. Jolada Rotti is vegan, gluten-free and plant based and easily fits into various diets.

The recipe of Jolada Rotti that I have here is slightly different from the traditional one, but it produces the same results - a soft, heavenly rotti. Traditionally, the flour is made by adding hot water to the flour and kneading it until you have a pliable dough. In my recipe, I add the flour to hot water, this tends to increase the elasticity of the dough making it easier for you to roll it out. Also, traditionally, a jolada rotti is patted out thin using your fingers or palm. It requires a lot of practice and expertise to be able to pat out a thin rotti. Here, I'm demonstrating the easier option of rolling out the rotti using a rolling pin.

Since jowar is a gluten free millet, making the rotti is a little trickier than making chapatis, naan or rotis that are typically made from gluten rich wheat flour and hence the deviations from the traditional recipes. Additionally, I am giving you a few tips so that you don't fail, however, only practice can make you perfect in the art of making jolada rotti.

  • Firstly, the flour - Buy the best quality jowar flour you can, preferably, organic and unadulterated. I usually buy jowar and get it powdered at a local mill and I found this works best for me over pre-packaged flours. If you have the option, try it out, you won't regret it.
  • As Jowar is gluten free, you cannot make the dough in advance and the rottis later. You have to roll out the rottis when the dough is warm for best results. So make the dough only when you plan to make the rottis. You can store the rottis for later though. So make all the rottis and keep aside. 
  • Roll the rottis on your kitchen counter or slab. I've tried to roll it out on a wooden board like I do for wheat rotis, but jowar seems to get stuck to the wood, so preferably roll it out on your granite kitchen slab or use marble slab.
  • Roast the rottis on an oil free tava or griddle. 

There is a crisper version of the rotti called "kataka rotti" that you will find for sale in a lot of North Karnataka shops. Kataka rotti is jowar rotti cooked on very low heat until it becomes dry and crisp like a papad. It is usually made for travel or if one wants to store the rotti for weeks.

Come back for my next post - Yennegai or Baby eggplant curry - a perfect accompaniment to the Jolada Rotti.

jowar roti with curries or jolada rotti oota


If you made this recipe, let me know! Leave a comment here or on Facebook tag your tweet with @oneteaspoonlife on Twitter and don't forget to tag your photo #oneteaspoonoflife on Instagram. You can also email me at onetspoflife@gmail.com I'd love to see what you are upto.


If you like this recipe, do not forget to share it with your friends and family! 


You can follow One Teaspoon Of Life on FacebookTwitterInstagramPinterest and Google+ or you can subscribe to One Teaspoon Of Life and receive all the latest updated via Email


Video Recipe


--------------------------------------------------------------------------------------------------------------------------

Joladda Rotti Recipe | How to make Jowar Bhakri


jowar roti with curries or jolada rotti ootaJoladda Rotti or Jowar Bhakri is an oil-free, vegan and gluten free Indian flatbread made from jowar millet or sorghum.

Recipe Type:  Bread
Cuisine:            South Indian
Prep Time:     15 minutes
Cook time:     30 minutes
Total time:     45 minutes
Yield:                16

Ingredients:


3.25 cups Jowar Flour
3 cups Water
1 tsp Salt
Jowar flour to dust
Water to cook the rottis

Method:


1. Add the water to a kadhai or a deep pot and allow it to come to a boil.
2. Add salt to the water.
3. Reduce the heat, and add 3 cups of jowar flour to the water and mix well with a wooden spoon.
4. Once the flour is well mixed, cover and cook on low heat for 4-5 minutes.
5. Turn off the heat and keep covered for 2 more minutes.
6. Remove the dough from heat and transfer to a clean plate. Spread it out a little and allow to cool slightly.
7. While the dough is still warm, knead it until smooth. If it is wet, add a little dry flour. If it is dry, then add a little water to help you knead.
8. Take out a lemon sized piece of dough and roll it into a ball and flatten it. Keep the rest of the dough covered with a kitchen towel.
9. Dust your kitchen counter with dry flour and dip the ball of dough in it.
10. Using a rolling pin, roll it into a thin rotti or flatbread. Make it as thin as you can.
11. Dust with dry flour while rolling to prevent the dough from sticking to the rolling pin and the counter.
12. Heat a clean ungreased tava or griddle on medium heat and put the rotti counter side up on the tava.
13. Wipe the rotti with a wet cloth.
14. Flip the rotti when one side has brown spots. Cook until the rotti puffs up a little.
15. All rottis may not puff up completely, but do not worry, they are still cooked.
16. Serve the rottis hot/warm with curry.


If you liked this, you may also like:

curry made with chickpea flour and tomatoes
Jhunka

fresh red chilli chutney
Ranjaka
Akki Rotti

Read more ...

Bangalore Street Style Tomato Puri Chaat Recipe | Tomato Slice Recipe


Popular Bangalore Street food, made by topping tomato slices with a mix of sweet and spicy chutneys and topped off with salted puffed rice.

Bangalore Street food made by topping tomato slices with a mix of sweet and spicy chutneys and topped off with salted puffed rice

Do you want something (some what) healthy, that could ignite your taste buds? And how much more convenient would it be if this "healthy-tastebud-igniter" were ready in 15 minutes? 

Awesome!!! Right?

Presenting Tomato Puri or Tomato Slice Chaat, right from the streets of Bangalore. 

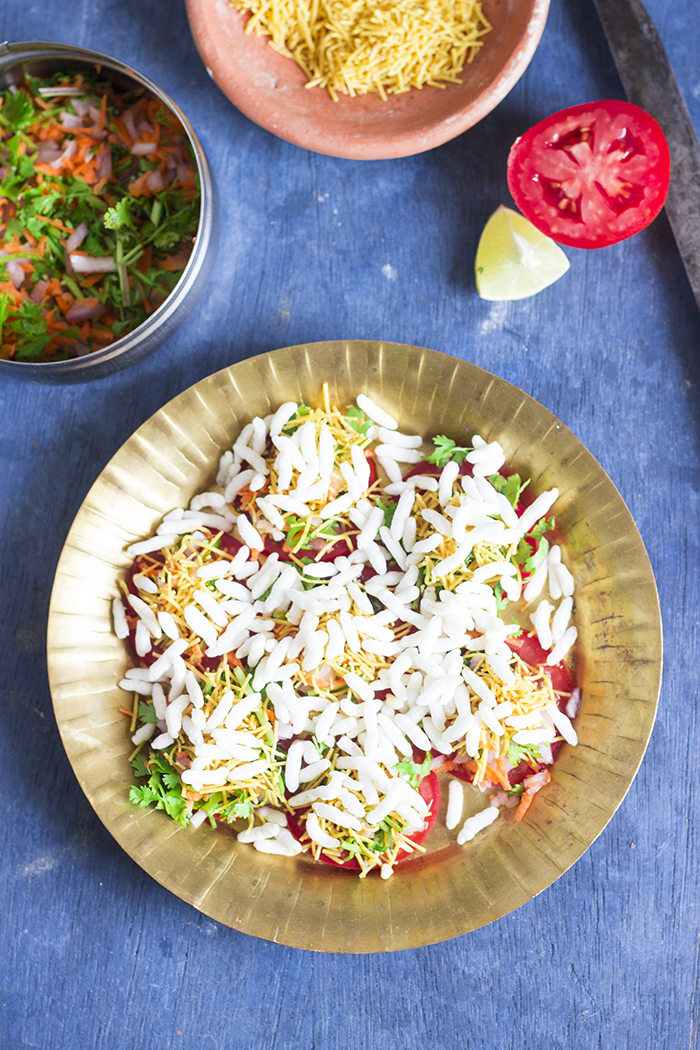
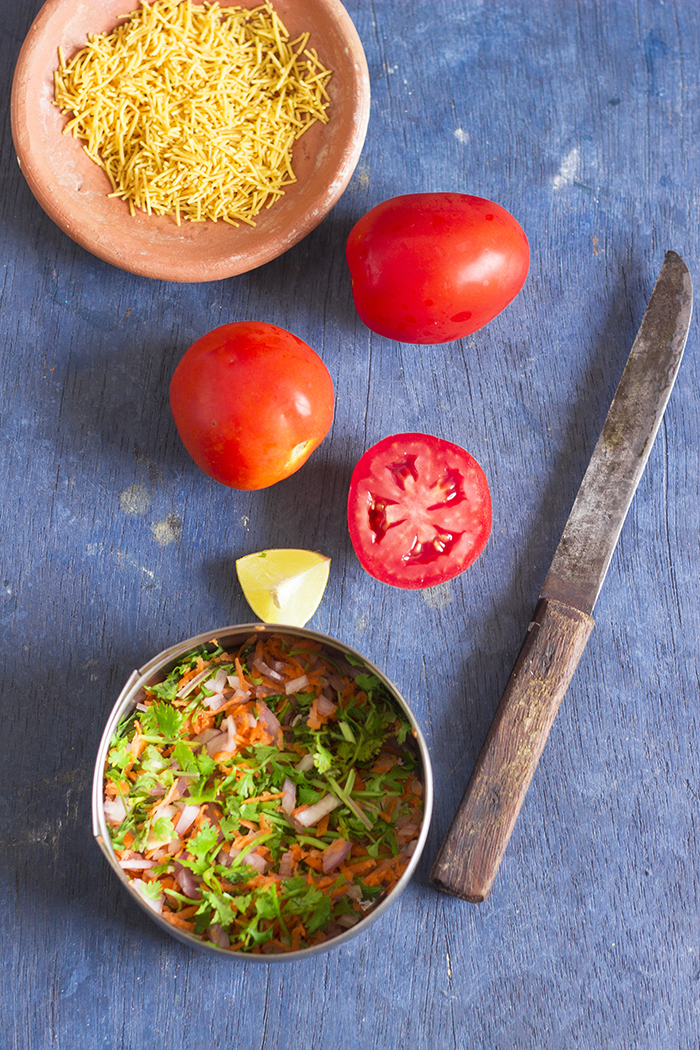
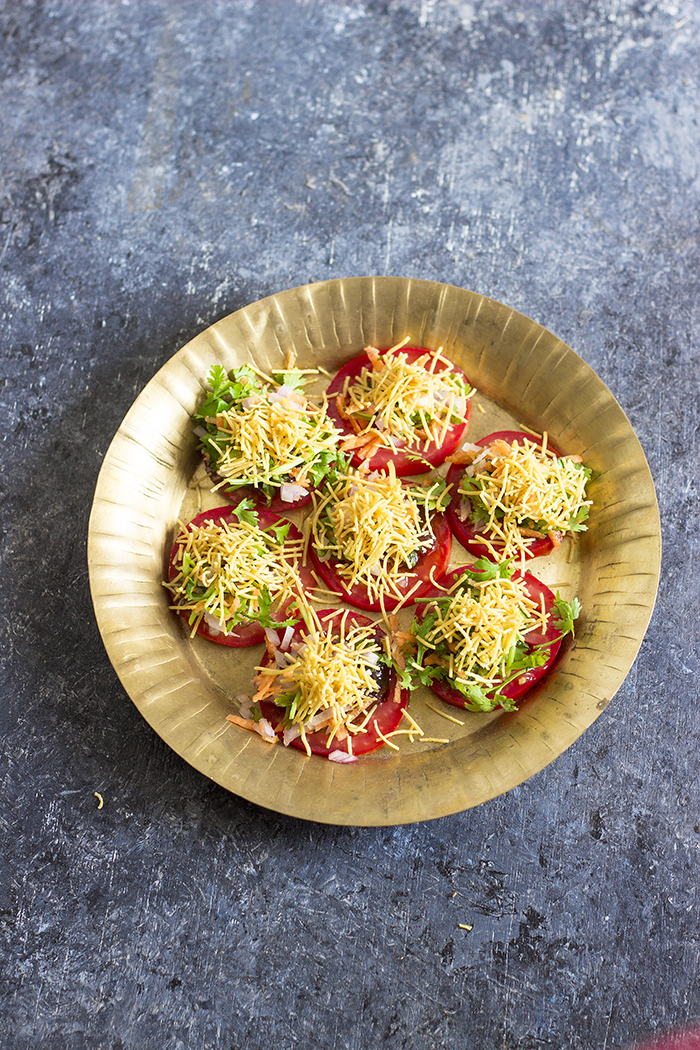
This chaat uses tomatoes like canapes. Tomato slices are flavored with sweet and tangy Tamarind-Date Chutney and the fresh and spicy Mint-Coriander Chutney. Top it up with some finely chopped onions, grated carrots and chopped coriander for added crunch. It also makes it almost a salad!! Wait, there are more toppings - the quintessential Sev, the only unhealthy thing out here. Sev is deep fried savory strands made from gram flour and is always present in any chaat. It is available in all super markets/ Indian stores very easily. After the sev, the whole plate is covered with a layer of salted puffed rice or churmuri or murmura.

Bangalore Street food made by topping tomato slices with a mix of sweet and spicy chutneys and topped off with salted puffed rice

Bangalore Street food made by topping tomato slices with a mix of sweet and spicy chutneys and topped off with salted puffed rice

If you are wondering why this is called "Puri" when there is no wheat and nothing has been deep fried, let me enlighten you my friend. The puri in the Tomato Puri is the puffed rice. Areas around Bangalore refer to it as "Kadle Puri" and hence, the puri since it overshadows the entire plate.

The chaat vendors also make versions where they replace the tomato slices with slices of cucumber. You can try that too, or make a mix of both.

Prep Advice: 
  • Since puffed rice has a tendency to soften when exposed to moisture, I suggest you add it only when you are ready to serve. 
  • The chutneys can be prepared in advance and stored in the fridge. The Tamarind-Date Chutney will last several weeks, while the Mint Coriander Chutney stays good for 2-3 days. 


Bangalore Street food made by topping tomato slices with a mix of sweet and spicy chutneys and topped off with salted puffed rice

Bangalore Street food made by topping tomato slices with a mix of sweet and spicy chutneys and topped off with salted puffed rice

Bangalore Street food made by topping tomato slices with a mix of sweet and spicy chutneys and topped off with salted puffed rice

If you made this recipe, let me know! Leave a comment here or on Facebook tag your tweet with @oneteaspoonlife on Twitter and don't forget to tag your photo #oneteaspoonoflife on Instagram. You can also email me at onetspoflife@gmail.com I'd love to see what you are upto.


If you like this recipe, do not forget to share it with your friends and family! 


You can follow One Teaspoon Of Life on FacebookTwitterInstagramPinterest and Google+ or you can subscribe to One Teaspoon Of Life and receive all the latest updated via Email


---------------------------------------------------------------------------------------------------------------------------


Tomato Puri Recipe | Tomato Slice Chaat Recipe


Bangalore Street food made by topping tomato slices with a mix of sweet and spicy chutneys and topped off with salted puffed ricePopular Bangalore Street food, made by topping tomato slices with a mix of sweet and spicy chutneys and topped off with salted puffed rice. Vegan and healthy tomato canapes recipe.

Recipe Type:  Snacks
Cuisine:            South Indian
Prep Time:     15 minutes
Cook time:     0 minutes
Total time:     15 minutes
Yield:                Serves 2

Ingredients:


2 firm Tomatoes
1 small Onion
0.5 Carrot
2 Tbsp Coriander leaves, chopped
4 Tbsp Tamarind Date Chutney
4 Tbsp Mint Coriander Chutney
2 cups Puffed Rice
0.5 cup Sev
0.5 Lime
Salt to taste
Chaat Masala to taste

Method:


1. Slice the tomatoes, at least 3mm thick.
2. Finely chop the onions and grate the carrot.
3. Add chopped coriander to the onions and carrot. Squeeze the lime and mix well.
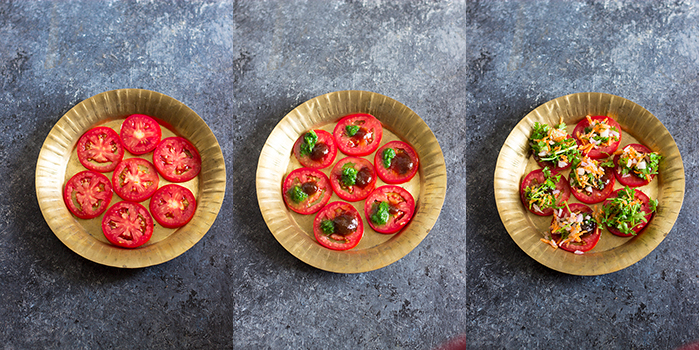
4. Lay out the tomatoes on the plate with no overlap.
5. Sprinkle salt and chaat masala on the tomato slices.
6. Spoon the tamarind date chutney and the mint coriander chutney on each of the tomato slices.
7. Spoon the onion-carrot mix on the tomato slices.
8. Add sev to each of the tomato slices.
9. Add the puffed rice over the tomato slices and serve immediately.
10. Don't let it sit too long, else the puffed rice will soften.


If you liked this, you may also like:

How to make pani puri recipe, how to make puchka recipe, how to make golgappa recipe, pani puri ka pani recipe at www.oneteaspoonoflife.com
Pani Puri

Indian street food, chaat, made with bread, yogurt, chutneys and spices
Dahi Bread Chaat
popular street food made from puri, peas and a spicy gravy
Masala Puri

Read more ...