Showing posts with label Snacks. Show all posts

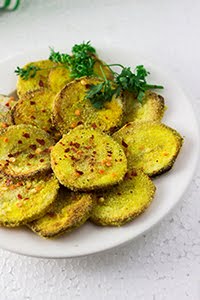
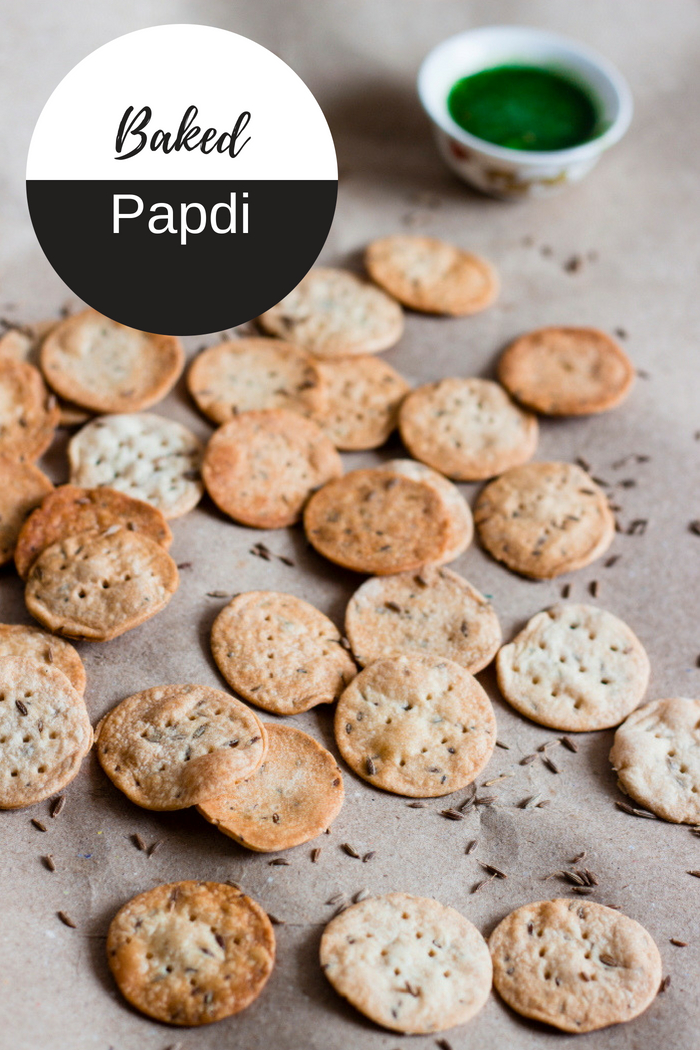
Baked Papdi | Carom and Cumin Crackers


Guilt free baked popular Indian snack made from wholewheat flour and spices...

popular Indian snack - baked flat discs made of four and spices

Hiya folks!!

This is my first outstation post in a long time. As you must have read here, I am not in Bangalore, but at my in-laws place near Mangalore on the West Coast. I've been enjoying my time off but definitely not the heat. We can feel the full effect of summer out here. I'm just thankful for the bursts of rain at night which make it cool enough for me to sleep.

And of course, the ice creams!! If you have come to Mangalore and missed the ice creams here, you have missed out on a lot of deliciousness. From when I can remember, Mangalore had the best ice creams ever!! I never miss a chance to hog on those when I'm out here.

While the ice creams are tempting, this post is not even remotely related to ice creams, but I could really not get them out of my head. This post is about a much healthier snack - Papdis, that have been baked. Papdi are just flat discs made from wholewheat flour and flavored with some spices. Traditionally these are deep fried, but I baked them, just to keep them guilt free. And they tasted just as delicious, but now I can eat a lot more without worrying.

popular Indian snack - baked flat discs made of four and spices


Papdis can either be eaten as a tea time or mid day snack or can be added to other dishes, most popularly - Chaats. Chaat is a collection of Indian street food and many of them use papdis as the building blocks for them. They are the crunch element of the dish. They are added to Masala Puri, Papdi Chaat, Sev Puri etc. You can either make plain papdi, where you don't add any spices but personally I like ajwain (carrom) and jeera (cumin) a lot, so I never skip them out.

Also, I suggest get on to making papdis fast and log onto the blog soon. I have a new recipe planned that uses these crunchy papdis in a simple yet fabulously delicious dish.

Until then, goodbye from the West Coast!


popular Indian snack - baked flat discs made of four and spices

popular Indian snack - baked flat discs made of four and spices


popular Indian snack - baked flat discs made of four and spices

popular Indian snack - baked flat discs made of four and spices


popular Indian snack - baked flat discs made of four and spices

popular Indian snack - baked flat discs made of four and spices


If you made this recipe, let me know! Leave a comment here or on Facebook, tag your tweet with @oneteaspoonlife on Twitter and don't forget to tag your photo #oneteaspoonoflife on Instagram. You can also email me at onetspoflife@gmail.com. I'd love to see what you are upto. 

If you like this recipe, do not forget to share it with your friends and family! 


You can follow One Teaspoon Of Life on Facebook, Twitter, Instagram, Pinterest and Google+ or you can subscribe to One Teaspoon Of Life and receive all the latest updated via Email


---------------------------------------------------------------------------------------------------------------------------


Baked Papdi


popular Indian snack - baked flat discs made of four and spicesFlat round discs made with flour and spices, a popular vegan Indian snack.

Recipe Type:  Snacks
Cuisine:            Indian
Prep Time:     60 minutes
Cook time:     20 minutes
Total time:     80 minutes
Yield:                75 papdi


Ingredients:


0.5 cup Wholewheat Flour (50 gms)
0.5 cup All Purpose Flour (50 gms)
0.5 tsp Carrom seeds
0.5 tsp Cumin seeds
3 tsp Oil
0.5 tsp Salt
0.75 cup Water
Oil for brushing
Wholewheat flour for dusting

Method:


1. Take wholewheat flour, all purpose flour, carrom seeds and cumin seeds in a large bowl.
2. Add the oil and salt. You may need less/more salt, so add it little by little.
3. Start by adding half the water and knead the dough. Add more water by the spoonful as required.
4. The dough should have a stiff consistency.
5. Cover and rest the dough for 20-30 minutes.
6. Divide the dough into 2 balls and roll one of them out until it is 1 millimeter thick.
7. Use a cookie cutter to cut the dough into papdis. You can also use a bottle /box cover to do the same. 
8. Do the same with the second ball of dough.
9. Preheat the oven to 180 degree Celsius.
10. Grease a baking sheet and place the papdis on it in one layer. They should not overlap.
11. Using a fork, prick holes into the papdis.
12. Brush oil over them and bake until golden.
13. Mine took 14-15 minutes to bake. If the papdis are rolled out thin they will start burning, so I suggest checking on them after 12 minutes.
14. Allow the papdis to cool completely before storing in an air tight box.


popular Indian snack - baked flat discs made of four and spices


If you liked this, you may also like:
Baked whole wheat nachos
Baked Chapati Chips

baked chips sweetpotato
Baked Sweetpotato Chips
How to make sun dried potato chips recipe, batate sandige recipe, aloogadde sandige recipe, aloo chips, aloo sandge recipe, how to make aloo papad recipe, potato chips recipe at www.oneteaspoonoflife.com
Sun dried Potato Chips
Read more ...

Avocado, Cucumber, Carrot Sushi | Vegan Maki Roll [Video Recipe]


Vegan Maki Sushi Roll made by rolling avocados, cucumber and carrots in sushi rice and Nori sheets.

Avocado, cucumber, carrot vegan maki sushi roll


Remember here, I spoke of Gee going to Malaysia and shopping in super markets? It paid off, a second time!! It is she who bought me the Nori Sheets and the Sushi Rice all the way from a Japanese store in KL. (You can buy them in Gourmet stores in Bangalore or buy them online).

Well, she looves sushi. And this time she got to eat them sitting at home in her pajamas without worrying if they are really vegetarian. Win-win! I always knew of sushi as a raw fish dish. But the first time I heard of a vegan one was when I was in California and my friend wanted to make me try some. I did not get the chance to try there, but I did try it the first chance I got once I was back in Bangalore and the love affair has continued since. Every single time I see a vegan sushi on the menu, I order it. This was my first time making it at home, but it definitely won't be the last.

Avocado, cucumber, carrot vegan maki sushi roll


Avocado, cucumber, carrot vegan maki sushi roll

Making sushi is really not that difficult, if you have the correct variety of rice. A lot of recipes online say you can use quinoa or brown rice or some other variety of rice. While I'm sure you can work with them if you are a pro at sushi making. For an amateur, sushi rice works best. This rice is very different from the other varieties of rice in my pantry. It is sticky, yet the grains hold their shape. Any Indian rice when cooked to become sticky, will turn mushy and become paste like. And that is definitely a no-no for sushi making. You want to be able to identify the grains, yet have them stick to each other. I was scared when I rolled my first roll, but the rice made it impossible for me to mess it up. So say what you may, according to me it is the rice that is the hero of the sushi. Making the rice is simple, you cook it as per instructions on the packet. Then spread it out in a large bowl or plate and mix in the vinegar, sugar and salt while smashing the rice a little. Adjust the vinegar, sugar and salt to your taste.

Once your rice is ready, you can fill your rolls up with basically anything. Keep it fresh and simple. I filled my rolls with avocado, cucumber and carrots. And for a few, I threw in some sauteed mushrooms as well. The flavor of a sushi comes majorly from the rice and the nori sheets. Nori sheets give the sushi a mild fishy umami flavor. 

Serve sushi with a good quality Soy Sauce, Pickled Ginger and Wasabi paste.

Note: Sushi is usually rolled with a bamboo mat, but the technique is achievable with a kitchen towel and a plastic wrap. Watch the video for more details!

Avocado, cucumber, carrot vegan maki sushi roll

Avocado, cucumber, carrot vegan maki sushi roll

If you made this recipe, let me know! Leave a comment here or on Facebook, tag your tweet with @oneteaspoonlife on Twitter and don't forget to tag your photo #oneteaspoonoflife on Instagram. You can also email me at onetspoflife@gmail.com. I'd love to see what you are upto. 

If you like this recipe, do not forget to share it with your friends and family! 

You can follow One Teaspoon Of Life on Facebook, Twitter, Instagram, Pinterest and Google+ or you can subscribe to One Teaspoon Of Life and receive all the latest updated via Email

Video Recipe


---------------------------------------------------------------------------------------------------------------------------


Avocado Cucumber Carrot Maki Sushi Roll

Avocado, cucumber, carrot vegan maki sushi roll
Vegan Maki Sushi Roll made by rolling avocados, cucumber and carrots in sushi rice and Nori sheets.
Recipe Type:  Appetizer
Cuisine:            Japanese
Prep Time:     30 minutes
Cook time:     20 minutes
Yield:                Serves 3-4. Makes 27-30 individual rolls.

Ingredients:


3 Nori Sheets
1 cup uncooked Sushi Rice
2 cups Water
2 Tbsp Vinegar
1.5 tsp Sugar or Jaggery
0.5 tsp Salt
0.5 Avocado
1 Cucumber
1 Carrot
Wasabi paste to serve
Soy sauce to serve

Method:


Making the Sushi Rice:


1. Wash and cook the rice as per instructions on the packet. I rinsed the rice once and pressure cooked it with 2 cups of water for 10 minutes on low-medium heat.
2. Once the rice is cooked, remove it into a large steel or wooden bowl or plate.
Heat the vinegar in a small pan, add the sugar and salt. Once the sugar has dissolved, remove from heat.
3. Add the vinegar to the rice and with a wooden spoon, mix it well. The rice should be sticky, yet retain the grain structure. Allow it to cool.


Making the Avocado Cucumber Carrot Maki Sushi Roll:


4. Slice the avocado and julienne the cucumber and carrot.
5. Take a kitchen towel and spread a plastic sheet on it. I used a clean plastic packet in which I had purchased rice. I cut it into a rectangle and laid it on top of the kitchen towel.
6. Place the nori sheet, shiny side down on the plastic sheet.
7. Take 1/3rd of the rice and place it on the nori sheet. Wet your hands and spread the rice until it covers the nori sheet. Layer it as evenly as you can. It doesn't have to be perfectly even, the rolling later will ensure it spreads evenly.
8. On one edge, place 1/3rd of the cucumber, carrot and avocado.
9. Gently roll the nori sheet until the vegetables are covered. Use the kitchen towel now to compress the vegetables.
10. Continue rolling until the full nori sheet is rolled up.
11. Using the kitchen towel, compress the roll. Turn and compress again.
12. With a sharp wet knife slice the roll into individual maki rolls. Wet the knife between each slice. Do not apply pressure while slicing, make gentle to and fro motions. The roll should be sliced in 2-3 knife movements.
13. Serve with pickled ginger, soy sauce and wasabi paste.


Avocado, cucumber, carrot vegan maki sushi roll


If you liked this, you may also like:
Vegan healthy soup made with white miso, wholewheat noodles and fresh vegetables
Vegan Miso Soup

Vegan Tomato Onion Avocado Olive Mint Coriander Italian Sourdough Baguette Bread Sandwich
Breakfast Bruschetta
Baked Tofu Lettuce Wraps
Read more ...

Baked Falafel Beetroot Wraps


Baked chickpea falafels and hummus in a beetroot flatbread!


Baked chickpea falafels and hummus in a beetroot flatbread

Mediterranean food has so much to offer to vegetarians - dips, salads and of course, the ever so loved Falafels. The falafel is a great meat free option for anyone eating Mediterranean food, it is full of protein and fiber. While traditionally falafels are made with fava beans and are deep fried, I chose to make them with the easily available chickpeas and to bake them. I love fried falafels, but when one moves to eating healthy, one has to find the alternative to balance both health and flavor. And I can tell you for sure, there was no loss of flavor here!

Falafels are served in so many different ways - as an appetizer with dips, stuffed inside a pita pocket to make a sandwich or as a part of a bowl meal. I chose to serve it inside a vibrant pink beetroot wrap. 

Baked chickpea falafels and hummus in a beetroot flatbread


I have an obsession for wraps and rolls. I simply love them, they are so easy to eat and not so messy. And they are usually healthier than the sandwiches made with leavened white bread. When it comes to wraps, I always go for whole wheat. 

You will love this because:
  • Easy to eat, not messy
  • Healthy
  • Vibrant
  • You can customize it to your liking
  • Vegan
  • Delicious
To make the Baked Falafel Beetroot Wraps, I soaked dried chickpeas overnight. If you are using canned ones, you can start right away. I boiled a third of them to make hummus and used the remaining to make the falafels. I made my own hummus, just because it is so easy to make and I love the taste of fresh hummus, but you can save yourself the trouble and buy your favorite hummus.


Baked chickpea falafels and hummus in a beetroot flatbread

Baked chickpea falafels and hummus in a beetroot flatbread


For the falafels, I coarsely ground together uncooked chickpeas, fresh coriander leaves, green chillies, garlic along with coriander powder and cumin powder. Season as per taste. Add in a little flour or corn starch to help it bind better if the batter is too wet. While falafels are usually spherical, while baked it is preferred to flatten them, to increase the surface area that touches the baking sheet. The area that touches the sheet tends to crisp up, so lets increase that! If you don't have an oven, you can pan fry it with little oil. I suggest you make more than what is required, cause these taste delicious and make a great healthy snack!

For the wrap, I boiled beetroots and pureed them, then I added salt and wholewheat flour and kneaded a smooth dough with a little water. Rolled the wraps out and cooked them on a tava or griddle with a little oil. If you are too lazy to make the wrap, you can buy frozen chapatis or even use tortillas that only need to be heated up. But I definitely recommend making them fresh. They are soft and slightly sweet due to the natural sweetness of the beets. Plus they look so beautiful. You can add spice powders to the dough while kneading to jazz it up a little, just don't overpower it with a lot of them.

Finally to assemble, just spread the hummus on the flatbread, add the falafels and a simple salad of colorful peppers, cabbage or lettuce and onions. Toss in some olives or pickle if you would like. Roll it up and eat.

Baked chickpea falafels and hummus in a beetroot flatbread

If you made this recipe, let me know! Leave a comment here or on Facebook, tag your tweet with @oneteaspoonlife on Twitter and don't forget to tag your photo #oneteaspoonoflife on Instagram. You can also email me at onetspoflife@gmail.com. I'd love to see what you are upto. 

If you like this recipe, do not forget to share it with your friends and family! 

You can follow One Teaspoon Of Life on Facebook, Twitter, Instagram, Pinterest and Google+ or you can subscribe to One Teaspoon Of Life and receive all the latest updated via Email

If you liked this, you may also like:


---------------------------------------------------------------------------------------------------------------------------


Baked Falafel Beetroot Wraps


Baked chickpea falafels and hummus in a beetroot flatbreadBaked chickpea falafels with hummus and vegetables rolled in a whole wheat beetroot flatbread.

Recipe Type:  Main
Cuisine:            Mediterranean Indian Fusion
Prep Time:     8 hours (includes soaking time)
Cook time:     60 minutes
Yield:                Makes 6 wraps

Ingredients:

To make the Baked Falafels:


200 gms Chickpeas
1 Onion
2-3 Garlic Cloves
0.5 cup Coriander leaves (tightly packed)
2 Green Chillies
1 tsp Cumin powder
0.5 tsp Coriander Powder
0.5 Lime
0.5 tsp Baking Soda
1 Tbsp Corn Starch or Flour (Optional)
3 Tbsp Vegetable Oil
Salt to taste

To make the Beetroot Wrap:


2 cup Wholewheat Flour (atta)
1 large Beet root
0.5 tsp Red Chilli Powder
6 tsp Oil
Salt to taste
Water as required

To assemble the Wrap:


6 Beetroot Wraps
12 Falafels
6 Tbsp Hummus
4-5 leaves of Ice berg lettuce or Cabbage
0.5 cup julienne Capsicum
1 small Onion, sliced

Method:


To make the Baked Falafels:


Soak the chickpeas overnight or for 8-10 hours if using dried chickpeas. If using canned chickpeas, skip the soaking.
Drain out all the water and transfer the chickpeas to a food processor or a mixer.
Add the garlic, chopped onion, coriander leaves, chopped green chillies, lime juice, baking soda, cumin powder and coriander powder to the blender along with salt.
Pulse the food processor until everything is combined. Do not over process it and make it smooth and mushy. The batter has to just sticky enough to hold when pressed together.
Add corn starch or flour if the dough is too wet.
Refrigerate for 20-30 minutes.
Preheat the oven to 180 degree C.
Divide the mix into 12 equal portions.
Roll them into balls and flatten them.
Brush a baking sheet with oil. Place the falafels on the baking sheet.
Brush the falafels with oil.
Bake for 10 minutes, then flip them over and bake for another 10-12 minutes, until the falafels have browned.
Remove from the oven and keep aside.

To make the Beetroot Wraps:


Boil and peel the beetroot.
Allow it to cool and then puree it until smooth. Run through a sieve to get a smoother puree.
Transfer the uree to a large plate or bowl. Add 0.5 tsp of salt and red chilli powder and mix well.
Add in the whole wheat flour and start kneading. Add water as required.
Knead until the dough comes together.
This can be done while the falafel batter is resting in the fridge.
Divide the dough into 6 equal portions and roll them into balls.
Using a rolling pin, roll out the dough as thin as possible. Use wholewheat flour for dusting.
Heat a tava or a griddle and brush it with oil.
Cook the wrap on medium-high heat. Brush the wrap with a little oil and flip over.
When the wrap has a few brown spots, remove from heat and keep aside.
Do the same for all 6 portions.

To assemble the Baked Falafel Beetroot Wraps:


Spread hummus on the wrap.
Place the julienne capsicum, sliced onion and lettuce on the hummus.
Place 2 falafels on each wrap.
Roll and serve.


Read more ...

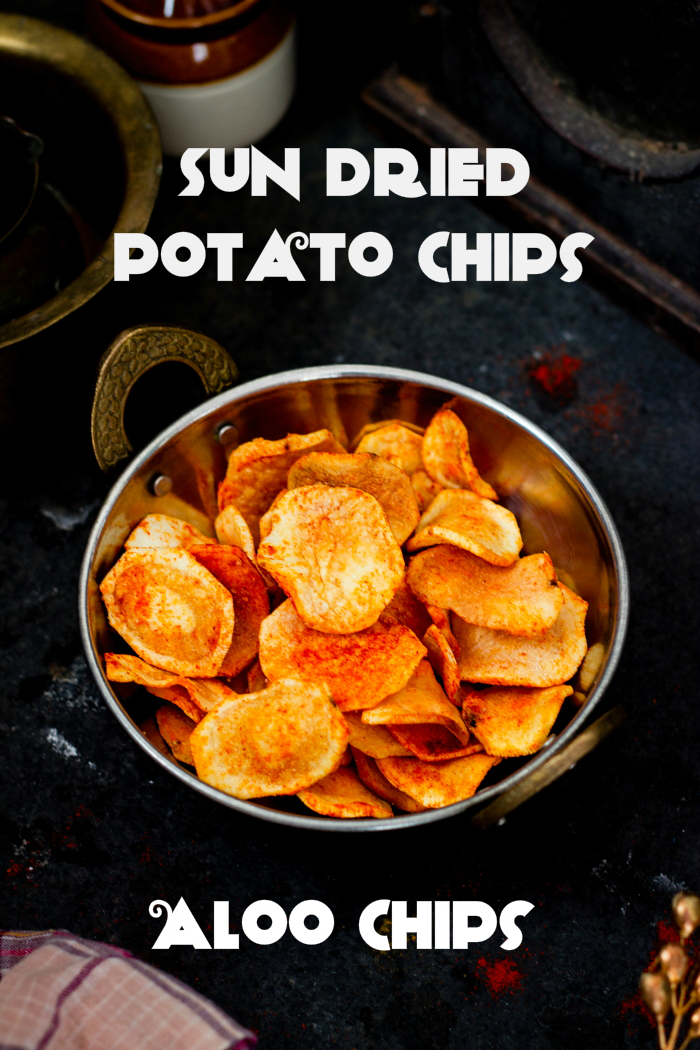
Sun dried Potato Chips | Aloo Chips | Aloogadde Sandige [Video]


Sun dried Potato Chips - potato slices that are dried in the sun and then deep fried and tossed in seasoning. Highly addictive!!

In a hurry? Jump to Video or Jump to Recipe

How to make sun dried potato chips recipe, batate sandige recipe, aloogadde sandige recipe, aloo chips, aloo sandge recipe, how to make aloo papad recipe, potato chips recipe at www.oneteaspoonoflife.com


The Sun dried Potato Chips are the BEST, seriously guys!!!

Who doesn't love potato chips? I'm sure even the Victoria Secrets models who are eternally on a diet wouldn't mind sneaking one in, once in a while. There are so many varieties of potato chips or crisps or whatever else you might want to call them, but I assure you, this is the best. Cause of course, you will make them yourself. And tell me if I'm wrong, but anything homemade tastes so much better than the preservative loaded air filled packet stuff. 

Recently, I was reading this really old article on Reddit about what surprised non Americans when they visited the USA, I was definitely surprised with the vastness of the country and the enormous food portions. But something that definitely got me crazy was the size of the Potato Chips packets. I think they are as tall as toddlers. Why are they so big? Are they meant to be family packs? If yes, how large is this family? Don't people get bored of the flavor after going through quarter of the packet? Or is it meant to last a month? I did not get that at all. I went a little nuts over the number of flavors though, you get every flavor under the sun.

How to make sun dried potato chips recipe, batate sandige recipe, aloogadde sandige recipe, aloo chips, aloo sandge recipe, how to make aloo papad recipe, potato chips recipe at www.oneteaspoonoflife.com


Back to the Sun, that's really the focal point today. Did I tell you how the Sun cheated us this year?We had the shortest summer ever, just ONE month. Just April. Summer came and went in the blink of an eye. Summer gets replaced by Monsoons in this part of the world and then everyday is just a dull cloudy day dotted with spells of rain. Usually, I'm a big fan of the rains, I simply love how everything turns bright green, and that fragrance when the rain hits the earth is simply divine. And rains, means deep fried deliciousness and loads of hot cups of chai. But this year I was a little disappointed. I had so many things planned for Summer, and I could barely scramble them in, in a month. But what I did manage to do , was sun dry some potatoes. 

You may have only heard of sun dried tomatoes, but believe me sun dried potatoes are even better!! And people have been doing it for ages, just not me though. This was my first and definitely not my last attempt. Potatoes barely take 3-4 days to dry and the drying makes them intense and all the more potatoey (if that were a word). 

So...

STEP 1 - Wash, peel, and slice the potatoes. 
STEP 2 - Soak the slices in salted boiling water until they are just about done.
STEP 3 - Lay them out on a cloth to dry in the sun.
STEP 4 - Deep fry them and toss them in salt and chilli powder.

Step 4 can be done months later. The chips can be stored for 3-4 months easily if stored in a clean dry air tight container. The good thing here is, you can decide how much to fry, you don't need to fry the entire batch at once and worry about them going soft, however, I assure you, that is not a problem, coz like all potato chips, these are irresistible.

How to make sun dried potato chips recipe, batate sandige recipe, aloogadde sandige recipe, aloo chips, aloo sandge recipe, how to make aloo papad recipe, potato chips recipe at www.oneteaspoonoflife.com

How to make sun dried potato chips recipe, batate sandige recipe, aloogadde sandige recipe, aloo chips, aloo sandge recipe, how to make aloo papad recipe, potato chips recipe at www.oneteaspoonoflife.com

Some tips to make sure your potato sun drying turns out to be the best...

1) Do not slice the potatoes very thin like you would for regular chips. These need to be around 2mm. 
2) As you slice the chips, put them in water so they don't darken due to oxidization.
3) The chips are soaked in boiling water until they are just about done. If you take them out too quickly, the chips will darken while drying. If you leave them in there too long, they will be completely cooked. So you need to drain them out in 5-8 minutes. Squeeze a chip in between your thumb and index finger and the chip should give when you apply a little pressure. If it does not, it still needs to be cooked, if it gives too soon, it is overcooked.
4) Dry on a cloth, not a tray or plate or paper. The chips will stick to whatever you have placed under it, and removing them from a tray or paper can be difficult. Preferably, use a white cloth or a light colored one as you don't want color running onto the chips.
5) If the chips turn black on the edges or in small spots, you can still use them, just make sure these are the ones you fry first.
6) If you don't have enough sun, place them in the shade, they will dry there as well, but will take much longer.

And last, you can flavor these chips with whatever flavor you like - curry, mint, oregano etc. Just do it immediately after frying while the chips are still hot so the flavor sticks to them. Or you can just salt them and enjoy the potato flavor to its maximum.

How to make sun dried potato chips recipe, batate sandige recipe, aloogadde sandige recipe, aloo chips, aloo sandge recipe, how to make aloo papad recipe, potato chips recipe at www.oneteaspoonoflife.com

If you made this recipe, let me know! Leave a comment here or on Facebook tag your tweet with @oneteaspoonlife on Twitter and don't forget to tag your photo #oneteaspoonoflife on Instagram. You can also email me at onetspoflife@gmail.com I'd love to see what you are upto.


If you like this recipe, do not forget to share it with your friends and family! 


You can follow One Teaspoon Of Life on FacebookTwitterInstagramPinterest or you can subscribe to One Teaspoon Of Life and receive all the latest updated via Email

Video Recipe


--------------------------------------------------------------------------------------------------------------------------

Sun dried Potato Chips


How to make sun dried potato chips recipe, batate sandige recipe, aloogadde sandige recipe, aloo chips, aloo sandge recipe, how to make aloo papad recipe, potato chips recipe at www.oneteaspoonoflife.comPotato slices that are sun dried and then deep fried and tossed in seasoning.

Recipe Type:  Snacks
Cuisine:            Indian
Prep Time:     3 days
Cook time:     10 minutes
Yield:                Serves 4-5


Ingredients:


3-4 medium sized Potatoes
Salt to taste
Red Chilli powder to taste
Water as required
Oil for deep frying

Method:


Wash and peel the potatoes.
Slice the potatoes to about 2mm thickness and immerse in water to prevent them from browning.
Boil water in a large pot, add salt.
Once it comes to a rolling boil, lower heat and add the potato slices to it. Boil for 2-3 minutes then turn off the heat.
Let the potato slices soak for 5-8 minutes. Squeeze a slice between your thumb and index finger and it should give slightly after you apply a little pressure. If it does not, allow it to soak longer. If it gives too quickly, it has overcooked, remove from water immediately.
Drain the potato chips and lay them out on a white cloth in the sun. Cover with a light muslin cloth to prevent dust from settling on to the chips. You can dry them in shade as well.
Leave it in the sun for 3-4 days or until completely dried.
Store in a clean dry air tight container. It can be stored for 3-4 months.
When you want to eat the chips, deep fry them and toss with salt and chilli powder immediately.


How to make sun dried potato chips recipe, batate sandige recipe, aloogadde sandige recipe, aloo chips, aloo sandge recipe, how to make aloo papad recipe, potato chips recipe at www.oneteaspoonoflife.com


If you liked this, you may also like:

Balekayi balekayee podi kelyachi kapa raw banana fry vegan snacks indian goan maharashtrian
Plantain Chips

Jeegujje Podi
popular Indian snack - baked flat discs made of four and spices
Baked Papdi


Read more ...

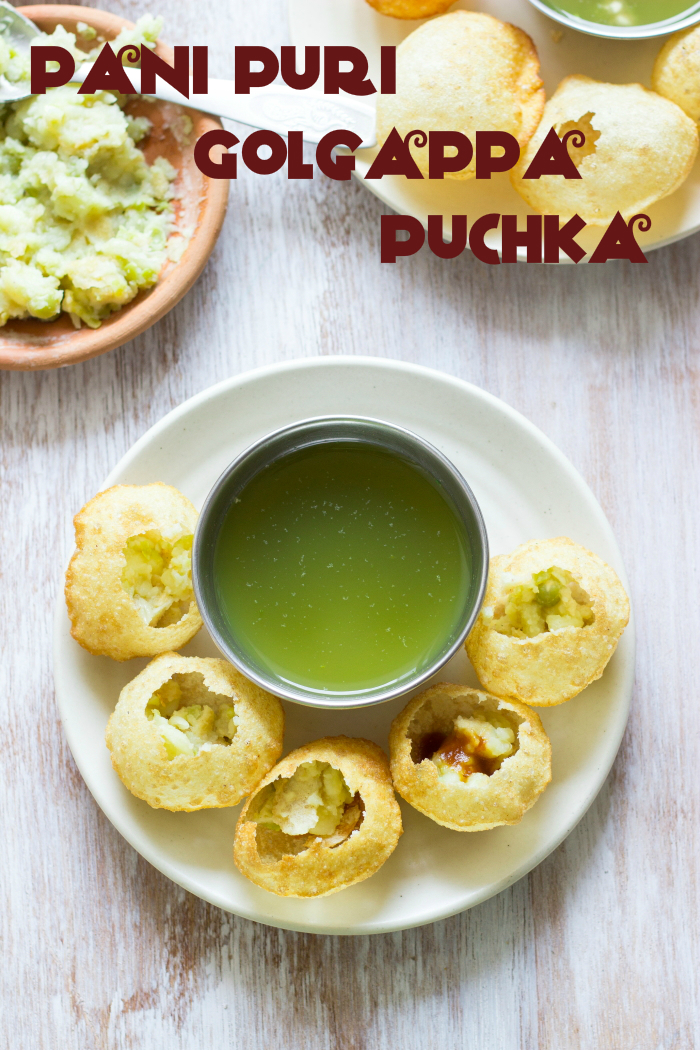
Pani Puri Recipe| Golgappa Recipe | Puchka Recipe [Video]


Pani Puri recipe with step by step Video instructions. The KING of Indian Street food - Pani Puri or Golgappa or Puchka. Crispy fried dough balls stuffed with a potato pea mash, sweet tamarind chutney and a chilled spicy coriander-mint water.


In a hurry? Jump to Video or Jump to Recipe


How to make pani puri recipe, how to make puchka recipe, how to make golgappa recipe, pani puri ka pani recipe at www.oneteaspoonoflife.com

What kind of a place would the world be if there was no street food? Boring???

I think Street Food talks a lot more than Restaurant food. Street food is like the soul of the place. You learn so much more about the culture and people just by looking at the street food being sold. While restaurant food is usually mellowed down and modified to suit the palate of the customers it serves, street food is bold and original. If you haven't eaten street food, you probably haven't tasted the city yet.

India wouldn't be India if it were not for its "Chaat". Chaat refers to a variety of savory sweet tangy food sold on the roadsides from either small stalls or little food carts. And according to me, the most popular Chaat has always been - Pani Puri, also known as Golgappa in the North and Puchka towards the East. Names may vary, but the love for this dish does not. You can find Pani Puri being sold in every nook and corner of any city in India. But each one has their own favorite stall that they are extremely loyal to. Our favorite, is the Bihari guy outside a supermarket in Jayanagar 4th Block. He makes the crispest puri there is. I have never made my own Puris, that is an experiment for some other day. Buying is a lot easier.

How to make pani puri recipe, how to make puchka recipe, how to make golgappa recipe, pani puri ka pani recipe at www.oneteaspoonoflife.com

How to make pani puri recipe, how to make puchka recipe, how to make golgappa recipe, pani puri ka pani recipe at www.oneteaspoonoflife.com

Puris are crispy hollow balls made of deep fried dough. These balls are gently tapped with fingers to make a hole on one side. Then comes the stuffing, the stuffing varies according to the region you are in. It can be a potato mash, potato-green pea mash, sprouts, black chana, chickpeas etc. A little bit of this stuffed is stuffed into the puri. Then comes the celebration - the Pani or water. The Pani awakens every teeny weeny taste bud in your mouth. It is sour, it is spicy, it is salty. Made of mint, coriander, tamarind, chillies and spices, it is a flavor bomb. One of the essential ingredients for making the perfect pani is Black Salt or Kala Namak. A funky smelling salt that has its origin in the Himalayas. The pani is stirred before dipping the puri in it to fill up the puri with this wonderful Pani. Now if you want, you can add jaggery or sugar to the Pani to make it slightly sweet, or you can make the Date Tamarind Chutney like it is traditionally done and spoon in a little of it along with the Pani to get a slightly sweet Pani Puri. Keeping the sweet chutney separate from the Pani allows you to adjust the sweetness according to each individual's taste.

How to make pani puri recipe, how to make puchka recipe, how to make golgappa recipe, pani puri ka pani recipe at www.oneteaspoonoflife.com

How to make pani puri recipe, how to make puchka recipe, how to make golgappa recipe, pani puri ka pani recipe at www.oneteaspoonoflife.com

Once the puri is filled with the pani, it has to be eaten immediately. Eating a Pani Puri can be tricky if you have never had it. You have to eat the puri in one go. It is like a filled water balloon, you try to cut it in half and all the water will be out and you will be left with a soggy puri. 

My love for Pani Puri comes from my Dad. He never missed a chance to eat a plate of pani puri, neither does Raj. When I am shopping for weekly groceries at the super market, he's outside sneaking a plate of pani puri. In this one matter, we are definitely made for each other. We are 2 bottomless holes when it comes to pani puris. We can just keep on going!!

How to make pani puri recipe, how to make puchka recipe, how to make golgappa recipe, pani puri ka pani recipe at www.oneteaspoonoflife.com


If you made this recipe, let me know! Leave a comment here or on Facebook, tag your tweet with @oneteaspoonlife on Twitter and don't forget to tag your photo #oneteaspoonoflife on Instagram. You can also email me at onetspoflife@gmail.com. I'd love to see what you are upto. 

If you like this recipe, do not forget to share it with your friends and family! 

You can follow One Teaspoon Of Life is there on Facebook, Twitter, Instagram, Pinterest and Google+ or you can subscribe to One Teaspoon Of Life and receive all the latest updated via Email (How convenient!!)


Video Recipe


--------------------------------------------------------------------------------------------------------------------------

Pani Puri | Golgappa | Puchka Recipe


How to make pani puri recipe, how to make puchka recipe, how to make golgappa recipe, pani puri ka pani recipe at www.oneteaspoonoflife.comPani Puri | Golgappa | Puchka is an Indian Street food or Chaat item in which crispy fried dough balls are stuffed with mashed potatoes, spicy coriander-mint water and a sweet tamarind chutney.

Recipe Type:  Snacks
Cuisine:            Indian
Prep Time:     8 hours (includes soaking time for peas)
Cook time:     45 minutes
Yield:                Makes 100

Ingredients:


To make the Pani:


0.75 -1 cup chopped Coriander leaves
0.75 -1 cup chopped Mint leaves
1 litre cold Water
Lemon sized piece of Tamarind
2-3 green Chillies
1 tsp Cumin Powder
2 tsp Chaat Masala
Black Salt to taste

To make the Potato-Pea Stuffing:


5-6 Potatoes
3/4 cup dried Green Peas
1 tsp Chaat Masala
Salt to taste
Water as required

To Assemble the Pani Puri:


100 Puris
1 bowl Date Tamarind Chutney

Method:


To make the Potato-Pea Stuffing:


1. Soak the dried green peas overnight or for 6-8 hours.
2. Drain and boil them until done. I usually pressure cook them for 2-3 whistles.
3. Boil and peel the potatoes.
4. Mash together the potatoes and the green peas.
5. Add in salt and chaat masala and mix well. Keep it slightly under seasoned as the pani is already salty.

To make the Pani:


6. Soak the tamarind in a cup of water for 15 minutes and squeeze out the liquid. Remove the pulp and keep the tamarind juice aside.
7. Blend together the coriander leaves, mint leaves and green chilli with a little water into a smooth puree.
8. Add the puree to 1 litre of water , preferably cold.
9. Add the cumin powder, tamarind juice, black salt and chaat masala to taste.
Chill the green pani in the fridge until serving. Alternately, you can add ice to the pani to serve immediately.
10. Strain the water before serving.

To Assemble the Pani Puri:


11. Gently tap a hole in the puri using your finger.
12. Spoon in the potato stuffing into the puri.
13. Now pour in the date tamarind chutney if you like the pani puri to be slightly sweet.
14. Spoon in the green pani and eat immediately.


How to make pani puri recipe, how to make puchka recipe, how to make golgappa recipe, pani puri ka pani recipe at www.oneteaspoonoflife.com


If you liked this, you may also like:
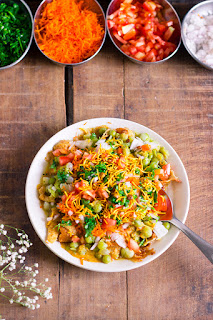
bangalore street food masala puri chat
Masala Puri

Masala Pav, Indian street food
Masala Pav
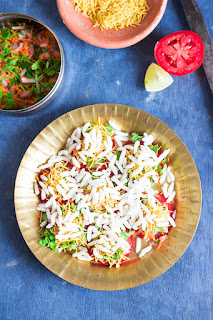
Bangalore Street food made by topping tomato slices with a mix of sweet and spicy chutneys and topped off with salted puffed rice
Tomato Puri


Read more ...