Showing posts with label Rice. Show all posts

Methi Rice Recipe


How to make methi rice recipe at www.oneteaspoonoflife.com How to make Fenugreek Pilaf recipe How to make Methi Pulao recipe at One Teaspoon Of Life

So how is Monday treating you? 

I've always suffered from Monday Blues... more so these days as weekends seem to go off in a blur.

Come Sunday night, and I find myself wondering what I did in the past two days. Usually, it is just a lot of cooking, photography and cleaning. This weekend I added in an extra trip to a place called Pottery Town, hoping to buy some earthen pots to cook in. I've heard that the earthen pots enhance the flavor of the food cooked in them and I'm always in the forefront to try out anything that takes my food to the next level. And while the entire trip was futile, as we reached late and probably skipped the very section of the street we should have driven on, I've not yet given up hope. So if you stay in Bangalore and have visited Pottery Town/Lane/Road and know the best shops there to pick up pots for cooking, please leave me a comment, I highly appreciate any help I get to locate the place.

How to make methi rice recipe at www.oneteaspoonoflife.com How to make Fenugreek Pilaf recipe How to make Methi Pulao recipe at One Teaspoon Of Life

So this Sunday night when I did a little introspect, I realized I'm getting so involved in all this that I'm running out of time to do the thing I love next to cooking - Blogging!! I'm now consciously making a resolution to start managing my time better so I get enough time to blog. 

While I spend most of my weekend cooking for the week ahead and making dishes that are slow cooked or have too many steps, my weeknight mantra is "Quick and Simple" with a very strong emphasis on the quick part. My work has a way of interfering with my evenings and a lot of it is unplanned so I'm usually scrambling for time on weeknights. So quick it has to be.

How to make methi rice recipe at www.oneteaspoonoflife.com How to make Fenugreek Pilaf recipe How to make Methi Pulao recipe at One Teaspoon Of Life

When I think quick cooking recipes, I always turn to Rice. One of my quick rice recipes is this Methi Rice. Methi, Menthe or Fenugreek is a small leaved green that is native to India. Usually slightly bitter in taste, it goes amazingly well with rice. I've been eating Methi Sabzi all my life like this Aloo Methi, but the first time I tried Methi Rice was at my aunt's place a few years ago. I loved it instantly. Spicy, fragrant, with the slight salty bitterness of Methi leaves, what's not to love in it?

There are 2 ways to make Methi Rice. You can cook it entirely in the pressure cooker or a single pot or you can make rice separately and the methi masala separately and mix the two together. For those weeknights when I need a quick fix, I make the pressure cooker version and on weeknights like today, when I have a little more time, I use the latter method. The recipe below is for the second method, but if you plan to make it in a single pot, just skip the steps to cook the rice. Make the masala as described below, and then add the rice and water and cook the rice with the masala until it is done.

How to make methi rice recipe at www.oneteaspoonoflife.com How to make Fenugreek Pilaf recipe How to make Methi Pulao recipe at One Teaspoon Of Life

If you liked this, you may also like:
  • Mint Rice - Mint Rice is a one pot dish of rice cooked along with a mint puree, vegetables and spices.
  • Mushroom Biryani - Mushroom Biryani is Basmati rice cooked along with whole spices and mushrooms.
  • Ghee Rice - Ghee Rice is a simple Indian rice dish where Basmati rice is cooked in ghee or clarified butter.


Methi Rice


How to make methi rice recipe at www.oneteaspoonoflife.com How to make Fenugreek Pilaf recipe How to make Methi Pulao recipe at One Teaspoon Of Life
Methi Rice is made by cooking rice along with methi or fenugreek leaves and a fragrant masala.

Recipe Type:  Rice
Cuisine:            Indian
Prep Time:     20 minutes
Cook time:     60 minutes
Yield:                Serves 2


Ingredients:


2 cups Fenugreek / Methi leaves
1 cup Basmati Rice
1 medium Potato
1 large Onion
1 large Tomato
1 tsp Red Chilli Powder
1/2 tsp Turmeric Powder
1/2 tsp Garam Masala
1/2 tsp Sugar
1 tsp Ginger Garlic Paste
1/2 tsp Cumin seeds
1/2 a Lime
4-5 Tbsp Oil
2 cups + 2 Tbsp Water
Salt to taste

Method:


Wash the basmati rice until the water runs clear. Drain and keep aside.
Boil 2 cups of water in a large pot. Add 1 tsp oil and 1/2 tsp salt to it.
Add the washed rice. Cover and cook until the rice is done.
Allow to cool, then fluff rice with a spoon or fork
Heat the remaining oil in a large kadhai or pan.
Add diced potato to the oil and stir fry until the potatoes are cooked. Remove from oil and keep aside. Alternately, you can boil the potato and then dice into cubes.
Add the cumin seeds the oil.
After the cumin seeds are slightly browned, add sliced onions.
Fry until onions turn golden brown.
Add the ginger garlic paste and saute for 1 minute until fragrant.
Add chopped tomatoes and cook until the tomatoes are soft.
Add the turmeric powder, red chilli powder and garam masala. Mix well and cook for 1-2 minutes.
Add washed and chopped methi leaves and 1-2 Tbsp water.
Cook until the methi leaves are completely cooked. Add sugar, salt and lime juice. Mix well. Fry for another 1 minute.
Add the cooked rice and mix until the masala coats every grain.
Cook on low heat for 3-4 minutes until the rice is at least warm.
Serve with raita.

How to make methi rice recipe at www.oneteaspoonoflife.com How to make Fenugreek Pilaf recipe How to make Methi Pulao recipe at One Teaspoon Of Life


Read more ...

Ghee Rice Recipe


Happy Republic Day to all my fellow Indians...

How to make ghee rice recipe at One Teaspoon Of Life www.oneteaspoonoflife.com
What did you do today?

I did exactly what I have been doing since I was probably 8-9 years old. We all gather around the TV at 9am, turn on Doordarshan and watch the Republic Day Parade. Times have changed, I've moved from a 12 channel TV that actually just had one station to telecast to one that has so many channels I lose the count, but the Republic day tradition remains unchanged. And I realised, it is not just in my house, but a lot of people of my generation still continue the tradition started by our parents. 

Time stands still at the Amar Jawan Jyothi, eyes mist up when the President honors the soldiers with Ashoka Chakra and the chest swells with pride when the Armed Forces walk by in absolute synchronicity. Then come the fun floats with each state showcasing it's highlights. I loved Goa this year, such a peppy song being played. Then are the dances from children, stunts on bikes and the air force display. Of all the year I've watched, this year's bike stunt - especially one called the Christmas Tree gave me goosebumps!! 

How to make ghee rice recipe at One Teaspoon Of Life www.oneteaspoonoflife.com
What a lovely show it was... melancholy, patriotism, pride, happiness, awestruck - all these feelings in a duration of less than 2 hours. 

With all those emotions in me, I really wanted something simple for lunch today. Simple to make and simple in taste. This Ghee Rice felt perfect for the moment.

Ghee is to Indians what butter is to the French. Most Indian households will have a jar of ghee, mostly homemade, and sometimes store bought. Although ghee is indispensable to most Indian sweets, it has a special place in savory cooking too. Ghee is smeared on rotis, ghee is drizzled over rice, some people even add a tempering of ghee to curries. Ghee holds such a  revered place in our lives that every festival meal served on a Banana leaf begins only after Ghee has been served.

How to make ghee rice recipe at One Teaspoon Of Life www.oneteaspoonoflife.com
Ghee Rice celebrates Ghee like no other dish does. Ghee Rice is a simple rice dish where Basmati Rice is cooked in rich flavorful Ghee. Nuts roasted in ghee are added to add texture and more richness to the dish. Unlike most of Indian cooking, Ghee Rice is a very mild dish. While spices are added to add fragrance, they are kept to a minimal, letting Ghee take the center stage. This dish is not hot or over-spicy, 

Ghee Rice is best served with a simple dal. Try out this restaurant style Dal Fry or this mixed lentil Pancharangi Dal.

How to make ghee rice recipe at One Teaspoon Of Life www.oneteaspoonoflife.com

If you liked this, you may also like:


Ghee Rice


How to make ghee rice recipe at One Teaspoon Of Life www.oneteaspoonoflife.comGhee Rice is a simple Indian rice dish where Basmati rice is cooked in ghee or clarified butter.

Recipe Type:  Main
Cuisine:            North Indian
Prep Time:     40 minutes
Cook time:     30 minutes
Yield:                Serves 2


Ingredients:


1 cup Basmati Rice
3 Tbsp Ghee
1 Onion
1 Green Chilli
1" Cinnamon
2-3 Cloves
2 Cardamoms
1 Bay leaf
5-6 Peppercorns
8-10 Cashew nuts
1.5 cups Water
Salt to taste

Method:


Wash the basmati rice until the water runs clear. Around 5-6 times. Drain and keep aside for 30 minutes.
Heat the ghee in a large pan.
Split the cashew nuts and add to the pan. Roast them until they are golden brown, then remove from the ghee and keep aside.
Add all the whole spices to the ghee and fry for 45-60 seconds on low heat until fragrant.
Add chopped onion and slit green chilli. Fry until the onion is translucent.
Add the rice and toast it gently for 30 seconds.
Add water and salt. Cover and cook on low to medium heat until the rice is cooked.
If all the water is absorbed and the rice feels undercooked, sprinkle 1-2 Tbsp water and cover and cook on low heat until rice is done.
Add chopped onion and slit green chilli. Fry until the onion is translucent.
Allow it to cool a little before fluffing it with a spoon.
Serve hot/warm along with dal.


Read more ...

Pathrode Dosa | Uppu Menasu Dosa | Uppu Khara Dosa


Happy Weekend Guys!!

 How to make uppu khara dosa / uppu menasu dosa / Pathrode Dosa recipe at www.oneteaspoonoflife.com


Isn't it a wonderful feeling that you get to wake up when you want and for once your life is not ruled by technology. No alarms to snooze, no water heaters to be turned on, no bus / train to miss. So Saturday breakfast is usually something relaxed, that does not need too much effort, but definitely not something like a zero effort cereal. I love cooking traditional recipes on weekends when we get to sit down and enjoy a meal while it is still hot.

Pathrode Dosa also sometimes called Uppu Khara Dosa or Uppu Menasu Dosa is a dish from Mangalore and its surroundings. Rice grows abundantly there and almost every meal out there has rice as their hero.

Pathrode Dosa is a very similar to the Menthe Pathrode recipe, the only difference being there the entire batter is steamed and then fried, while here it is spread on a tava or a griddle and cooked.

 How to make uppu khara dosa / uppu menasu dosa / Pathrode Dosa recipe at www.oneteaspoonoflife.com


To make Pathrode dosa, you need to soak rice for 2-3 hours and then grind it as fine as you can. Let that rest for 30 mins to an hour. For the masala, you can either use fresh coconut or onion depending on what you have available with you. Grind the onion or coconut with tamarind pulp, red chillies and coriander powder to make a coarse thick masala. Add the masala to the rice batter along with some salt and chopped up fenugreek or methi leaves to make Pathrode Dosa batter. Add water to adjust the consistency. You can replace the methi leaves with spinach or any peppery leaf, or just leave it out. Spoon out the batter and spread it a little on a hot greased tava or griddle. Flip when one side is cooked and cook until the other side is browned.

If you don't want to wait 3 hours for your breakfast, I don't, just soak the rice the previous night for 2-3 hours or you can soak it the previous morning. Grind it at night and leave it covered on the counter overnight at room temperature. Make the masala fresh in the morning and add it to batter just 10-15 minutes before making. Don't add any salt to the batter if leaving it overnight and don't add the masala overnight either.

You have to serve this dosa hot like all other dosas. You can serve this dosa with chutney or butter, or even just plain. It has enough flavour to stand up on its own.

Try out this Tondekayee Chutney to go with the Pathrode Dosa.

 How to make uppu khara dosa / uppu menasu dosa / Pathrode Dosa recipe at www.oneteaspoonoflife.com


If you liked this, you may also like:
  • Mysore Masala Dosa - A rice and lentil pancake that has a chilli and garlic chutney spread on the inside and stuffed with a potato bhaji.
  • Instant Ragi Dosa - Instant dosa or crepe  made with rava or semolina and ragi flour (finger millet flour).
  • Instant Wheat Dosa - Instant savory dosa or pancake made with whole wheat flour.


Pathrode Dosa | Uppu Menasu Dosa | Uppu Khara Dosa

How to make uppu khara dosa / uppu menasu dosa / Pathrode Dosa recipe at www.oneteaspoonoflife.com
Pathrode Dosa is a pancake made with rice, spices and fenugreek or methi leaves. It is vegan and gluten free. 

Recipe Type:  Breakfast
Cuisine:            South Indian
Prep Time:     3 hours
Cook time:     30 minutes
Yield:                8 to 10


Ingredients:


1.5 cups Dosa Rice or any Regular Rice
1/2 cup grated fresh Coconut or 1 Onion
2 tsp Coriander Powder
3-4 dry Red Chillies or 3/4 tsp Red Chilli Powder
1/2 tsp Tamarind pulp
A handful of Fenugreek leaves or Methi leaves
1 cup Water
Salt to taste
Oil for frying

Method:


Soak the rice for 2 hours.
Drain out the water from the rice and grind it with very little water to get a smooth batter. Let it rest for 30 mins to 1 hour.
Grind together the coconut or onion along with the coriander powder, tamarind and the dry red chillies into a fine masala paste. Use 1/4 cup of water to help the grinding.
Wash the methi leaves thoroughly and chop it finely.
Add the masala paste and the chopped methi leaves to the rice batter.
Add salt and the remaining water and mix well.
Heat a griddle and grease it.
Once the griddle is hot, pour a ladle of the batter on to the griddle and gently spread it.
Cover and cook for 45-60 seconds on medium heat.
Spoon a little oil on the top and flip the dosa.
Cook for another 45-60 seconds or until the dosa is cooked through.
Serve hot.

How to make uppu khara dosa / uppu menasu dosa / Pathrode Dosa recipe at www.oneteaspoonoflife.com


Read more ...

Savory Puffed Rice | Murmura Chiwda | Churmuri Chiwda | Khara Kadle Puri | Bhadang

It was such an awesome day to sleep in and do absolutely nothing...

How to make vegan murmura chiwda or churmuri chiwda or bhadang or khara kadle pure recipe at www.oneteaspoonoflife.com

Unfortunately, it was a Tuesday!! Working day, guys. 

There is nothing worse than having to work on a day as cold, humid and lazy as today. Well, may be getting stuck on an island with no chocolate is worse, but hey, let's stick to reality. 

There is also something about cold rainy days that gets my appetite worked up. I'm always HUNGRY... Well, I'm "always" hungry most other times as well, but this rainy day hunger is different. It is just not my stomach, but my heart and my head as well that craves all sorts of deep fried goodness and endless cups of piping hot tea.

How to make vegan murmura chiwda or churmuri chiwda or bhadang or khara kadle pure recipe at www.oneteaspoonoflife.com

I know deep fried food is bad especially when I've missed 4 days of my workout. The first was justified, I was super tired and my back ached. But the other 3 days were just plain laziness and excuses. So no matter how much the heart or the head craves, I let my guilty conscience take over and snacked on this Savory Puffed Rice (Murmura Chiwda | Churmuri Chiwda | Bhadang | Khara Kadle Puri) the whole day with at least 3 cups of tea. 

I've always loved Savory Puffed Rice,what's not ot love in it? It's crispy, it's light, it is spicy without being overpowering, and the best part - Peanuts, I make sure every handful has a minimum of 2 peanuts in it.

Savory Puffed Rice | Murmura Chiwda | Churmuri Chiwda | Bhadang | Khara Kadle Puri is plain salted puffed rice that has been mixed with a tempering of mustard seeds, curry leaves, peanuts, fried gram, dry red chillies, turmeric powder, salt and a little bit of sugar. See how easy that is? The list of ingredients may seem long, but the best part of making something from scratch is infact that you can omit what you don't want. Skip what you don't have. Just make sure you have turmeric and salt. A lot of people I know add a lot more ingredients like dried coconut slices or cashewnuts or fried garlic to their chiwda, but I prefer the basic one with just fried Peanuts.

The instructions to make this Savory Puffed Rice must be the shortest ever on One Teaspoon Of Life... All you need to do is, heat oil, and then add mustard seeds. Once they splutter, chuck in the peanuts and fried gram. Fry them until the peanuts are slightly browned, then add everything else and mix and pour onto the Puffed Rice or Murmura or Churmuri or Kadle Puri. Carefully (cause the oil is hot), mix everything until every grain of puffed rice is bright yellow. Initally use a spoon to mix, but later, just get your hands dirty and mix it. If you feel anything is lacking, like turmeric or you feel you need more peanuts ( I always feel I need more), just heat a little oil, add whatever is missing and pour that oil to the puffed rice and mix again.

This is just the basic snack, there is so much more you can do with it. You can use it as a base for Bhel Puri instead of plain murmura or chop up some onions, tomato and coriander, mix well and enjoy a quick fresh snack. It also makes a great travel snack - a lot of vegetarians travelling abroad usually carry it or like me, you can just snack on it when stuck in traffic on your way back from work (and you don't have to even feel guilty about it)

How to make vegan murmura chiwda or churmuri chiwda or bhadang or khara kadle pure recipe at www.oneteaspoonoflife.com

Store it at room temperature in an air tight box and it will easily last you 3-4 weeks. 

Savory Puffed Rice is easily available at local stores, but I've found that many a times, the store bought one smells like old oil. Also, they skimp on the peanuts and load it up with dried coconut or sugar, both of which I don't enjoy. I assure you, what you make at home is definitely better than the one at the store.

There is just one thing you need to remember, use the crispiest puffed rice (murmura | churmuri | kadle puri) you can find. And preferably one that does not have sand in it. If you are based out of Bangalore, I highly recommend the one from Nilgiris, it's the best I've found till date - clean and crisp and it stays crisp longer.

How to make vegan murmura chiwda or churmuri chiwda or bhadang or khara kadle pure recipe at www.oneteaspoonoflife.com

If you liked this, you may also like:


Savory Puffed Rice | Murmura Chiwda | Churmuri Chiwda | Khara Kadle Puri | Bhadang


How to make vegan murmura chiwda or churmuri chiwda or bhadang or khara kadle pure recipe at www.oneteaspoonoflife.comSavory Puffed Rice | Murmura Chiwda | Churmuri Chiwda | Khara Kadle Puri | Bhadang is a simple crispy snack made by mixing plain puffed rice with peanuts and spices.

Recipe Type:  Snacks
Cuisine:            South Indian
Prep Time:     5 minutes
Cook time:     20 minutes
Yield:                200 gms

Ingredients:


200gms salted Puffed Rice (Churmuri / Kadle Puri/ Murmura)
1/3 cup Oil
4-5 Tbsp Peanuts
1 Tbsp Fried Gram
1 sprig Curry leaves
1/2 tsp Mustard Seeds
1 tsp Turmeric Powder
4-5 dried Red Chillies
1/4 tsp Red Chilli Powder
1/2 tsp Sugar
Salt to taste

Method:


Pour the puffed rice to a large bowl or onto newspapers and keep aside.
Heat oil in a small pan and add the mustard seeds.
Once the seeds splutter, add the dry red chillies, peanuts and the fried gram and fry until the peanuts are slightly browned.
Add the curry leaves, turmeric powder and salt.
Allow it to cool for 1-2 minutes and then pour onto the puffed rice. Add sugar and red chilli powder.
Using a spoon mix the oil with the puffed rice until the mixture is cool enough to handle with your hands.
Now using your hands, mix well until every grain of puffed rice is bright yellow.
Adjust the salt and sugar as required.
If you feel the need to add anything else like turmeric powder or peanuts or curry leaves, heat a little more oil and add the ingredient to it and then add it to the puffed rice. Mix well.
Store at room temperature in an air tight container after it cools.


How to make vegan murmura chiwda or churmuri chiwda or bhadang or khara kadle pure recipe at www.oneteaspoonoflife.com

Read more ...

Mushroom Biryani

It's good to be back... especially with flavorful dish like Mushroom Biryani.

How to make mushroom biryani recipe at www.oneteaspoonoflife.com

I've had a family filled weekend since my last post and days and days of writer's block.

I attended the first family wedding in over 2 years and what fun it was! I got to meet my cousins, aunts and uncles, eat good South Indian food and the best part was I got to dress up. Out came all those heavy Silk Sarees that I had tucked to the back of the cupboard. LOVED wearing every one of them.

Before the wedding, my palate had somehow mellowed down and I was more for eating less spicy and blander food. No known reasons for the change, but it was definitely not welcome. But the spicy South Indian Rasam-Rice managed to wake up the taste buds and then they craved more spice.

When I think of spicy food, I always think of Biryani. Biryani is usually meat cooked along with lots of spices and rice. But in India, we vegetarians are super lucky, cause there is always a vegetarian version of a non vegetarian dish, so we never miss out on the flavors. I've made vegetable biryani many times before, but this was my first time making Mushroom Biryani and with all my love for Mushrooms, there was really no way I could not LOVE this biryani.

How to make mushroom biryani recipe at www.oneteaspoonoflife.com

Unlike the biryanis I've made before, I did not half cook anything and layer anything. This is a simple biryani - cook the rice until done, cook the mushroom masala until done and then just mix the two well to get a flavorful Mushroom Biryani.

To make the perfect Mushroom Biryani, you need 3 things:
  1. Rice:  Biryani is as much about the rice as it is about the meat or the vegetables. Different regions use different varieties of rice, with Basmati being the most popular rice. Long grained fragrant Basmati Rice is perfect for Biryanis, and that is exactly what I used. Rice is washed and allowed to soak for 30 minutes, until it is cooked along with whole spices to enhance its taste.

  2. Mushrooms: The hero of the dish is definitely the mushrooms. Either keep the mushrooms whole or half them. Anything smaller than that and the mushrooms will be lost in the Biryani. Mushrooms are cooked along with onions, ginger-garlic, tomato puree, yogurt, spices and herbs. In traditional style, a paste of browned onions is also added to the mushroom masala. Use any large mushrooms you can find. 

  3. Spices: Any biryani is incomplete without an array of whole spices. A mix of cinnamon, clove, pepper, green cardamom, black cardamom, cumin seeds, bay leaf and nutmeg is added to the rice as well as to the mushroom masala. Whole spices have a long shelf life and it's good to have your pantry stocked with them. However, if you have run out of spices or don't use them much, you can replace the spices in the mushroom masala with store bought Biryani Masala ( spice powder).
Always serve your Mushroom Biryani piping hot. Raita or Salan make for great accompaniments with the Biryani.

How to make mushroom biryani recipe at www.oneteaspoonoflife.com


If you liked this, you may also like:


Mushroom Biryani


How to make mushroom biryani recipe at www.oneteaspoonoflife.com Mushroom Biryani is Basmati rice cooked along with whole spices and mushrooms.

Recipe Type:  Main
Cuisine:            Indian
Prep Time:     10 minutes
Cook time:     45 minutes
Yield:                Serves 2-3

Ingredients:


For the Biryani Rice:


1.25 cups Basmati Rice
1 Bay leaf
2 Cloves 
1 Green Cardamom
0.5" piece Cinnamon
1 tsp Salt
2.5 cups Water

For the Mushroom Masala:


15-20 Button Mushrooms
2 Onions, large
1 Tomato, medium
0.5 cup Yogurt
1" piece Ginger
5-7 Garlic cloves
0.5 tsp Turmeric
1 tsp Red Chilli Powder
0.5" piece Cinnamon
1-2 Cloves
1 Bay leaf
5-6 Black Peppercorns
0.5 tsp Cumin seeds
0.25 tsp grated Nutmeg
1 Green Cardamom
1 Black Cardamom
0.5 tsp Garam Masala
Handful of fresh Mint leaves
Handful of fresh Coriander leaves
5-6 Tbsp Oil
Salt to taste

Method:


Wash the rice twice and keep is aside.
Halve the mushrooms and keep aside.
Slice the onions.
Chop the tomatoes finely or puree the tomato.
Crush the garlic and ginger to form a paste.
In a pan, heat 3 Tbsp of Oil. Once the oil is hot, add 3/4 the onion and fry on low heat until the onions brown. Stir frequently, taking care not to burn the onions.
In a large kadhai or saucepan, add water, salt and spices and allow it to come to a rolling boil.
Add the washed rice and cook on medium heat until the rice is almost done. Drain out the excess water and spread the rice out in a large plate to cool. This will prevent the rice from becoming sticky.
Heat the remaining oil in a clean pan or kadhai.
Add the remaining onions and the whole spices and cook until the onions are cooked.
Add the ginger garlic paste and fry it for 2 minutes, stirring frequently.
Add the chopped tomatoes and fry for 4-5 minutes or until the tomatoes are soft.
Add the halved mushrooms and salt as required. Cook for 5 minutes on low heat.
Keep aside 1 Tbsp of browned onions, and puree the rest.
Add the onion puree to the mushrooms and fry for 1 minute.
Whisk the yogurt and add it to the mushrooms. Add the turmeric powder, red chilli powder and garam masala and simmer on low heat for 5 minutes.
Add chopped mint and coriander leaves and cook for 2-3 minutes.
Pick out the whole spices from the rice and fluff up the rice with a fork to separate the rice grains.
Add the rice to the mushroom masala and mix well. 
Add salt as required and mix well.
Cook for 2-3 minutes.
Garnish with the remaining browned onions and serve hot.


How to make mushroom biryani recipe at www.oneteaspoonoflife.com


Read more ...

Mixed Dal Handvo Recipe | Lauki Handva Recipe | How to make Gujarati Handvo


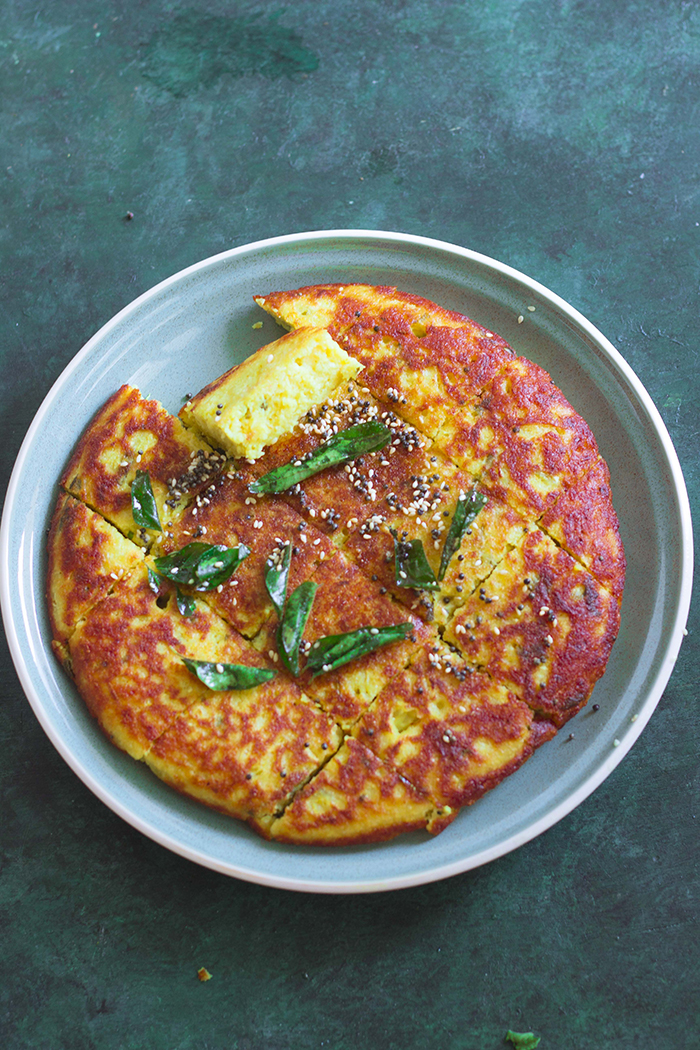
Mixed Dal Handvo or Lauki Handva is a popular gluten free Gujarati breakfast or snack, made from mixed lentils, rice and bottle gourd. Handvo is made with a rice-dal fermented batter and grated bottle gourd (lauki / ghiya). Handvo is steamed / pan fried in a frying pan or a kadhai. Handvo is suitable for a Jain diet.

In a hurry? Jump to Video or Jump to Recipe


mixed dal gujarati handvo


I had been waiting for this long weekend for ages and it has gone in a poof.. Somehow, all my long weekends seem busier than my regular 2 day weekends. Any of you out there with me on this one?

So, what did you do this Ganesh Chaturthi? I hope you all had a wonderful Chaturthi.

I spent my days cleaning the house before the festival and then just cooking, cooking and more cooking. Whew! Does life get busy around festivals!

mixed dal gujarati handvo

I made these super delicious Steamed Modaks. I love them sooo much more than the fried ones. I think I ate more than all others combined. 

To add to this Raj has a potluck in office and he wanted to take these Almond Chocolate Brownies. Thanks to my small oven, we had to keep baking it batches and it kept us in the house watching the oven for a long time.

But the festivities are done, the sweets have taken a toll on my weight for sure. It's now time to get back to something nutritious and healthy. These Protein Packed Mixed Dal Handvo or Handva as it is sometimes called, was just the thing I had in mind for Tuesday breakfast. 

mixed dal gujarati handvo

To tell you the truth, I wasn't convinced about Handvo when I watched it on TV. I wondered if it could taste so good as the show presenter was saying. Then, I tried it at home, following this recipe from Tarla Dalal and I must say, those guys on TV weren't lying, it is absolutely delicious. And healthy too... Now I can have my cake and eat it too!!

What is Handvo or Handva?


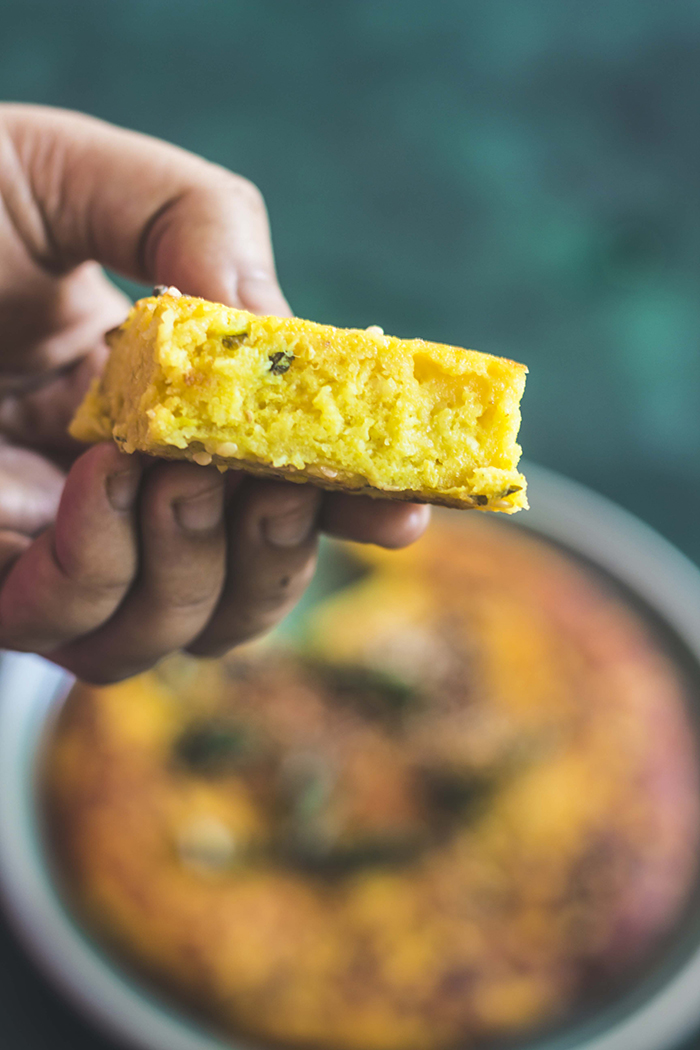
Handvo is a pan-fried or steamed savory cake made with a fermented batter of rice and mixed lentils. Rice and a variety of lentils or dals are soaked for 6-8 hours and then blended to form a thick coarse batter. To this batter, yogurt or curd is added to help it ferment better.

You can tell that the batter is fermented by looking at it, it should be light and fluffy and should have risen. If the temperatures in your region are high, this may take as less as 5-6 hours and if they are cold, it may take 10 hours or longer. 

Lauki or Bottle gourd or Ghiya is lightly fried in a tempering of mustard, curry leaves, asafoetida (hing) and turmeric powder before adding to the batter. If you cannot find bottle gourd, you can replace it with Zucchini or skip it too.

This batter is then steamed on a greased pan until cooked.

The side facing the pan first is crispy and the inside is soft. 

You may add a tempering before serving, it is highly recommended.

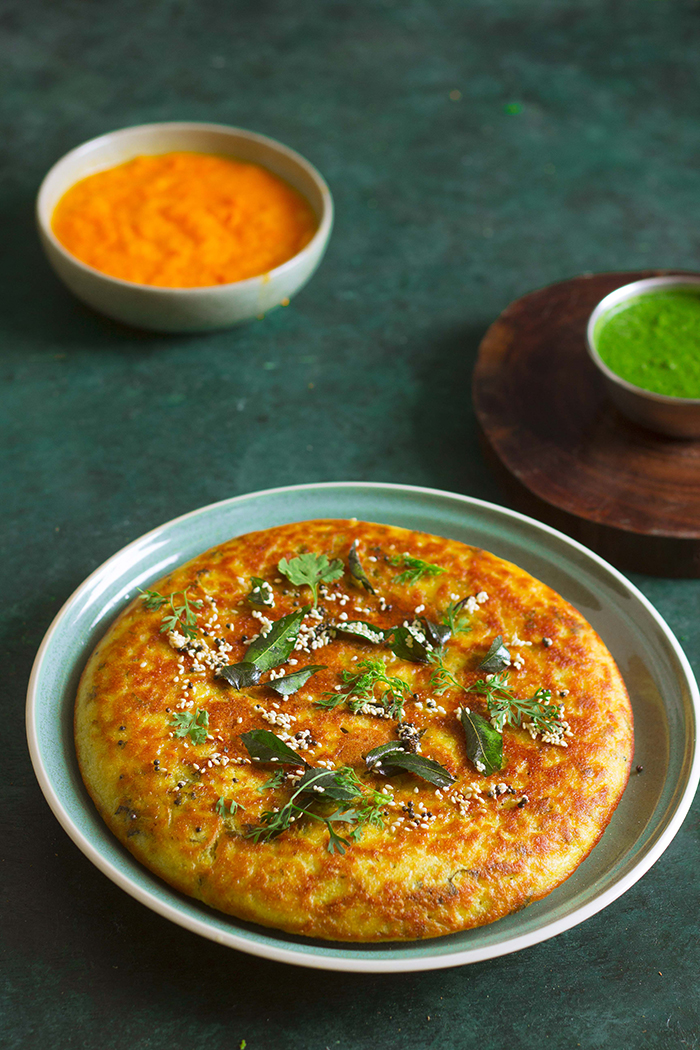
Handvo tastes best with pudina chutney, but you can also serve it with ketchup or just plain.


mixed dal gujarati handvo


If you made this recipe, let me know! Leave a comment here or on Facebook tag your tweet with @oneteaspoonlife on Twitter and don't forget to tag your photo @oneteaspoonoflife on Instagram. You can also email me at onetspoflife@gmail.com I'd love to see what you are up to.

If you like this recipe, do not forget to share it with your friends and family! 


You can follow One Teaspoon Of Life on FacebookTwitterInstagramPinterest or you can subscribe to One Teaspoon Of Life and receive all the latest updated via Email


Video Recipe


--------------------------------------------------------------------------------------------------------------------------

Mixed Dal Handvo Recipe | Lauki Handva Recipe | How to make Gujarati Handvo


mixed dal gujarati handvoMixed Dal Handvo or Lauki Handva is a popular gluten free Gujarati breakfast or snack, made from mixed lentils, rice and bottle gourd. Handvo is made with a rice-dal fermented batter and grated bottle gourd (lauki / ghiya). Handvo is steamed in a frying pan or a kadhai.

Recipe Type:  Snacks
Cuisine:            Gujarati
Prep Time:     16 hours
Cook time:     30 minutes
Total time:     6 minutes
Yield:                Serves 4 to 5


Ingredients:


1 cup Rice
0.5 cup Moong Dal
0.5 cup Toor Dal
2 Tbsp Urad Dal
2 Tbsp Chana Dal
0.5 cup thick Curd ( yogurt / dahi)
0.25 tsp Baking Soda (meetha soda)
2 cup Bottlegourd (Lauki / ghiya), grated, loosely packed
2 Tbsp Oil
1 tsp Mustard Seeds
1 Tbsp Curry leaves, chopped
0.25 tsp Asafoetida (Hing), gluten free
0.5 tsp Turmeric Powder
1 tsp Sesame seeds (til)
Oil to grease the pan
Salt to taste
Oil to grease the pan

For the tempering:


1 tsp Mustard Seeds
1 tsp Sesame seeds (til)
1 sprig Curry leaves

Method:


1. Mix the rice, moong dal, toor dal, chana dal and urad dal in a large bowl. Wash 2 to 3 times and soak in water for 6 hours.
2. After 6 hours, drain the water and blend to a thick coarse batter without adding any water. The dals would have soaked up water and that is sufficient to blend. If you still are struggling to blend, add very little and blend.
3. Remove the batter to a large bowl and add in the curd and baking soda. Mix well and cover and keep aside to ferment overnight or for 6-8 hours.
4. Next morning, heat oil in a pan and add mustard seeds.
5. Once the mustard seeds splutter, add the chopped curry leaves, hing, turmeric powder and grated bottle gourd. Mix well and cook on low heat for 5 minutes or until the bottlegourd softens a little.
6. Add this to the batter and add salt. Mix well.
7. In a shallow kadhai or in a frying pan add 1-2 Tbsp oil and spoon in the batter. Sprinkle sesame seeds. You will have to cook the handvo in batches. The size of your frying pan or kadhai will determine how many batches. I made 2 handvos in a 24 cm frying pan.
8. Cover and cook on low heat until the top is almost cooked. It should look somewhat set. This may take 8-10 minutes.
9. Carefully flip the handvo and cook on high heat until the second side is cooked and has brown spots.
10. Cool the handvo a little before slicing. Handvo will appear to be sticky when hot, it will set better as it cools.
11. Just before serving, make a tempering by heating oil and adding mustard seeds, curry leaves and sesame seeds and pour on the handvo.
12. Serve warm with pudina chutney.


If you liked this, you may also like:

Steamed Gujarati Green peas Snacks
Matar Dhokla

Kothimbir Vadi Coriander Chickpea Cake cilantro garbanzo steamed baked savory maharastrian vada wada pancake vegan
Kothimbir Vadi
How to make vegan sabudana vada sabakki vada recipe at www.oneteaspoonoflife.com
Sabudana Vada


Read more ...

Mysore Masala Dosa

Mysore Masala Dosa is a rice and lentil pancake that has a chilli and garlic chutney spread on the inside and stuffed with a potato bhaji and served with a simple coconut chutney.

How to make Mysore Masala Dosa recipe at www.oneteaspoonoflife.com


Weekends are meant to be slept in. Aren't they? But sometimes, waking up early on a weekend has it's own excitement - that slight chill in the air, the sky all grey and cloudy, birds chirping away from their hiding places and an occasional car or bus on the road. At times like this, all I need is a steaming hot cup of coffee and a blanket to wrap myself as I sit in the balcony watching the world go by. And you know what's better than that? Having a plate of absolutely delicious homemade Mysore Masala Dosa to eat.

There is absolutely nothing like a Mysore Masala Dosa for breakfast. The good thing about Bangalore is you can eat a Masala Dosa morning, evening or night and for as little as Rs.20 and for as much as Rs.200. But this homemade Masala Dosa is sooo much better than the restaurant ones. I swear you won't like those once you have tasted one that YOU made at home.

How to make Mysore Masala Dosa recipe at www.oneteaspoonoflife.com

A Mysore Masala Dosa is crisp and golden brown on the outside and soft and fluffy on the inside. It has a spicy red chilli and garlic chutney spread on the inside and is always stuffed with a potato bhaji. Served with a simple coconut chutney, it actually makes one of the most delicious breakfast. Sometimes, dinner too. Skip the red chilli chutney, to get a regular Masala Dosa.

In the age of fast food, a Dosa is a mix of both food movements - slow and fast. It needs to go through the slow process of fermentation but after that, it is a matter of minutes to cook it. 

How to make Mysore Masala Dosa recipe at www.oneteaspoonoflife.com

Points to keep in mind:

  • There are many recipes out there that replace the rice with rice flour or with all purpose flour, but a Dosa tastes authentic only when it is made with with rice grains as opposed to flour. 
  • I ALWAYS use an age old cast iron griddle or tava to make Dosa. It gives it that amazing color and crispness, but my sister swears by her non stick tava or griddle. Either way, a Dosa tava is meant to be absolutely flat, non stick or cast iron. You can also use a flat frying pan. 
  • In winters or if the day is cold, you may need more time to ferment the batter. Keeping it near a warm stove or oven helps. If you live in a hot region or it is summer, you may need only 6-8 hours for the batter to ferment. 
  • You will know that the batter is fermented when it has risen and tastes sour. 
  • If you do not plan to use the entire batter at one go, remove the excess and only add salt to the batter you plan to use immediately. 


How to make Mysore Masala Dosa recipe at www.oneteaspoonoflife.com


Mysore Masala Dosa


How to make Mysore Masala Dosa recipe at www.oneteaspoonoflife.comMysore Masala Dosa is a rice and lentil pancake that has a chilli and garlic chutney spread on the inside and stuffed with a potato bhaji.

Recipe Type:  Breakfast
Cuisine:            South Indian
Prep Time:     24 Hours (Including soaking and fermenting)
Cook time:     5 minutes per Masala Dosa
Yield:                Makes 12-15

Ingredients:


For the Dosa:


1.5 cups Dosa Rice (Use regular rice if you don't have dosa rice)
0.5 cup Urad Dal or Split Black Gram
1 tsp Fenugreek seeds or Methi seeds
Water to grind
1-2 tsp Salt
1.5-2 tsp Oil per Dosa

For the Red Chilli Chutney:


8-10 dry Red Chillies
1-2 Garlic cloves
1-2 Tbsp Water
1/2-1 tsp Salt

For the Potato Bhaji:


3-4 medium sized Potatoes (Boiled and Peeled)
1 large Onion
3-4 Green Chillies
1 sprig Curry Leaves
1 tsp Mustard Seeds
1 tsp Turmeric Powder
3-4 tsp Oil
Salt to taste
2 Tbsp finely chopped Coriander Leaves

Method:


To make the Dosa Batter:


Soak the rice, urad dal and methi seeds for 8-10 hours. To make Dosa for breakfast, soak the grains the previous morning. So you can grind the batter at night.
Drain the water and grind the soaked rice and dal into a fine batter. Use as little water as possible while grinding. Adding too much of water will not allow the batter to become fine. Start with 1/4-1/2 cups of water and then add more if required.
Pour the batter into a deep vessel. Mix well if you ground the batter in batches.
Cover and keep in a warm place to ferment overnight.
When the batter has risen and become sour, it has fermented enough and can be used to make Dosa.
The batter keeps well in the fridge for almost a week. See "Points to keep in mind" above for more information on storage.

To make the Red Chilli Chutney:


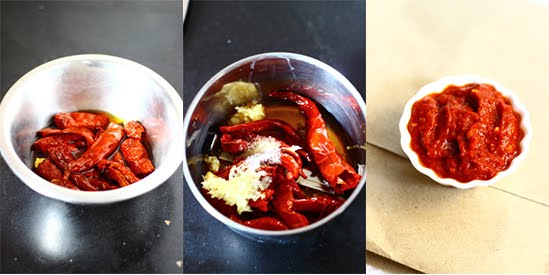
red chilli chutney garlic

Remove the seeds from the dry red chillies and soak them in warm water for 30 minutes.
Grind them into a fine paste along with the garlic, salt and a little water.
Store in an airtight box in the fridge. It keeps well for 2 weeks in the fridge.

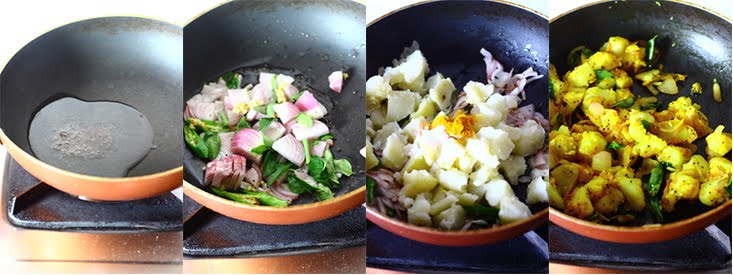
To make the Potato Bhaji:


potato onion hash

Mash the potatoes into rough cubes.
Slice the onions and chop green chillies.
Heat oil in a pan and add the mustard seeds.
Once they splutter, add the curry leaves, onions and the green chillies.
Fry the onions until they are translucent.
Add the potato and mix well. 
Now add the salt and turmeric powder. Mix well.
Fry for 1-2 minutes.
Garnish with the chopped coriander leaves.

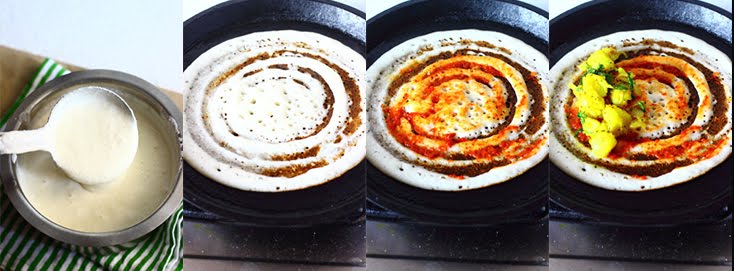
To make the Mysore Masala Dosa:


dosa mysore masala chutney pancake red chilli rice urad dal

Grease a cast iron or non stick griddle and heat it.
Once the griddle is hot (not smoking), pour one ladle full of batter on the griddle and spread it from the inside out into a thin circle.
Drizzle a spoonful of oil on it and allow it to cook on medium heat.
When the side touching the griddle turns golden brown and crisp and the side facing you is cooked and there is no raw batter there, spread 1/2-1 tsp of the red chilli chutney on the dosa.
Place a spoonful of potato bhaji on the dosa and fold the dosa into half.
Serve it hot with coconut chutney.

Read more ...

Khara Pongal


Khara Pongal Ven Ghee Khichdi moong dal rice

I spent 10 hours travelling by train yesterday. 10 long HOURS.
Can you imagine starting out at 5am, travelling by train for 5 hours and then spending a few hours at your destination and then travelling 5 hours in train coming back and then charging through the horrible HORRIBLE traffic home and having to cook your own dinner???

5am is close to mid night for me. I'm so not a morning person.


I was exhausted. I was more than exhausted, I don't even have a word for it. It was late to order food or parcel something from a restaurant. I was hungry and I had to eat. At times like this, come out the simplest recipes where I don't need to do a thing and magically delicious food appears on the table.

Khara Pongal is one of those magic recipes. Pongal is a South Indian version of Khichdi. To make khara pongal, all you need to do is dump rice, moong dal, water, ginger and a few other things into the rice cooker or pressure cooker and let it do its thing. And VOILA! 15-20 mins later, food on your table. It is just as simple as that.

Khara Pongal Ven Ghee Khichdi moong dal rice

So I washed and soaked my rice and moong dal as soon as I walked into the house. You can skip the soaking and directly cook it together but it may take you a little more time than what I took. Soaking for at least 30 minutes is recommended.

I'd never had Pongal until I moved to Bangalore. I'd never eaten rice for breakfast either until I moved to Bangalore. Then in the office cafeteria, I had khara pongal with masala vada for the first time for breakfast and it was love at first bite. Since then, I've been making it when ever I'm short of time.

Khara Pongal Ven Ghee Khichdi moong dal rice

Pongal is meant to be mushy, so don't worry about overcooking it. In fact, go ahead overcook it. This is why is generally fed to little kids as it needs no chewing. If serving it to kids, do not add the peppercorns and the chilli. 

Pongal is a vegan dish, but what takes it to a totally different level is the Ghee or clarified butter tempering that's poured over it. I say, the more the ghee, the better it tastes. If you are not vegan, don't forget this step. 


Khara Pongal


Khara Pongal Ven Ghee Khichdi moong dal riceKhara Pongal is a quick dish made by cooking together rice and moong dal with ginger and tempered with ghee.

Recipe Type:  Main
Cuisine:            South Indian
Prep Time:     30 minutes
Cook time:     30 minutes
Yield:                Serves 2

Ingredients:


1/2 cup Rice (uncooked)
1/2 cup Moong Dal (uncooked)
3 cups Water 1/2 tsp Black Peppercorns
3/4" Ginger
1/2 tsp of Turmeric Powder
Salt to taste
3-4 tsp Ghee
8-10 Curry Leaves
1 tsp Cumin seeds

Method:


Method:


Wash the rice and dal and keep aside for 30 minutes.
Add the washed rice and dal to a pressure cooker with the water, turmeric powder, black peppercorns, grated or sliced ginger and salt.
Pressure cook for 15 minutes or for 5-6 whistles. Pongal is meant to be mushy so don't worry about overcooking it.
Heat the ghee in a small pan and add cumin seeds to it.
Once they brown slightly, turn off the heat and add the curry leaves.
Pour this tempering over the khara pongal and mix well.
Serve hot with some raita

Read more ...