Showing posts with label North Indian. Show all posts

Beetroot Paratha Recipe [Video]


Beetroot Paratha is a Indian pan fried whole wheat flatbread that is stuffed with beetroot and spices. Earthy sweet beats are mixed with hot and sour spices before stuffing in dough and pan frying. 

In a hurry? Jump to Video or Jump to Recipe

beet root paratha

Isn't that beetiful?

I just had to say that. I promise, no more bad jokes. Seriously.

Don't you just love that earthy sweetness of the beets? And pair it with the extremely vibrant pink color and then you wonder, who wouldn't love something like beets. Right? Wrong, my fussier half in the house won't eat beets. At least not in cooked form. And as he ages, he tends to become even more stubborn about not eating them. So, I have to come up with recipes that will convince him that beets aren't that bad. And with this recipe, I have him convinced, at least for now.

WHAT IS A PARATHA?

Paratha is a North Indian flatbread made mostly from whole wheat flour. It can be plain or stuffed with vegetables, eggs, meat or cheese. The dough can be made entirely of whole wheat flour or partly of whole wheat flour and partly of all purpose flour (maida). The dough is plain and simple, just made from flour, water and salt. It has no rising agents, no yeast and really requires very little rest time. It also stays well in the fridge for 4-5 days easily. The dough is rolled and then stuffed, sealed, and rolled out again. The paratha is then fried in a pan. On the streets, in North India, a paratha is fried in so much oil, it is almost deep fried, but at home, a lot less oil is used.

beet root paratha

beet root paratha

BEETROOT PARATHA

The most common paratha is definitely the Aloo Paratha stuffed with boiled potatoes. You are unlikely to find a beetroot paratha on the menu of any restaurant. But that doesn't mean the Beetroot Paratha is any inferior. 

To make the beetroot paratha, I peeled and grated the beets, and then mixed in hot spices like garam masala and red chilli powder and the sour dried mango powder, aka, amchur along with salt to make the stuffing. I lightly cooked the stuffing so that it doesn't ooze out of the paratha. I also added in a little bit of besan or chickpea flour to absorb any juice that does ooze out of the beets. This makes it easier to roll out the paratha when stuffed.


beet root paratha


If you made this recipe, let me know! Leave a comment here or on Facebook tag your tweet with @oneteaspoonlife on Twitter and don't forget to tag your photo @oneteaspoonoflife on Instagram. You can also email me at onetspoflife@gmail.com I'd love to see what you are up to.


If you like this recipe, do not forget to share it with your friends and family! 


You can follow One Teaspoon Of Life on FacebookTwitterInstagramPinterest or you can subscribe to One Teaspoon Of Life and receive all the latest updated via Email


Video Recipe


--------------------------------------------------------------------------------------------------------------------------

Beetroot Paratha Recipe
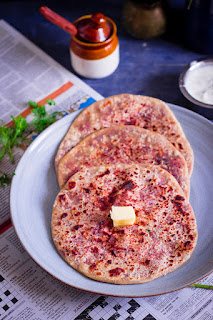

beet root parathaBeetroot Paratha is a Indian pan fried whole wheat flatbread that is stuffed with beetroot and spices.

Recipe Type:  Snacks, Breakfast
Cuisine:            North Indian
Prep Time:     15 minutes
Cook time:     30 minutes
Total time:     45 minutes
Yield:                Makes 3 Parathas

Ingredients:


For the Beetroot Stuffing:


1 cup Beetroot, grated
1 Tbsp Oil
1 tsp Red Chilli Powder
1 tsp Amchur
0.5 tsp Garam Masala
1 Tbsp Chickpea Flour
1 Tbsp Coriander leaves, chopped
0.25 cups Cheese, grated
Salt to taste

For the Dough:


1.5 cups Wholewheat Flour
0.25 tsp Salt
1 cup Water

Oil to fry the Paratha

Method:


1. Keep aside 0.25 cups of the flour and take the remaining flour in a large bowl/plate.
2. Add in the salt and 0.5 cups of water. Start kneading the dough. Add more water as required while kneading. Knead until you have a smooth dough. Cover and keep aside.
3. Heat 1 Tbsp Oil in a pan and add the grated beetroot.
4. Cook the beetroot on low heat for 3-4 minutes.
5. Add in salt, red chilli powder, amchur (dried raw mango powder) and garam masala. Mix well.
6. Cook for 2-3 minutes.
7. Add in the chickpea flour (besan) and mix until combined. Cook until the raw smell of the flour goes off.
8. Remove from heat and keep aside to cool.
9. Add in the coriander leaves and grated cheese (if using) when the beetroot stuffing has cooled. Mix until combined.
10. Divide the dough into 3 equal parts and roll into balls.
11. Dust the counter with a part of the remaining flour and roll out the dough into small circles.
12. Divide the stuffing into 3 equal parts and spoon onto the dough. Seal the parathas.
13. Dust flour on the counter as required and roll out the parathas as thin as possible.
14. Heat the tava or a flat pan and grease it. Place the rolled paratha on the tava and spoon oil and spread well.
15. Flip the paratha and cook until the it is cooked on one side.
16. Flip the paratha again and cook until the second side is cooked. Press with a spatula so that the paratha is cooked evenly.
17. Serve the parathas hot along with either butter, pickle or curd (yogurt).


If you liked this, you may also like:

How to make shakharkand aloo cheese paratha recipe at www.oneteaspoonoflife.com
Sweet Potato Cheese Paratha

How to make vegan methi fenugreek paratha recipe at www.oneteaspoonoflife.com
Methi Paratha
Baked chickpea falafels and hummus in a beetroot flatbread
Beetroot Falafel Wraps


Read more ...

Dahi Sandwich Recipe | Yogurt Sandwich Recipe [Video]


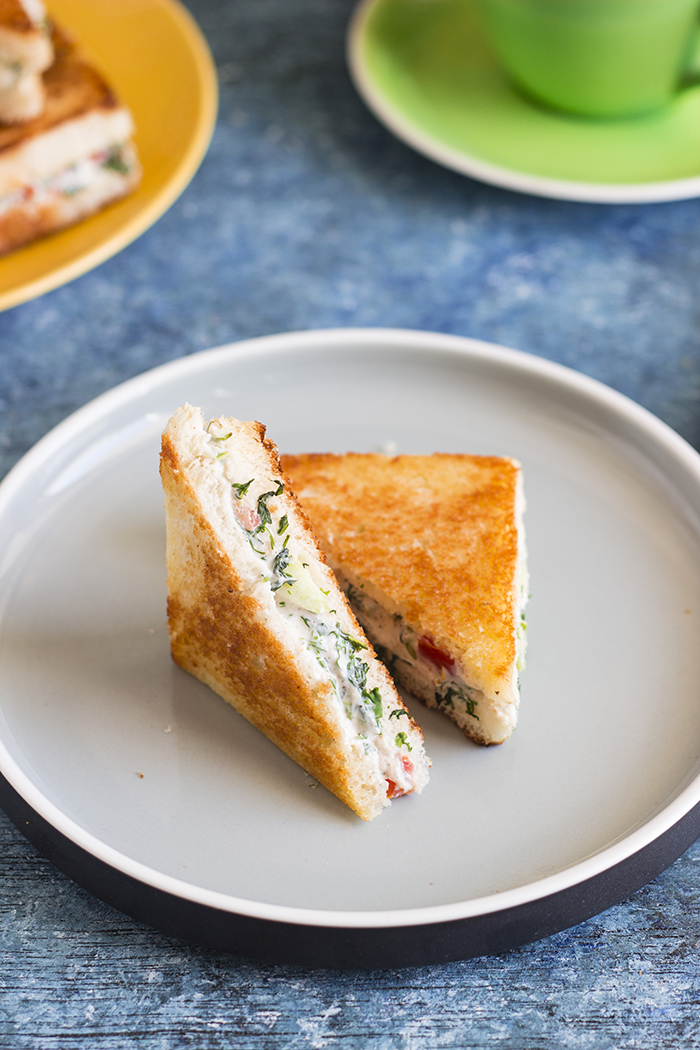
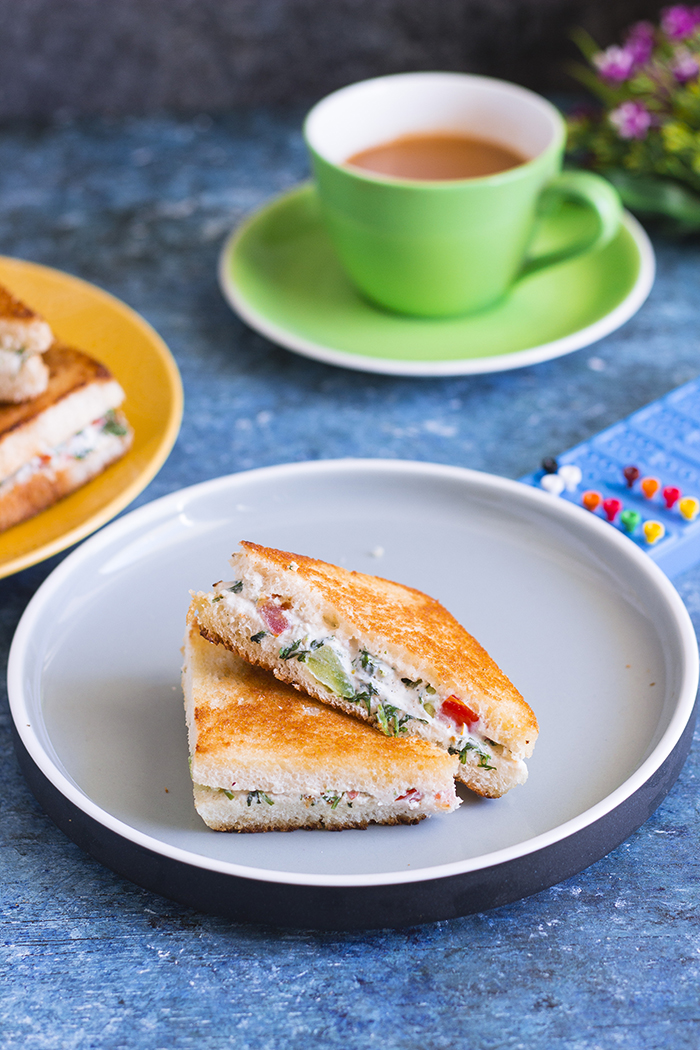
Dahi Sandwich or Yogurt Sandwich. An easy and healthy vegetarian sandwich that is made by stuffing bread with a delicious mix of hung curd (yogurt), finely chopped vegetables, and spices and toasting it off in a frying pan until golden and crispy. Perfect for breakfast or snacks.

In a hurry? Jump to Video or Jump to Recipe

dahi sandwich yogurt sandwich hung curd sandwich

Hola! to all you fun people out there. Weekend's near and I'm already in my lazy mood. And this sandwich is perfect for the mood. Today, I bring to you a fun and Summery sandwich - The Dahi Sandwich or the Yogurt Sandwich.

Say what you may, Summer is here, at least in Bangalore. And might I say I'm not loving it. It's gotten a tad too hot for my liking. I've been sending messages up in the sky for some rain and I hope I get a reply. Until then, all I can do is enjoy some Summery food in the shade with the fan on full speed.

So, Dahi Sandwich, when I first heard of it, I was so excited. I love Dahi (yogurt). It is the only thing that prevents me from becoming a vegan. Vegan yogurt is just not for me. If you love creamy sandwiches wrapped in crispy golden bread, then this one is the ONE for you.

dahi sandwich yogurt sandwich hung curd sandwich

Dahi Sandwich is super easy to make once you have the "hung curd". I will interchangeably use the words dahi, curd and yogurt, because they all are the same. And when I say yogurt, it is always the plain one and not flavored ones. Back to the "hung curd", hung curd is just curd from which the liquid has been drained out. There are several ways you can make hung curd. The traditional method is wrapping the curd in a muslin or thin cotton cloth and tying the cloth and then hanging it somewhere (preferably over the sink) and letting the liquid drain out. I choose the easy method, which is using a huge tea strainer. I add the curd to the strainer and keep it over a deep bowl in the fridge overnight. Come morning and all you curd is strained and you have the thick creamy solids. More about this in notes.

Once you have mastered making the hung curd, you can also try to make these delicious "Dahi Kebabs" that are perfect for dinner parties where you want to show your culinary skills. I only use homemade Dahi or Yogurt, you can learn how to make your own yogurt, here. It is super easy and the results are so much better than packaged yogurt.

After you have the hung curd, add in finely chopped vegetables, very little spice and then spread it on the bread and then toast the sandwich on a pan until crisp and golden. I kept the spices light, because I wanted the sandwich to be cooling. I added Chaat Masala, you can just add Garam Masala or any spice mix you like, or just stick to plain pepper. 

These Dahi Sandwiches are kid friendly and adult friendly (very). Also, between us, these are somewhat healthy, if you overlook the white bread and the butter. But I think on weekends, we can always cheat a little. So b-bye for now.

Happy Weekend folks, see you next week.

dahi sandwich yogurt sandwich hung curd sandwich


If you made this recipe, let me know! Leave a comment here or on Facebook tag your tweet with @oneteaspoonlife on Twitter and don't forget to tag your photo #oneteaspoonoflife on Instagram. You can also email me at onetspoflife@gmail.com I'd love to see what you are upto.


If you like this recipe, do not forget to share it with your friends and family! 


You can follow One Teaspoon Of Life on FacebookTwitterInstagramPinterest and Google+ or you can subscribe to One Teaspoon Of Life and receive all the latest updated via Email


Video Recipe


--------------------------------------------------------------------------------------------------------------------------

Dahi Sandwich Recipe


dahi sandwich yogurt sandwich hung curd sandwichInstant Mix Vegetable Uttappa is a quick savory South Indian pancake that is made from semolina and topped with finely chopped vegetables. It is popularly served as breakfast along with some fresh coconut chutney.

Recipe Type:  Snacks, Breakfast
Cuisine:            Indian
Prep Time:     10 minutes
Cook time:     15 minutes
Total time:     25 minutes
Yield:                5

Ingredients:


10 Bread Slices
0.75 cup hung Curd
2 Tbsp Tomato, finely chopped
2 Tbsp Capsicum, finely chopped
1 Green Chilli, finely chopped
2 Tbsp Coriander leaves, finely chopped
1 tsp Chaat Masala
Salt to taste
Butter as required

Method:


1. Mix together the hung curd (see Notes), tomato, capsicum, coriander leaves, green chilli, chaat masala and salt until combined.
2. Spread the curd mixture on a slice of bread and place another bread on top to make a sandwich.
3. Slice off the edges of the sandwich.
4. Grease a pan with butter and place the sandwich on the pan.
5. Cook on low to medium heat until the sandwich turns golden brown on one side.
6. Flip the sandwich and cook until the second side browns.
7. Cut diagonally and serve.

Notes:

1. Hung curd is made by straining thick dahi or curd or yogurt in a muslin cloth for a 4-5 hours. The same quantity of yogurt may give different people different quantities of hung curd as it depends on how much liquid the yogurt contains. Different brands may give different results too. Hence, for the sake of uniformity, this recipe uses the quantity of hung curd instead of quantity of curd or yogurt.

2. To make hung curd, take a muslin cloth and tie yogurt in it. Then suspend the cloth from a tap or rod for a few hours. Alternately, you can also use a fine strainer and leave the yogurt in it in the fridge overnight.


If you liked this, you may also like:

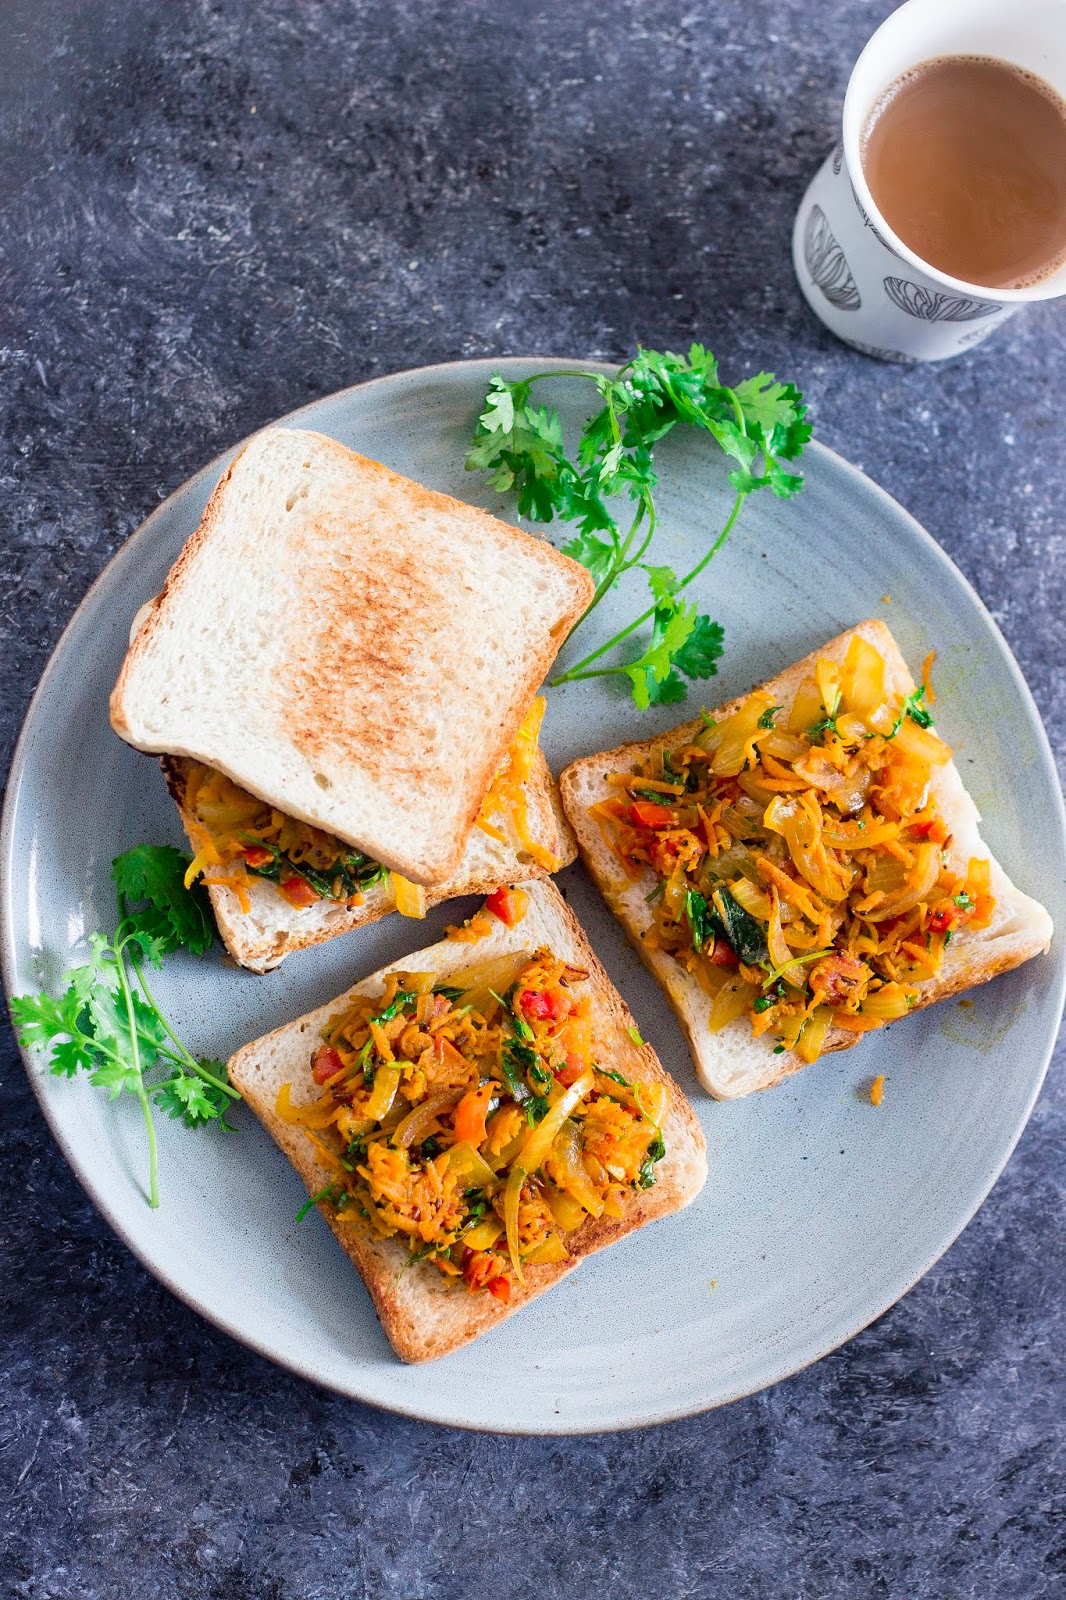
Bangalore Iyengar Bakery Style bread toast topped with an onion-carrot masala
Masala Bread Toast

Bombay sandwich, Bombay masala toast, Mumbai sandwich, Spiced potato sandwich
Mumbai Masala Toast
Masala Pav, Indian street food
Misal Pav


Read more ...

Jeera Rice Recipe | How to make Jeera Rice [Video]


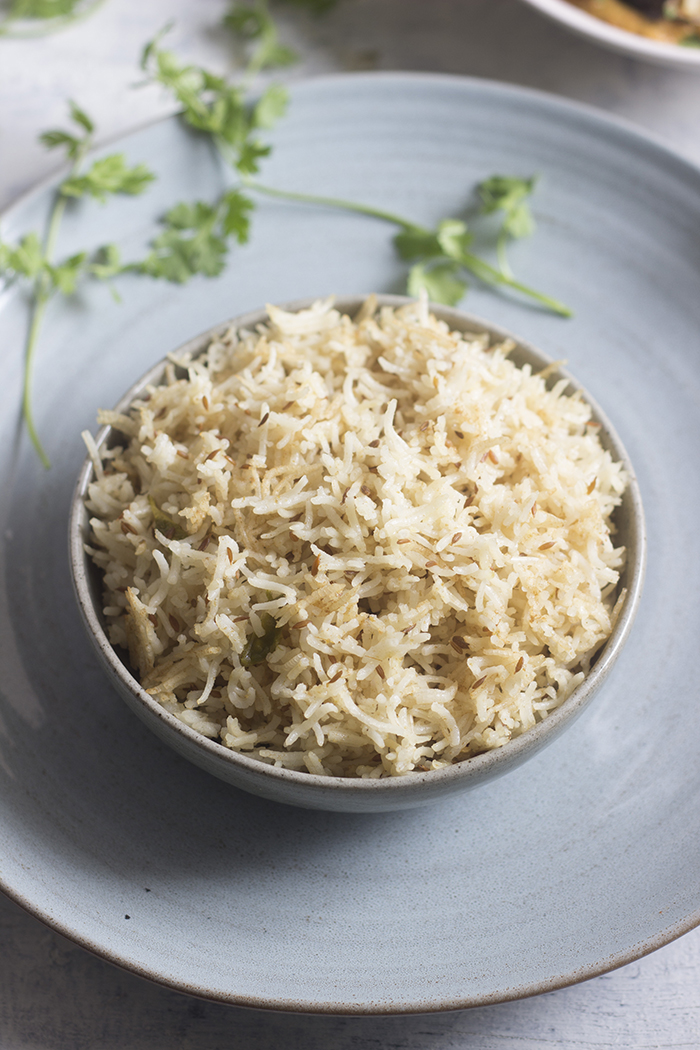
Jeera Rice or Cumin Rice is a simple flavorful rice main made by cooking Basmati rice with whole and ground cumin seeds. Jeera Rice is earthy, fragrant, healthy and delicious. It also fits into various diets - vegan, gluten-free and plant based with no or minimal alterations.


In a hurry? Jump to Video or Jump to Recipe

Jeera rice, cumin rice

I always considered December as the slowest month of the year at work. With everyone in the world looking forward to the holidays and doing their last minute holiday shopping, baking boozy cakes, and making travel plans. This year hasn't turned out to be that - Slow. Come December, and I've been busier than usual at work, and it may have something to do with the holidays. May be everyone wants to complete what they started before going off to enjoy some quality time with family. And that means we are all working twice as hard and scrambling to get stuff done at office. All in all, extremely exhausting and stressful. Add in all those pending treats from friends and dinners with family. It's led to me barely cooking on weekdays.

And when I am stressed out or busy, all I look forward to is comfort food. And my idea of comfort food is simple Indian food, especially, Rice. I hate to say this, but I think I secretly like rice. I spent a better part of my life, telling people how much I hate rice and how much I love wheat. If it was a battle of the cereals, my teenage self would have fought front and center of the wheat army. But now a days, I realize that although I eat wheat more regularly than rice, I tend to lean towards rice when I need comfort. And with such chaos at work, I've never needed more comfort. And this Jeera Rice is that and more. It is flavorful comfort food that is easy on your body and time.

Jeera rice, cumin rice

This Jeera Rice is not hot nor heavy on the spices, but it is definitely not flavor less. It has loads of that earthy cumin flavor. Plus it has the fragrance of Basmati Rice. You can get all chefy on this recipe and add all sorts of whole spices, but I kept it simple. Of all the spices out there, Cumin has to be my favorite. I add cumin to my tadka all the time.

You can make Jeera Rice two ways, one by tempering leftover rice with cumin seeds and the other by cooking raw rice along with cumin seeds. This recipe is the latter. I made this Jeera Rice in a pressure cooker, you can also make it in a pan or in a rice cooker. Jeera rice is Vegan, gluten free and healthy. It can also fit into a plant based diet, by totally eliminating the oil in the recipe.

Jeera Rice is almost always accompanied by a flavorful Dal. There are several recipes of Dal on One Teaspoon Of Life that will go wonderfully with this Jeera Rice.

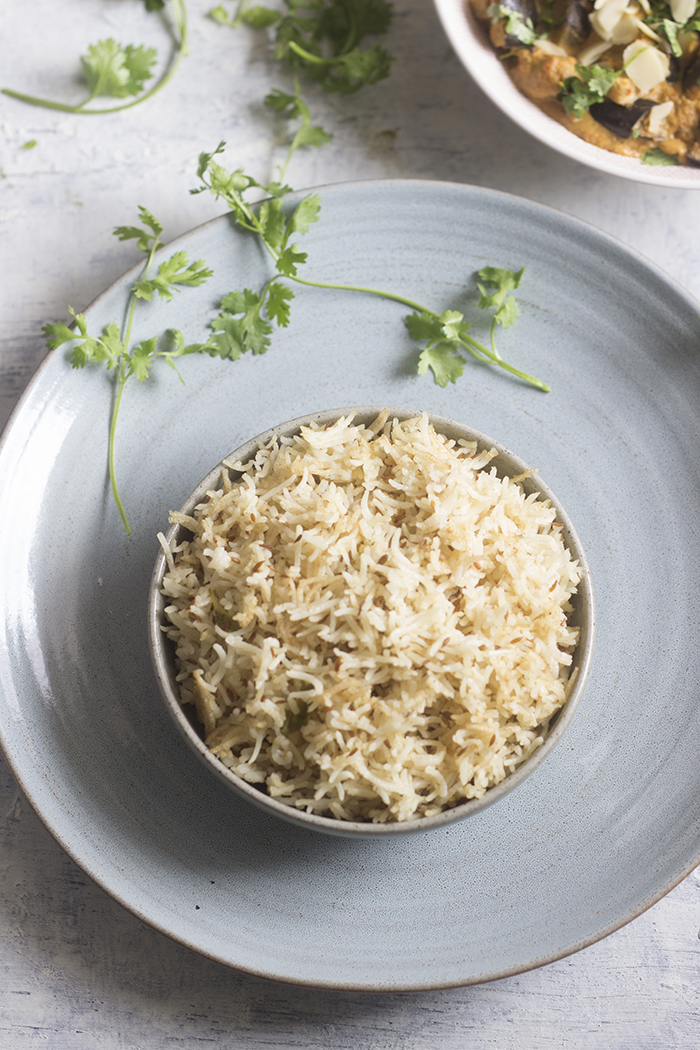
Jeera rice, cumin rice

If you made this recipe, let me know! Leave a comment here or on Facebook tag your tweet with @oneteaspoonlife on Twitter and don't forget to tag your photo #oneteaspoonoflife on Instagram. You can also email me at onetspoflife@gmail.com I'd love to see what you are upto.


If you like this recipe, do not forget to share it with your friends and family! 


You can follow One Teaspoon Of Life on FacebookTwitterInstagramPinterest and Google+ or you can subscribe to One Teaspoon Of Life and receive all the latest updated via Email


Video Recipe


--------------------------------------------------------------------------------------------------------------------------

Jeera Rice Recipe


Jeera rice, cumin riceJeera Rice is a vegan and gluten free rice main dish made by cooking basmati rice along with cumin seeds.

Recipe Type:  Main
Cuisine:            Indian
Prep Time:     30 minutes
Cook time:     20 minutes
Total time:     50 minutes
Yield:                Serves 2-3

Ingredients:


1 cup uncooked Basmati Rice
1.5 cups Water
1 tsp Cumin Seeds
1 tsp Cumin Powder
1 Green Chilli, chopped
3 tsp Oil
Salt to taste

Method:


1. Wash the basmati rice 5-6 times until the water runs clean. Drain and keep aside for 30 minutes.
2. Heat oil in a pressure cooker and add cumin seeds.
3. Once they brown slightly, add in the chopped green chilli.
4. Add the basmati rice and mix until the oil coats the rice grains.
5. Add in the water and cumin powder.
6. Add salt to taste.
7. Cover and pressure cook for 2-3 whistles or 5-8 minutes after the pressure builds up.
8. Serve hot with dal.


If you liked this, you may also like:
Indian rice pilaf made with corn, spinach and whole spices
Corn Spinach Pulao

How to make ghee rice recipe at One Teaspoon Of Life www.oneteaspoonoflife.com
Ghee Rice
pudina pulao, mint rice, mint pulao
Mint Rice


Read more ...

Aloo Methi Recipe | How to make Punjabi Aloo Methi [Video]


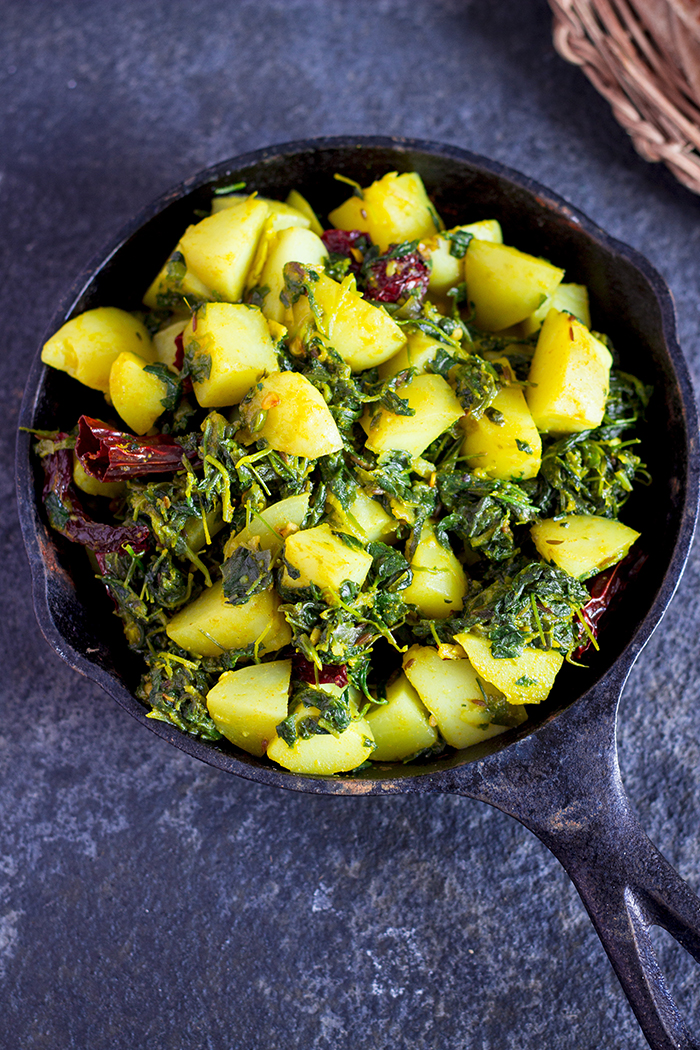
Aloo Methi is a popular mildly spiced North Indian dry curry made by tossing boiled potatoes with cooked fenugreek or methi leaves. Aloo Methi is a quick and simple vegan curry.

In a hurry? Jump to Video or Jump to Recipe

vegan Indian curry made of potatoes and fenugreek leaves

Hiya friends!! I'm back.

I hope you guys had a wonderful Diwali with your friends and family. I had my best Diwali in several years. Last year, we were in Bali for Diwali. The year before that, we were in Cambodia. So it's been a few years that I actually got involved in the festivities. This year, we decided to go home to Goa for Diwali and it was the best decision ever.

We met all our neighbors and we reminisced about the good old days. We cooked snacks and sweets and distributed it among friends and family. I met my school besties and had some good laughs. And I went for the one event that you will never get outside of Goa - the Narakasuras!!

vegan Indian curry made of potatoes and fenugreek leaves

While Diwali is celebrated by the whole country, each region has a different religious significance attached to the festival. In Goa and most of Karnataka, Diwali is celebrated as the day when Lord Krishna slayed the demon Narakasura. In Goa, people build effigies of Narakasura prior to Diwali, and on the Diwali eve's night, these Narakasuras are paraded throughout the city and burnt in the wee hours of morning of Diwali. Although I've lived in Goa most of my life, I never ventured out at night to see these creations. This time was our first and it was amazing. I applaud the creativity and hard work of all the people who created these beauties. If you are ever in Goa around Diwali, make sure you don't miss this competition, it is worth watching. 

While I never wanted to come off the Diwali high, I had to. So now I'm back to work, although I must say unwillingly. And I'm back to everyday cooking too. Eating the rich festival food, definitely made us all crave for some simple home cooking. 

I will be sharing my Diwali cooking soon, but until then I have this simple yet delicious Aloo Methi for you guys. This Punjabi style Aloo Methi is one of the quickest curries to make, and yet it is a family favorite. Aloo Methi is a simple mildly spiced curry made by tossing boiled potatoes along with cooked methi leaves. Aloo Methi tastes best with Roti, Naan or with Rice and Dal.

vegan Indian curry made of potatoes and fenugreek leaves


If you made this recipe, let me know! Leave a comment here or on Facebook tag your tweet with @oneteaspoonlife on Twitter and don't forget to tag your photo #oneteaspoonoflife on Instagram. You can also email me at onetspoflife@gmail.com I'd love to see what you are upto.


If you like this recipe, do not forget to share it with your friends and family! 


You can follow One Teaspoon Of Life on FacebookTwitterInstagramPinterest or you can subscribe to One Teaspoon Of Life and receive all the latest updated via Email


Video Recipe


--------------------------------------------------------------------------------------------------------------------------

Aloo Methi Recipe


vegan Indian curry made of potatoes and fenugreek leavesAloo Methi is a popular North Indian dry curry made with boiled potatoes and fenugreek or methi leaves. Aloo Methi is a mildly spiced vegan curry.

Recipe Type:  Side
Cuisine:            Indian
Prep Time:     30 minutes
Cook time:     30 minutes
Total time:     60 minutes
Yield:                2

Ingredients:


1 bunch Methi Leaves or 3 cups Fenugreek Leaves
2 medium Potatoes, boiled and cubed
0.5 tsp Cumin Seeds
1 tsp Ginger Garlic Paste
3-5 dry Red Chillies
0.5 tsp Turmeric Powder
Pinch of asafoetida (hing)
1 tsp Coriander Powder
3 tsp Oil
Salt to taste
Water as required

Method:


1. Chop the methi leaves and add 0.5 tsp of salt. Mix well and keep aside for 20-30 minutes.
2. Squeeze out as much water from the methi leaves as you can and keep aside.
3. Heat oil in a pan, add the cumin seeds.
4. Once the cumin seeds brown, add the dry red chillies.
5. Saute for 30-40 seconds and add the ginger garlic paste.
6. Saute until fragrant.
7. Add the methi leaves and fry until wilted.
8. Add the asafoetida, turmeric powder, coriander powder and salt. Mix well.
9. Add a little water and cover and cook until the methi leaves are completely cooked.
10. Add in cubed boiled potatoes and mix well.
11. Stir fry for 3-4 minutes.
12. Serve hot with chapati or roti.


If you liked this, you may also like:

Lahsuni Methi Mushroom

Black Chickpea Curry
Ghugni Masala
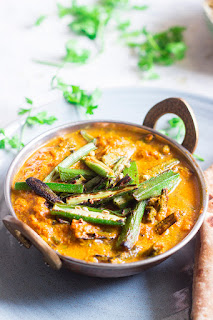
Pan fried okra cooked in a curry made with pickle spices and yogurt.
Achari Bhindi Dahiwali

Read more ...

Ghugni Masala | Kala Chana Masala [Video]


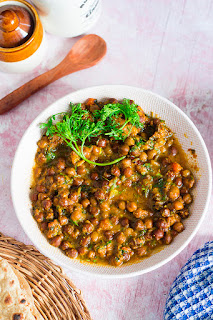
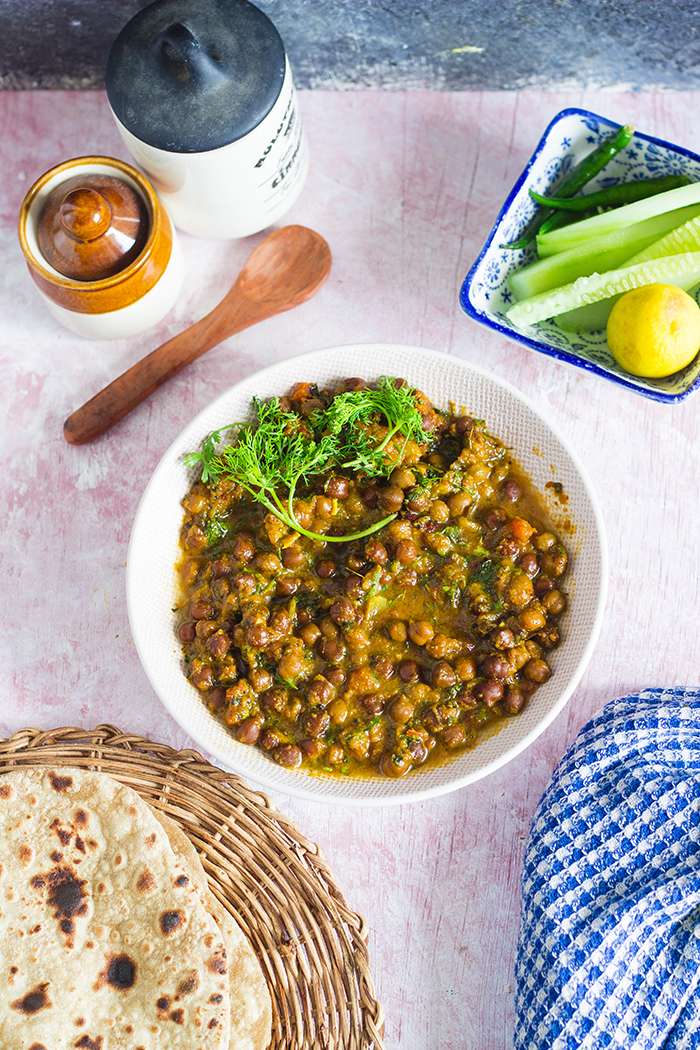
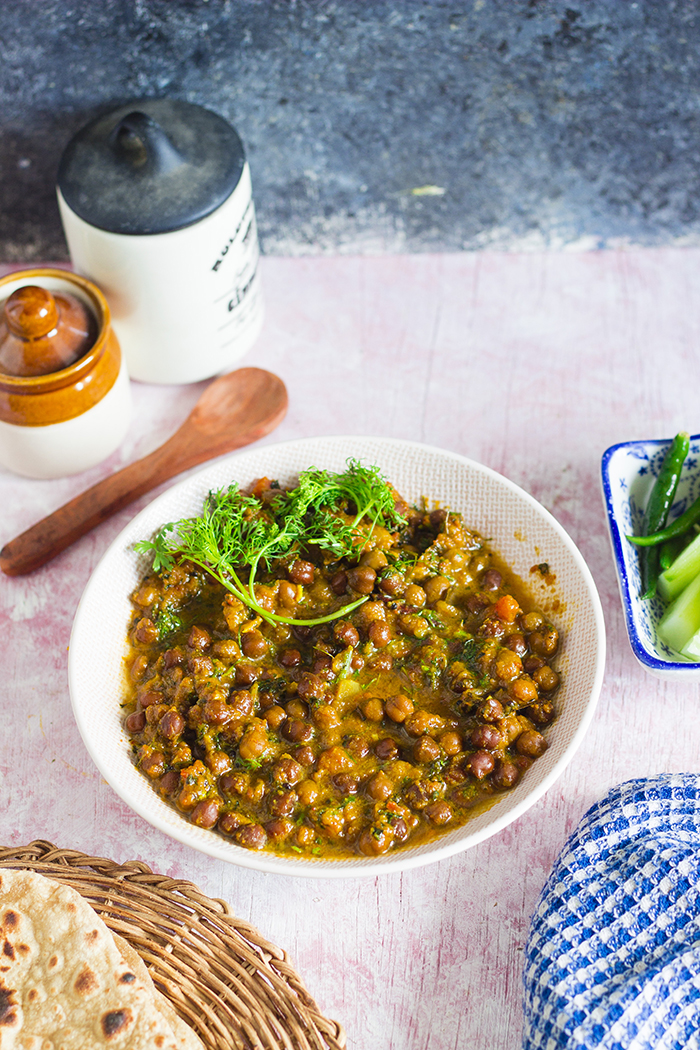
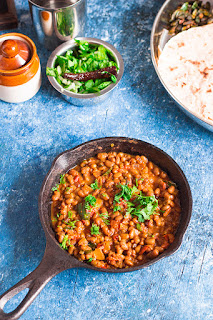
Ghugni Masala is a vegan and healthy curry made from black chickpeas or kala chana. The chickpeas are simmered in a masala made from pureed onions, tomatoes and spices. A perfect gluten free accompaniment to roti or naan bread.

In a hurry? Jump to Video or Jump to Recipe

Black Chickpea Curry


What's a better way to start of a week than with a healthy meal? And this Ghugni Masala or Kala Chana Masala is as healthy as it gets.

Kala Chana or Ghugni are desi black chickpeas. If you aren't Indian, there is a possibility you haven't seen the black chickpeas. Black chickpeas are smaller, denser and have a rougher skin than their cousin, the more popular, white chickpeas. Black chickpeas have more fiber and a lower glycemic index and make it perfect for someone trying to lose weight or just lead a healthier life. 

Also, I just love them!

Black Chickpea Curry

I enjoy eating the black chickpeas way more than the lighter variety, also known locally as Kabuli Chana. And what I love even more than the black chickpeas? the water it is cooked in or the aqua faba. The black chickpeas release a lot of umami into the water that they were boiled in, making it perfect for using in curries. Which is why in this curry, we don't use regular water, we use the water in which the chickpeas were boiled. The water adds color as well as an oomph to the curry. 

Ghugni Masala is a very simple curry to make and stores brilliantly in the fridge. 

The curry is simply made by simmering boiled black chickpeas in a masala made from pureed onions and tomatoes that have been flavored with 4 simple spice powders - coriander powder, turmeric powder, red chilli powder and garam masala. Whole spices are also used in the recipe to make the dish even more fragrant. If you don't have all the whole spices, just use what you have.

Kala Chana Masala fits right into the vegan diet as well as a gluten free diet. To make the dish fit the plant based diet, just replace the oil with water.

Kala Chana Masala tastes best when served with Naan bread or Roti, but you can also serve it with rice. In case serving with rice, adjust the consistency of the gravy.

Black Chickpea Curry

If you made this recipe, let me know! Leave a comment here or on Facebook tag your tweet with @oneteaspoonlife on Twitter and don't forget to tag your photo #oneteaspoonoflife on Instagram. You can also email me at onetspoflife@gmail.com I'd love to see what you are upto.


If you like this recipe, do not forget to share it with your friends and family! 


You can follow One Teaspoon Of Life on FacebookTwitterInstagramPinterest and Google+ or you can subscribe to One Teaspoon Of Life and receive all the latest updated via Email


Video Recipe


--------------------------------------------------------------------------------------------------------------------------

Ghugni Masala | Kala Chana Masala


Black Chickpea CurryGhugni Masala is a vegan and healthy curry made from black chickpeas or kala chana. The chickpeas are simmered in a masala made from pureed onions, tomatoes and spices. A perfect gluten free accompaniment to roti or naan bread.

Recipe Type:  Main
Cuisine:            Indian
Prep Time:     8 hours
Cook time:     30 minutes
Total time:     8 Hours 30 Minutes
Yield:                2-3

Ingredients:


1 cup Black Chickpeas or Kala Chana
2 medium Onions
2 medium Tomatoes
1 tsp Ginger Garlic Paste
0.5 tsp Mustard Seeds
0.5 tsp Cumin Seeds
1 Bay leaf
2 Cloves
1 Mace
1" Cinnamon
1 tsp Coriander Powder
0.5 tsp Turmeric Powder
1 tsp Red Chilli Powder
0.5 tsp Garam Masala
1 Tbsp Coriander leaves (finely chopped)
1 Tbsp Kasuri Methi (Optional)
2 Tbsp Vegetable Oil
Salt to taste
Water as required

Method:


1. Soak the dried black chickpeas overnight. Pressure cook them the next day with 0.5 tsp salt until they are cooked.
2. Puree the onion and tomatoes separately.
3. Heat oil in a pan and add mustard seeds.
4. Once the mustard seeds splutter, add the bay leaf, cloves, mace, cinnamon and cumin seeds.
5. Add the ginger garlic paste and saute until fragrant.
6. Add the onion paste and saute until slightly browned.
7. Now add the tomato paste and all the spice powders and cook on low heat for 5-7 minutes while stirring frequently.
8. Add 1 cup of water in which the chickpeas were cooked.
9. Add salt to taste.
10. Cover and cook on low heat for 5-7 minutes.
11. Add kasuri methi and mix well.
12. Garnish with the chopped coriander leaves.
13. Serve hot with roti or naan bread.


If you liked this, you may also like:

How to make goan bhaji pao, pav bhaji, alsanyache tondak at One Teaspoon Of Life www.oneteaspoonoflife.com
Alsane Tonak

North Karnataka kaalu palya made with alsande kaalu. Black eyed peas curry.
Lobia Masala
double beans tomato masala gravy sabzi
Double Beans Masala

Read more ...

Shalgam Ke Kebab | Vegan Turnip Chops [Video]


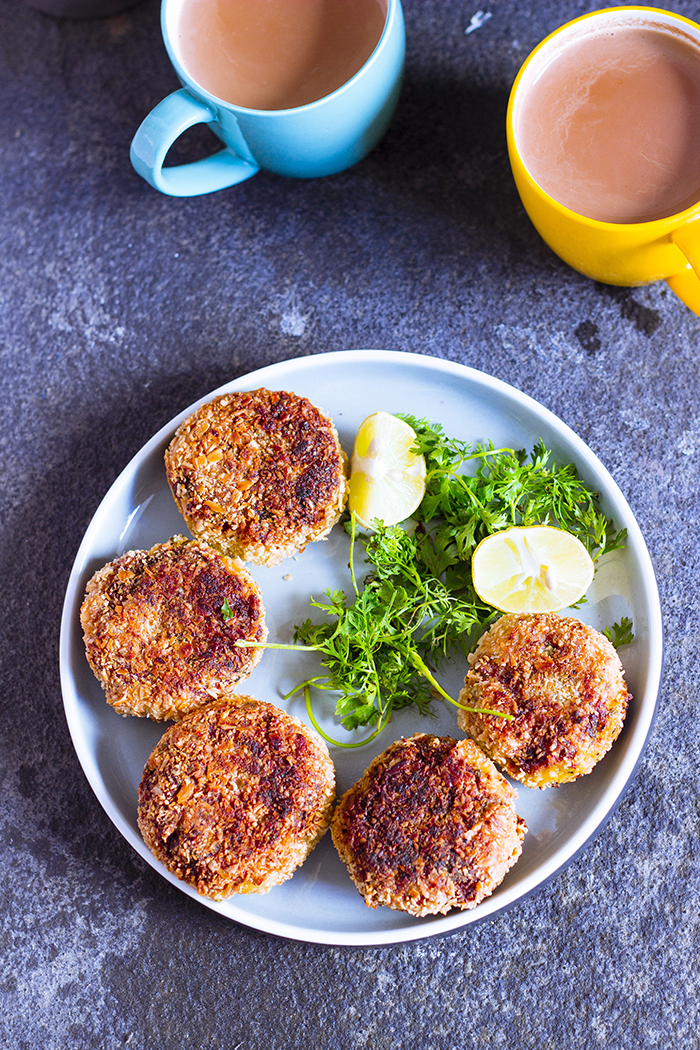
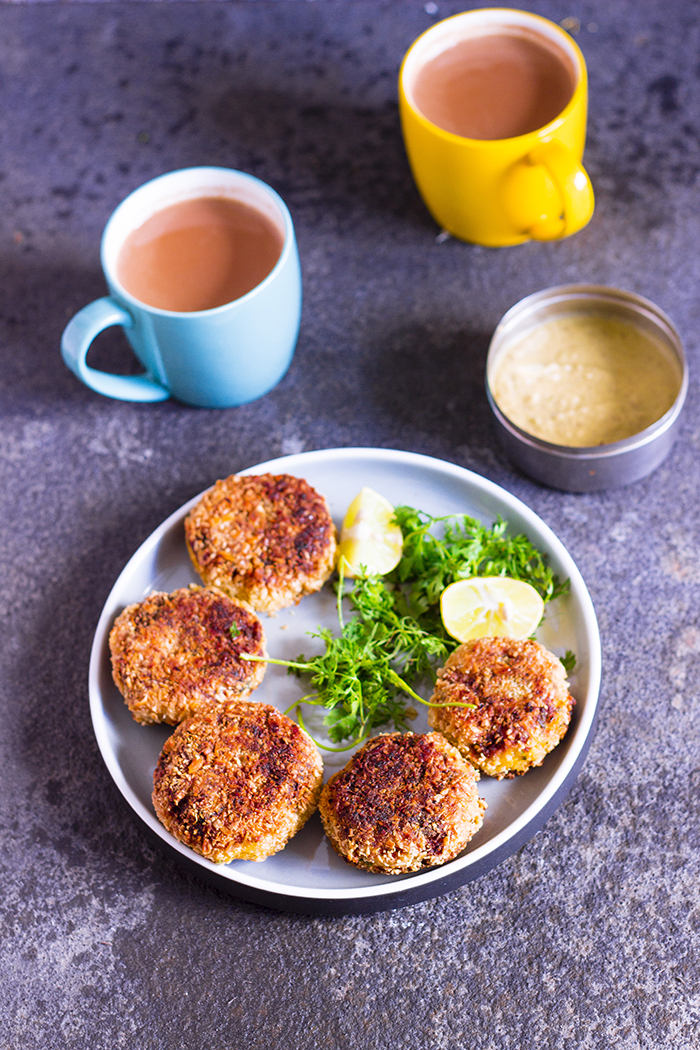
Shalgam ke Kebab or Turnip Chops are crumb coated pan fried patties made from fresh seasonal turnips and mashed potatoes, flavored with spices. Perfect for winter evening tea !!

In a hurry? Jump to Video or Jump to Recipe

vegan pan fried turnip chops

It feels so good to eat seasonal!!

I cannot remember the last time I ate turnips. Being seasonal, turnips start coming into the market around this time, and because the demand isn't so high I guess, they tend to be available in very few shops across Bangalore. I'm lucky I found them in my vegetable store. 

I haven't cooked much with turnips in the past. But this year, I've been buying them every week. I made a dry curry with grated turnips, I added them to sambar, I made parathas, and lastly, I made these delicious, crispy kebabs.

vegan pan fried turnip chops

Here are the details.

Since, they are called Shalgam ke Kebab, they have to taste of Shalgam (turnips). Turnips are slightly sharp or bitter in taste, but they are much milder than the daikon radish. At the peak of the season, they are actually sweet, which would be the best time to cook with them. You can either boil the turnips and use in this kebab or you can grate them like I did. Boiling them dilutes the flavor slightly as they combine very easily with the other ingredients. I grated them because I wanted the turnip flavor to be dominant in the kebabs. So, peel the turnips and grate them. Make sure you squeeze out as much water as you can from the turnips, this will prevent the kebabs from getting soggy on the inside.

We need binding agents to make the kebabs. And here, we are using two of them - potatoes and gram flour (besan). Use just enough to bind the mixture.

I mildly spiced the kebabs with turmeric powder, red chilli powder and some homemade garam masala. I added coriander leaves, because, well, I add coriander to pretty much everything. I love the freshness it adds. You can skip it or replace it with herbs like dill or parsley. 

In the absence of an egg wash, because I don't eat eggs, I made a simple plain flour slurry. This helps in crumb coating the kebabs. If you want to use eggs, you can.

The crumb coating - I ran out of bread crumbs, which would have been ideal, so I replaced them with coarsely powdered rolled oats. What can I say, it was fantastic. The oats behaved more like panko bread crumbs and they gave the kebab a nice crunchy outer layer. And may be made it feel a little healthier too. 

I shallow fried the kebabs until they were nice and brown. I've never tried baking them, so I don't know if that will work. But if you have already baked something similar, I'd say go ahead and bake them. If you do, leave me a comment so it helps out other readers who may want to bake.

Top the kebabs with some chat masala or squeeze some lime juice on them while eating. 
These Shalgam ke Kebab also go fantastically with green chutney

vegan pan fried turnip chops


If you made this recipe, let me know! Leave a comment here or on Facebook tag your tweet with @oneteaspoonlife on Twitter and don't forget to tag your photo #oneteaspoonoflife on Instagram. You can also email me at onetspoflife@gmail.com I'd love to see what you are upto.


If you like this recipe, do not forget to share it with your friends and family! 


You can follow One Teaspoon Of Life on FacebookTwitterInstagramPinterest and Google+ or you can subscribe to One Teaspoon Of Life and receive all the latest updated via Email


Video Recipe


--------------------------------------------------------------------------------------------------------------------------

Shalgam ke Kebab Recipe

vegan pan fried turnip chops
Shalgam ke Kebab or Turnip Chops are crumb coated pan fried patties made from fresh seasonal turnips and mashed potatoes, flavored with spices.

Recipe Type:  Snacks
Cuisine:            North Indian
Prep Time:     15 minutes
Cook time:     15 minutes
Total time:     30 minutes
Yield:                5

Ingredients:


3 small Turnips
1 boiled Potato
2 Tbsp chopped Coriander leaves
2 Tbsp Gram Flour (Besan)
1 tsp Ginger Garlic Paste
0.5 tsp Turmeric Powder
1 tsp Red Chilli Powder
0.5 tsp Garam Masala
2 Tbsp Plain Flour (Maida)
0.5 cup Bread Crumbs or coarsely powdered Oats
Oil to fry
Salt to taste
Water as required

Method:


1. Peel and grate the turnips. Squeeze out as much water from the turnips as possible.
2. Mash the boiled potato and add it to the turnip.
3. Add in ginger garlic paste, turmeric powder, red chilli powder, chopped coriander leaves, garam masala, gram flour and salt.
4. Mix well until completely combined.
5. Divide the mixture and shape into kebabs or patties.
6. Mix together flour with 2-3 Tbsp of water to make a thick smooth slurry.
7. Dip the kebab into the slurry and coat it fully.
8. Dip the kebab into bread crumbs or powdered oats and coat it completely.
9. In a shallow pan, heat up oil.
10. When the oil is hot, add the kebab. Keep the stove on medium heat.
11. Fry until one side browns, then flip over and continue to fry until the other side browns.
12. Remove from the pan onto paper napkins.
13. Serve hot with chutney or ketchup.
14. Demould and serve hot with chutney or sambhar.
15. All rottis may not puff up completely, but do not worry, they are still cooked.
16. Serve the rottis hot/warm with curry.


If you liked this, you may also like:
How to make banana flower cutlets recipe at www.oneteaspoonoflife.com
Banana Blossom Cutlets

how to make vegetable cutlets recipe, aloo tikki recipe, vegan cutlet recipe, beetroot cutlet recipe at www.oneteaspoonoflife.com
Vegetable Cutlet
How to make vegan foxtail millet cutlet fritter or navane tikki at www.oneteaspoonoflife.com
Millet Cutlet
How to make vegan sabudana vada sabakki vada recipe at www.oneteaspoonoflife.com
Sabudana Vada

Dahi Kebab Yogurt Kebab kabab kebob hung curd punjabi besan chickpeas snacks
DAhi Kebab
instant quick paneer tikka masala grilled capsicum pepper tomato spices
Instant Paneer Tikka

Read more ...