Showing posts with label Maharastrian. Show all posts

Maavina Hannu Seekarne or Aamras

aamras alphonso mango pudding dessert


The best thing about summer??? MANGOES. My sweet dreams are made of eating a ripe juicy mango dripping juice all over my hands. I never saw any other reason for the month of May to appear on the Calendar. I mean, May is the HOTTEST month of the year. In school, it marked the end of one month of summer vacations. The only saving grace for the month of May was the mangoes it brought with it.

Every Indian household I know uses mangoes to make either their favorite milkshake, or lassi, or dessert or pickle. There are so many dishes that you can make with Mangoes - both raw and ripe. I've made a few in the past:

Mavinkayee Chitranna or Mango Rice - Flavored rice made with grated raw mangoes and leftover rice.

Hagalkai Mavinkayee Gojju or Bittergourd & Raw Mango Curry - Bitter sweet sour and spicy curry made with bitter gourd and raw mangoes

Sweet and Sour Mango Curry or Saasav or Pashingiri Mango curry made with ripe mangoes and fresh coconut famous along the Konkan coast of India.

Aam Panna or Sweet and Spicy Raw Mango Cooler - A sweet and spicy beverage made using raw mangoes

Mango Cheesecake - Cheesecake made using fresh mangoes, paneer and agar agar.

Raw Mango Gojju - South Indian raw mango curry and coconut curry

Corn and Raw Mango Salsa - A Simple Salsa made with boiled sweet corn and raw mango.


aamras alphonso mango pudding dessert

Don't you just want to grab that bowl of luscious Seekarne and eat it right now?

Maavina hannu Seekane or Aamras is probably the easiest delicacy you can make with Mangoes. All you need are ripe fresh JUICY mangoes. India is the birthplace of Mango and every state has it's own favorite. Alphonso, Kesar, Dasheri, Badami, Mankurad (Being a Goan, I had to list this one), Raspuri etc.There are so many more varieties, I don't even know all the names. 

aamras alphonso mango pudding dessert

Maavinahannu Seekarne or Aamras was my Mom's favorite Mango dish, she made it every summer, without fail. I made this today as a dedication to her. 

Maavinahannu Seekarne can be made in two ways, either by finely chopping the mangoes, like my mom made it or squeezing the mango to get a fine puree, the way my grandmother made it. The only difference in the 2 methods, is the way the mango pulp is treated - chopped or pureed. It is typically flavored with cardamom and almost always has a little milk added to it.


Traditionally, the Maharastrians eat their aamras with deep fried puris and here in Karnataka, it is eaten with chapati - the pan fried wholewheat flatbread. But you can eat it just like that as a dessert. Seekarne tastes best chilled for an hour or two in the fridge. But you can eat it at room temperature as well.


Maavina Hannu Seekarne or Aamras


aamras alphonso mango pudding dessert
Maavina Hannu Seekarne or Aamras is a simple traditional dessert made with mango pulp and milk and flavored with cardamom.

Recipe Type:  Dessert/ Drink
Cuisine:         Indian
Prep Time:     15 minutes
Yield:             2-3 bowls

Ingredients:


2 ripe Mangoes
1/2 cup of Milk
1 tsp Cardamom Powder
1-2 tsp Jaggery Powder or Sugar

Method:


Peel the mangoes and chop the mango cheeks finely. Alternatively, instead of chopping it, you can just puree the mango.
Add cardamom powder and milk. Mix well.
Taste and check if you want it sweeter, then add jaggery or sugar.

Read more ...

10 minute Plantain Chips | Balekayee Podi | Kelyachi Kapa


Balekayi balekayee podi kelyachi kapa raw banana fry vegan snacks indian goan maharashtrian

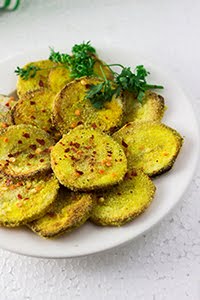
Crisp on the outside, soft on the inside. Coated with fine semolina and coloured yellow by Turmeric. A dash of heat and seasoning. Sounds fancy doesn't it? 
I'm only describing these awesomely EASY to make 10 minute quick Plantain Chips. Yup! that's all it takes to make them. 10 minutes. And did I mention, they are pan fried? YES! They are NOT deep fried. That just made them healthy, did it not? Healthy chips - that's the way we roll....

And the ingredients are even lesser in number than the time- Just 6. And that includes salt and oil. Now isn't that economical.

Balekayi balekayee podi kelyachi kapa raw banana fry vegan snacks indian goan maharashtrian

This recipe comes from Goa - the tiny state on the west coast of India is extremely popular for its heavenly beaches and with the beach, comes the amazing seafood (or so I've heard). I'm a vegetarian, so I haven't sampled any of this amazing seafood, but I believe my friends when they say it. On certain days, even the most hard core non vegetarian craves Vegetarian food. On those days, comes out the fish fry substitute - Plantain chips. Sometimes it is made with Potato or Brinjals too. For us vegetarians, this is just daily food.

These chips are a very common side dish / accompaniment to a rice and dal meal. It goes amazingly well with the starchy soft white rice and the mild yellow dal. These chips just add a bit of texture to the meal. They are crisp, they are soft, they are yellow and they are just slightly hot.

Some days I don't even make the rice and dal, I just have them as a snack in the evenings. 

I ate it differently this time. I had my last week's Olive Hummus in the fridge and I baked a few whole wheat pita breads, and instead of stuffing my Pita Pockets with falafels, I stuffed it with my Plantain chips. Soooo QUICK  to make. Did I mention they hardly take 10 minutes? So what are you waiting for? Get set go...

Balekayi balekayee podi kelyachi kapa raw banana fry vegan snacks indian goan maharashtrian


10 minute Plantain Chips | Balekayee Podi | Kelyachi Kapa


Quick and easy pan fried semolina coated plantain chips. A famous accompaniment to rice and dal in Goa

Balekayi balekayee podi kelyachi kapa raw banana fry vegan snacks indian goan maharashtrianRecipe Type:  Snacks
Cuisine:          Indian / Goan
Prep Time:     10 minutes
Cook time:     10 minutes
Yield:              20-25

Ingredients:


1 Raw Banana / Plantains
1 tsp of Turmeric Powder
1 tsp of Red Chilli Powder
1/2 cup of fine Semolina / Chiroti Rava
Oil to fry
Salt to taste

Method:


Peel the raw banana and slice into discs. I usually keep them at least 3-4mm in thickness.
Toss the slices with turmeric powder, red chilli powder and salt.
Heat up a griddle or a flat bottomed frying pan.
Dip the slices one by one in the fine semolina and place on the hot griddle.
Spoon over oil so that each one is coated in oil.
Once the first side browns a little, flip them and cook until done.
Insert a knife to check if done, if the knife goes in smoothly and there is no resistance, the chips are done.
Serve hot.
Read more ...

Kothimbir Vadi | Pan Fried Coriander and Chickpea Cake


Kothimbir Vadi Coriander Chickpea Cake cilantro garbanzo steamed baked savory maharastrian vada wada pancake vegan

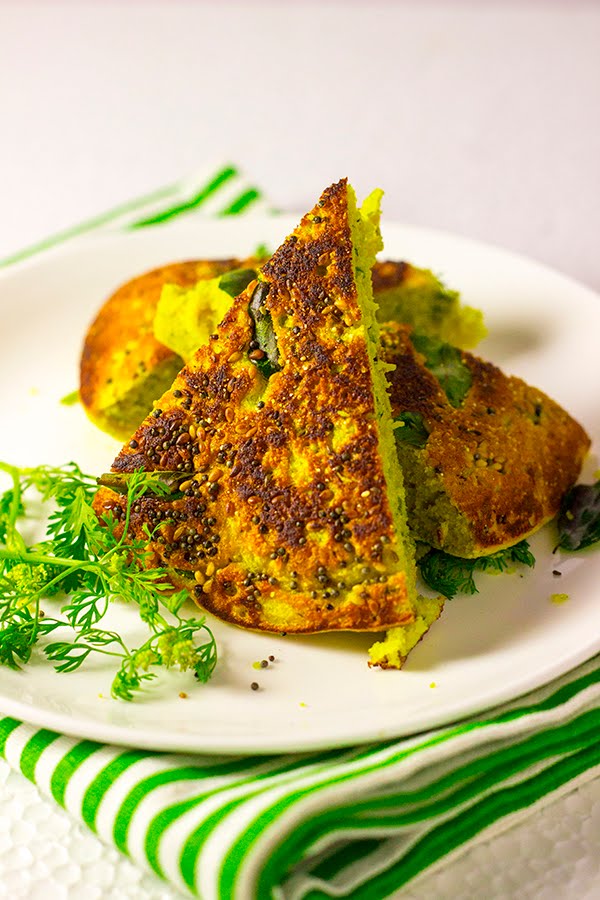
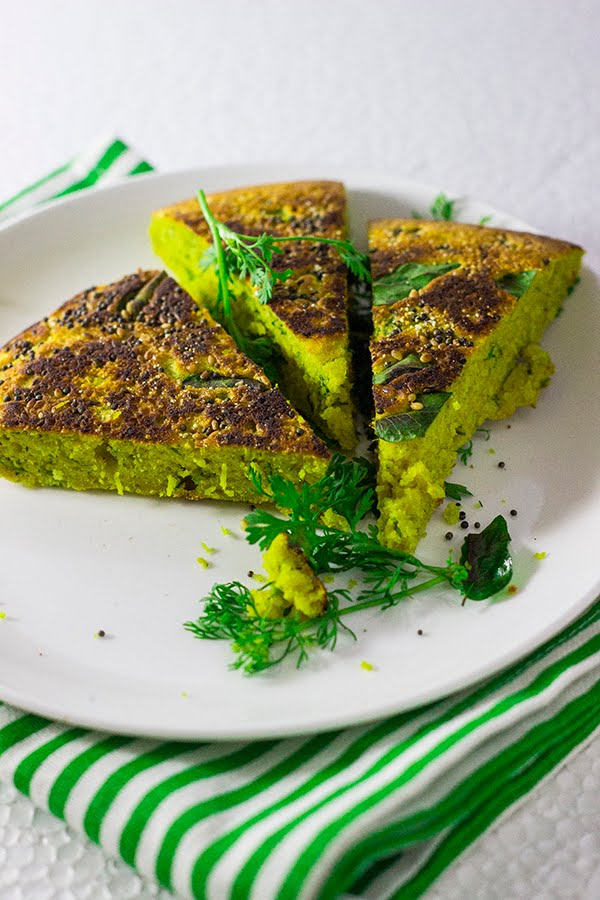
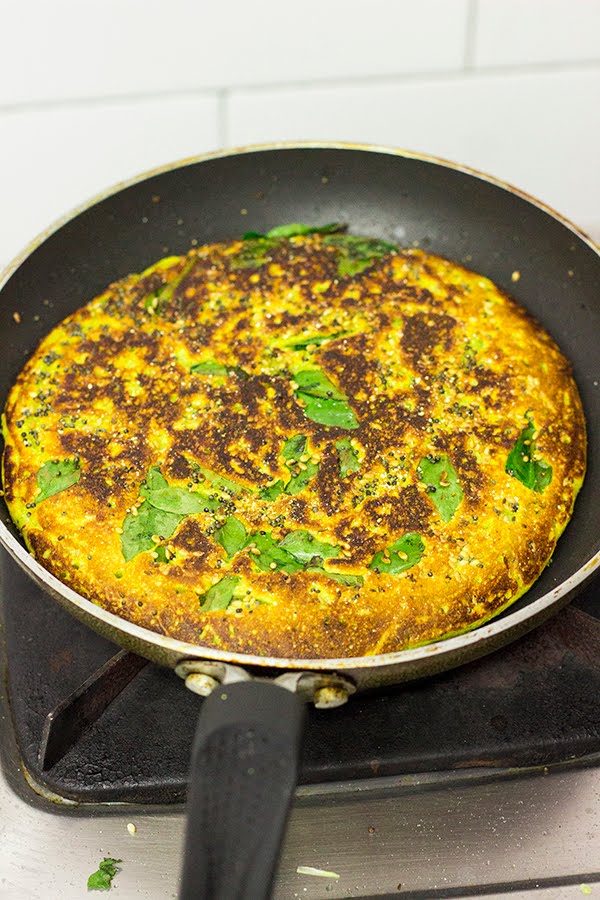
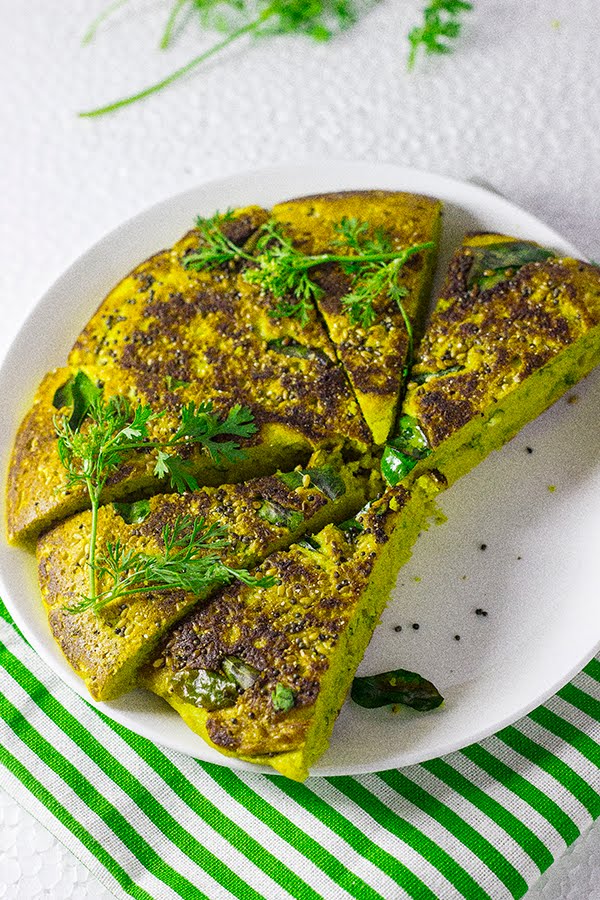
A lot of my food cravings are thanks to the magazines I read. Recently, in one of them, there was this delicious looking Kothimbir Vadi or Coriander Vada photo. It had the traditional recipe following the photo where the vadas are deep fried after being steamed. I love deep fried vadas but they are a big bane to my weight loss program, so I try to modify the recipe to make it healthier.

Kothimbir Vadi Coriander Chickpea Cake cilantro garbanzo steamed baked savory maharastrian vada wada pancake vegan

Recently, I had made the Gujrati Handvo which is a pan fried thick cake, very similar to the recipe in this post. Bells went off in my head! I could try the same with this kothimbir vadi. And to my delight, it turned out very well. Everyone loved it at home and they went missing in minutes.

It tastes the best with some coriander and mint chutney, but goes equally well with tomato ketchup. It is a very good option for a packed lunch as it carries well in boxes. It is versatile, you can have it for breakfast or as a tea time snack.

Step by Step recipe:

Kothimbir Vadi Coriander Chickpea Cake cilantro garbanzo steamed baked savory maharastrian vada wada pancake veganKothimbir Vadi Coriander Chickpea Cake cilantro garbanzo steamed baked savory maharastrian vada wada pancake veganKothimbir Vadi Coriander Chickpea Cake cilantro garbanzo steamed baked savory maharastrian vada wada pancake vegan

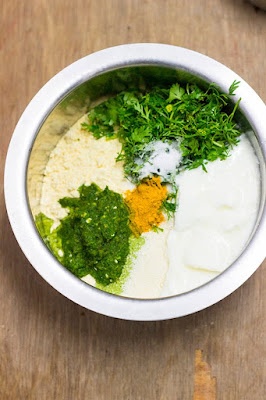
1) Blend the ginger, garlic,green chillies and half the coriander leaves into a paste along with a little water.
2) Add it to the chickpea flour along with the semolina, yogurt, coriander leaves, turmeric powder, salt and baking soda.
3) Add a little water to loosen the batter, I added around 1/4 cup.
4) Mix well and keep aside for 10-15

Kothimbir Vadi Coriander Chickpea Cake cilantro garbanzo steamed baked savory maharastrian vada wada pancake veganKothimbir Vadi Coriander Chickpea Cake cilantro garbanzo steamed baked savory maharastrian vada wada pancake vegan

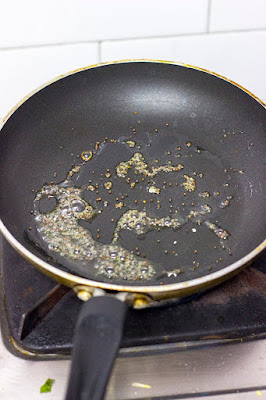
5) Heat a small non stick pan or a kadhai.
6) Add around 2 tsp of oil to it.
7) Once the oil is hot, add the half the mustard seeds.
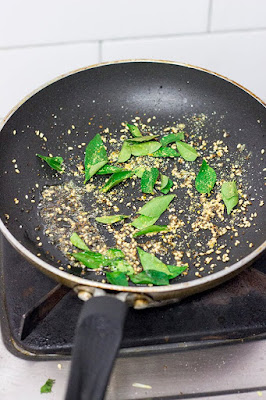
8) Once they splutter, add half the sesame seeds, half the carom seeds, half the asafoetida and half the curry leaves.

Kothimbir Vadi Coriander Chickpea Cake cilantro garbanzo steamed baked savory maharastrian vada wada pancake veganKothimbir Vadi Coriander Chickpea Cake cilantro garbanzo steamed baked savory maharastrian vada wada pancake vegan

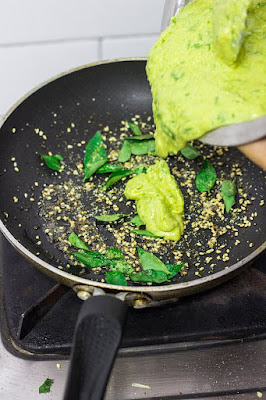
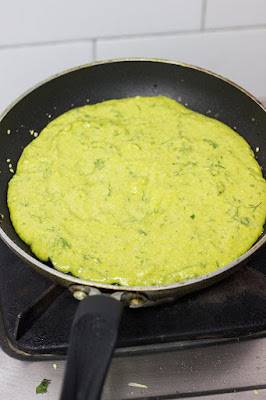
9) Now pour in half the batter.
10) Cover and cook on low heat for around 10-12 mins.

Kothimbir Vadi Coriander Chickpea Cake cilantro garbanzo steamed baked savory maharastrian vada wada pancake vegan

11) Now with the help of 2 spatulas, carefully flip the thick pancake.

Kothimbir Vadi Coriander Chickpea Cake cilantro garbanzo steamed baked savory maharastrian vada wada pancake vegan

12) Allow it to cook until the second side browns.

Kothimbir Vadi Coriander Chickpea Cake cilantro garbanzo steamed baked savory maharastrian vada wada pancake vegan

13) Remove from heat and cut into pieces. Serve hot with chutney or ketchup.


Kothimbir Vadi Coriander Chickpea Cake cilantro garbanzo steamed baked savory maharastrian vada wada pancake vegan

Kothimbir Vadi


Pan Fried Coriander and Chickpea Cake.

Recipe Type:  Snacks
Cuisine:          Indian
Prep Time:     30 minutes
Cook time:     45 minutes
Yield:              6-8 servings

Ingredients:


2 cups Besan / Chickpea Flour
1/2 cup Fine Semolina / Chiroti Rava
1/2 cup Yogurt / Curd
1 cup chopped Coriander Leaves
3-4 cloves of Garlic
1" piece of Ginger
2-3 Green Chillies
1/2 tsp of Baking Soda
1 tsp of Carom seeds / Ajwain
2 tsp of Sesame seeds / Til
1 tsp of Mustard seeds
1/2 tsp of Asafoetida/ Hing
1 tsp of Turmeric Powder
2 sprigs of Curry Leaves
4-5 tsp of Oil
Salt to taste
Water

Method:


Blend the ginger, garlic,green chillies and half the coriander leaves into a paste along with a little water.
Add it to the chickpea flour along with the semolina, yogurt, coriander leaves, turmeric powder, salt and baking soda.
Add a little water to loosen the batter, I added around 1/4 cup.
Mix well and keep aside for 10-15 mins.
Heat a small non stick pan or a kadhai.
Add around 2 tsp of oil to it.
Once the oil is hot, add the half the mustard seeds.
Once they splutter, add half the sesame seeds, half the carom seeds, half the asafoetida and half the curry leaves.
Now pour in half the batter.
Cover and cook on low heat for around 10-12 mins.
Now with the help of 2 spatulas, carefully flip the thick pancake.
Allow it to cook until the second side browns.
Remove from heat and cut into pieces.
Serve hot with chutney or ketchup.


Read more ...

Shankarpali / Shankarpole / Shakarpara (Video Recipe)


How to make shakkarpara recipe, shankarpole recipe at www.oneteaspoonoflife.com

Aren't road trips so much fun??? :D

Not knowing where you may end up, what you may end up eating is so thrilling.

We, hubby dearest and I, have more differences than similarities, but in this one matter we are made for each other. Come long weekend, and off we go. No clue of the destination, only the direction. No planning, no hotel booked, no real map in hand and no real food to eat. All we have is a hurriedly packed bag of clothes, my trusted camera, bottles of water and of course, my iPod and we are all set.

How to make shakkarpara recipe, shankarpole recipe at www.oneteaspoonoflife.com


We've done instant trips to Ooty, Wayanad and our latest was to Belur. We had a long long weekend last week. I miss it already, We started on the most peaceful day of the year - Oct 2nd, with our basic necessities dumped in the car. When we started out we weren't sure if we were planning to go north or west. Finally thought of west and I'd never seen ShravanBelgola, so that became Destination number 1, With some Kunigal Tatte idlis in our tummies, we scaled the hill to see the Bahubali statue. 

Halebeedu became destination number 2. The beautiful architecture of that temple puts to shame even the best architects today I think. The workmanship is awesome. If you haven't seen it, it's time to visit. Belur was our next destination. Similar to Halebeedu, the architecture is simply amazing. The only sad thing was by the time we reached Belur, night had fallen, so we could not really spend a lot of time there.

Bangalore was 5 hours away, it was 7pm, crazy as we are, we decided we should go ahead instead of returning, So off we went to Karkala, hubby dearest's hometown and spent our extremely looong weekend there.

How to make shakkarpara recipe, shankarpole recipe at www.oneteaspoonoflife.com

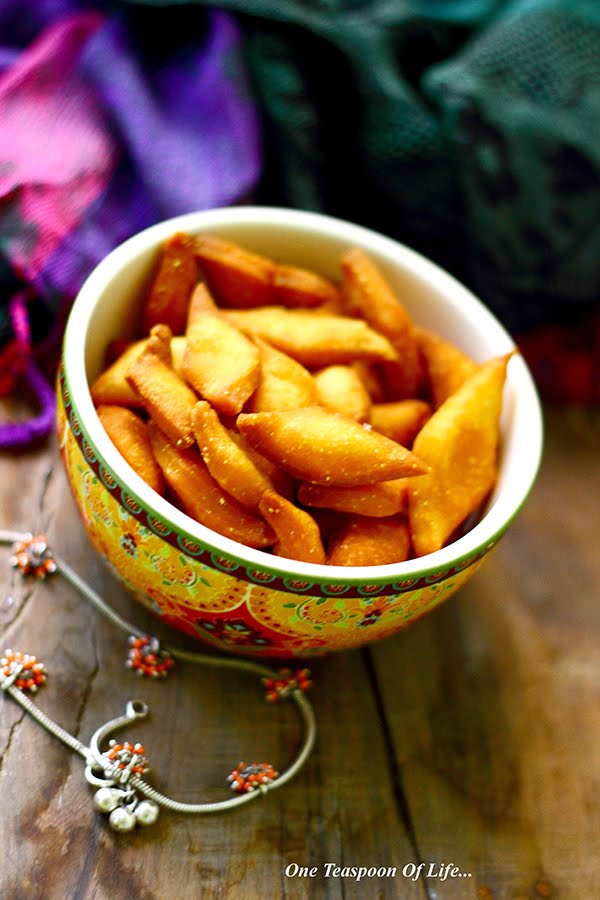
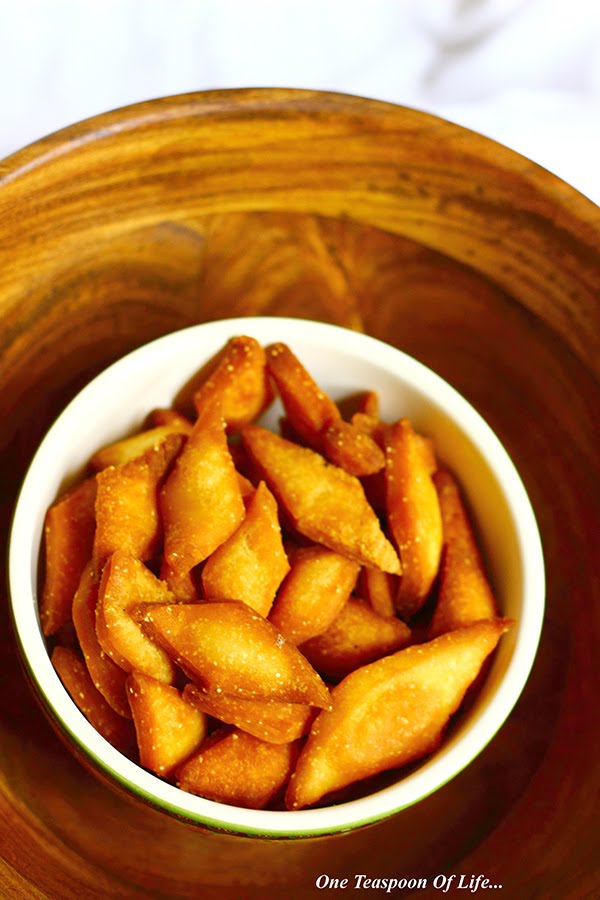
Back to my recipe now, Monday was a holiday for me. Alone on a holiday gets boring sometimes, So what better to occupy myself than cook, right? I've been wanting to make Shankapali for a long time now. This is a traditional Maharastrian fried sweet made especially during the festival of lights - Diwali. 

I'd gotten multiple recipes from my mom, mom in law, sister, her mom in law etc. I think you get the picture. I finally mixed them up and made my own recipe that turned out pretty great. Really! And I could not believe it is so easy to make. Only tricky thing is the temperature of the oil, Once you get that correct, you needn't worry about anything, 

The below recipe makes 150-200. Don't worry, they are sooo yummy, they won't last too long. They stay fresh for weeks in stored in air tight container.


How to make shakkarpara recipe, shankarpole recipe at www.oneteaspoonoflife.com


Video Recipe


If you made this recipe, let me know! Leave a comment here or on Facebook, tag your tweet with @oneteaspoonlife on Twitter and don't forget to tag your photo #oneteaspoonoflife on Instagram. You can also email me at onetspoflife@gmail.com. I'd love to see what you are upto. 

If you like this recipe, do not forget to share it with your friends and family! 

You can follow One Teaspoon Of Life is there on Facebook, Twitter, Instagram, Pinterest and Google+ or you can subscribe to One Teaspoon Of Life and receive all the latest updated via Email (How convenient!!)


If you liked this, you may also like:

  • Modak - Steamed dumplings stuffed with coconut and jaggery.
  • Khova Peda - Peda (fudge) made with milk from scratch.
  • Coconut Laddoo - Easy to make laddoos with only 4 ingredients.


Shankarpali / Shankarpole / Shakarpara


How to make shakkarpara recipe, shankarpole recipe at www.oneteaspoonoflife.comLight and crisp bite sized sweet snacks 

Recipe Type:  Dessert / Snacks
Cuisine:          Indian
Prep Time:     60 minutes (Includes resting of dough)
Cook time:     60 minutes
Yield:              250-300

Ingredients:


6-7 cups Maida / All purpose flour
3/4 cup Chiroti rava / Fine semolina
1 cup Milk
1 cup Ghee / Clarified butter
2.5-3 cups Powdered Sugar
1 tsp Salt
Oil for deep frying

Method:


Mix the milk and ghee and microwave on high for 30 seconds until the ghee melts. You can do this on stove too, just don't heat it too long or the mix may curdle. If the ghee is already liquid, skip this step.
Add the sugar to this mix and stir until it dissolves.
Add salt, semolina and the flour by the spoonfuls. Stir to remove lumps.
Once all the flour is added, knead the dough using your hands for 2-3 mins until it is one shiny mass.
If after kneading the dough, you feel it isn't sweet enough, then take a little milk and dissolve the required amount of sugar in it.Add this to the dough and knead well. Add a little more flour if needed.
Cover and allow it to rest for at least half hour.
Divide the dough into smaller balls and roll them out to approximately 3-5 mm thickness
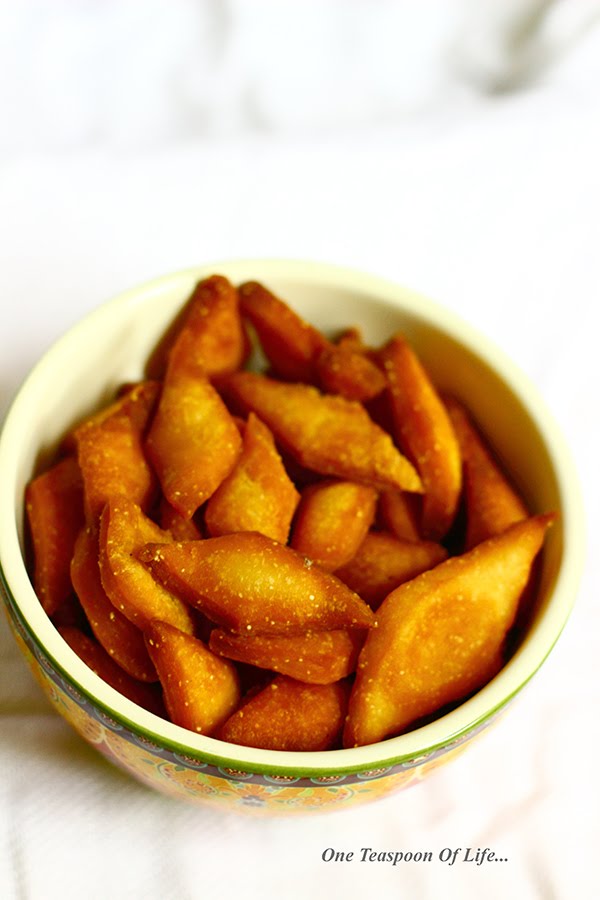
Cut into diamond shape with each side of appx 1.5-2cm. You can use the crimped cutter, pizza cutter or a knife. Don't worry if the shape or size is not consistent. It does not change the taste.
Heat oil in a thick bottomed kadhai.
The oil should not be too hot or too cold. I test fried a couple to get the temperature right. Between Low to Medium heat works well. If the oil is too hot, the shankarpali will turn brown but will not be cooked, too low will make them oily.
Remove them when they turn golden brown and crisp.


Read more ...

Aam Panna [Without Boiling] | Sweet and Spicy Raw Mango Cooler

During these hot summer months in Bangalore, I catch myself day dreaming about summers in Goa. Summer vacations, back then was our right, now just a dream. Off to play by 9am and back home only by 8.30pm managing to squeeze in a lunch only cause my friend was called in for lunch and I would be alone in the sun. It was bliss! Hot & sweaty, all tanned up, we would play everything from lagori to chor police. When the heat got to us, we would take juice breaks. Rasna was an all time favorite among kids back then. Come summer, and all the moms would make a bottle of Rasna and keep it in the fridge for these breaks of ours. It was in times like these, my best friend N introduced me to a more natural homemade drink - Aam Panna. I loved it so much, that she had to bring me some every summer when her mom made it.


Aam Panna is a raw mango cooler. So easy to make and oh so tasty. These days we catch it staring at us from the pages of restaurant menus, but that bright green concoction tastes nothing like the real thing. Firstly, the real thing isn't even bright green :) The recipe I have below is N's mom's. The extra additions I have made to it are all the optional ingredients. You can make it without all the optional ingredients and it will still taste equally good.


Aam Panna | Sweet and Spicy Raw Mango Cooler


Aam PannaA sweet and spicy beverage made using raw mangoes

Recipe Type:  Beverage
Cuisine:          Indian / Maharastrian /Goan
Prep Time:     3 Hours (Includes soaking time)
Cook time:     10 minutes
Yield:              4-5 Glasses / 750 ml

Ingredients:

3 or 500 gms Raw Mangoes
500-750 ml Water
8-10 tsp Sugar
1 tsp Pepper powder
A pinch Salt (Optional)
1/4 tsp Black salt / Kala Namak (Optional)
1/2 tsp Cumin powder / Jeera powder (Optional)

Method:


  • Wash and peel the raw mangoes
  • Take 500ml of water in a large container
  • Grate the mangoes and add them to the water
  • Cover and leave aside for 2-3 hours
  • Drain out the water into another container. Squeeze the pulp to remove any more juice available.
  • Add sugar, pepper powder, salt, black salt and cumin powder and mix well until sugar dissolves.
  • If it is concentrated, add more water and serve it on a hot summer day.


Notes:

1) The above recipe made 750ml of diluted juice for me. If the mangoes are very sour, you can store this as a concentrate and dilute it while serving.
2) The amount of sugar, salt and spices, all depends on the sourness of the mangoes being used. I suggest starting with half the quantity of sugar/salt/spices mentioned above and adding more as required.
3) N suggested this is usually served at room temperature, however I generally serve is slightly cooler.
4) This may not be suitable if you are suffering from throat infections, it may aggravate it. There is a slightly different version you can make if you are suffering from throat troubles, boil the mangoes until then are half cooked and then peel and grate. Follow the rest of the recipe as is. This version apparently does not aggravate throat infections.
5) This stores well in the fridge for 18-20 days. However, I doubt you will ever get the chance to test this :). Mine barely lasted 3.


Read more ...

Bombay Pav Bhaji

The reason I call this the Bombay Pav Bhaji is because I eat and make 2 kinds of Pav bhajis and it gets confusing about which one I'm talking about. The other one being the Goan Pav bhaji ( recipe will be posted soon). The Bombay pav bhaji is the red coloured pav bhaji most commonly eaten across India in restaurants or small chaat carts / gaadis . As a kid, eating out meant small snacks in the evenings, as restaurant culture had not yet caught on as it has today. We would go on my dad's Bajaj scooter to our favorite chaat cart/ gaadi in the market to eat Pav bhaji. With very low tolerance for spices, I was generally stuck eating just butter pav. But as I grew up, the spice tolerance also grew and I was able to enjoy this spicy red bhaji with the greasy yet amazingly tasty butter pav. I'm sure a lot of us have similar memories of the 1990s. Till date, whenever I go home, I make it a point to go to the same gaadi and eat the same pav bhaji. I don't know his secret recipe that makes it so yummy, but I do make it my way at home... The recipe that follows is the way I make it at home...


Bombay Pav Bhaji


A popular Bombay street food consisting of spicy mix vegetable mash and bread rolls/pav.

Recipe Type:  Snacks
Cuisine:          Indian
Prep Time:     30 minutes
Cook time:     30 minutes
Yield:              2-3 Servings

Ingredients:

3 medium Potato
1 cup chopped Tomato
3/4 cup chopped Onion
1/2 cup chopped Capsicum
1/4 cup chopped Carrot
1/2 cup Cauliflower (broken into small florets or chopped)
1/4 cup Green peas
3-4 cloves or 1 Tbsp paste of Garlic
1" piece or 1 Tbsp paste of Ginger
2 Tbsp Pav bhaji masala (In case you don't have this available, use Garam masala - 1/2 tsp, Coriander powder - 1 tsp, Amchur/ Dry mango powder - 1/4 tsp, Cumin powder - 1/2 tsp)
A pinch of Garam masala
2 Tbsp Butter
Red chilli powder - To taste
Salt - To taste
A handful of Coriander leaves
Lemon wedges

Method:

  • Boil and peel the potatoes
  • Boil the carrot, cauliflower, peas and capsicum.
  • Grind the ginger-garlic into a fine paste.
  • Heat 1 tbsp of butter in a kadhai or pan
  • Add the onions and fry until golden brown.
  • Add the ginger-garlic paste and fry until fragrant.
  • Add the tomatoes and fry until soft and cooked.
  • Add all the remaining vegetables and mash them.
  • Add all the spices and salt.
  • Add a little water to achieve the desired consistency
  • Boil for 5-6 mins
  • Add 1 tbsp of butter on top
  • Garnish with chopped coriander leaves
  • Serve hot with some lemon wedges, chopped onion and buttered Pav


Read more ...

Matki Usal

Matki or Moth beans are look very similar to moong beans but are brown in colour and are slightly smaller in size. They are a high source of protein and as most beans, very low in calories. I usually use these to make Misal, but on days I have less time, I am content with just the usal. You can make the same recipe with sprouted moong beans too...


Matki Usal


spicy curry made with moth beans and fresh coconutMaharastrian curry made with sprouted moth beans and fresh coconut.

Recipe Type:  Main Course
Cuisine:          Indian / Maharastrian
Prep Time:     15 minutes (Does not include sprouting time)
Cook time:     45 minutes
Yield:              3-4 servings

Ingredients:

1 cup dried or 2 cups sprouted Matki beans / Moth beans
1 Onion
1 Tomato
2-3 Green chillies
5-6 Curry leaves
A handful of Coriander leaves
3 tbsp desiccated Coconut
3 tsp Oil
1 tsp Mustard seeds
Salt
Water
Method:

  • To sprout the beans yourself, soak in matki beans in 2 cups of water overnight
  • Next morning, drain out the water from the container and cover the container with a steel plate and allow to rest in a warm place for 2 days or until the beans sprout.
  • Alternatively, you can also tie the beans in a muslin cloth and allow them to sprout.
  • Heat oil in a pan and add the mustard seeds.
  • Once they splutter, add the curry leaves, slit green chillies and chopped onions
  • Fry until the onions are done
  • Add chopped tomatoes and cook until they are done
  • Add the sprouts and enough water to cover them
  • Add salt and cover and cook until the beans are done.
  • Keep checking the beans, if it feels dry and the beans aren't done, then add more water and cover and cook longer. If the beans are done, and there is excess water, then remove the lid and cook on high flame until the water evaporates. This can take anywhere between 20-30 mins to cook.
  • Once the beans are done, garnish with desiccated coconut and finely chopped coriander leaves and serve hot with chapati
Read more ...

Steamed Modaks | Ukadiche Modak | Sihi Kadabu


How to make Ukadiche Modak Recipe at www.oneteaspoonoflife.com

Lord Ganesha's birthday aka Ganesh Chaturthi is celebrated with fervor and grandeur in Goa. People take a nice vacation from their hectic lives and move into their ancestral houses for a week usually. The entire family gets together to welcome Ganesha into their house and hearts. You can see colorful idols of Ganesha everywhere you turn. His throne is decorated with flowers and banana leaf. Everyone is dressed in their festive best.

And when everything is at its best, so is the Food. In India, every festival revolves around Food. Ganesh Chaturthi is no exception. While one may not make as many variety of sweets and snacks as one does for Diwali, there are a few that are made especially for beloved Ganesha only.

How to make Ukadiche Modak Recipe at www.oneteaspoonoflife.com

Modaks are considered to be Lord Ganesha's favorite sweet and a must on Ganesh Chaturthi.
Modaks are made in myriad different ways. Some deep fry it while some steam it. Sometimes the filling is of fresh coconut and jaggery, while sometimes it is dry coconut and sugar. I have also seen a recipe where it is filled with chocolate. Sometimes all this is skipped and modaks are just modak shaped pedas.

In our culture, we do not deep fry modaks. My grand mother was totally against deep frying anything on Ganesh chaturthi so we always made the steamed version stuffed with fresh coconut and jaggery. And this is the version I absolutely LOVE.
Steamed Modaks or Ukadiche Modak or Sihi Kadabu have the outer layer made of a rice flour dough and a stuffing of fresh coconut, jaggery (unrefined sugar) and cardamom powder.

To make the outer layer of rice flour, the rice flour is added to boiling water and mixed until it forms a stiff dough. Getting the consistency of the dough right is probably the toughest part of making the Modak. If the dough isn't made properly, there are chances that the modaks will split while steaming, which, believe me isn't really as disastrous as it sounds. They still taste great and means just some more modaks for the Cook. Hurray!!

How to make Ukadiche Modak Recipe at www.oneteaspoonoflife.com

The filling is made by cooking together grated fresh coconut and jaggery. In this recipe, the jaggery cannot be replaced with refined sugar, as it just will not live up to the taste and texture of the modak. The mixture is cooked until it the water almost evaporates. Cooking it beyond that will cause the jaggery to crystallize and the filling will become one big hard lump.

These days there are moulds available to shape the modaks after filling them. Unfortunately, as you can see in the pictures, I wasn't aware of it until I'd finished making them, hence very amateurish looking modaks in my house this year. But who is worried about the looks when they tasted SO delicious.

If you are making this for Naivedyam for Lord Ganesha, please do not taste anything and follow the recipe and your instincts and it will turn out great.

How to make Ukadiche Modak Recipe at www.oneteaspoonoflife.com

If you liked this, you may also like:
  • Khova Peda - Simple peda made from milk solids and sugar.
  • Kaju Katli - Fudge or Barfi made from cashewnuts and sugar. A favorite in every household.
  • Coconut Laddoo - A simple laddoo made from coconut powder and condensed milk in under 1 hour.
  • Kadle Bele Payasa - Kheer made with rice, chana dal and coconut
How to make Ukadiche Modak Recipe at www.oneteaspoonoflife.com


Steamed Modaks | Kadabu | Sweet Dumplings


How to make Ukadiche Modak Recipe at www.oneteaspoonoflife.comModaks are traditional steamed Indian dumpling made from rice flour, coconut and jaggery. Served as an offering to Lord Ganesha in West and South India. 

Recipe Type:  Dessert
Cuisine:          Indian
Prep Time:     30 minutes
Cook time:     60 minutes
Yield:              9

Ingredients:


0.75 cup Coconut
0.5 cup Jaggery
1 tsp Cardamom
0.75 cup Rice flour
1.5 cups Water
1 tsp Ghee or Oil
0.25 tsp Salt

Method:


In a kadhai, mix the coconut and jaggery and cook on low flame. Keep stirring the mixture to avoid burning. Cook until the mixture is almost dry. Do not overcook as then the jaggery will harden. Add the cardamom powder and keep aside to cool.
In another pan, bring 1 cup of water to a  rolling boil. Add the salt and the ghee and remove it from the heat.
Add rice flour by the spoonful and keep stirring to avoid forming lumps.
Add more water if needed. The dough should be slightly stiff yet malleable.
Keep the pan back on the stove and keep the flame low.
Keep stirring until the whole dough becomes one mass. It will start sticking to the spoon/ spatula. It took me around 5 mins. Take a small marble sized piece of dough and press it using  your thumb and index finger, it should not break into pieces. Nor should it stick to your hand. If the consistency or the texture is not correct, the modaks may split while cooking. If it is your first time, do not fret over a few split ones.
Allow this to cool for some time.
While it is still warm, take a small ball of flour and flatten it. Place a small ball of the filling inside it and use your hands and stretch the flour to cover the filling.
Shape the modaks accordingly.
Steam the modaks in a steamer for around 8-10 mins. I used an idli steamer, you can use a cooker without the whistle.
Read more ...

Jhunka

Jhunka Bhakri is a simple but thoroughly enjoyed meal in North Karnataka. Jhunka takes hardly 10 mins to prepare and is a welcome substitute to the regular sabzi once in a while. So on Friday night, tired of cooking ,once again, and bored of eating out. once again. This was the quickest fix for dinner.


Jhunka


curry made with chickpea flour and tomatoesQuick Maharastrian curry made from chickpea flour/ besan and tomatoes.

Recipe Type:  Side
Cuisine:          Indian / Maharastrian
Prep Time:     10 minutes
Cook time:     20 minutes
Yield:              2-3 servings

Ingredients:

1/2 cup Besan / Gram Flour
1 cup Water
1 Tomato
4-5 Curry Leaves
2 Green Chillies
1 tsp Cumin Seeds / Jeera
2 tsp Oil
1 tsp Turmeric Powder / Haldi
Salt

Method:

Heat oil in a kadhai and add the cumin seeds
Once they brown slightly, add the curry leaves, chopped tomatoes and chopped chillies and fry for 2 mins
Add 1/2 a cup of water and cook until the tomatoes are soft
Add the turmeric powder
Mix the besan in the remaining water until it is a smooth paste
Add this to the kadhai and add salt
Heat on low flame until the raw taste of the besan disappears. Keep stirring to prevent the jhunka from burning
Add more water if desired
Eat with jowar rotti or phulka


Read more ...

Sabudana Khichdi or Sabakki Khichdi

The moment I mention I'm making Sabudana Khichdi, I see lit up eyes at home. Sabudana Khichdi is a famous Mahashtrian Upvas (fasting) meal. It is basically a stir fry of fluffed up Sabudana or Sago Pearls with boiled potato and crushed peanuts.


For a long long time (read 18 years), I assumed Sabudana was a whole grain. The name is misleading. "Dana" means grain in Hindi, so I assumed it is a grain. Much later the internet opened my eyes to reality. It is a man made grain.

I don't know what to classify the Sabudana Khichdi as - slow food or fast food? It is super quick to make once you have fluffed up sabudana. But to get fluffed up sabudana requires some advance planning. I know the prep isn't as much, but you still need to soak the sabudana.


Everyone loves it when it is well made. There are so many ways to mess up this otherwise simple khichdi, go through the "Quick Tips" list below:

Quick Tips:

1) To get fluffy Sabudana or Sago, soak it in water for around 15-20 minutes. Then drain out the water completely. Cover and leave it to fluff for 2-3 hours.
2) If you plan to make it for breakfast, you can follow step (1) and then after draining out the water, cover and leave it in the fridge overnight.
3) If you do not remove the water completely, it tends to get sticky and becomes one big lump, so drain the water completely.
4) Do not soak for more than half hour to one hour depending on the variety of Sago / Sabudana you have, they tend to dissolve in water.
5) Don't add any water while cooking. If you need to loosen it, add oil. Water will make it sticky and gluggy.


Sabudana Khichdi or Sabakki Khichdi


Sabudana Khichdi
A famous Maharastrian Upvas snack made with sabudana or sago pearls and peanuts.

Recipe Type:  Breakfast / Snacks
Cuisine:           Maharastrian
Prep Time:     2 hours
Cook time:     15 minutes
Yield:                Serves 2

Ingredients:

1 cup Sago Pearls or Sabudana
1 Potato(boiled, peeled and chopped into 1/2 inch cubes)
8-10 Curry leaves
1-2 Green Chilli (chopped)
3-4 Tbsp Peanuts
1/2 tsp Lime juice
4 tsp Oil
1 tsp Cumin seeds
Salt to taste
A handful of fresh Coriander leaves for garnish

Method:

Wash the sabudana and leave it aside for 2-3 hours until the sabudanas are soft. In case you don't have enough time to leave it aside in the morning, wash them the previous night, drain the water and store in a box in the fridge. You can use it in the morning. Refer to the Quick Tips above for more info.
Roast the peanuts and grind them to a powder in a mixer. This can also be done the previous night and kept ready for morning. You can replace this with flax seed powder as well or roasted pumpkin seed powder.
Heat oil in a kadhai and add the cumin seeds. Once the seeds splutter, green chillis,curry leaves and potato.
Cook for around 1-2 mins. Add the sabudana and salt.
Stir on stove for around 2-3 minutes, then add the peanut powder. Mix well.
Remove from heat and add coriander and lime juice and serve hot.
Read more ...