Showing posts with label Indian. Show all posts

Lauki Kofta Biryani Recipe | How to make kofta biryani [Video]


Lauki Kofta Biryani is a spiced vegan rice dish made with fried dumplings of bottle gourd (lauki), spices, mixed vegetables and fragrant long basmati rice.  Perfect for Sunday lunch!

In a hurry? Jump to Video or Jump to Recipe

vegetable biryani


Wanna know a secret?

We NEVER eat biryani in restaurants!

At least, I may once in a blue moon, but Raj absolutely detests biryani from restaurants. But whip it up at home and he'll enjoy it. We are yet to find a restaurant biryani that hits all the right buttons for us. We usually find that restaurant biryanis are high on spice and low on flavor, either have no vegetables or have undercooked vegetables and like all takeout, extremely greasy. No wonder he abhors it, which is quite surprising for a lot of friends. Bangalore is almost Biryani Town, with at least 2-3 biryani outlets on every main road and here, there are people who won't even look at one.

So, once in a while, just to treat ourselves, I put on my chef's hat and cook up a biryani that suits our tastebuds and our sensitive tummies. I add spices for flavor but reduce the chilli powder, so we still taste flavor, but not get burned by the heat. I always add a lot of vegetables, because I simply love the different textures. And a Biryani isn't a Biryani for me if it is not made with fragrant Basmati rice. 

The story of this Vegan Lauki Kofta Biryani, goes back a few months, when I was irritated with Raj for being fussy during vegetable shopping. He kept rejecting all my choices of vegetables for the week, that I lost it and made him shop what he wanted for the whole week. In came the lauki or bottle gourd, one of my least favorite of the veggies. I'm not sure even he likes it. But there it was staring at me from my fridge for a week. And finally on a Sunday, when I was in a good mood, I decided this lauki deserved to be finally eaten and this Lauki Kofta Biryani was born. And since, I've made it multiple times and we've all had a hearty sunday lunch.

vegetable biryani


Lauki Kofta Biryani, as the name suggests, contains koftas or fried dumplings made from grated lauki. The water from the grated lauki is squeezed out and a few spice mixes are added for flavor. I added chickpea flour or besan and corn flour as the binding agent to make the koftas. You can add potatoes or breadcrumbs or even grated paneer. I've tried with Paneer and it gave me these amazing rich and chewy koftas. You can either shallow fry the koftas, pan fry the koftas or even deep fry them. If your kofta feels crumbly after cooking, add it to the biryani only while serving, instead of cooking it in the masala.

I added a lot of boiled vegetables to the Biryani, but you can skip it and let only the kofta shine. If you want to add vegetables, you can add cauliflower, beans, carrots, green peas, potato, or broccoli. Cut them chunky and cook them to your liking. I like my beans completely cooked, while my cauliflower still crunchy. 

Use aged Basmati rice to get the best results. I always cook my biryani rice with spices for added flavor, but if you don't have whole spices, you can give them a miss. Or if you want a change, you can also cook the rice with saffron for a richer feel. 

The masala made with onions and tomatoes is what imparts flavor to the biryani. A Biryani does take more oil than a pulao, don't skimp on it too much, it will impact the flavor. The oil is what ensures that the rice takes on the flavor of the masala. I used store bough biryani masala, you can grind whole spices to make your own too. 

Lauki Kofta Biryani can be prepped in advance too. The rice can be cooked a few days before and so can the masala. Vegetables too can be boiled in advance. I would only suggest making the koftas fresh.

Biryani tastes best when served with raita or salan. You can try this Boondi Raita to go with the Biryani,

vegetable biryani


If you made this recipe, let me know! Leave a comment here or on Facebook tag your tweet with @oneteaspoonlife on Twitter and don't forget to tag your photo @oneteaspoonoflife on Instagram. You can also email me at onetspoflife@gmail.com I'd love to see what you are up to.


If you like this recipe, do not forget to share it with your friends and family! 


You can follow One Teaspoon Of Life on FacebookTwitterInstagramPinterest or you can subscribe to One Teaspoon Of Life and receive all the latest updated via Email


Video Recipe


--------------------------------------------------------------------------------------------------------------------------

Lauki Kofta Biryani
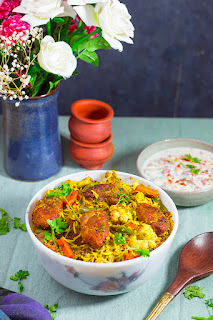

vegetable biryaniLauki Kofta Biryani is a spiced vegan rice dish made with fried dumplings of bottle gourd (lauki), spices, mixed vegetables and fragrant long basmati rice.

Recipe Type:  Main
Cuisine:            Indian
Prep Time:     30 minutes
Cook time:     60 minutes
Total time:     90 minutes
Yield:                Serves 3-4


Ingredients:


For the Lauki Kodta


1 Bottlegourd
3-4 Tbsp Besan (chickpea flour)
1 Tbsp Cornflour
0.5 tsp Garam Masala
0.5 tsp Turmeric Powder
0.5 tsp Red Chilli Powder
Salt to taste
Oil to fry

For the Biryani


1 cup Basmati Rice
2 medium Onions, sliced
1 cup Tomato Puree
2 cups mixed boiled Vegetables (cauliflower, carrots, beans)
0.5 cup Coriander leaves, chopped
0.5 cup Mint leaves, chopped
1 Tbsp Ginger Garlic Paste
2 Tbsp Biryani Masala
0.5 tsp Turmeric Powder
1 tsp Shah Jeera (Caraway seeds)
1 Tbsp Dagad Phool (black stone flower)
2 Cloves
1 Green Cardamom
1 Black Cardamom
1 Bay leaf
0.5" Cinnamon
4 Tbsp Oil
Salt to taste
Water as required

Method:


1. Wash the basmati rice 4 to 5 times until the water runs clear. Soak in 2 cups water and keep aside for 30 minutes.
2. After 30 minutes, boil 1.5 cups water in a pan and add 0.25 tsp salt, cloves, green cardamom, black cardamom, bayleaf and cinnamon to the water. Allow the water to come to a rolling boil.
3. Drain the rice and add to the water. Cover and cook on low to medium heat until the rice is cooked and all the water is absorbed.
4. Allow to cool uncovered.
5. To make the kofta, peel, cut and deseed the bottle gourd. Grate or shred the bottle gourd.
6. Add a little salt and keep aside for 10 minutes.
7. After 10 minutes, squeeze out the water from the bottle gourd.
8. Take the squeezed bottle gourd in a bowl. Add in the salt, red chilli powder, turmeric powder, garam masala, corn flour and besan. Mix well until combined. If the batter feels wet, add more besan.
9. Heat oil for frying the koftas, you can either deep fry or shallow fry the koftas.
10. Shape the koftas and fry until browned and crisp. Remove from heat and keep aside.
11. Heat 4 Tbsp oil and add in shah jeera and dagad phool. Saute for 30 minutes.
12. Add in sliced onions and fry until the onions are golden brown.
13. Add in the ginger garlic paste and saute until fragrant.
14. Add the tomato puree and cook on low-meidum heat for 6-8 minutes or until oil separates.
15. Add in the biryani masala and turmeric powder, mix well. Cook on low heat for 3-4 minutes.
16. Add in chopped coriander and mint leaves.
17. Add in the boiled vegetables and the kofta. Mix well until combined.
18. Add in the basmati rice and mix until completely combined.
19. Serve hot with raita.


If you liked this, you may also like:

Spicy Soya Biryani made with soya chunks, mix vegetables and basmati rice
Soya Biryani

How to make jackfruit biryani, jackfruit biryani recipe, vegan jackfruit recipe, raw jackfruit recipe, young jackfruit recipe, how to make kathal biryani, kathal biryani recipe, kathal recipes at www.oneteaspoonoflife.com
Jackfruit Biryani
How to make mushroom biryani recipe at www.oneteaspoonoflife.com
Mushroom Biryani
How to make methi rice recipe at www.oneteaspoonoflife.com How to make Fenugreek Pilaf recipe How to make Methi Pulao recipe at One Teaspoon Of Life
Methi Rice

How to make ghee rice recipe at One Teaspoon Of Life www.oneteaspoonoflife.com
Ghee Rice
Indian rice pilaf made with corn, spinach and whole spices
Corn Spinach Pulao
raw mango rice
Raw Mango Rice

pudina pulao, mint rice, mint pulao
Mint Rice
Palak Rice


Read more ...

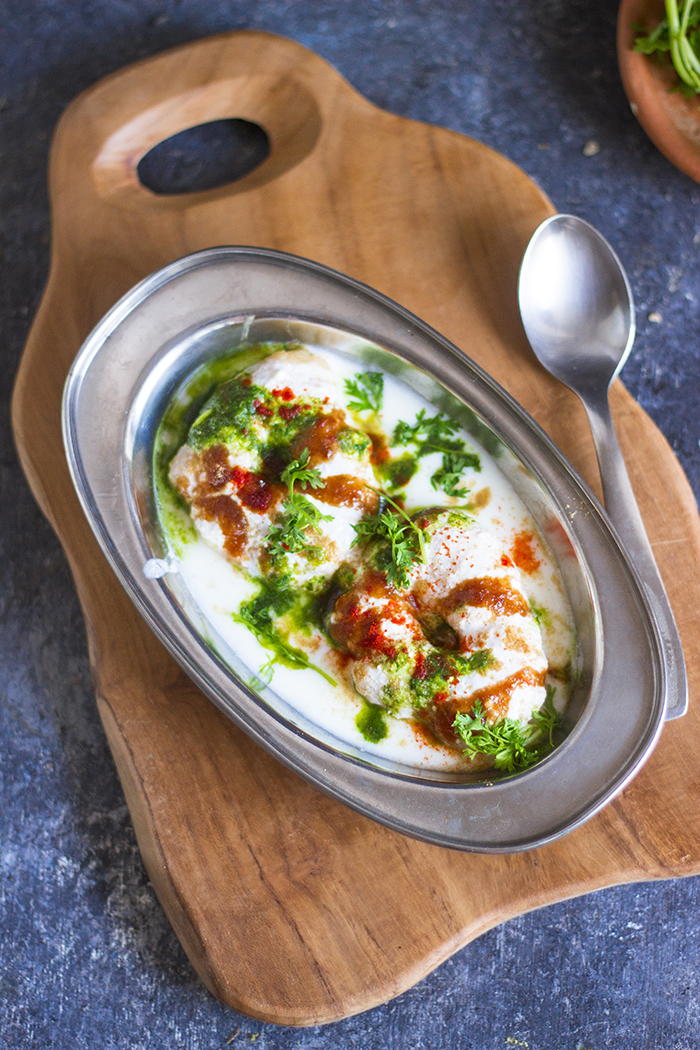
Dahi Vada Recipe | How to make Dahi Vada [Video]


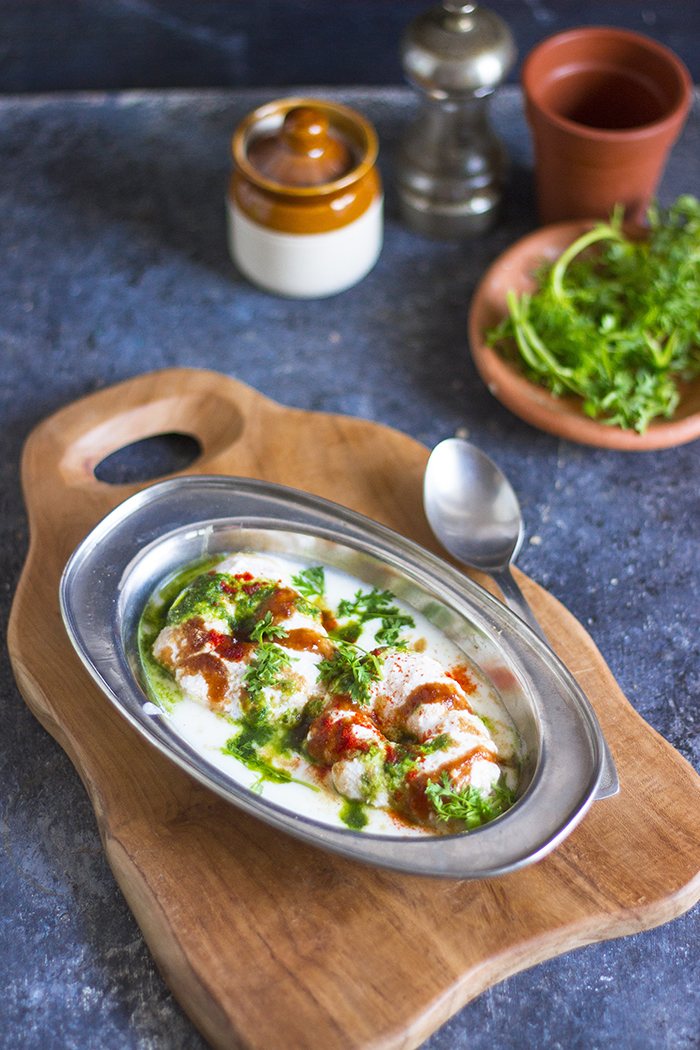
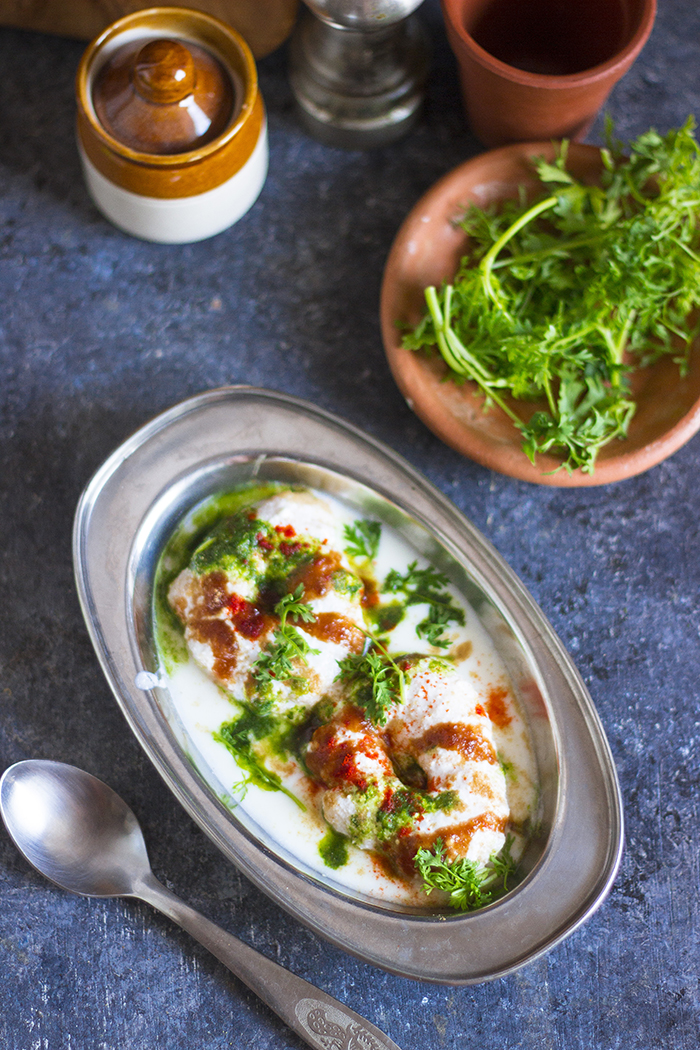
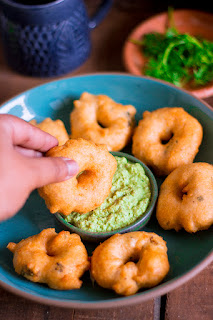
It's still Summer, the perfect time to have these chilled Dahi Vadas. Dahi Vada is a popular Indian snack that consists of soaking a savory lentil donut in yogurt and topping with a combination of sweet and spicy chutneys and some spice powders. 

In a hurry? Jump to Video or Jump to Recipe


curd vada

Cool and refreshing! Just 2 words to describe this Dahi Vada.

Dahi Vada has been a favorite of mine since childhood, the soft vadas dunked in a sweet dahi (yogurt), what's not to love. And in a place like Goa which is always hot, the chilled vadas are always welcome.

Apart from eating cool stuff, how do you keep your cool?


curd vada


A few months ago, I had posted the recipe for Medu Vada or Uddina Vada, that forms the base of this Dahi Vada. I never claim to be an expert or a chef, I am just a home cook who loves cooking and taking photos of food. But when I posted the recipe of Medu Vada on one of the Facebook Groups, a nasty man commented that it is okay for me to make misshapen vadas for home, but if I had to post it on Facebook, I should make them perfectly round. I was so upset when I read the comment, but Raj calmed me down and asked me to ignore it. And then I realized the power of women. By the time I woke up the next morning, a bunch of women had replied aptly to the man as well as asked me to continue posting. I haven't thanked each of those women personally, but I would like to take this opportunity to thank all of them once again. The way all the women got together and defended me, made me feel so special and loved. 

It reaffirmed my belief that Food Connects People!

Also, it got me thinking, why we assign so much importance to perfection and detail. Why do vadas or laddoos have to be perfectly round? Why do we want perfectly concentric circles in our Chaklis?Why to vegetables have to be blemish free and shaped perfectly? While I got thinking about all this, it reminded me of watching Jamie Oliver talk about "wonky vegetables" and how that desire for perfection led to so much food waste around the world. As a food blogger, it is my job to make my food look as good as possible, but I would never resort to using food coloring or wax or any of the other tactics advertising companies use to sell food. So while my food may be imperfect in shape and appearance, I can assure, it is food that I eat as well as I serve to my family. 

Deep thoughts, I know for a very light and refreshing recipe post, but I had to say it.

So don't worry if your food or your clothes or your hair doesn't look perfect. Own it! Ignore the bad and absorb the good.

Wishing you a Sunny day ahead!

curd vada

If you made this recipe, let me know! Leave a comment here or on Facebook tag your tweet with @oneteaspoonlife on Twitter and don't forget to tag your photo @oneteaspoonoflife on Instagram. You can also email me at onetspoflife@gmail.com I'd love to see what you are up to.


If you like this recipe, do not forget to share it with your friends and family! 


You can follow One Teaspoon Of Life on FacebookTwitterInstagramPinterest or you can subscribe to One Teaspoon Of Life and receive all the latest updated via Email


Video Recipe


--------------------------------------------------------------------------------------------------------------------------

Dahi Vada Recipe


curd vadaDahi Vada is a popular snack in which a savory lentil donut is soaked in sweet and salty yogurt and then topped with sweet tamarind chutney, spicy green chutney and spice powders. Served chilled, this make a perfect summer snack.

Recipe Type:  Snacks, Breakfast
Cuisine:            Indian
Prep Time:     4 Hours
Cook time:     60 minutes
Total time:     5 Hours
Yield:                Makes 12 small dahi vadas

Ingredients:


1 cup Urad Dal
1 Tbsp Rice Flour
6-8 Curry leaves, finely chopped
1 Green Chilli, finely chopped
0.5 tsp Pepper, freshly crushed
A pinch of baking soda
500gms Yogurt
4-5 Tbsp Tamarind Chutney
4-5 Tbsp Green Chutney
1-2 Tsp Cumin Powder
1-2 tsp Red Chilli Powder
Salt to taste
Oil to fry
Water as required
Coriander leaves to garnish

Method:


1. Wash the urad dal and soak the dal in water for around 3-4 hours.
2. Drain the dal and grind into a fine batter. Use as less water as possible. The batter should be thick.
3. Heat oil in a kadhai to deep fry the vadas.
4. While the oil heats, add in the rice flour, green chilli, pepper, baking soda and salt. Mix well until combined. IF the dough feels watery, add a little more rice flour.
5. Once the oil is hot enough, wet your hands and take a spoonful of batter onto your fingers. Using the wet finger of the other hand, make a hole in the center. Watch the video for help on how to do this.
6. Gently drop the vada in the oil.
7. Fry on high heat for 1 minute, then lower the heat slightly and continue to cook until the vada becomes golden brown.
8. Now gently slide this batter into the oil. Stir the vada occassionally and flip it, so that it cooks evenly. Cook until golden brown on both sides.
9. Remove the vada from the oil and immediately drop in a bowl filled with water.
10. Gently immerse the vada in the water and let it soak for 30 minutes.
11. Meanwhile, whisk the yogurt (dahi) until smooth. Add in salt to taste. You can also add in a little sugar and a tempering of mustard seeds to the yogurt.
12. To serve, take 1-2 vadas and gently squeeze out the water and place in a serving bowl. Spoon over some of the yogurt (dahi) along with a little of the yogurt, top with a spoonful of tamarind chutney, green chutney and sprinkle cumin powder and red chilli powder. Garnish with chopped coriander leaves and serve.
13. If planning to serve later, then squeeze out all the vadas and place in a large bowl, pour the yogurt on it and chill in the fridge. Top with the chutneys and spice powders before serving.


If you liked this, you may also like:

Indian accompaniment made with yogurt, boondi (fried gram flour balls) and spices
Boondi Raita

dahi sandwich yogurt sandwich hung curd sandwich
Dahi Sandwich
medu vada medhu vada with chutney
Medu Vada


Read more ...

Maharashtrian Tomato Saar Recipe [Video]


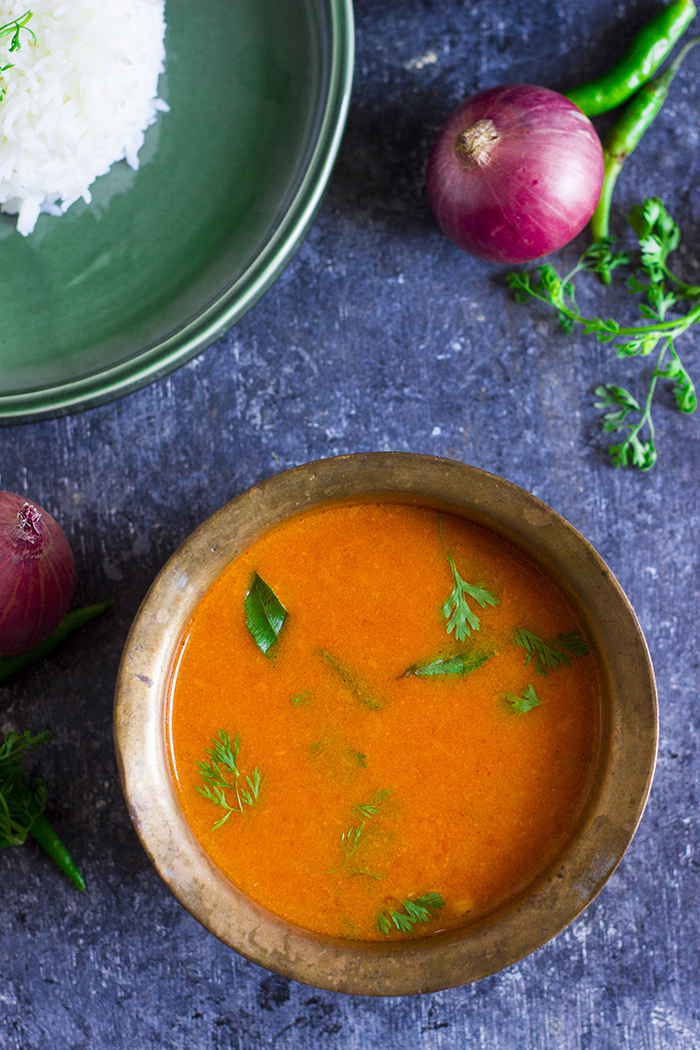
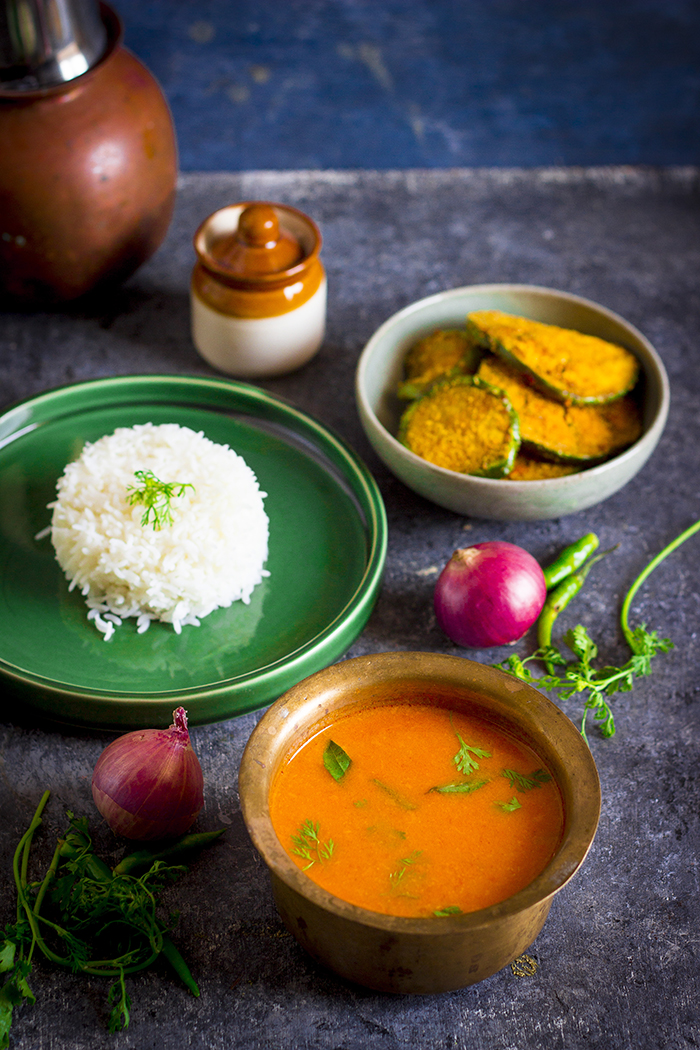
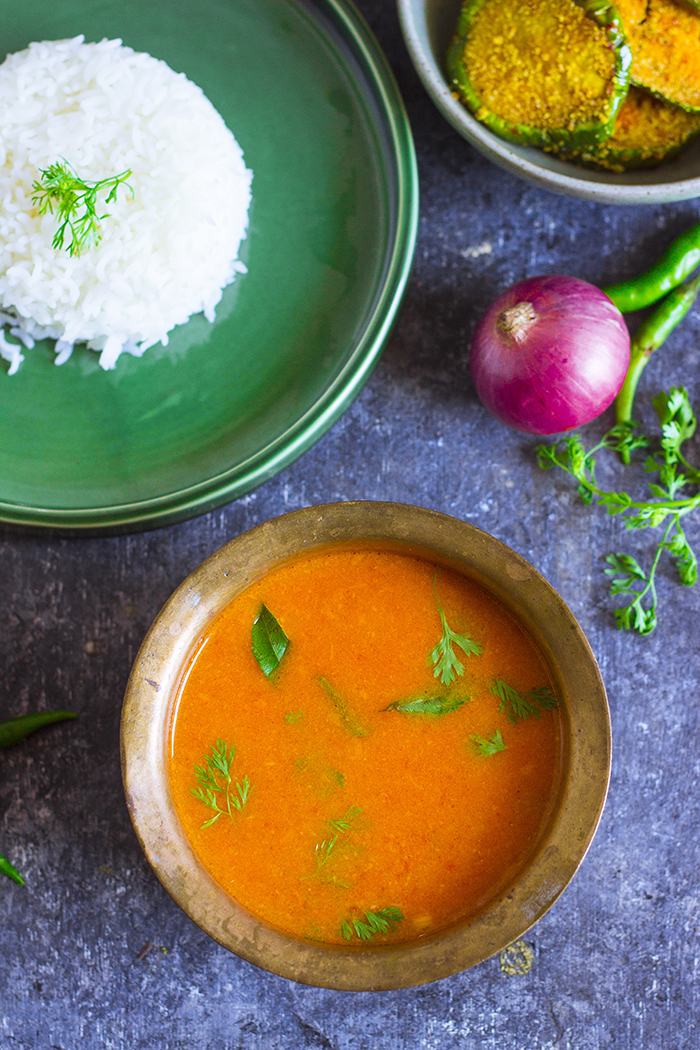
Nothing says Summer like red juicy ripe tomatoes. Use the tomatoes to make this simple vegan curry from India. The Tomato Saar is vegan and gluten free.

In a hurry? Jump to Video or Jump to Recipe

Vegan tomato curry from Maharashtra, Maharshtrian tomato saar

Red juicy tomatoes = Summer, right?

Summer is the best and worst time to be in India. Yeah. Let's go with the bad thing first, it is worst because of the heat. If it weren't for the summer rains in Bangalore, I would probably be swimming in a pool of my own sweat. Ugly visual, scratch that. But the best past about Summer, the best fruits and vegetables. 

If you want to have the sweetest fruits, the juiciest fruits, you have to come to India in Summer and then probably hide yourself in an AC room the entire day. 

Come April, I had a good list of recipes I wanted to cook for Summer and share with you guys. As predicted, I never stuck to that list. I really never do, I don't know why I bother. Instead of making what I had so patiently planned (I even set a Google Calendar reminder, I know, that's deep), I went on cooking with what I found in the market. I think it worked out better this way. At least I have been cooking seasonal to a large extent.

Vegan tomato curry from Maharashtra, Maharshtrian tomato saar

This Tomato Saar is just that, seasonal and delicious. But then you get tomatoes all year round, so what's your excuse to not make this? I assume you have nothing, so read ahead.

The history, I first encountered this Tomato Saar when I was in College. We were working to change the hostel mess menu when someone suggested this, and the cooks (lazy as they were) actually agreed to make this. They made it for the trial menu one weekday lunch and for some reason, while I really enjoyed it, it never did make the cut to the final menu. I tend to blame the cook's stubbornness to change, that led to it being out, because it was so delicious. A term I rarely used on anything that came out of the hostel kitchen.

Ever since, I've made this many times when I want a quick curry that does not require me to boil dal or make some elaborate masala. This Tomato Saar is simple, quick, vegan, healthy, gluten free and foremost, it is tasty. It is tangy and spicy and pairs perfectly with rice or with bread. 

To make the Tomato Saar, boil tomatoes, blend them with coconut, garlic and chillies, boil this puree again and season it. That's literally it! I'm really not giving you any excuses to chicken out, am I?

So wishing you a Happy Summer! May you cook with the best of the season's produce.

Vegan tomato curry from Maharashtra, Maharshtrian tomato saar


If you made this recipe, let me know! Leave a comment here or on Facebook tag your tweet with @oneteaspoonlife on Twitter and don't forget to tag your photo @oneteaspoonoflife on Instagram. You can also email me at onetspoflife@gmail.com I'd love to see what you are up to.


If you like this recipe, do not forget to share it with your friends and family! 


You can follow One Teaspoon Of Life on FacebookTwitterInstagramPinterest or you can subscribe to One Teaspoon Of Life and receive all the latest updated via Email


Video Recipe


--------------------------------------------------------------------------------------------------------------------------

Maharashtrian Tomato Saar Recipe


Vegan tomato curry from Maharashtra, Maharshtrian tomato saarMaharashtrian Tomato Saar is a simple yet flavorful vegan curry made from tomatoes and coconut. The dish is made popularly in the Western state of Maharashtra in India. 

Recipe Type:  Curry
Cuisine:            Indian
Prep Time:     10 minutes
Cook time:     30 minutes
Total time:     40 minutes
Yield:                Serves 2


Ingredients:


3 large Tomatoes, diced
0.75 cup grated Coconut
2 cloves Garlic
2 Green Chilli, roughly chopped
2 Tbsp Oil
1 tsp Cumin Seeds
Curry leaves
Salt to taste
1 Tbsp Coriander leaves, chopped
Water as required

Method:


1. Boil the roughly diced tomatoes in water until soft.
2. Drain the tomatoes and allow to cool. Keep the water it was boiled in aside, do not throw away.
3. Blend together the tomatoes, coconut, garlic and green chillies along with a little water until smooth.
4. Heat oil in a kadhai and add cumin seeds.
5. Once they brown, add in the curry leaves. 
6. Add in the tomato-coconut paste. Add the water used to cook the tomatoes as required to reach the desired consistency.
7. Add salt and boil for 6-8 minutes. Remove from heat and garnish with coriander leaves.
8. Serve hot with rice or bread.

Vegan tomato curry from Maharashtra, Maharshtrian tomato saar


If you liked this, you may also like:
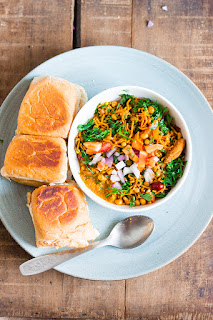
Spicy Maharashtrian Misal Pav
Misal Pav

Oriya dalma with mix vegetables
Dalma
North Karnataka kaalu palya made with alsande kaalu. Black eyed peas curry.
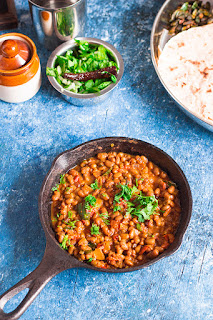
Black Eyed Peas Curry


Read more ...

Paan Kulfi Recipe | How to make Meetha Paan Kulfi [Video]


Paan Kulfi is a frozen milk based dessert that is flavored with gulkand (rose jam) and paan (betel leaves). This kulfi is of Meetha Paan flavor. Kulfi is a traditional Indian ice-cream made from sweetened reduced milk. 

In a hurry? Jump to Video or Jump to Recipe

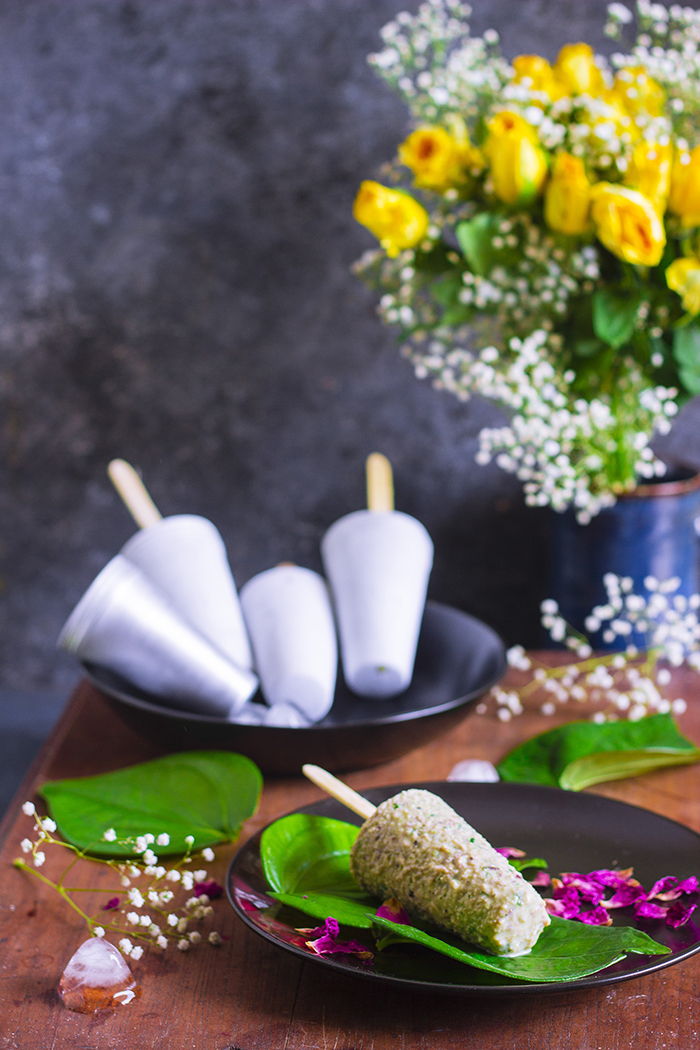
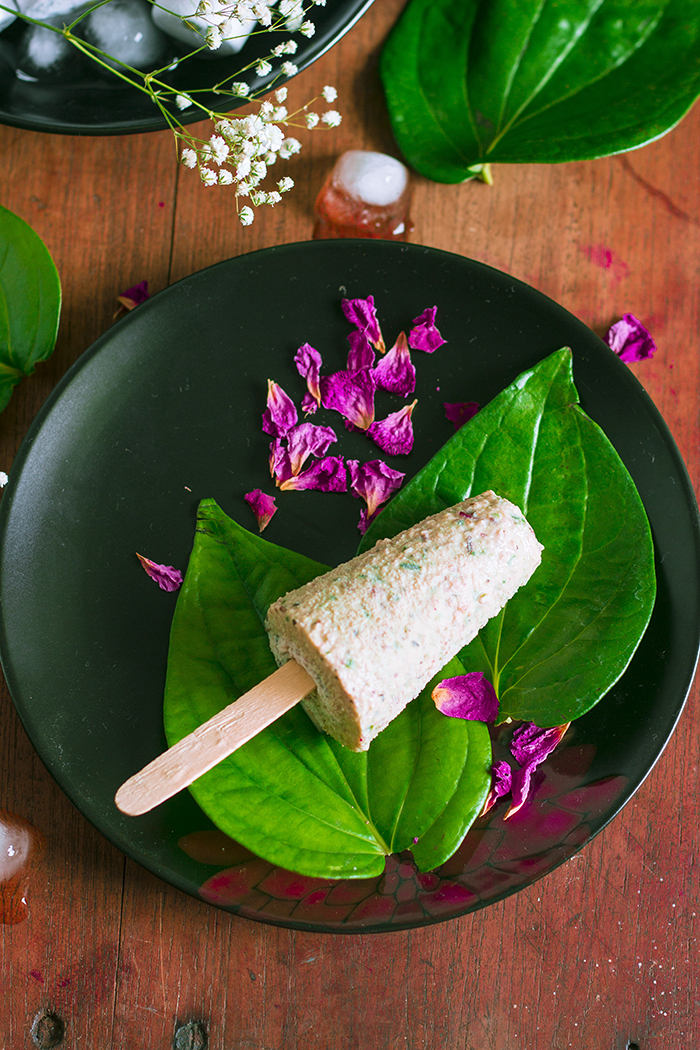
Meetha paan kulfi


I could not be more excited to share this kulfi with you, it is everything I wanted it to be, and it was actually better. This Paan Kulfi is the perfect marriage of two of my favorite things, meetha paan and kulfi and I just couldn't have enough of it.

Kulfi is India's contribution to the world of Ice Cream. Kulfi is denser and creamier than the commonly available ice cream. A Kulfi is made by slowly reducing the milk until it is thick, creamy and caramelized. The reduced milk, is also called Rabdi or Basundi. As the milk caramelizes, it also brings out the natural sweetness of the milk, hence, you don't need much sugar to flavor the milk.   The dessert is also amazingly delicious at this stage and I could have bowls of it if there was enough. Flavoring is then, added and then this creamy deliciousness is frozen until it is completely set.

The flavoring for my kulfi was Meetha Paan (sweet betel leaf). This is the favorite flavor in the city right now. If your restaurant is a hip and happening place, you are definitely serving something Paan flavored. I've seen Paan Kulfi, instant Paan Ice Cream made using liquid nitrogen and Paan shots.

A traditional Paan is a betel leaf smeared with limestone and then stuffed with tobacco and betel nuts. This is consumed as a digestive after a heavy meal in several parts of India and South East Asia. As this is detrimental to one's health, the meetha Paan or Sweet Paan was born. The sweet paan is made by stuffing the betel leaf with pieces of dates, fennel seeds, dry coconut (sometimes) and a sweet rose jam called gulkand. This is super delicious. While I say this, I've realized this can be an acquired taste for few.

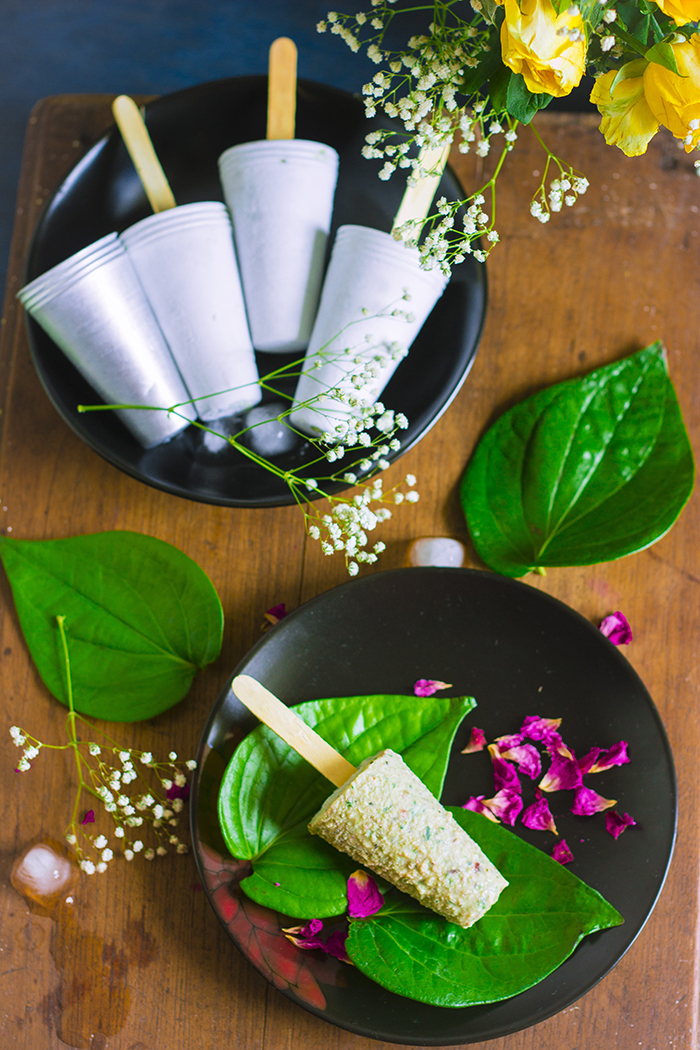
Meetha paan kulfi


To make this Paan Kulfi, I used fresh betel leaves that I pureed and added. The betel leaf has a strong pungent taste if consumed by itself but when mixed in the dessert the flavor becomes really mild. I started off with puree of 5 leaves and then went on to add the puree of 7 more leaves, 12 in total to get a prominent taste of paan. Also, instead of gulkand, I added a Kolkata Meetha Paan Mukhwas. This is easily available online as well as in fairs and Malls in bigger cities.  If you don't have access to either of these, but have access to a ready made meetha paan from the corner shop, just grind them fine and use them.

Paan Kulfi available in restaurants has a distinct green color. This is achieved by adding a few drops of food coloring. I'm not in favour of food coloring, so I left the kulfi to its natural color.

To make the Kulfi, always use milk with a high fat content. Some folks add cornflour, milk powder or khova to hasten the thickening of the milk. I have used the traditional method of slow cooking instead. While this takes a little more time, the kulfi ends up tasting very good. You can literally keep the milk on the lowest heat possible and continue to do your work, just peeking in every once in a while to ensure it is overflowing or burning and to scrape the sides. To cook the kulfi sooner, you can also divide the milk into 2 or more pots and reduce them individually before mixing them all together and adding sugar.

I hope you love this Paan Kulfi as much as my family and I. Wishing you a very happy Summer!

Meetha paan kulfi


If you made this recipe, let me know! Leave a comment here or on Facebook tag your tweet with @oneteaspoonlife on Twitter and don't forget to tag your photo @oneteaspoonoflife on Instagram. You can also email me at onetspoflife@gmail.com I'd love to see what you are upto.


If you like this recipe, do not forget to share it with your friends and family! 


You can follow One Teaspoon Of Life on FacebookTwitterInstagramPinterest or you can subscribe to One Teaspoon Of Life and receive all the latest updated via Email


Video Recipe


--------------------------------------------------------------------------------------------------------------------------

Paan Kulfi Recipe | How to make Meetha Paan Kulfi


Meetha paan kulfiPaan Kulfi is a frozen milk based dessert that is flavored with gulkand (rose jam) and paan (betel leaves). This kulfi is of Meetha Paan flavor. Kulfi is a traditional Indian ice-cream made from sweetened reduced milk.

Recipe Type:  Dessert
Cuisine:            Indian
Prep Time:     9 Hours
Cook time:     2 Hours
Total time:     11 Hours
Yield:                Makes 8 Kulfis

Ingredients:


2 litres Full Fat Milk
0.5 cup Sugar
10-12 Betel Leaves
2-3 Tbsp Meetha Paan Mukhwas or Gulkand
1 Tbsp Almonds, chopped
1 Tbsp Cashewnuts, chopped
1 Tbsp Pistachios, chopped

Method:


1. Boil the 2 litres of milk until it comes to a rolling boil.
2. Reduce the heat to low and continue to boil.
3. Keep stirring to prevent the milk from burning.
4. Keep scraping the solidified milk from the sides of the pot and add it to the boiling milk.
5. Once the milk has reduced to half, add the sugar. Half a cup of sugar makes the kulfis pretty sweet. Add by the spoonfuls to get the right amount of sweetness.
6. Once the milk has reduced to 1/3rd the quantity and has become thick and creamy, remove from heat and allow to cool down to room temperature.
7. Puree the betel leaves (paan) with a little milk until smooth. Use 4-6 paans for a milder taste and 10-12 paans for a stronger taste.
8. After the milk has cooled, add in the chopped nuts, meetha paan mukhwas or gulkand and the paan puree. Mix well.
9. Fill into the kulfi moulds and freeze for around 2-3 hours.
10. The kulfis should be 50% set in 2-3 hours. Remove from the freezer and gently place the ice-cream stick. This step can be skipped if you are not planning to add the ice-cream stick.
11. Place the moulds back in the freezer and freeze for 8-10 hours or until completely set.
12. To demould the kulfi while serving, dip the kulfi mould in warm water, the kulfi should loosen. If using an ice-cream stick, twist the kulfi and pull it out gently. If not then place the mould on a plate and tap the mould until the kulfi comes out.
13. Serve immediately.

If you liked this, you may also like:
How to make coconut ice cream, coconut ice cream recipe, how to make ice cream without eggs, how to make ice cream without ice cream maker, naturals tender coconut ice cream recipe at www,oneteaspoonoflife.com
Tender Coconut Ice Cream

Jamun Ice Candy
How to make eggless fresh fruit tart recipe, vegetarian fruit tart recipe, fruit pie recipe, mango tart recipe at www.oneteaspoonoflife.com
Fresh Fruit Tart


Read more ...

Dalma Recipe | How to make Dalma | Oriya Dalma Recipe [Video]


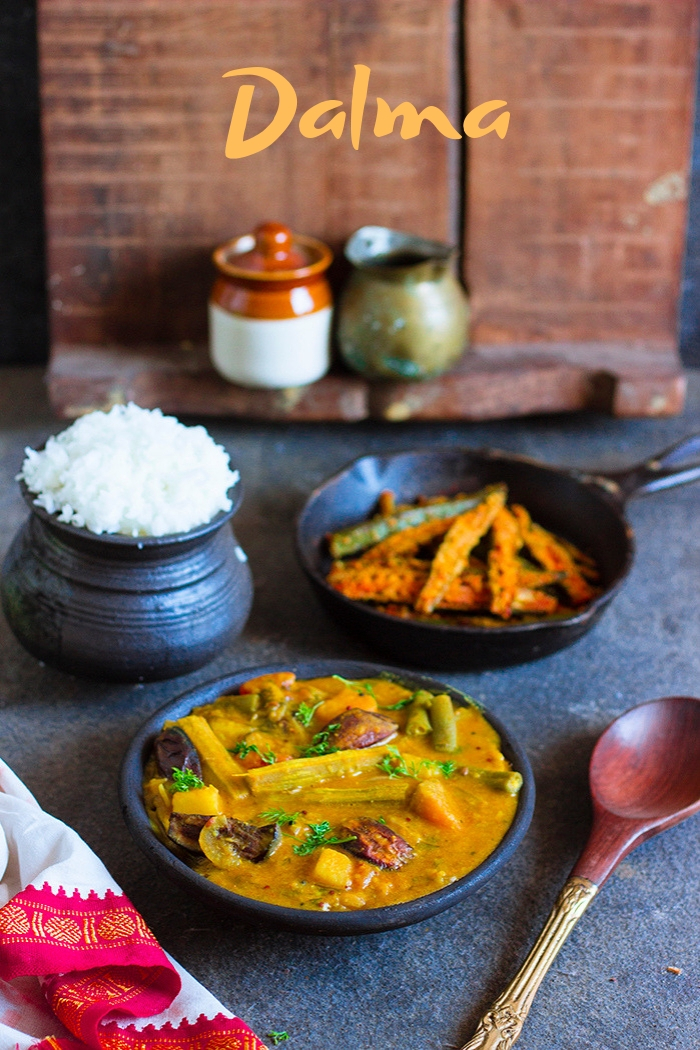
Dalma is a popular mix vegetable dal based curry from the region of Odisha in India. A variety of vegetables are simmered along with dal to give a delicious curry that is usually served with steamed white rice.

In a hurry? Jump to Video or Jump to Recipe

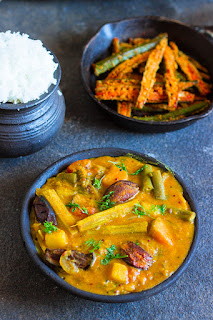
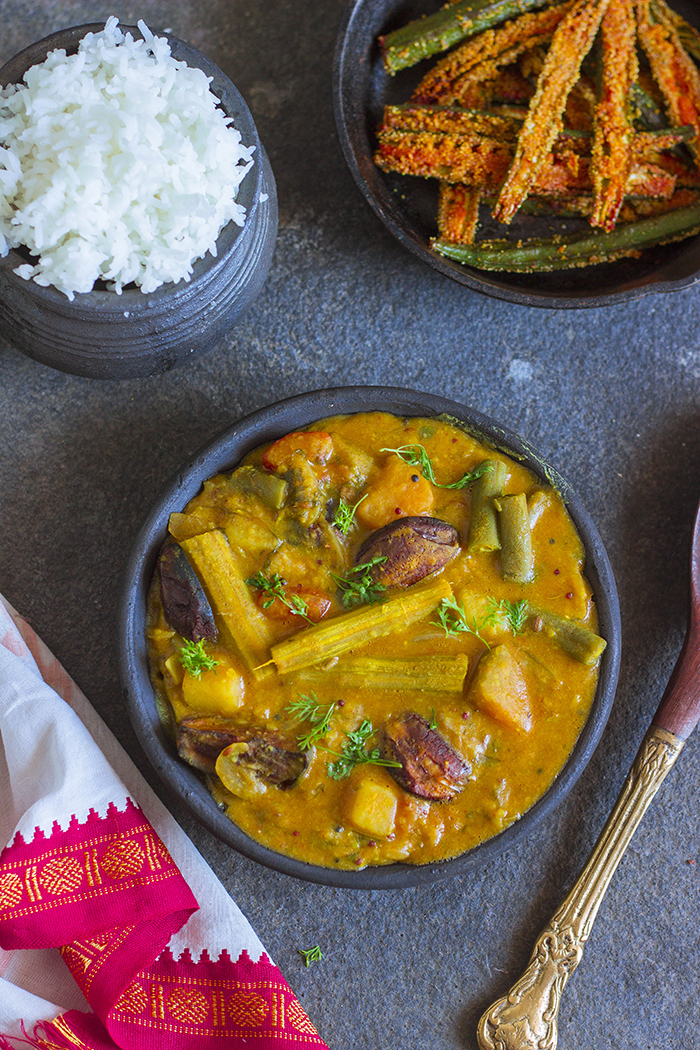
Oriya dalma with mix vegetables


Caution, this is not a Summer Recipe. But I still love it and can eat it anytime. 

The curiosity all started with a restaurant in Bangalore named Dalma. I would cross it and wonder what the name means. I had no clue it actually referred to this very popular classic Odia or Oriya dish. And then we met, me and Dalma, the curry, not the restaurant. The restaurant is still a mystery, never stepped in there.

Dalma was introduced to me by my neighbor who had an Oriya cook. He was fond of cooking his traditional cuisine once in a while and I loved it the first time I ate it. Unfortunately, I never took the recipe from him, but my neighbor who watched over him at times, gave this recipe to me. I have read online that there are different recipes of Dalma, some use coconut, some use onions, some use neither. I believe each region has adapted the dish to what is available locally. The coastal belt uses coconut while the interior regions do not. 

The Odia folks love Dalma so much that it is also served as a part of Chappan Bhog in Puri's Jagannath Temple.


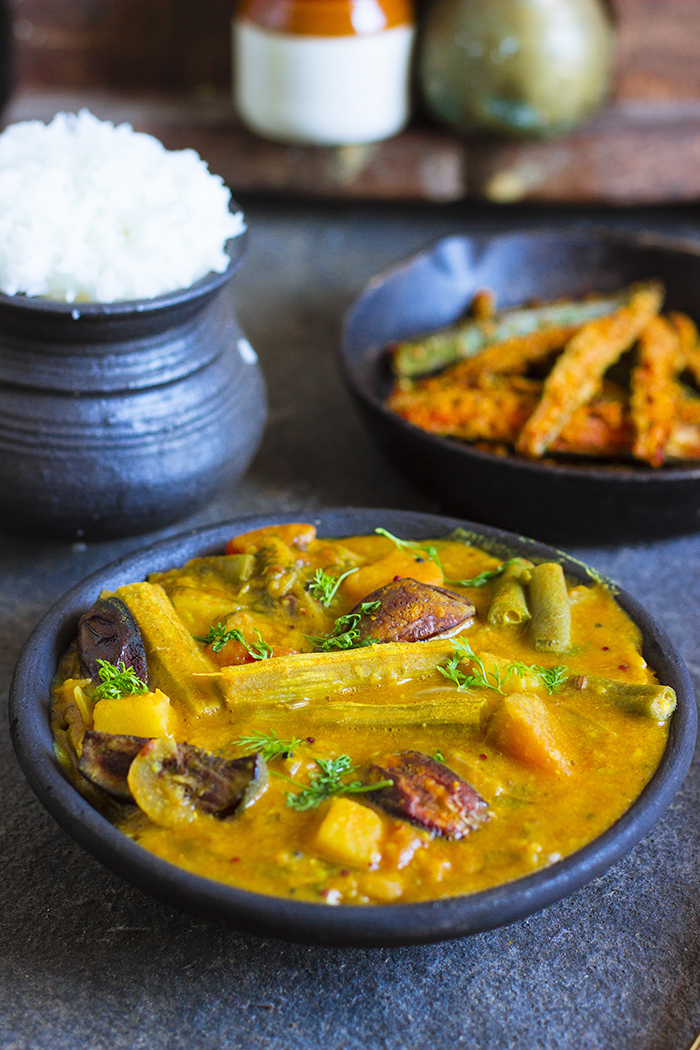
Oriya dalma with mix vegetables

Oriya dalma with mix vegetables

Dalma is a very simple mix vegetable curry that is also very healthy. The dal is full of veggies and barely has any oil. The only oil used is that in tempering. Dalma is a hearty and wholesome curry that is usually served with Rice or Roti. If you plan to serve it with roti, add less water to keep the curry thick. Each variation of the recipe may use different vegetables, use what you can get your hands on. Vegetables that need time to cook are added in the beginning and once they are partially cooked, the faster cooking vegetables are added. The Oriya cook used to cook the dal in the same pan and while the dal was still cooking, he added in the veggies. I just sped up the process by using already cooked dal. Some folks may also use Chana Dal instead of Toor Dal or a mix of both. 

Wishing you a warm and comforting weekend with Dalma!

Oriya dalma with mix vegetables


If you made this recipe, let me know! Leave a comment here or on Facebook tag your tweet with @oneteaspoonlife on Twitter and don't forget to tag your photo @oneteaspoonoflife on Instagram. You can also email me at onetspoflife@gmail.com I'd love to see what you are upto.

If you like this recipe, do not forget to share it with your friends and family! 


You can follow One Teaspoon Of Life on FacebookTwitterInstagramPinterest and or you can subscribe to One Teaspoon Of Life and receive all the latest updated via Email


Video Recipe


--------------------------------------------------------------------------------------------------------------------------

Dalma Recipe | How to make Dalma | Oriya Dalma Recipe


Oriya dalma with mix vegetablesDalma is a popular mix vegetable dal based curry from the region of Odisha in India. A variety of vegetables are simmered along with dal to give a delicious curry that is usually served with steamed white rice.

Recipe Type:  Curry
Cuisine:            Indian
Prep Time:     15 minutes
Cook time:     45 minutes
Total time:     60 minutes
Yield:                Serves 3-4

Ingredients:


3 cups cooked Toor Dal (Pigeon Pea Lentils)
1 Drumstick, peeled and chopped
1 Raw Banana, peeled and diced
1 big Potato, peeled and diced
10-12 Beans, diced
0.5 cup diced Pumpkin
2 Brinjals, diced
1 Tomato, roughly chopped
1 Onion, sliced
2 Tbsp Mustard Oil
1 Tbsp Panch Phoran (whole spice mix)
1 Bayleaf
1 tsp Turmeric Powder
1 tsp Red Chilli Powder
1 tsp Cumin Powder
1 Tbsp chopped Coriander Leaves
Salt to taste
2-3 cups Water
Salt to taste

Method:


1. Add cooked toor dal (lentils) to a deep pan or kadhai. Add water as required and 1 tsp turmeric powder. Mix well.
2. Add in the drumsticks, raw banana, pumpkin, potato and beans.
3. Add salt to taste. Cover and cook until the vegetables are half cooked.
4. Add in the brinjal and cover and cook until the vegetables are almost cooked.
5. Add in the chopped tomato and cook until all the vegetables are cooked.
6. Adjust seasoning if required. Remove from heat and keep aside.
7. To make the tempering, heat mustard oil in a pan and add the panch phoran spice mix.
8. Once the spices splutter, add in the bay leaf and sliced onions.
9. Fry until the onions are translucent.
10. Add in red chilli powder and the cumin powder and saute for 1 minute.
11. Add the Dalma to the tempering and simmer for 5-6 minutes.
12. Add water if required.
13. Garnish with the chopped coriander leaves.
14. Serve hot with rice or roti.

If you liked this, you may also like:
How to make vegan Panchmel Dal or mixed lentil soup at www.oneteaspoonoflife.com
Pancharangi Dal

Black Chickpea Curry
Ghugni Masala
How to make gujarati undhiyo recipe at One Teaspoon Of Life. How to make vegan mix vegetable curry recipe at www.oneteaspoonoflife.com
Undhiyu


Read more ...

Steamed Veg Momo Recipe | Vegan Dumplings Recipe [Video]


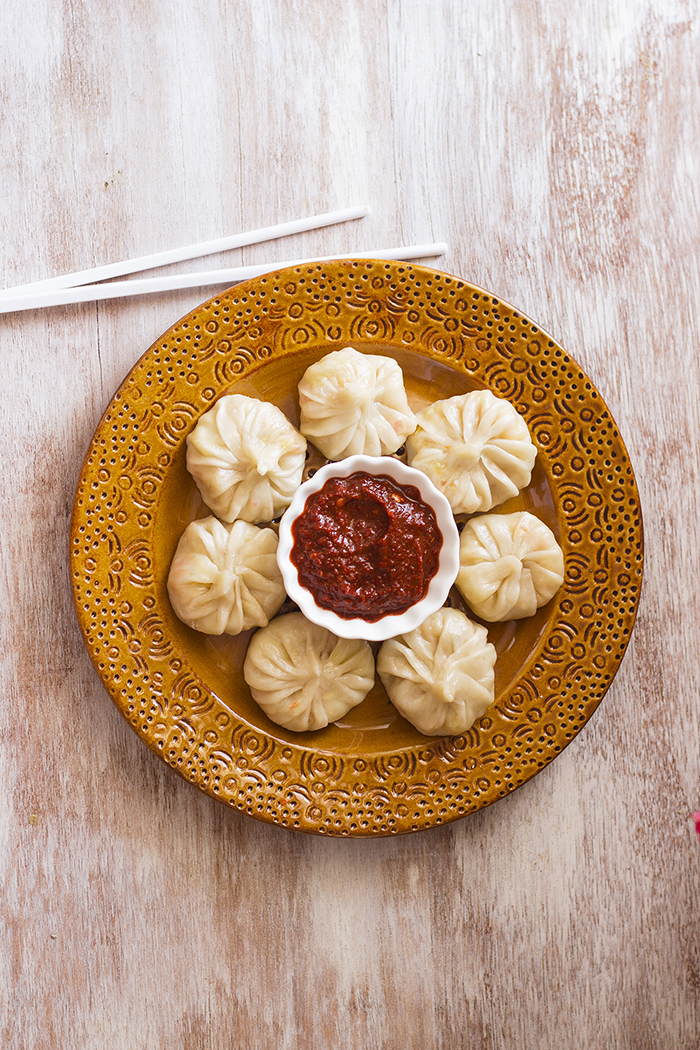
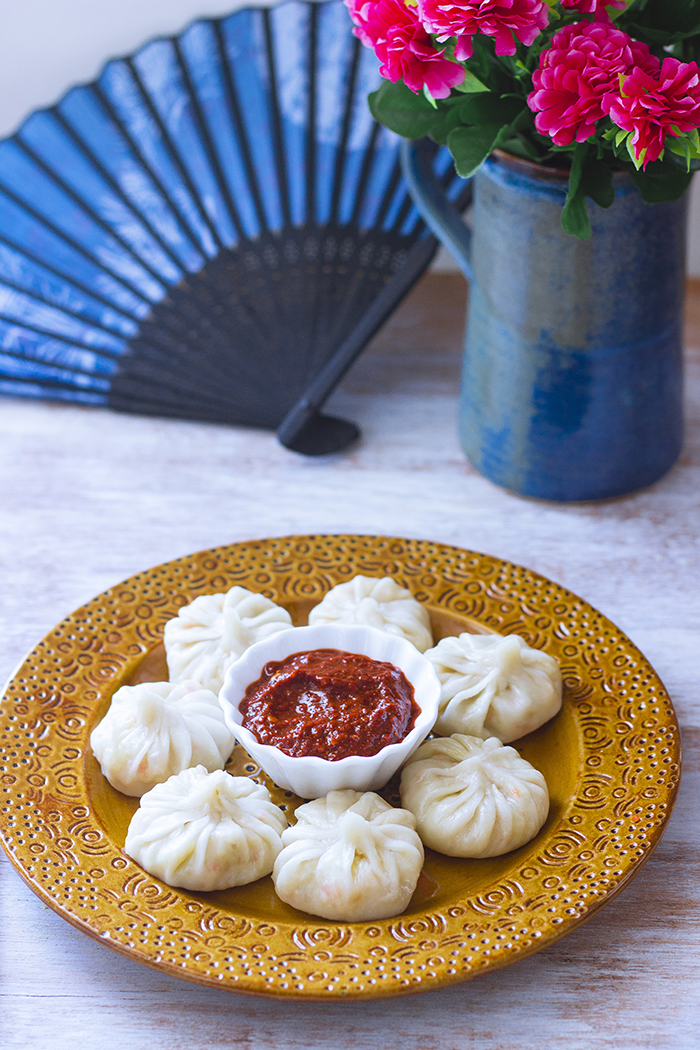
Veg Momos are vegan dumplings stuffed with a stir fried mix of finely chopped vegetables. The dumpling can either be steamed,  deep fried or pan fried. This is the recipe for steamed veg momos. Steamed veg momos are a specialty of North East India and these are now a popular street food all through India.

In a hurry? Jump to Video or Jump to Recipe

Steamed vegan dumplings or momo from India

I never skip a chance to eat a Momo. But making them, I've had my excuses.

I'm glad I finally got around to making some, because I simply loved this recipe and I'm so happy I can share it with you. And unlike what I imagined earlier, it is not that elaborate and no, homemade is so much better than the street side one. 

So.... a Momo is a dumpling that is native to the Himalayan region, mainly North-East India, Tibet, Nepal and regions around them. In recent times, momos have taken the streets by storm and it is not unusual to see folks selling momos at street corners. They have become extremely popular as street food. 

My first experience with momo making was in 2009, when we visited Darjeeling. Darjeeling is very famous for momos and I had it in my bucket list to try some there. We used to frequent a small family run restaurant called Nimto that served us vegetarian food. It was here that we saw Auntie (the owner and chef) prepare momos. I was amazed at the speed and quality of the pleating of her momos. While I am nowhere close to her's in aesthetic appeal, I believe I've made up for it with taste.

Steamed vegan dumplings or momo from India

Veg momos are usually stuffed with cabbage and a mix of other finely chopped veggies. A momo is very mild in flavor, it has a subtle hint of ginger, garlic and heat. It is usually served with either chilly vinegar or a spicy chilli garlic sauce or a spicy peanut sauce. There are some places that serve momos with mayo but I would never visit those places. 

In this post and video, I have included details on how to make the momo wrappers as well. In my next post, I will share a simple recipe to make the Chilli Garlic sauce that I served the momos with. While I did not do it this time, in the past I have frozen momos and steamed them when required. If you plan to freeze momos, place the momos in a large box in a single layer and freeze them. You can then directly steam them (no thawing required) when you want to eat the momos. But just serve them hot, momos tend to get chewy if allowed to cool.

This recipe shows one method of pleating the momos, this is usually how veg momos are pleated. But feel free to pleat or seal the momos as you please. Look up online, there are several easy ways to pleat. Hope you enjoy this recipe. If you do, please let me know!!

Happy Momo Making Weekend!

Steamed vegan dumplings or momo from India


If you made this recipe, let me know! Leave a comment here or on Facebook tag your tweet with @oneteaspoonlife on Twitter and don't forget to tag your photo #oneteaspoonoflife on Instagram. You can also email me at onetspoflife@gmail.com I'd love to see what you are upto.


If you like this recipe, do not forget to share it with your friends and family! 


You can follow One Teaspoon Of Life on FacebookTwitterInstagramPinterest or you can subscribe to One Teaspoon Of Life and receive all the latest updated via Email


Video Recipe


--------------------------------------------------------------------------------------------------------------------------

Steamed Veg Momo Recipe | Vegan Dumplings Recipe


Steamed vegan dumplings or momo from IndiaVeg Momos are vegan dumplings stuffed with a stir fried mix of finely chopped carrots and cabbage. The dumpling can either be steamed, deep fried or pan fried. This is the recipe for steamed veg momos. Steamed veg momos are a specialty of North East India and these are now a popular street food all through India.

Recipe Type:  Snacks
Cuisine:            Indian
Prep Time:     60 minutes
Cook time:     45 minutes
Total time:     50 minutes
Yield:                Makes 20 momos

Ingredients:


For the Dumpling Wrappers:


1 cup All Purpose Flour (Maida)
0.5 tsp Salt
0.5 cup hot Water

For the Momo filling:


3 cups finely chopped Cabbage
0.5 cup finely chopped Carrot
1 Tbsp finely chopped Garlic
1 Tbsp finely chopped Ginger
1 Green Chilli, finely chopped
2 Tbsp Oil
Salt to taste

Method:


1. To make the dumpling wrappers, take the flour in a large bowl and add salt to it.
2. Now add water by the spoonfuls and knead until you have a smooth dough. Knead the dough for at least 10 minutes to allow the gluten to develop. You can also use cold water to knead the dough, but hot water yields a softer wrapper.
3. Cover and keep aside for 30 minutes to 1 hours.
4. While the wrapper dough is resting, make the filling for the momo.
5. To make the momo filling, heat oil in a pan and add in the chopped garlic, ginger and green chilli. Saute until fragrant.
6. Now add the chopped carrot and saute for 2-3 minutes on medium heat.
7. Add in the chopped cabbage and salt to taste and continue to saute on low heat until the cabbage is almost cooked.
8. Remove from heat and allow to cool down to room temperature.
9. Divide the wrapper dough into 20 equal portions.
10. Fill in 1-2 spoons of filling.
11. Wet the edge with water.
12. Carefully pleat the edges to seal the momos.
13. Steam the momos for 5-6 minutes.
14. Serve hot with chilli sauce.


If you liked this, you may also like:

Malaysian Laksa Lemak or Curry Laksa. Vegan spicy asian noodle soup
Vegan Laksa Soup

Steamed cups made from rice semolina
Steamed Rice Cups
Steamed Lentil Dumplings


Read more ...