Showing posts with label Easy. Show all posts

Vegan Omelette Recipe | How to make omelet without eggs [Video]

Vegan Omelette or Vegetarian Omelet without eggs! This omelet is made using chickpea flour and plain all purpose flour.  Enjoy it guilt free!

In a hurry? Jump to Video or Jump to Recipe

eggless omelette made with chickpea flour

This Vegan Omelette HAS to be on your breakfast menu!!

Eggs have always been so tightly associated with breakfast, that if you don't eat any (like me), you are left with very few options. Well, until now!! Presenting the Omelet without eggs, that tastes just like it was made with eggs. You can hardly tell the difference.

This Omelet has become a go-to breakfast for us on those busy weekday mornings or on those really lazy Sunday mornings. Sometimes, dinner too.

I have to thank Gee for introducing me to this recipe. She saw this online and made it for me. We LOVED it!! We were surprised that this tasted so much like the real deal. I've tried the cheese omelet and trust me, that is so so close to the Cheese Omelet made with eggs that you could fool anyone.

eggless omelette made with chickpea flour


Wondering what makes this taste like the real egg omelette? Black Salt. Just one simple ingredient.

The funky smell of black salt has always been equated to that of eggs. The smell comes because of the high sulphur content in the salt. Much like those hot water springs, but much milder. Black salt is now easily available online and pretty much all over the world. If you do buy black salt, you can use it in so many more recipes or sprinkle it over fruits or that salad for a different taste.

Why you SHOULD make this Omelette:

  • If you turned vegan and miss eating eggs, then you should make this and be guilt free. You can eat the cake and have it too!
  • It is so easy to make, you should definitely add it to your breakfast recipes list. After all, we are always looking for one more of those to add to the kitty.
  • If you've never eaten eggs in your life, at least, now you will know what they taste like and what the hypes all about.
  • Got any more good reasons? Leave a comment.

eggless omelette made with chickpea flour

eggless omelette made with chickpea flour


If you made this recipe, let me know! Leave a comment here or on Facebook tag your tweet with @oneteaspoonlife on Twitter and don't forget to tag your photo @oneteaspoonoflife on Instagram. You can also email me at onetspoflife@gmail.com I'd love to see what you are up to.


If you like this recipe, do not forget to share it with your friends and family! 


You can follow One Teaspoon Of Life on FacebookTwitterInstagramPinterest or you can subscribe to One Teaspoon Of Life and receive all the latest updated via Email


Video Recipe


--------------------------------------------------------------------------------------------------------------------------

Vegan Omelette Recipe | Eggless Omelet Recipe


eggless omelette made with chickpea flourVegan omelette or vegetarian omelet is an omelet made with chickpea flour and plain flour instead of eggs. A quick breakfast recipe.

Recipe Type:  Breakfast
Cuisine:            International
Prep Time:     10 minutes
Cook time:     10 minutes
Total time:     20 minutes
Yield:                Makes 4 omelettes

Ingredients:


0.3 cups Chickpea Flour
0.3 cups Flour
0.25 tsp Turmeric Powder
1 Onion, finely chopped
1 Green Chilli, finely chopped
2 Tbsp Coriander leaves, finely chopped
Black salt to taste
Pinch of baking soda
Water as required
Oil to pan fry the omelettes

Method:


1. Take the chickpea flour and plain flour in a bowl. Add 0.5 cup of water and whisk until smooth.
2. Add in the turmeric powder, chopped onion, chopped green chilli, chopped coriander and mix well.
3. Add in more water if required.
4. Add in the black salt to taste and mix well.
5. Add in the baking soda and mix well.
6. Heat a pan and grease it. Spoon in the batter and cook on medium heat until one side cooks.
7. Spoon some oil over the top and flip the omelette. Cook until the other side is cooked.
8. Remove from heat and serve with toast.


If you liked this, you may also like:

How to make vegan frittata recipe at One Teaspoon Of Life How to make vegetarian vegan omelet recipe at www.oneteaspoonoflife.com
Vegan Zucchini Spinach Frittata

spiced scrambled tofu with wilted spinach
Spinach Tofu Scramble
Vegan Tomato Onion Avocado Olive Mint Coriander Italian Sourdough Baguette Bread Sandwich
Breakfast Bruschetta


Read more ...

Sweet & Sour Mango Curry | Saasav | Pashingiri Recipe [Video]


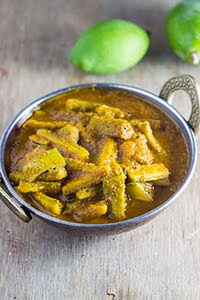
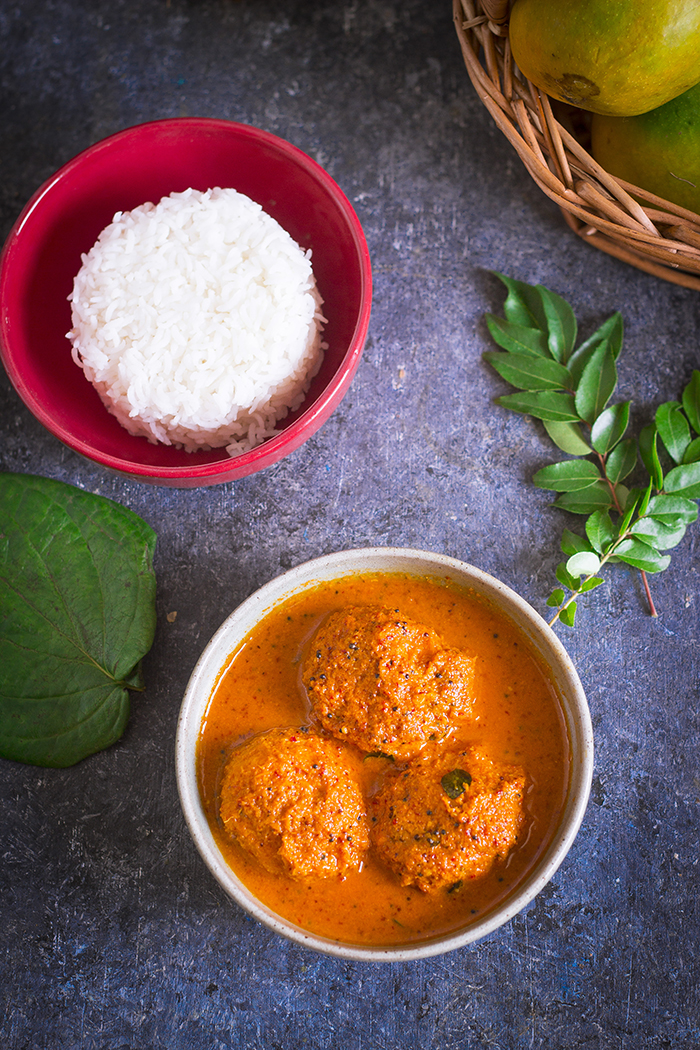
Pashingiri or Saasav is traditional sweet and sour Mango Curry from the Konkan coast of India made by simmering ripe baby mangoes in a vegan masala made of coconut and spices. This curry is popular in the coastal households during Summer.


In a hurry? Jump to Video or Jump to Recipe


sweet and sour mango curry, Mangalore pashingiri curry, Goan mango saasav, Konkani saasav

Summer is almost over and the love of my summers is going to go out from markets soon. Until then we are going to honour the king of fruits - Mango. For us, in the tropics, summer isn't all about the Sun, we see the Sun all year round. But summer brings with it the delicious juicy selection of seasonal fruits like the mango, jackfruit, guavas and melons. But it has always been the mango that rules my heart.

If you love Mangoes as much as I do, you may enjoy these other mango recipes:

MAVINKAYI CHITRANNA / RAW MANGO RICE
AAM PANNA
INSTANT MANGO PICKLE
RAW MANGO GOJJU
HAGALKAI MAVINKAYI GOJJU
MANGO CHEESECAKE
FRUIT TART WITH MANGO CREAM
AAMRAS / MAVINKAYI SEEKARNE

sweet and sour mango curry, Mangalore pashingiri curry, Goan mango saasav, Konkani saasav

sweet and sour mango curry, Mangalore pashingiri curry, Goan mango saasav, Konkani saasav


Lalbagh in Bangalore has been hosting the annual Mango Mela or Mango Festival for years. Every year farmers from around Bangalore set up their stalls to sell naturally ripened mangoes and organic mangoes. In 2019, it started from 1st June and it is scheduled to be around for 3 weeks. So if you are in the city, do not miss it. They have a wide variety at very competitive prices. We went there on Saturday ago and bought several kilograms of Alphonso, and some of these tiny Sugar Baby or Sakre Gutti. 

I bought the Sugar Baby mangoes only to make this sweet and sour ripe mango curry. You heard it right, ripe mango not raw. The first time I made it I called up several people and collected 5 different recipes, before I decided to make this one given to me by my very close friend from Goa. The Goan version uses Turmeric and Asafoetida, which is optional in the Mangalore version.

There are 2 major variants of this curry - cooked and uncooked. The recipe listed here is the cooked one. The other one, where the coconut masala is not cooked, resembles this Tambuli recipe.

This Mango Curry is best served with rice, but can also be served with bread on the side.

Enjoy the mango season while it lasts!

P.S - This is a repost of a 2015 post. Video instructions are added and the post is altered slightly, but the recipe remains the same.

sweet and sour mango curry, Mangalore pashingiri curry, Goan mango saasav, Konkani saasav


Video Recipe


--------------------------------------------------------------------------------------------------------------------------

Sweet and Sour Mango Curry | Saasav | Pashingiri

Sweet and Sour Mango curry made with ripe mangoes and fresh coconut. This recipe is famous along the Konkan coast (Western coast of India) and is a popular curry in Summers.

Recipe Type:  Main Course
Cuisine:          South Indian/ Mangalorean/ Goan
Prep Time:     10 minutes
Cook time:     30 minutes
Yield:              3 Servings

Ingredients:


8 small Ripe Mangoes
1 cup Desiccated Coconut
1 tsp Mustard seeds
2-3 Dry red chillies
2-3 Tbsp Jaggery or Sugar
A marble sized ball Tamarind (Optional)
8-10 Curry leaves
1/2 tsp Turmeric powder / Haldi (Optional)
A pinch Asafoetida / Hing (Optional)
2 tsp Oil
Salt
Water

Method:


1. Wash and peel the mangoes and keep aside
2. Soak the tamarind in half a cup of water and keep aside
3. Dry roast 1/2 tsp of the mustard seeds in a pan on low heat for 1 min. Be careful not to burn it otherwise the curry will turn bitter. 
4. Heat 1 tsp of the oil in the pan, add the red chillies and fry for 30 sec or until the chillies are crisp.
5. Grind the coconut, roasted mustard seeds and red chillies into a coarse paste with a little water. 
6. Heat the remaining oil and add the remaining mustard seeds
7. Once they splutter, add the curry leaves and lower the heat
8. Add the coconut paste, turmeric and asafoetida and mix well. Add 0.5 cup of water and simmer for 6-8 minutes. Turmeric and Asafoetida are used in the Goan version of the curry, while it is optional in the Mangalore version.
9. Slightly mash the mangoes and add to the curry
10. Add water to achieve the desired consistency. Add more if eating with rice and less if with bread.
11. Add salt and jaggery. Do not add all the jaggery at once, taste and add. If the mangoes are very sweet, you may not need much. 
12. Squeeze the tamarind in the water and remove the pulp. Add this sour liquid to the curry. Again, like the jaggery, do not add all the liquid at once, taste and add. If the mangoes are very sour, you may not need it.
13. Cook on low heat for 5 mins.
14. Serve warm with rice or bread.


sweet and sour mango curry, Mangalore pashingiri curry, Goan mango saasav, Konkani saasav


If you liked this, you may also like:

Konkani Recipes, how to make bibbe upkari recipe, how to cook tender cashew nuts, how to make tondekayee palya with cashew nuts recipe at www.oneteaspoonoflife.com
Tendle Bibbe Upkari

South Indian curd based curry
Doddapatre Tambuli
Hagalkai Mavinkai Gojju Bittergourd Raw Mango Curry Karela Kacche Aam sabzi vegan gravy stew bittermelon indian
Bittergourd Mango Curry

Read more ...

Mavinkayi Chitranna Recipe | Raw Mango Rice Recipe [Video]


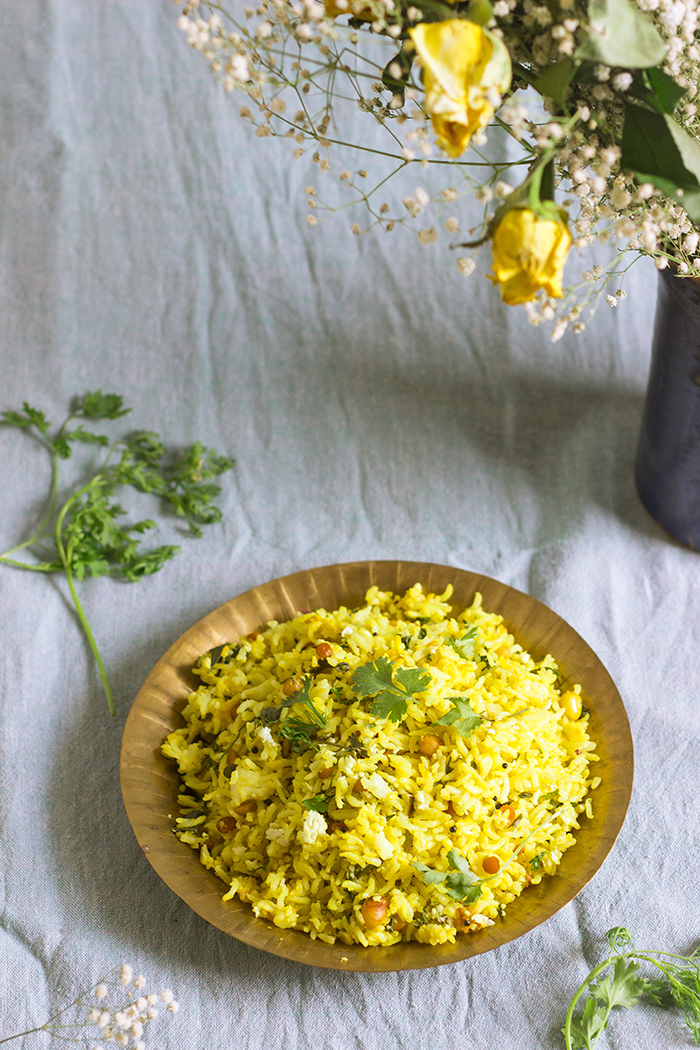
Mavinkayi Chitranna or Raw Mango Rice is a vegan South Indian sour and spicy mango flavored rice made from tart raw mangoes and leftover rice. Mango Rice takes less than 30 minutes to make. Raw Mango Rice is also gluten free.

In a hurry? Jump to Video or Jump to Recipe

raw mango rice

A quick weeknight fix. That's exactly what this Mavinkayi Chitranna or Raw Mango Rice is.

We've had a week of thunderstorms here in Bangalore and it's been scary. I scare easy, but thunder has never scared me, but I have been pretty jumpy the last weekend. The sound was akin to the sky ripping apart and a few of these extremely loud ones even managed to wake me up. Although we've been swamped with unseasonal rains, I still believe it is Summer, because mangoes, you know. While Bangalore really doesn't have a season for most things, that is, you can find pumpkins and beets all year round, but Mangoes, come only once a year in Summer. So when Summer gives you mangoes, you make sure you make use of it to the fullest. Ripe, raw and everything in between. If you like Mangoes, as much as me, you may also enjoy these other Mango recipes:

AAM PANNA
INSTANT MANGO PICKLE
RAW MANGO GOJJU
HAGALKAI MAVINKAYI GOJJU
MANGO CHEESECAKE
FRUIT TART WITH MANGO CREAM
AAMRAS / MAVINKAYI SEEKARNE


raw mango rice


I usually shop for the week on Saturday and then prep my veggies for the week ahead. Amidst the thunder and the crazy winds and the heavy downpour, I barely managed to get any meal prep done last weekend. So this Raw Mango Rice just pulled me through Monday. No prep really required, except may be cooking the rice.

Mavinkayi is the Kannada word for raw mangoes and Chitranna, well that's just colorful rice. In all other seasons, Chitranna is made using lemons or limes, but come Summer, tart raw mangoes are the preferred choice. Mavinkayi Chitranna is more of a South Indian fried rice in which leftover rice is tossed with a raw mangoes.

To make Mavinkayi Chitranna, use firm and tart raw mangoes. All green mangoes aren't raw, so pick carefully. Once you have the raw mangoes and some leftover rice, you are all sorted. To make the Raw Mango Rice, all we do is make a tempering of mustard seeds, a few lentils and then toss in grated raw mango along with turmeric and salt and allow the raw mango to cook down slightly. Then toss in the rice and add salt and mix well. Yes, it's as simple as that.

This tastes amazing with a side of Mango pickle, yes more mangoes, or a simple raita.

P.S. - This is a repost of a 2015 post. Only video is added and a few photos. Recipe remains the same.

raw mango rice


If you made this recipe, let me know! Leave a comment here or on Facebook tag your tweet with @oneteaspoonlife on Twitter and don't forget to tag your photo #oneteaspoonoflife on Instagram. You can also email me at onetspoflife@gmail.com I'd love to see what you are upto.


If you like this recipe, do not forget to share it with your friends and family! 


You can follow One Teaspoon Of Life on FacebookTwitterInstagramPinterest or you can subscribe to One Teaspoon Of Life and receive all the latest updated via Email


Video Recipe


--------------------------------------------------------------------------------------------------------------------------

Mavinkayi Chitranna Recipe | Raw Mango Rice Recipe


raw mango riceMavinkayi Chitranna or Raw Mango Rice is a vegan South Indian sour and spicy mango flavored rice made from tart raw mangoes and leftover rice. Mango Rice takes less than 30 minutes to make. Raw Mango Rice is also gluten free.

Recipe Type:  Main
Cuisine:            Indian
Prep Time:     10 minutes
Cook time:     20 minutes
Total time:     30 minutes
Yield:                Serves 2-3

Ingredients:


3 cups cooked Rice
0.5 cup Raw Mango, grated
2 Tbsp Oil
0.5 tsp Mustard Seeds
1 Tbsp Urad Dal
1 Tbsp Chana Dal
1 Sprig Curry leaves
1-2 Tbsp Peanuts
1 Green Chilli, finely chopped
0.5 tsp Turmeric Powder
2 Tbsp Water
Salt to taste
Fresh grated coconut to garnish
Coriander leaves to garnish

Method:


1. Heat oil in a pan and add the mustard seeds.
2. Once the mustard seeds splutter, add in the chana dal and the urad dal and saute until lightly browned.
3. Add in the peanuts and curry leaves and fry until the peanuts are browned.
4. dd in the grated raw mango, turmeric powder, salt and a little water and cook until the mango softens slightly.
5. Add in the rice and mix well.
6. Garnish with the chopped coriander leaves and freshly grated coconut.
7. Serve hot.


If you liked this, you may also like:

Indian rice pilaf made with corn, spinach and whole spices
Corn Spinach Pulao

How to make ghee rice recipe at One Teaspoon Of Life www.oneteaspoonoflife.com
Ghee Rice
pudina pulao, mint rice, mint pulao
Mint Rice


Read more ...

Maharashtrian Tomato Saar Recipe [Video]


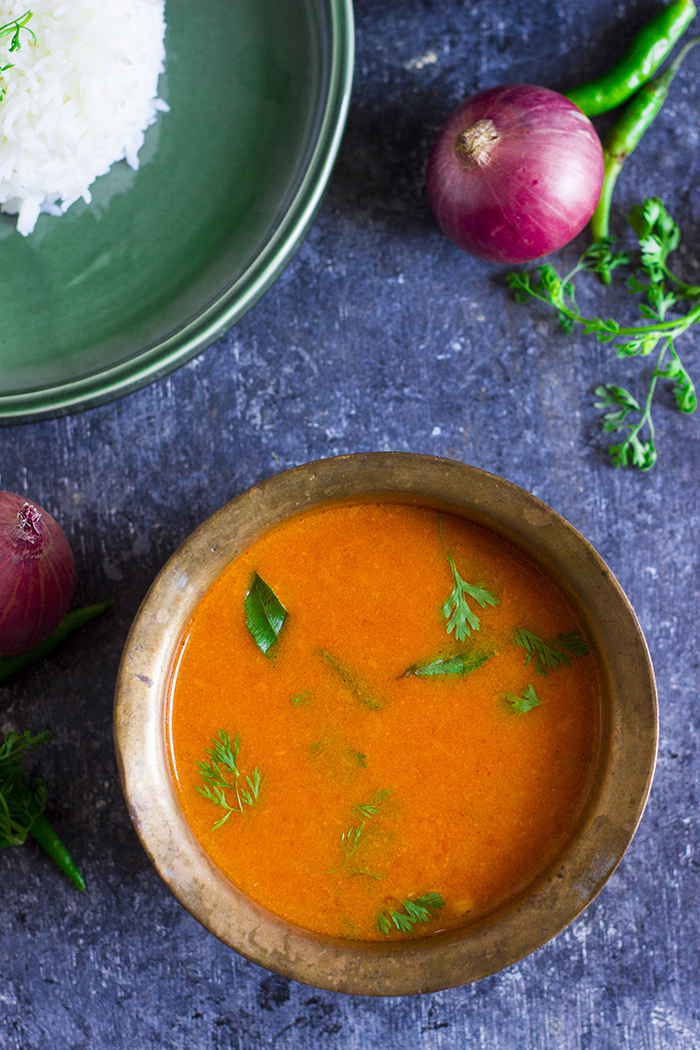
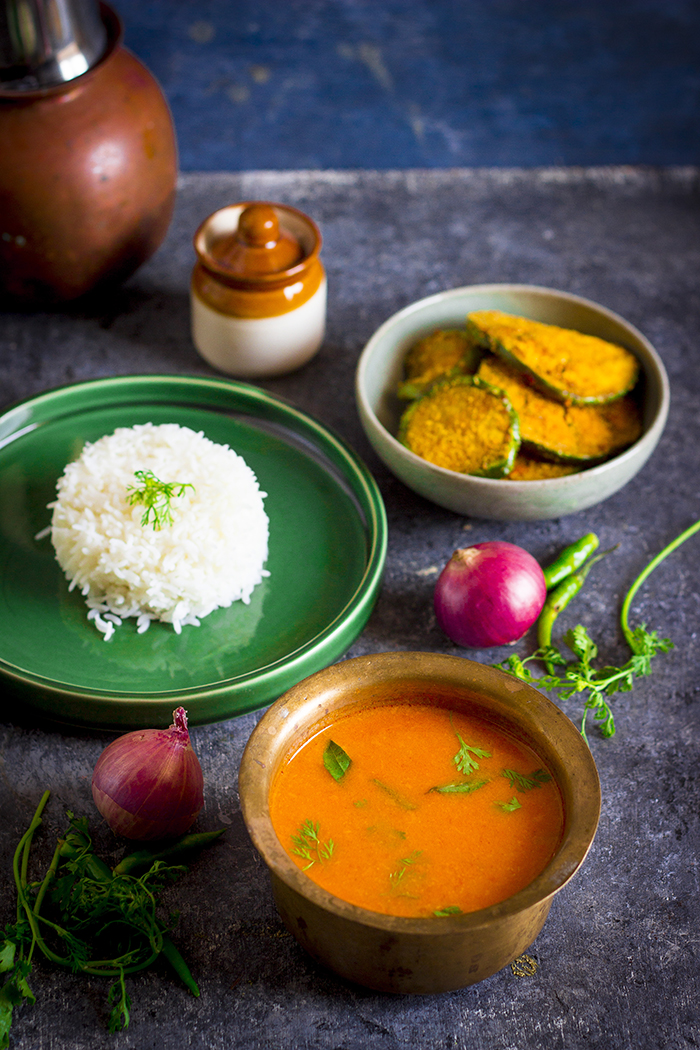
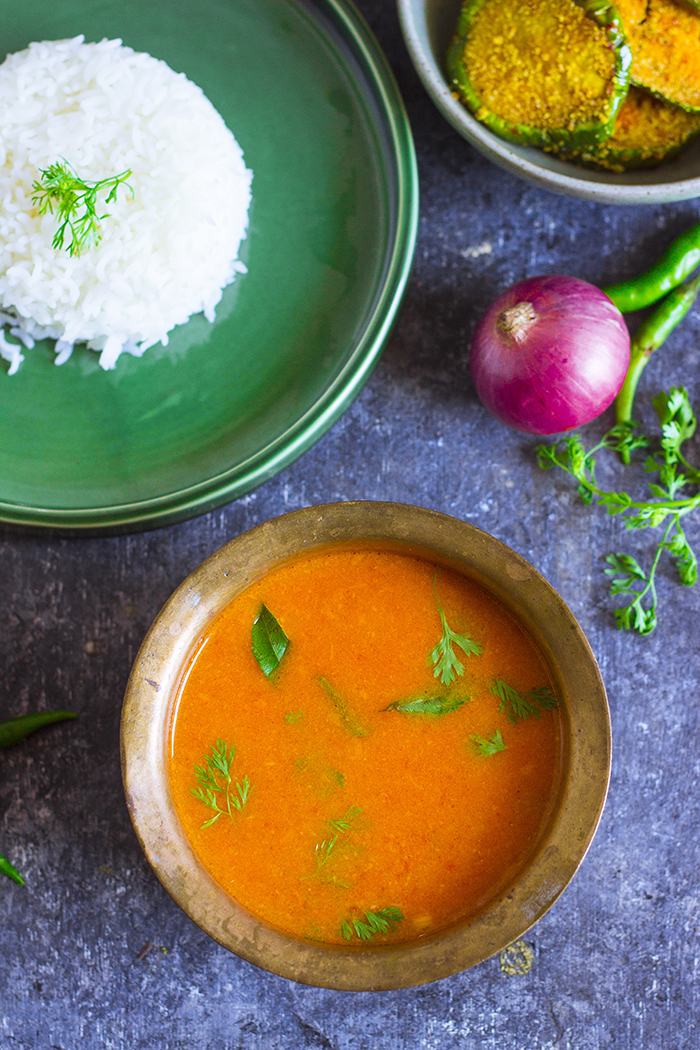
Nothing says Summer like red juicy ripe tomatoes. Use the tomatoes to make this simple vegan curry from India. The Tomato Saar is vegan and gluten free.

In a hurry? Jump to Video or Jump to Recipe

Vegan tomato curry from Maharashtra, Maharshtrian tomato saar

Red juicy tomatoes = Summer, right?

Summer is the best and worst time to be in India. Yeah. Let's go with the bad thing first, it is worst because of the heat. If it weren't for the summer rains in Bangalore, I would probably be swimming in a pool of my own sweat. Ugly visual, scratch that. But the best past about Summer, the best fruits and vegetables. 

If you want to have the sweetest fruits, the juiciest fruits, you have to come to India in Summer and then probably hide yourself in an AC room the entire day. 

Come April, I had a good list of recipes I wanted to cook for Summer and share with you guys. As predicted, I never stuck to that list. I really never do, I don't know why I bother. Instead of making what I had so patiently planned (I even set a Google Calendar reminder, I know, that's deep), I went on cooking with what I found in the market. I think it worked out better this way. At least I have been cooking seasonal to a large extent.

Vegan tomato curry from Maharashtra, Maharshtrian tomato saar

This Tomato Saar is just that, seasonal and delicious. But then you get tomatoes all year round, so what's your excuse to not make this? I assume you have nothing, so read ahead.

The history, I first encountered this Tomato Saar when I was in College. We were working to change the hostel mess menu when someone suggested this, and the cooks (lazy as they were) actually agreed to make this. They made it for the trial menu one weekday lunch and for some reason, while I really enjoyed it, it never did make the cut to the final menu. I tend to blame the cook's stubbornness to change, that led to it being out, because it was so delicious. A term I rarely used on anything that came out of the hostel kitchen.

Ever since, I've made this many times when I want a quick curry that does not require me to boil dal or make some elaborate masala. This Tomato Saar is simple, quick, vegan, healthy, gluten free and foremost, it is tasty. It is tangy and spicy and pairs perfectly with rice or with bread. 

To make the Tomato Saar, boil tomatoes, blend them with coconut, garlic and chillies, boil this puree again and season it. That's literally it! I'm really not giving you any excuses to chicken out, am I?

So wishing you a Happy Summer! May you cook with the best of the season's produce.

Vegan tomato curry from Maharashtra, Maharshtrian tomato saar


If you made this recipe, let me know! Leave a comment here or on Facebook tag your tweet with @oneteaspoonlife on Twitter and don't forget to tag your photo @oneteaspoonoflife on Instagram. You can also email me at onetspoflife@gmail.com I'd love to see what you are up to.


If you like this recipe, do not forget to share it with your friends and family! 


You can follow One Teaspoon Of Life on FacebookTwitterInstagramPinterest or you can subscribe to One Teaspoon Of Life and receive all the latest updated via Email


Video Recipe


--------------------------------------------------------------------------------------------------------------------------

Maharashtrian Tomato Saar Recipe


Vegan tomato curry from Maharashtra, Maharshtrian tomato saarMaharashtrian Tomato Saar is a simple yet flavorful vegan curry made from tomatoes and coconut. The dish is made popularly in the Western state of Maharashtra in India. 

Recipe Type:  Curry
Cuisine:            Indian
Prep Time:     10 minutes
Cook time:     30 minutes
Total time:     40 minutes
Yield:                Serves 2


Ingredients:


3 large Tomatoes, diced
0.75 cup grated Coconut
2 cloves Garlic
2 Green Chilli, roughly chopped
2 Tbsp Oil
1 tsp Cumin Seeds
Curry leaves
Salt to taste
1 Tbsp Coriander leaves, chopped
Water as required

Method:


1. Boil the roughly diced tomatoes in water until soft.
2. Drain the tomatoes and allow to cool. Keep the water it was boiled in aside, do not throw away.
3. Blend together the tomatoes, coconut, garlic and green chillies along with a little water until smooth.
4. Heat oil in a kadhai and add cumin seeds.
5. Once they brown, add in the curry leaves. 
6. Add in the tomato-coconut paste. Add the water used to cook the tomatoes as required to reach the desired consistency.
7. Add salt and boil for 6-8 minutes. Remove from heat and garnish with coriander leaves.
8. Serve hot with rice or bread.

Vegan tomato curry from Maharashtra, Maharshtrian tomato saar


If you liked this, you may also like:

Spicy Maharashtrian Misal Pav
Misal Pav

Oriya dalma with mix vegetables
Dalma
North Karnataka kaalu palya made with alsande kaalu. Black eyed peas curry.
Black Eyed Peas Curry


Read more ...

Jain Pav Bhaji [no onion, garlic, potato]


Jain Pav Bhaji has a bhaji (curry) made with raw banana or plantain. Jain Pav Bhaji is made without potatoes, onions, ginger or garlic. The bhaji is served along with buttered pav.

In a hurry? Jump to Video or Jump to Recipe

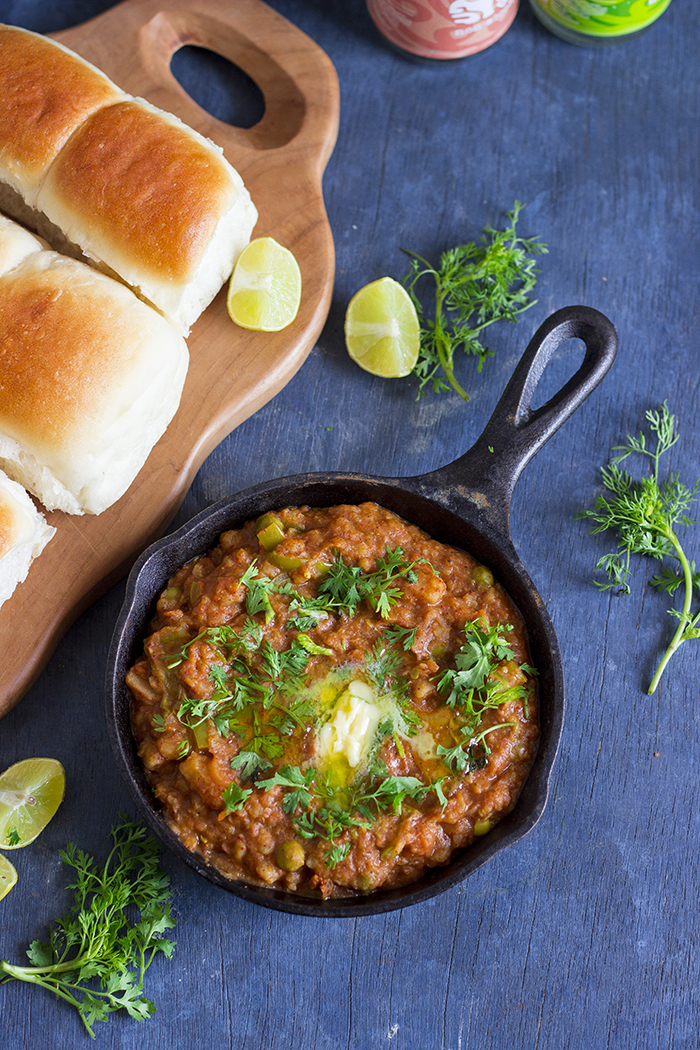
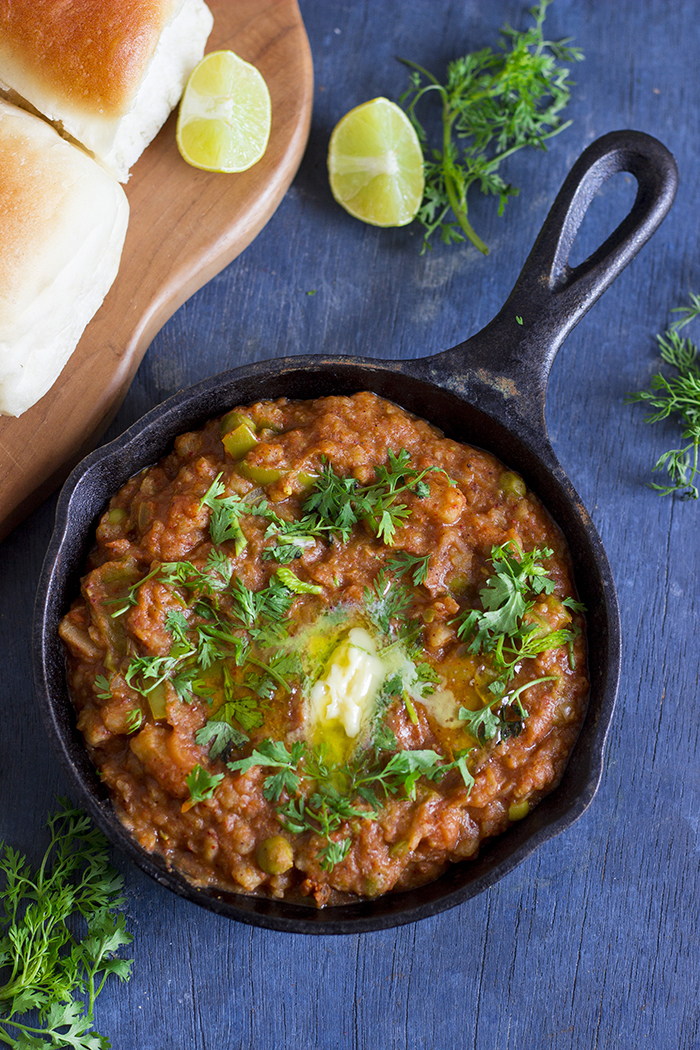
jain pav bhaji made without onion, garlic and potatoes

Yay! It's friday and I had an awesome evening. I logged off early for the day as I finished my work early. Which was a delight after several days of stress. I decided to take some time off for myself.

And when I want to relax and enjoy some me time, I visit food markets. Yes, nothing can excite me more than seeing the options in food and props out there. A true blue food blogger at heart. So I went to FoodHall and window shopped a lot there. Finally picked up some great looking sourdough bread and some exotic flavored cream cheese for my breakfast tomorrow. So looking forward to the morning, I can't wait for the night to fly through.

Going forward to my recipe of the day - Jain Pav Bhaji. Pav Bhaji is a popular street food that most probably originated out of Mumbai or just got super popular in Mumbai. Hence, its mostly called Mumbai Pav Bhaji. The "Bhaji" refers to a spicy curry made with mashed vegetables that is usually served with lots of butter and chopped onions and a quarter of a lime to be eaten along with a fluffy light square bread called "Pav". The bhaji is usually made of potatoes and other mixed vegetables like capsicum, carrot, onions, tomatoes etc. But this recipe is unique because it does not use any root vegetables, which are the base of a regular Mumbai Pav Bhaji.

jain pav bhaji made without onion, garlic and potatoes

The first "dharma" or principle of Jainism, an ancient religion in India, preaches non violence. While I was aware of Jainism, marrying a Jain guy brought me closer to this way of life. I started noticing life more where I would never have. I now make sure I look down when I walk in gardens and on garden paths, just so that I don't stamp an ant or a caterpillar. But life, in Jainism is not limited to animals or insects, it also extends to vegetables and fruits. Those who follow the religion strictly refuse to eat anything that grows below the ground. Vegetables like garlic, ginger, onions, potatoes, carrots etc. Since uprooting the plant to eat the root, actually kills the plant as well as the microorganisms that thrive underground. While my new family isn't extremely strict and follows this diet only on festivals and other good occasions, there are a few friends who live their daily lives avoiding the root vegetables.

In the past when I thought of a Jain Pav Bhaji, I always thought it was Pav Bhaji that was made without onions and garlic, it never struck me that Potato is also a no-no. This time when Raj brought a lot of home grown raw Bananas from my in-law's place, I decided to do something different with them and attempt a Jain Pav Bhaji. I had never expected it to taste so similar to the regular Mumbai Pav Bhaji. I never missed the flavor of the garlic or the onions, it tasted the same as always.

jain pav bhaji made without onion, garlic and potatoes


jain pav bhaji made without onion, garlic and potatoes


jain pav bhaji made without onion, garlic and potatoes


If you made this recipe, let me know! Leave a comment here or on Facebook tag your tweet with @oneteaspoonlife on Twitter and don't forget to tag your photo @oneteaspoonoflife on Instagram. You can also email me at onetspoflife@gmail.com I'd love to see what you are upto.

If you like this recipe, do not forget to share it with your friends and family! 


You can follow One Teaspoon Of Life on FacebookTwitterInstagramPinterest or you can subscribe to One Teaspoon Of Life and receive all the latest updated via Email

Video Recipe


--------------------------------------------------------------------------------------------------------------------------

Jain Pav Bhaji Recipe


jain pav bhaji made without onion, garlic and potatoesJain Pav Bhaji has a bhaji (curry) made with raw banana or plantain. Jain Pav Bhaji is made without potatoes, onions, ginger or garlic. The bhaji is served along with buttered pav.

Recipe Type:  Snacks
Cuisine:            Indian
Prep Time:     10 minutes
Cook time:     40 minutes
Total time:     50 minutes
Yield:                Serves 3-4


Ingredients:


2 Raw Banana
3 Tomatoes
1 cup Cauliflower Florets
0.5 cup Green Peas
0.5 Capsicum
2 Tbsp Oil
2-3 tsp Pav Bhaji Masala
0.5 tsp Turmeric Powder
1 tsp Red Chilli Powder
1 Lime
Handful of Coriander leaves
Salt to taste
Water as required
Butter to serve (Optional)

Method:


1. Cut the raw bananas into 3 large pieces. Add 2 cups of water and pressure cook until completely cooked.
2. Drain and allow the bananas to cool.
3. Cut the cauliflower into florets and boil them along with the green peas until cooked. This can either be pressure cooked or in a open pot.
4. Drain and keep aside.
5. Once the bananas are cool, peel the bananas and roughly mash them.
6. Puree the tomatoes in a mixer/blender.
7. Heat oil in a large frying pan. You can also use a kadhai or a large tava.
8. Once the oil is hot, add in the pureed tomatoes and cook on medium heat for 3-4 minutes. Keep stirring to prevent the tomatoes from burning.
9. Add in the turmeric powder and the pav bhaji masala. Pav bhaji masala is pretty spicy, so I recommend adding it by the spoonfuls and adjust according to taste.
10. Mix well and add in the mashed bananas, boiled cauliflower, peas and finely chopped capsicum.
11. Using a potato masher, mash the vegetables. Mash as per the consistency you want. If you want a chunky bhaji, mash roughly.
12. Add a little water and continue to mash until you get the desired consitency.
13. Add salt to taste and mix well. Add in the red chilli powder if using. You can also add more pav bhaji masala at this point. Mix well.
14. Cook on low heat for 8-10 minutes. Stir occassionally.
15. If the bhaji gets too dry, add a little water. If it is too watery, cook it longer so that the water evaporates.
16. Turn of the heat and add in the lime juice to taste.
17. Garnish with the chopped coriander leaves.
18. Add a generous spoonful of butter to each plate while serving. Skip this step if making for a vegan crowd.
19. Serve with butter toasted Pav.


If you liked this, you may also like:

Raw banana plantain koftas in a coconut milk based spicy tangy gravy
Raw Banana Kofta Curry

South Indian curd based curry
Doddapatre Tambuli


Read more ...

Aam Panna Recipe | Kairi Panna Recipe [Video]


Aam Panna or Kairi Panna is a drink made from boiled raw mangoes and jaggery. Aam Panna is popularly made in summer across India.

In a hurry? Jump to Video or Jump to Recipe

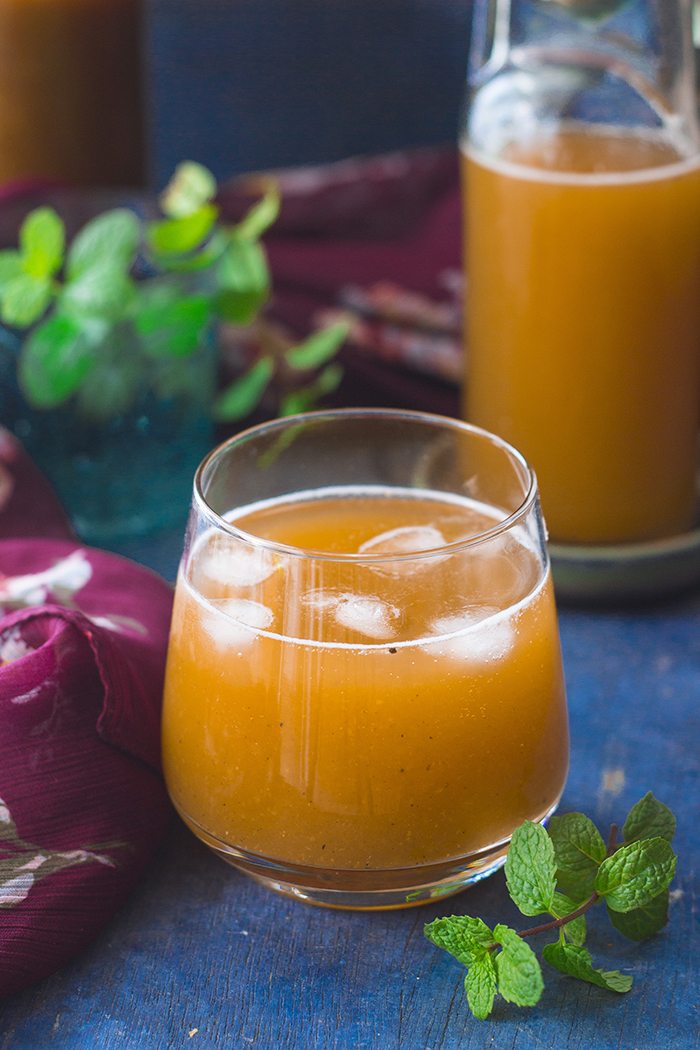
raw mango drink

Aam Panna, a beverage from my school days. My best friend's mom made the best Aam Panna ever and she never forgot to share a bottle of the concentrate with me. It was she who introduced me to this tangy sweet spicy beverage made of raw mangoes that is so popular during summers.

As I write this I realize it isn't really the right time to post this. By right time, I mean right now, this instant. Because it has just rained heavily and it is so cool that all I feel the need for is a hot cup of tea. But then I had this post all ready to go with the recipe jotted down, photos edited and the video uploaded. So I decided to go ahead and post it. And anyway it may not have rained in your city and it may be the absolute perfect time for you to try this golden treat.

Aam Panna is made in several ways, as I have learnt over the years. Earlier in my blogging days, I had posted one recipe that does not require boiling of the mangoes. That recipe involves grating the raw mango and soaking it in water, allowing the flavor of the mangoes to infuse into the water. That takes a little more time and the results are markedly different. I would not rate one above the other as each has its own taste. I've also seen recipes where the raw mango is roasted on coals or a gas stove until it is charred instead of boiling the mangoes. While I have not tried this recipe, it does sound very interesting. The one I am sharing today is the most common recipe out there.

raw mango drink

To make the Aam Panna, select firm raw mangoes. The mangoes are supposed to be unripe and sour. The mangoes are boiled, either with skin or without and then the pulp is mashed in a blender along with a sugar and spices like cumin and pepper. Some folks add cardamom too, but I feel it overpowers the fragrance of the mango, so I skip it. I also replaced the sugar with powdered organic jaggery and hence the bright orange color of my Aam Panna. If you use sugar, you tend to get a more golden color. You can also add mint while blending the panna. However, I don't recommend it if you plan to store the panna for long as the mint tends to get bitter after a few days. The blended puree is a concentrate and can be stored in the fridge for the whole of Summer. When you feel like having Panna, dilute it with water until the taste feels just right and serve. You can also add muddled mint leaves or mint puree while serving. The Aam Panna can also be diluted with Soda water or sparkling water for some added zing.

A homemade panna never has a bright green color. If you want that color, you can add food coloring, but I don't recommend it.

raw mango drink


If you made this recipe, let me know! Leave a comment here or on Facebook tag your tweet with @oneteaspoonlife on Twitter and don't forget to tag your photo @oneteaspoonoflife on Instagram. You can also email me at onetspoflife@gmail.com I'd love to see what you are up to.


If you like this recipe, do not forget to share it with your friends and family! 


You can follow One Teaspoon Of Life on FacebookTwitterInstagramPinterest or you can subscribe to One Teaspoon Of Life and receive all the latest updated via Email


Video Recipe


--------------------------------------------------------------------------------------------------------------------------

Aam Panna Recipe | Kairi Panna Recipe


raw mango drinkAam Panna or Kairi Panna is a drink made from boiled raw mangoes and jaggery. Aam Panna is popularly made in summer across India.

Recipe Type:  Beverage
Cuisine:            Indian
Prep Time:     15 minutes
Cook time:     15 minutes
Total time:     30 minutes
Yield:                Makes 18-20 glasses

Ingredients:


4 Raw Mangoes
2 cups Jaggery Powder
1 Tbsp Pepper, freshly crushed
1 Tbsp Cumin Powder
0.25 tsp Black Salt
0.25 tsp Salt
Water as required

Method:


1. Pressure cook the raw mangoes until they are cooked. You can also boil them in a pot until done.
2. Allow the mangoes to cool, then peel them.
3. Squeeze out the pulp of the raw mangoes and add to a blender.
4. Add in the jaggery powder or sugar, roasted cumin powder, pepper powder, black salt and salt.
5. Blend to a smooth paste with a little water. Adjust the quantities of jaggery, spices and salt as required.
6. Store the aam panna concentrate in a glass bottle in the fridge.
7. To serve the panna, add 3-4 Tbsp of the concentrate to a glass. Add in ice cubes (optional) and cold water. Stir and serve.
8. If the panna feels less sweet after diluting with water, then add a little jaggery powder while serving.


If you liked this, you may also like:
Indian mocktail made with guava and spices
Guava Panna

muskmelon sherbar
Kharbuja Panaka
rose yogurt beverage smoothie curd flavored drink Indian Punjabi
Rose Lassi


Read more ...

Doddapatre Tambuli Recipe [Video]


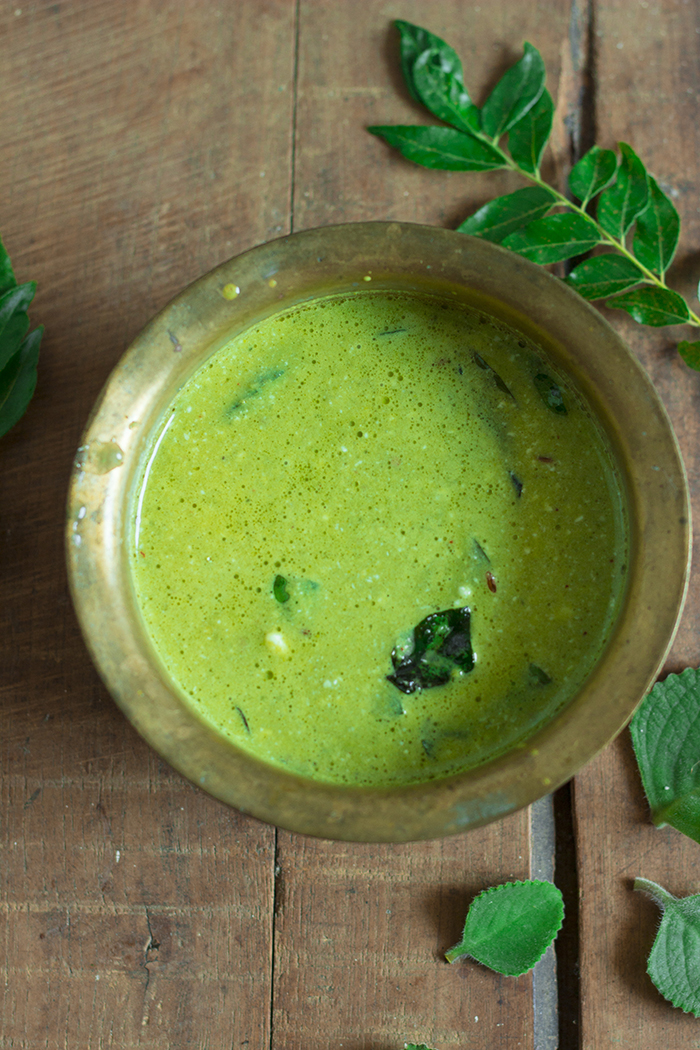
Doddapatre Tambuli is a traditional summer curry made with coconut and curd from Karnataka. This curry is made with Mexican mint leaves or Ajwain Patta.

In a hurry? Jump to Video or Jump to Recipe


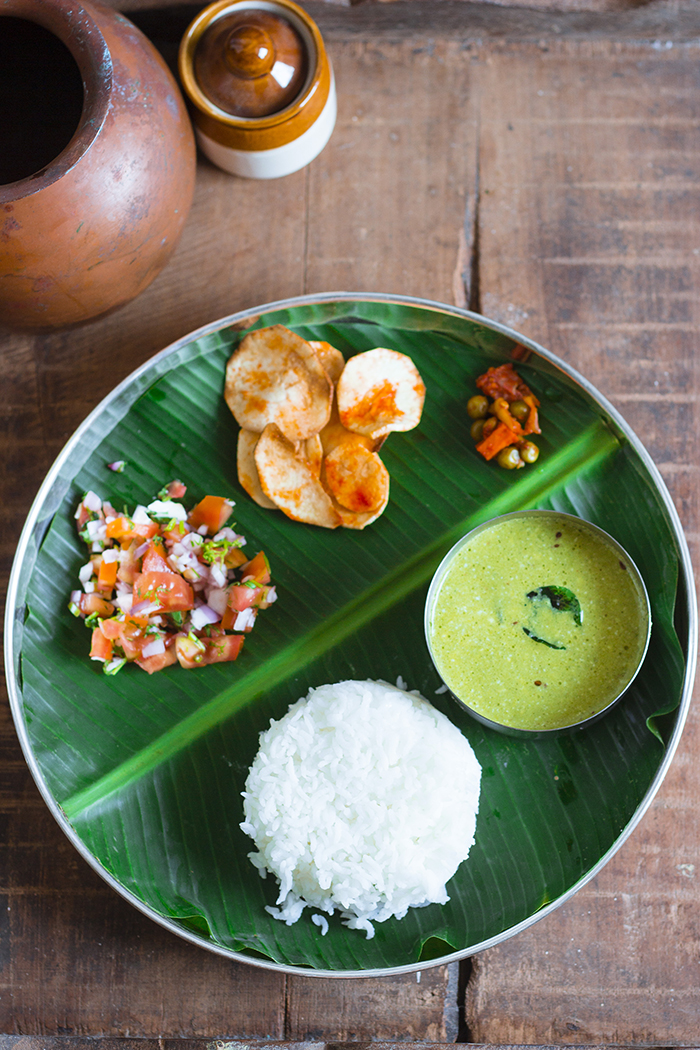
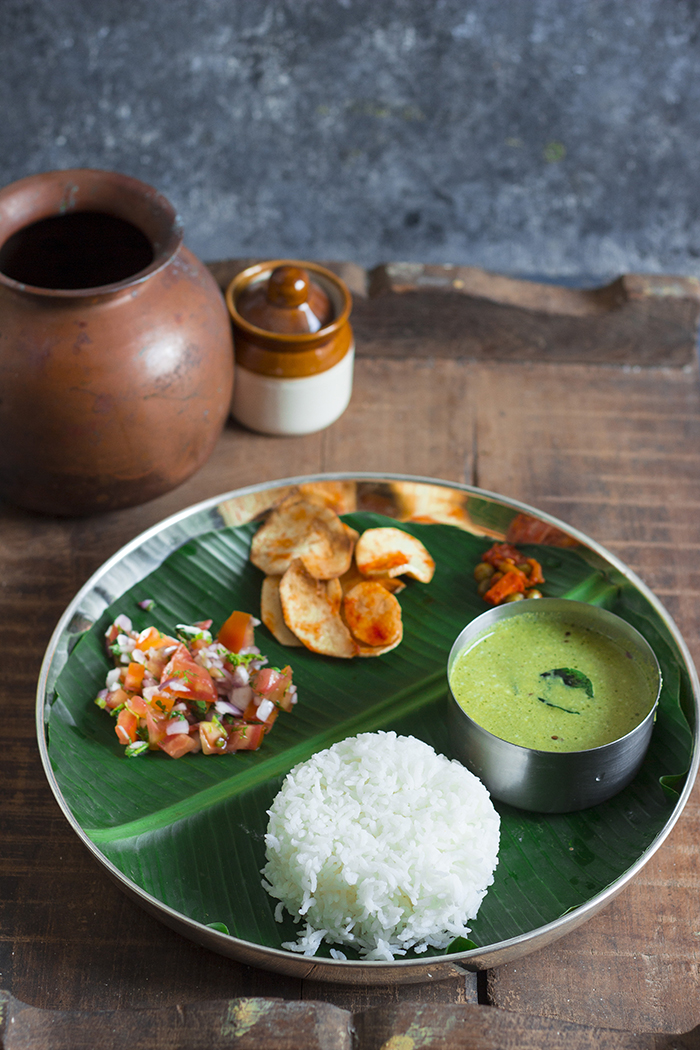
South Indian curd based curry

South Indian curd based curry

There has never been a better time to make Tambuli or Thambli as now. This summer heat calls for eating something that cools your insides.

Every region in India has a yogurt (curd) based curry that is popularly made in summer. Tambuli is one of those curries in Karnataka. It is very similar to Majjige Huli, but is much simpler and cooler. The main difference is Majjige Huli is boiled, while the Tambuli is not cooked, hence, usually needs to be consumed fresh.

Doddapatre
Doddapatre is known as Big Thyme or Mexican Mint in English, Ajwain Patta in Hindi and Karpooravalli in Tamil. It is a leaf that has a pungent and distinct aroma that is closest to the aroma of bishop's weed or ajwain, although unrelated. Some people equate the aroma to that of oregano or mint. This distinct aroma and taste becomes mild when the leaves are combined with yogurt and coconut to make the Doddapatre Tambuli.

My first interaction with this dish was at a Temple. On the coastal belt of Karnataka, there is a Lord Ganapati temple at Idagunji. When my grandfather frequented the place, one had to walk for miles together to reach it and it was hidden away tucked into a forest. I've seen the temple change from a small village temple to a quite popular one. When I used to visit the temple with my parents, it was still pretty small and the highway gave no indication to the tucked away temple. With no Google maps, one had to know the road before hand or had to ask the village folks for directions. It was here that they served a simple meal for lunch - Rice and Tambuli. It was and has been the only meal at a temple that I have relished.

South Indian curd based curry

Tambuli can be made with a variety of greens, but the recipe differs slightly with each green. Some are cooked longer while some are used raw. Doddapatre is mildly sauteed until it turn slightly yellow and wilts, this makes them milder in taste. The browned leaves are ground to a fine paste along with green chilli and fresh coconut. Whisked curd or buttermilk is added along with some salt. Then a tempering of cumin seeds and curry leaves, and Tambuli is ready to be served. Tamuli is not heated again, unlike most other curries. Tambuli is served with steamed rice.

P.S - This recipe has been reposted. The recipe was originally published in 2014. Images have been updated and a video has been added. The recipe remains the same.

South Indian curd based curry


If you made this recipe, let me know! Leave a comment here or on Facebook tag your tweet with @oneteaspoonlife on Twitter and don't forget to tag your photo @oneteaspoonoflife on Instagram. You can also email me at onetspoflife@gmail.com I'd love to see what you are upto. If you like this recipe, do not forget to share it with your friends and family! 


You can follow One Teaspoon Of Life on FacebookTwitterInstagramPinterest or you can subscribe to One Teaspoon Of Life and receive all the latest updated via Email


Video Recipe


--------------------------------------------------------------------------------------------------------------------------


Doddapatre Tambuli


South Indian curd based curryDoddapatre Tambuli is a traditional summer curry from Karnataka that is made with coconut, buttermilk or curd and doddapatre leaves, also known as Mexican mint or Ajwain Patta. This cooling curry is served with rice.

Recipe Type:  Main Course
Cuisine:          Karnataka
Prep Time:     5 minutes
Cook time:     30 minutes
Yield:              2 Servings

Ingredients:


20-25 Doddapatre Leave, chopped
0.5 cup Fresh Coconut, grated
1.5 cups Curd
1 Green Chilli
1 tsp Cumin seeds
A few Curry leaves
3 tsp Oil
Salt to taste
Water as required

Method:


1. Heat 1 tsp of oil in a pan and add the chopped doddapatre leaves.
2. Saute until the leaves wilt and turn slightly yellow.
3. Remove from heat and cool slightly.
4. Fry until the doddapatre turns slightly yellow.
5. Remove from heat and allow it to cool.
6. Grind it along with coconut, green chilli and a little water to a fine paste
7. Heat oil in the pan and add the cumin seeds. Once they brown, add the curry leaves.
8. Remove the pan from heat and add the blended paste. Mix well.
9. Add in whisked curd or buttermilk. Add salt to taste.
10. Add in more water if it is very thick.
11. Serve it with hot rice


If you liked this, you may also like:
How to make majjige huli recipe at www.oneteaspoonoflife.com
Majjige Huli

stew made with vegetables, coconut and yogurt
Avial
Indian accompaniment made with yogurt, boondi (fried gram flour balls) and spices
Boondi Raita

Read more ...