Showing posts with label Coconut. Show all posts

Honey Cake (Video Recipe)


Bangalore Iyengar Bakery style Honey Cake is made by soaking an orange sponge cake with honey syrup and then topping it with a jam-coconut frosting

how to make honey cake recipe,how to make bangalore honey cake recipe, how to make iyengar bakery honey cake recipe, eggless cake recipe, eggless baking at www.oneteaspoonoflife.com


how to make honey cake recipe,how to make bangalore honey cake recipe, how to make iyengar bakery honey cake recipe, eggless cake recipe, eggless baking at www.oneteaspoonoflife.com


Flashback to April 2002, 15 years and 1 month ago, I was in Bangalore with my dad, all set to answer the Common Entrance Test (CET) that would give me a chance to study Engineering in Karnataka. Because I took so long to decide that I want to answer CET, all the hotels we knew of were full. My aunt came to our rescue and arranged for us to stay at her sister's place. Her family was extremely hospitable, so before we left, we asked them what their favorite sweet was so we could it buy it for them as a gift. Their response was - Honey Cake, a complete novelty to me. 

Honey Cake is a Bangalore special. It is not something you will get in the gourmet high end bakeries, it is something that is available in the humble Iyengar Bakeries that dot the old city. A simple orange sponge that is soaked in a sweet honey syrup, topped with a jam coconut frosting is what this sweet treat is all about.

how to make honey cake recipe,how to make bangalore honey cake recipe, how to make iyengar bakery honey cake recipe, eggless cake recipe, eggless baking at www.oneteaspoonoflife.com

I had completely forgotten about this beauty until I went to the bakery randomly to buy some bread and saw them bring out a tray full of fresh honey cake. I had to have it!!! Unfortunately, the cake wasn't eggless and that prevented us from enjoying it then and there. So the food blogger was given the task of making the cake at home so all could enjoy it. I'm happy to say I did not disappoint. The cake was very similar to that memory of 2002. The only little tip I have is let that cake soak for a few hours. The syrup needs to soak up the entire cake and not just the bottom. Eating it immediately (like we impatient bunch did), will not let the honey permeate through the cake.  If you cannot resist the cake (like us, again), just keep a bowl of syrup nearby and just drizzle it over the sides of the piece of cake while you eat.

how to make honey cake recipe,how to make bangalore honey cake recipe, how to make iyengar bakery honey cake recipe, eggless cake recipe, eggless baking at www.oneteaspoonoflife.com

how to make honey cake recipe,how to make bangalore honey cake recipe, how to make iyengar bakery honey cake recipe, eggless cake recipe, eggless baking at www.oneteaspoonoflife.com

Soooo, let's break down the Honey Cake:

ORANGE SPONGE CAKE - The base of the whole cake, well, is the cake. This orange sponge was sooo delicious that I could eat it just like that over a cup of tea. In fact, I will, very soon, just when I feel I've denied myself of sufficient number of calories to bake a cake again. Until then, I just live with the memory of this yummy orange sponge. This sponge is so simple to make, you could have a kid do it. No creaming butter until your arm aches. Just 6 simple ingredients, hand whisked until combined. I used freshly squeezed Orange Juice in my cake, 2 not so juicy oranges gave me half a cup of OJ. Use more to get a more pronounced Orange flavor. I know I will. If you dislike oranges, however, just skip it and use water in place of it. 

HONEY SYRUP - This syrup isn't like your regular syrups. It is not boiled until you get a certain thread consistency. Just mix honey in warm water and your syrup is ready. Tastes purely of honey. 

JAM COCONUT FROSTING - Use whichever jam you want. The cake you get in bakeries seem to use mixed fruit, so I used mixed fruit. But I know I would love a mango jam to go with this cake. Heat together the jam and desiccated coconut (dry) along with a little water or honey syrup to make the frosting. The consistency should be slightly loose so it is easy to spread. You can buy desiccated coconut from the supermarket or you can just grate dry coconut using a fine grater to make your own. Top the frosted cake with more of this desiccated coconut to make it more coconut-y.

I have a Video Recipe for you too: 


Video Recipe


If you made this recipe, let me know! Leave a comment here or on Facebook, tag your tweet with @oneteaspoonlife on Twitter and don't forget to tag your photo #oneteaspoonoflife on Instagram. You can also email me at onetspoflife@gmail.com. I'd love to see what you are upto. 

If you like this recipe, do not forget to share it with your friends and family! 

You can follow One Teaspoon Of Life is there on Facebook, Twitter, Instagram, Pinterest and Google+ or you can subscribe to One Teaspoon Of Life and receive all the latest updated via Email (How convenient!!)

how to make honey cake recipe,how to make bangalore honey cake recipe, how to make iyengar bakery honey cake recipe, eggless cake recipe, eggless baking at www.oneteaspoonoflife.com

how to make honey cake recipe,how to make bangalore honey cake recipe, how to make iyengar bakery honey cake recipe, eggless cake recipe, eggless baking at www.oneteaspoonoflife.com


If you liked this, you may also like:


Honey Cake


how to make honey cake recipe,how to make bangalore honey cake recipe, how to make iyengar bakery honey cake recipe, eggless cake recipe, eggless baking at www.oneteaspoonoflife.comBangalore Iyengar Bakery style Honey Cake is made by soaking an orange sponge cake with honey syrup and then topping it with a jam-coconut frosting.

Recipe Type:  Dessert
Cuisine:            Indian
Prep Time:     15 minutes
Cook time:     60 minutes
Yield:                Serves 5-6


Ingredients:


For the Orange Sponge Cake:


1.5 cup all purpose Flour (Maida)
1 cup + 2 Tbsp sweetened Condensed Milk
0.5 cup fresh Orange Juice
0.5 cup Oil
1 tsp Baking Powder
0.5 tsp Baking Soda

For the Honey Syrup:


0.5 cup Water
3 Tbsp Honey

For the Jam Coconut Frosting:


2 Tbsp mixed fruit Jam
1.5 Tbsp Water or Honey Syrup
3 Tbsp dry desiccated Coconut

Others


3 Tbsp dry desiccated Coconut

Method:


To make the Orange Sponge Cake:


Add baking powder and bakind soda to the flour and mix well.
Add orange juice, oil and sweetened condensed milk and mix until combined and smooth.
Preheat the oven to 180 degree Celsius.
Grease a cake mould or baking tin and dust it with flour until coated. Remove the excess flour by upturning the tin.
Bake the cake for 30-35 minutes or until done. Test by inserting a toothpick in the center, if it comes out clean, the cake is done, else, let is bake a little longer.

To make the Honey Syrup:


Mix the honey in warm water and keep aside.

To make the Jam-Coconut Frosting:


Heat the jam in a pan and add the desiccated coconut.
Loosen the jam-coconut mixture by adding a little water or honey syrup.
Stir and cook for 2-3 minutes. The frosting should be smooth without any lumps of jam in it.

To assemble the Honey Cake:


Remove from heat and keep aside.
Prick the cake with a toothpick or a fork to create holes.
Pour half to 3/4th of the syrup onto the cake and allow it to soak. You can keep the cake aside at this point for 30-60 minutes and then pour the remaining syrup on the cake.
Spread the jam-coconut frosting on the cake.
Top with more dry desiccated coconut and chill until ready to serve.

how to make honey cake recipe,how to make bangalore honey cake recipe, how to make iyengar bakery honey cake recipe, eggless cake recipe, eggless baking at www.oneteaspoonoflife.com


Read more ...

Natural's style Tender Coconut Ice Cream (without ice cream maker)


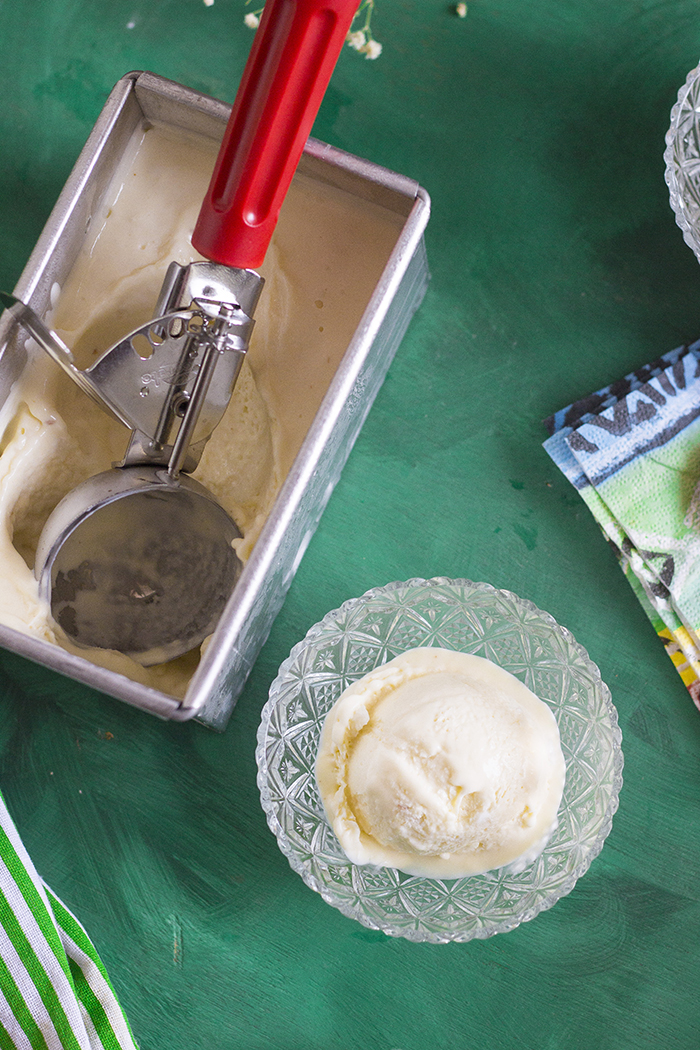
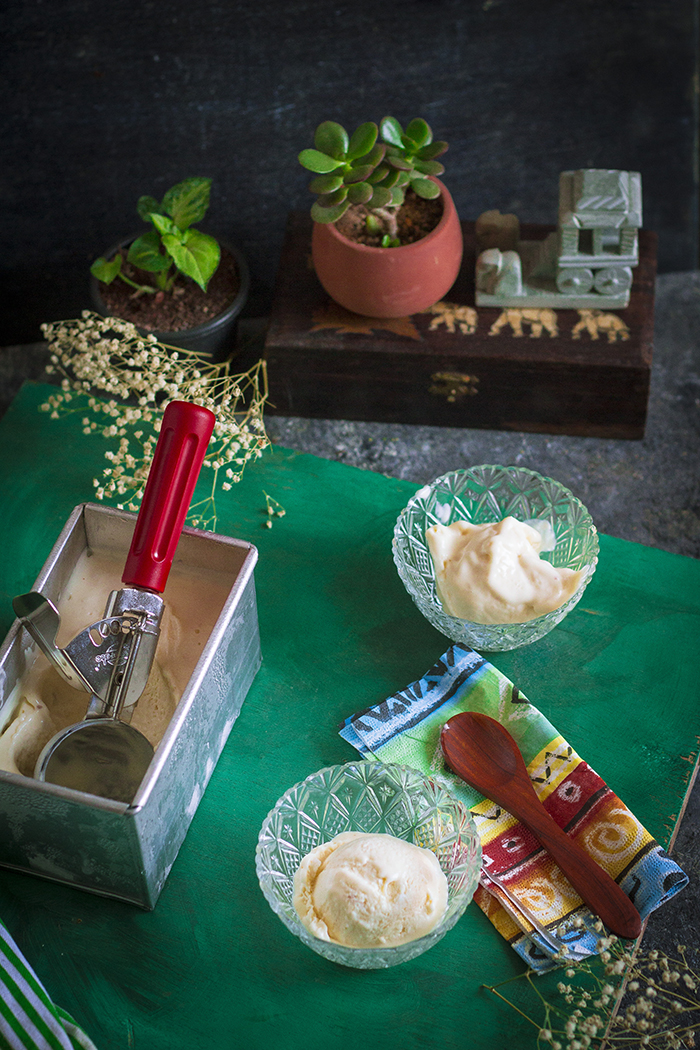
Tender Coconut Ice Cream recipe with step by step video instructions. This Naturals style Tender Coconut Ice Cream is made with only 4 ingredients and WITHOUT an ice cream maker!!! Tender Coconut Ice Cream is glutenfree and fits a Jain diet.

In a hurry? Jump to Video or Jump to Recipe


How to make coconut ice cream, coconut ice cream recipe, how to make ice cream without eggs, how to make ice cream without ice cream maker, naturals tender coconut ice cream recipe at www,oneteaspoonoflife.com

Heat Wave ALERT!! Bangalore is reeling under a heat wave right now and temperatures are soaring to mid thirty degrees C. Time to wallow in ice cream!

I have half the mind to move on to a chilled liquid diet until the heat wears off. But you know me, I wouldn't last a day without any food. So I'm doing the next best thing, well... not the next, but the BEST best thing, and that is loading up on ice cream. Chilled sweet perfection.

Tender coconut icecream

Everyone who's anyone in a town which has a Natural's Ice Cream Parlour has definitely tried their signature flavor - Tender Coconut. It's even in their logo. My family's favorite flavor. I personally die for their Custard Apple flavor but Gee and Raj love the Tender Coconut. You have to cook what the family will eat. Well, there is no cooking involved here, just like my last recipe of Bircher Muesli (Overnight Oats), which was also chilled, keeping in the spirit of Summer. 

Cut to last Saturday, while we were walking back home from one of our ridiculously long weekend walks, we picked up 4 tender coconuts from a local seller. Tender Coconut water is supposed to cool the body, and this heat definitely necessitates cooling. So the plan was to keep the coconut water in the fridge and drink it over the next few days so that we do not reach for any sugary sodas or drinks. 

I was then left with the meat or flesh of 4 coconuts. I don't mind eating it just like that or with a little jaggery, but 4 is a little too much for us to eat in a day. Light bulb moment!! Why don't I try making Tender Coconut Ice Cream! and the idea was born. I've made pop-sickles before, but never an ice cream. We usually just drive down to Natural's and buy a scoop of our favorite flavor. But Sunday was a first in my recipe book. I made Tender Coconut Ice Cream.... 

How to make coconut ice cream, coconut ice cream recipe, how to make ice cream without eggs, how to make ice cream without ice cream maker, naturals tender coconut ice cream recipe at www,oneteaspoonoflife.com

How to make coconut ice cream, coconut ice cream recipe, how to make ice cream without eggs, how to make ice cream without ice cream maker, naturals tender coconut ice cream recipe at www,oneteaspoonoflife.com

I don't own an ice cream maker and I don't know anyone who does, so this ice cream is something anyone can whip up. All you need is a whisk or a spatula. If you have a hand mixer, then you have all the power you need. This ice cream needs only 4 ingredients. Yup, that's it - FOUR!! Cream, Sugar, Coconut Meat and Coconut Water. Since there are only 4 ingredients, make sure you use fresh and the best quality you can find. 

I used fresh medium fat cream. Low fat cream may not work well. The cream needs to be chilled before use, else you may end up with butter instead of whipped cream.Whip the chilled cream until you have soft peaks. Blend a part of the coconut meat with 1/2 cup of coconut water. Fold in with the cream along with powdered sugar and chopped coconut meat. Pour in a freezer safe container and cover loosely with aluminium foil. Every 45-60 minutes for the first 3 hours, remove the ice cream from the freezer and whisk once completely and refreeze. This will prevent it from getting icy in places.
Tender coconut icecream

If you made this recipe, let me know! Leave a comment here or on Facebook, tag your tweet with @oneteaspoonlife on Twitter and don't forget to tag your photo #oneteaspoonoflife on Instagram. You can also email me at onetspoflife@gmail.com. I'd love to see what you are upto. 

If you like this recipe, do not forget to share it with your friends and family! 

You can follow One Teaspoon Of Life is there on Facebook, Twitter, Instagram, Pinterest and Google+ or you can subscribe to One Teaspoon Of Life and receive all the latest updated via Email (How convenient!!)


Video Recipe


--------------------------------------------------------------------------------------------------------------------------

Tender Coconut Ice Cream


How to make coconut ice cream, coconut ice cream recipe, how to make ice cream without eggs, how to make ice cream without ice cream maker, naturals tender coconut ice cream recipe at www,oneteaspoonoflife.comNaturals inspired Tender Coconut Ice Cream made with only 4 ingredients without an ice cream maker.

Recipe Type:  Dessert
Cuisine:            Indian
Prep Time:     30 minutes
Cook time:     0 minutes
Total time:     6 Hours 30 Minutes
Yield:                Serves 7-8


Ingredients:


400ml medium-fat Cream (chilled)
4 Tender Coconuts Meat
0.5 cup Tender Coconut Water
400gms sweetened Condensed Milk or 6-7 Tbsp Powdered Sugar

Method:


1. Blend the meat of 3 tender coconuts along with the tender coconut water to a smooth paste.
2. Chop the remaining tender coconut meat finely.
3. Whisk the chilled cream until you have soft peaks. Be careful not to over whisk, the cream will curdle into butter. If you feel the cream is getting warm, chill it for 10 minutes in the fridge and restart whisking.
4. Fold in the coconut paste, condensed milk or powdered sugar and the coconut pieces until combined.
5. Pour into a freezer safe box or baking pan. Cover with aluminium foil and place in the freezer.
6. After every hour for the first 3 hours, remove the ice cream from the freezer and whisk it again with the handheld mixer or with a spatula to prevent formation of ice crystals.
7. Leave it in the freezer until completely frozen.
8. Scoop and serve.


How to make coconut ice cream, coconut ice cream recipe, how to make ice cream without eggs, how to make ice cream without ice cream maker, naturals tender coconut ice cream recipe at www,oneteaspoonoflife.com


If you liked this, you may also like:

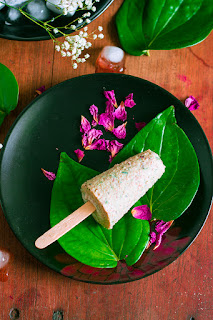
Meetha paan kulfi
Paan Kulfi

Coconut Laddoo
Blueberry Litchi Coconut Mocktail

Read more ...

Undhiyu | Gujarati Undhiyo Recipe | Gujarati Mix Vegetable Curry [Video]


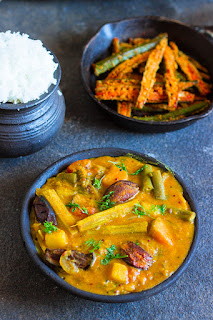
Undhiyu Recipe with step by step video instructions. Undhiyu is a mix vegetable Winter curry from the western state of Gujarat. It is a lovely green curry made from fresh coconut, coriander leaves and other aromatics and spices. The choicest of the winter vegetables are added along with the quintessential Muthia or Muthiya. This winter special is best enjoyed with hot Puris.

In a hurry? Jump to Video or Jump to Recipe

gujarati undhiyo, surti undhiyu

Food is how I celebrate and this mix vegetable Gujarati Undhiyu is just that. A celebration in your mouth. Full of seasonal winter vegetables and spices. A warming bowl of curry. I made this last week. Somehow it took me a week to get this published. I cooked some other amazing dishes like this Vegan Zucchini Kale Lasagna that I was really excited to post about, and somehow this celebratory bowl just took the backseat. Not that this is any less amazing, but I was super excited to have tried my hand at making vegan cheese that I had to bring it out to the world just as quickly as I could. 

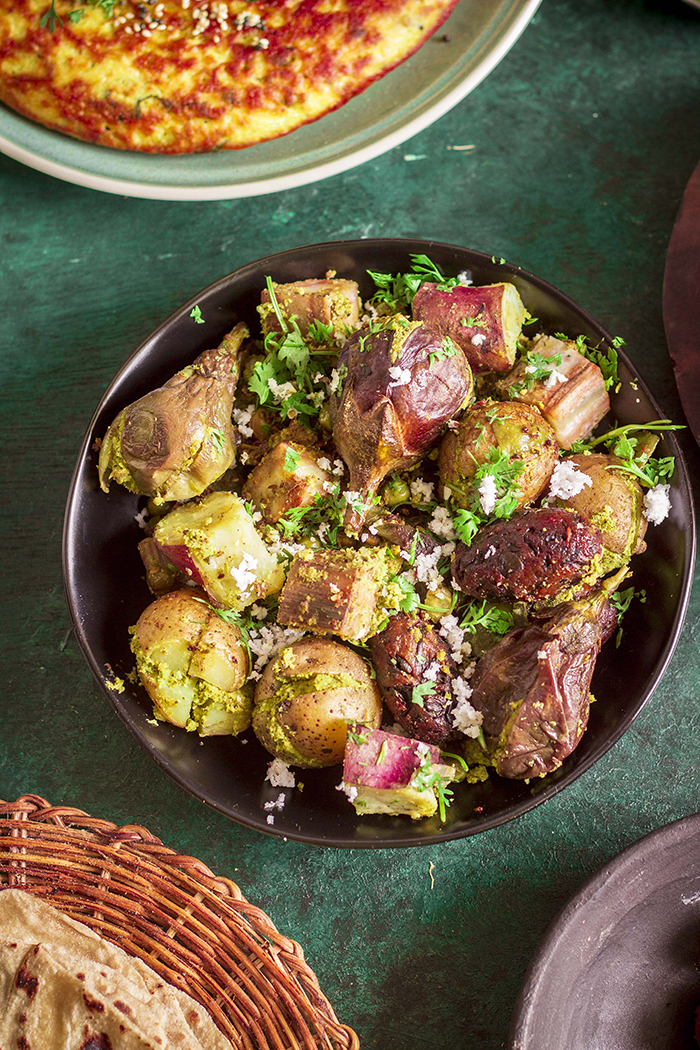
Back to my all-time favorite Gujarati curry - Undhiyu. While one thinks of India as a predominantly vegetarian eating country, it happens we are all wrong. Apparently a lot of India actually caters to the non vegetarians, but there is one state that never lets down vegetarians - Gujarat. The western most state of India is full of flavorful vegetarian food. From Dhokla to Handvo and similar scary sounding dishes that actually explode with flavor in your mouth to this super delicious Undhiyu. Undhiyu in it's humblest form is actually just a simple mix vegetable curry that is made using seasonal winter vegetables and a masala paste made using coconut, fresh coriander leaves and a few spices.

I had forgotten how much I liked Undhiyu until recently my sis's sis in law got us some. I couldn't get enough of it. I could have eaten the entire pot full of curry, but hey, I'm not that rude, I had to leave some for the rest. I HAD to make some of my own that I need not share with anyone, except of course Raj. I can rarely sneak food without him knowing, after all, he does the dishes. I love that man.

gujarati undhiyo, surti undhiyu

gujarati undhiyo, surti undhiyu

Traditionally, Undhiyu uses the following vegetables:
  • Potato
  • Baby brinjal or eggplant
  • Purple yam
  • Yam
  • Raw banana or plantain
  • Fresh Toovar or Pigeon Peas (Togarikalu)
  • Fresh Surti Papdi or Hyacinth Beans (Avarekai / Avarekalu)

A lot of this can be substituted if it is not the season or not available in your area. I could get most of it, except the purple yam. I'm yet to find it in Bangalore. I used Arbi. You can replace it with any variety of yam. The fresh toovar or pigeon peas can be replaced with fresh green beans. The surti papdi can be replaced with green beans and the surti beans can be replaced with Edamame. Don't worry about having the exact ingredients, just use what is available.

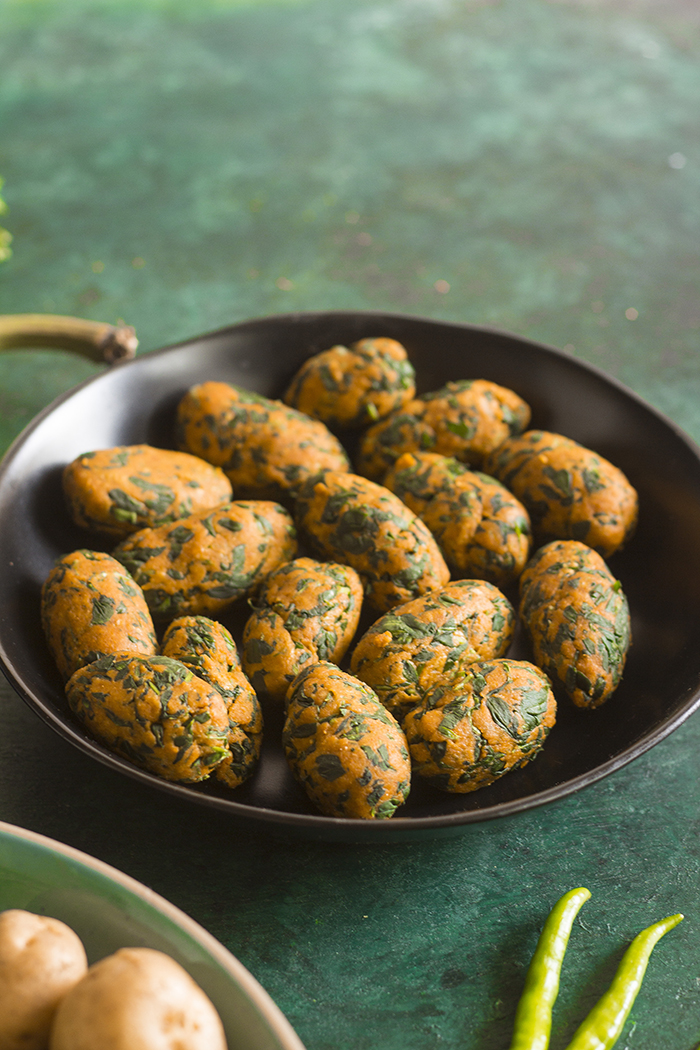
Apart from the vegetables, steamed balls made of gram flour or besan, spices and methi leaves (fenugreek leaves) called Muthia are also added for more flavor and texture. Methi leaves add a nice salty fragrance to the dish. But if you cannot find methi, feel free to replace with dill leaves, coriander or any fragrant greens. You can also buy ready made muthia in some places, like Ahmedabad and Mumbai.

gujarati undhiyo, surti undhiyu

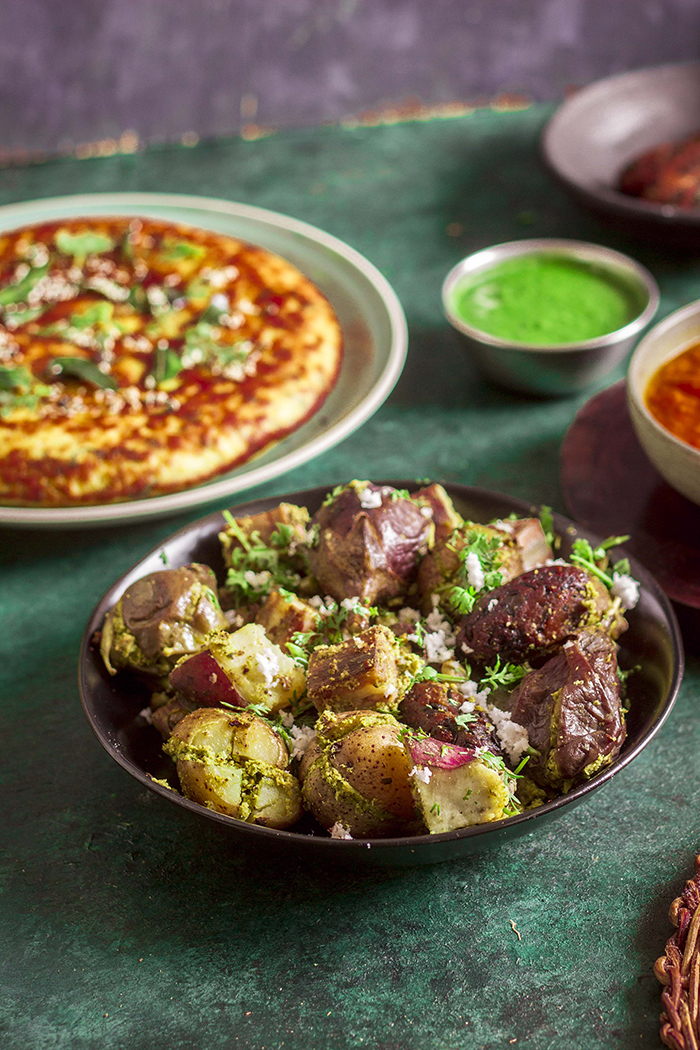
Undhiyu gets all its flavor from the green masala. The green masala is made by blending together fresh coriander leaves, fresh coconut, ginger, garlic, green chillies, sesame seeds, coriander powder, cumin powder, sugar, salt and lime juice. This masala is then stuffed into brinjal, and into baby potatoes if you use them. Then just heat oil in a pressure cooker and layer the vegetables and leftover masala and cook for 1-2 whistles until done. A pressure cooker drastically cuts down the cooking time making it a very quick cooking dish. However, if you don't own a pressure cooker, just use a covered flat bottomed saucepan or pot, preferably deep.

Undhiyu is generally eaten with either roti or puri.

gujarati undhiyo, surti undhiyu


If you made this recipe, let me know! Leave a comment here or on Facebook tag your tweet with @oneteaspoonlife on Twitter and don't forget to tag your photo @oneteaspoonoflife on Instagram. You can also email me at onetspoflife@gmail.com I'd love to see what you are up to.


If you like this recipe, do not forget to share it with your friends and family! 


You can follow One Teaspoon Of Life on FacebookTwitterInstagramPinterest or you can subscribe to One Teaspoon Of Life and receive all the latest updated via Email


Video Recipe


--------------------------------------------------------------------------------------------------------------------------


Undhiyu | Gujarati Undhiyo Recipe | Gujarati Mix Vegetable Curry


gujarati undhiyo, surti undhiyu Gujarati Undhiyu or Undhiyo is a vegan mix vegetable curry made with seasonal winter vegetables, methi muthia and a coriander based masala.

Recipe Type:  Curry
Cuisine:            Indian
Prep Time:     30 minutes
Cook time:     45 minutes
Total time:     75 minutes
Yield:                Serves 4 to 5


Ingredients:


The Vegetables:


5-6 Baby Potatoes
5-6 small Brinjals
1 raw Banana
1 small Sweet Potato
0.5 cup fresh Toovar or Pigeon Peas or Green Peas
0.5 cup fresh Surti beans or Hyacinth Beans or Edamame
8-10 fresh Surti Papdi or Green Beans

For the green masala:


1 cup chopped Coriander
1 cup grated Coconut
1 Tbsp Garlic, chopped
1 Tbsp Ginger, chopped
2-3 Green Chilli
2 tsp Coriander Powder
1 tsp Cumin Powder
0.5 tsp Turmeric Powder (Optional)
1 Tbsp Sesame Seeds
1 tsp Sugar
0.5 lime
Salt to taste

For the methi muthia:


1 cup Methi leaves, tightly packed
1 cup Whole wheat flour (atta)
0.5 cup fine Semolina (rava / sooji)
1 Tbsp Gram flour (Besan)
1 tsp Cumin Powder
2 tsp Coriander Powder
1 tsp Sugar
Pinch of asafoetida (hing)
2 tsp Red chilli powder
0.5 tsp Turmeric powder
3 Tbsp Oil
Salt to taste
Water as required
Oil to fry

For the tempering (tadka):


4-5 Tbsp Oil
0.5 tsp Carom seeds or Ajwain
1 tsp Cumin seeds or Jeera

1 cup Water

Method:


To make the methi muthia:


1. Add the coriander powder, cumin powder, hing, red chilli powder, turmeric powder, sugar, salt and 2 Tbsp oil to the chopped methi leaves and mix well.
2. Add in gram flour (besan), whole wheat flour, semolina (rava / sooji) and 1 Tbsp of remaining oil and knead into a stiff dough with water.
3. Heat Oil in a deep pan for frying.
4. Shape the muthia into small logs and deep fry until done and browned.
5. Keep aside until required.

To make the green masala:


6. Grind together all the ingredients for the green masala. If the mixture is too dry and difficult to grind, add only 1 tsp of water to help grinding. Adding too much water will make the consistency of the masala too loose.

To make the Undhiyu:


7. Peel the raw banana and cut into large chunks.
8. Chop the sweet potato into chunks.
9. Chop the surti papdi or the beans into 1" pieces.
10. Make a criss cross lengthwise slit on the brinjal and the baby potato.
11. Stuff the brinjals and potatoes with the masala.
12. Heat 4-5 Tbsp oil in the pressure cooker.
13. Add carom seeds (ajwain) and cumin seeds.
14. Once they brown slightly, add the surti papdi, surti beans and the fresh toovar or their replacements.
15. Add one third of the leftover masala and mix well.
16. Now add the raw banana and sweet potato.
17. Sprinkle over one third of the green masala. Sprinkle over 2-3 pinches of salt and 1-2 Tbsp oil.
18. Now layer the stuffed vegetables on the top along with the muthia.
19. Add the remaining masala and sprinkle a pinch of salt.
20. Add 1 cup of water from the side. Cover and pressure cook for 2-3 whistles or 8-10 minutes.
21. After the pressure settles, open the pressure cooker and gently mix the curry without breaking the stuffed vegetables.
22. Garnish with lots of fresh grated coconut and chopped coriander leaves before serving. Serve hot with roti or puris.


If you liked this, you may also like:

mix vegetable gravy paneer jalfrezi indian
Vegetable Jalfrezi

Oriya dalma with mix vegetables
Dalma
mixed dal gujarati handvo
Handvo
Read more ...

Alsane Tonak | Goan Pao Bhaji


How to make goan bhaji pao, alsanyache tondak at One Teaspoon Of Life www.oneteaspoonoflife.com
You know that feeling when you soooo want to eat something, you can already taste it before you have laid your hands on it, but it is so far away that you cannot reach it? Disappointed?

I miss Pao!!

Pao, sometimes called the lifeline of Goa, is a bread that was introduced to Goa by the Portuguese settlers and is by far the best bread I've ever had. Pao, sometimes called Pav, is available almost all through the country, but no one makes it the way it is made in Goa. It has a crusty outside and a chewy crumb; a texture that is just incomparable. Pao is such an integral part of Goan cuisine, that the Government actually subsidizes the cost of Pao.


I've pretty much eaten Pao every single day I lived in Goa. I've bought it for my grandparents when it cost as little as 25 Paise and today, when it costs 20 times more. I still wait for the Poder (local Pao seller) to come on his bicycle fixed with a cane basket in the back, honking his way through the meandering little streets bringing bread to every local man.

Look at this variety of wonderful Pao that I picked up on my recent vacation to Goa.

How to make goan bhaji pao, pav bhaji, alsanyache tondak at One Teaspoon Of Life www.oneteaspoonoflife.com

Just this week, I was in Goa. It was a short 5 day vacation where I met up with family and haunted all our favorite food joints across the state. While Bangalore is cosmopolitan and you pretty much get everything here, except probably the purple yam. I miss those certain somethings, that I took so much for granted when I stayed in Goa - a simple cheesy Mushroom Capsicum sandwich; Gobi Manchurian made exactly how it is supposed to be, fresh and with no food coloring; Chocolate cakes with chocolate cream that are to DIE for; that too sweet, yet perfectly enjoyable Badam Milk that you have to drink standing outside on the road; Samosa which has little pieces of beetroot in it along with the potato; that garlicky Batata Vada and lastly, loads and loads of Pao Bhaji. 

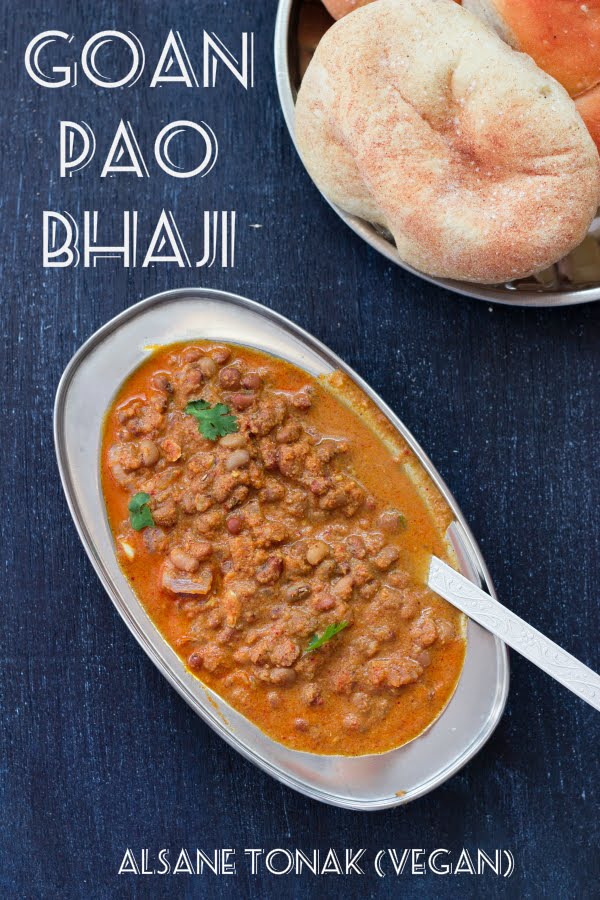
As much as I miss that wonderful Pao, I miss the coconut filled Bhaji too. It is pretty much my standard breakfast when I go to Goa. The Goan Pao Bhaji is very different from the Mumbai Pav Bhaji that is made with mashed potatoes and mixed vegetables. The Goan Pao Bhaji is usually made with some beans and coconut. Sometimes with Mushrooms too.

How to make goan bhaji pao, pav bhaji, alsanyache tondak at One Teaspoon Of Life www.oneteaspoonoflife.com

Goan bhaji is also called Tonak with Alsane Tonak being the popular one around. Alsane or Alsande are red cowpeas. To make Alsane Tonak, these red cowpeas are simmered in a spicy roasted coconut masala. 

To make Alsane Tonak, you need to coax the coconut gently to turn golden brown, before you grind it along with spices to make the Tonak gravy. This Alsane Tonak is not a recipe to be rushed, it encompasses the spirit of Goa - Relaxed, Sosegado... This is where you add all your love and patience into the otherwise simple gravy. The darker the color, the better the dish. However, don't burn it, trying to get it dark. 

When you go to a restaurant and ask for a "Mixed Bhaji", you will get the Tonak served with a helping of a simple Potato Bhaji on the side. So if the spice gets a bit much, let your next spoonful be the salty turmeric potatoes.

How to make goan bhaji pao, pav bhaji,  alsanyache tondak at One Teaspoon Of Life www.oneteaspoonoflife.com

If you liked this, you may also like:


Alsane Tonak | Goan Pao Bhaji


How to make goan bhaji pao, pav bhaji, alsanyache tondak at One Teaspoon Of Life www.oneteaspoonoflife.comAlsane Tonak is a Goan Pao Bhaji curry made by simmering red cowpeas in a spicy roasted coconut gravy.

Recipe Type:  Side
Cuisine:            Goan
Prep Time:     8 hours
Cook time:     1 hour
Yield:                Serves 4-5


Ingredients:


1 cup Red Cowpeas, dried
2 cups fresh Coconut, grated
2 Onions, chopped
1 Tbsp Coriander seeds
2-3 Cloves
5-6 Peppercorns
0.25" Cinnamon
1 Bay leaf, dried
2-3 dry Red Chillies
1/2 tsp Turmeric Powder
1 tsp Garam Masala
4-5 Kokum Peels or Marble sized Tamarind
2-3 cloves Garlic
0.5" Ginger
4-5 tsp Oil
Salt to taste
Water as required

Method:


Soak the cowpeas overnight or for 7-8 hours.
Drain the water and cook the cowpeas with 2 cups of water and 1/2 tsp Salt until done. The cowpeas should not be mushy, they should still have a bite. If using a pressure cooker to cook the peas, keep it for only 1-2 whistle and then release the pressure immediately, else they will overcook.
Drain the water and keep aside. Do not throw out the water, we use it later in the recipe.
Soak the kokum peels or tamarind in 1/2 cup of warm water and keep aside.
Heat 3 tsp Oil in a kadhai or pan and add half the onions.
Fry until the onions are translucent.
Now add the grated coconut and on low flame roast until the coconut turns golden brown. Stir occasionally to prevent the coconut from burning. This slow roasting takes time, almost half an hour.
When the coconut turns golden brown, add the cloves, cinnamon, bayleaf, peppercorns and dry red chillies and continue to roast for another 3-4 minutes.
Allow to cool, then add the turmeric powder and the water in which the Kokum or Tamarind was soaked and grind to a fine paste.
Crush the ginger and garlic into a coarse paste.
Heat the remaining oil in a pan and add the onions.
Fry until translucent. Now add the ginger-garlic paste and fry for 1 minute until fragrant.
Add the ground coconut masala and mix well.
Add the cooked cowpeas along with 0.75 cup water in which it was cooked.
Add salt if required.
Allow it to come to a boil, then cover and simmer for 4-5 minutes.
Serve hot along with Goan Pao or bread.


How to make goan bhaji pao, pav bhaji, alsanyache tondak at One Teaspoon Of Life www.oneteaspoonoflife.com


Read more ...

Coorg Pumpkin Curry


Coorg Pumpkin Curry kaddu sabzi coconut vegan kumbalkai palya


This Coorg style pumpkin curry is made with ripe pumpkin, coconut and spices. It is a spicy curry unlike most other pumpkin curries.

I don't usually crave pumpkins, at least not like I crave chocolate. But recently after eating a small bowl of pumpkin curry in office, I wanted more. And telepathically, my mother in law gave me a huge organic homegrown pumpkin. What's better than a pumpkin? A HOMEGROWN one.

The thing I hate most about pumpkins is actually peeling them. By the time I got through peeling this huge pumpkin, my palms were sore with the knife handle rubbing against them, my arms ached with all that effort. But the slightly sweet yet hot spicy coconut-ty curry made it totally worth it.

Coorg Pumpkin Curry kaddu sabzi coconut vegan kumbalkai palya

I usually make a simple dry pumpkin curry by boiling diced pumpkins with some fresh green chillies and garnishing it with freshly grated coconut. Simple and easy. It lets the sweetness of the pumpkin shine through. But this time I did not want a very sweet pumpkin curry. I wanted a change. I had something in mind but absolutely no idea how to make it.

Coorg is this beautiful place nestled among the Western Ghats of India. A bunch of friends went there several years ago and we stayed in this humble but beautiful homestay with a wonderfully warm family. The family cooked up all the traditional Coorgi delicacies and I remember one of them was this pumpkin curry with coconut, unlike I had ever eaten before. So I searched online for this curry and as usual Google spewed off many results, so I had to mix and match recipes to find the ONE. I tried this dish until I made something closer to the one in memory. 

Coorg Pumpkin Curry kaddu sabzi coconut vegan kumbalkai palya


Coorg Pumpkin Curry


Coorg Pumpkin Curry kaddu sabzi coconut vegan kumbalkai palya
Coorg style Pumpkin curry made with ripe pumpkin, coconut and spices.

Recipe Type:  Side
Cuisine:            Indian
Prep Time:     30 minutes
Cook time:     40 minutes
Yield:                Serves 3-4

Ingredients:


3 cups diced Pumpkin
3-4 tsp Oil
1 tsp Mustard seeds
6-8 Curry Leaves
1 Onion
2-3 Garlic cloves
2 tsp Coriander Powder
1 tsp Cumin Powder
1 tsp Turmeric Powder
1/2 cup grated Coconut or 1 cup of Coconut milk
1 tsp Tamarind pulp
3-4 dry red Chillies or 1-2 tsp of red chilli powder
1-2 tsp of Jaggery powder or Sugar
1 cup Water
Salt
Fresh Coriander leaves for garnish

Method:


Heat oil in a pan and add the mustard seeds.
Once they splutter, add the curry leaves, finely chopped onion and garlic. Fry until the onion is translucent.
Add the pumpkin.
Add the turmeric and water and cover and cook until the pumpkin is done.
If using grated coconut, grind together the coconut, tamarind, dry red chillies or chilli powder, cumin powder and the coriander powder with a little bit of water to make a fine masala paste.
Add it to the pumpkin in the pan and cook for 6-8 minutes.
If using coconut milk, then add the coconut milk along with the coriander powder, cumin powder, red chilli powder and the tamarind paste to the pumpkin and cook on low heat for 3-4 minutes.
Add salt and the jaggery powder or sugar and mix well.
Serve hot.
Read more ...

Matar Dhokla


Steamed Gujarati Green peas Snacks

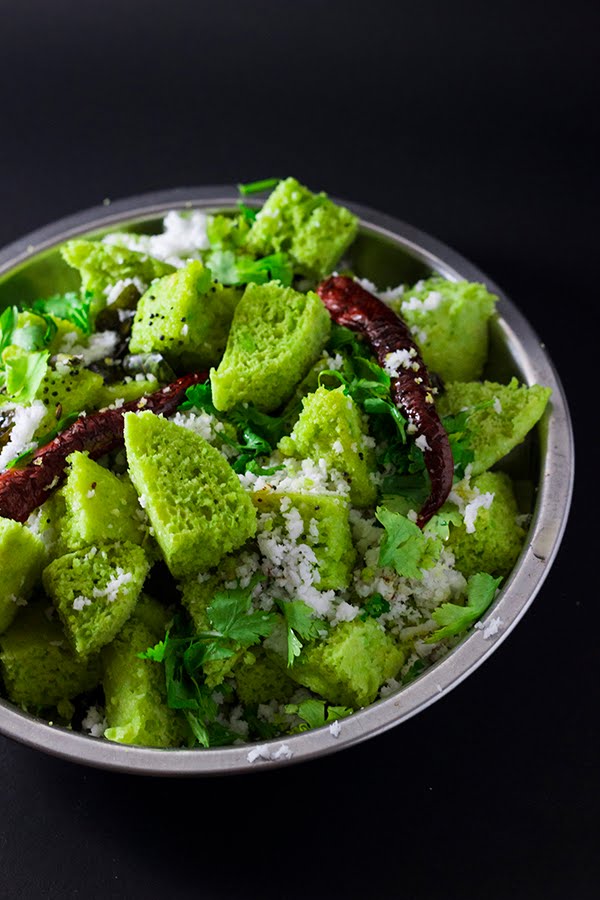
Dhokla is a steamed savory cake that is a favorite of western India. They are usually made of semolina and chickpea flour. They are light and fluffy and taste delicious with a tangy green chutney.

I never knew there was so much variety in something this simple.

I was browsing through cookery books in the library when I glanced upon Tarla Dalal’s Non-Fried Snacks. I’m a big fan of non-fried snacks. The book has some good recipes, majorly it has different types of dhoklas and muthias. And this Matar Dhokla or Green Peas Dhokla was a featured recipe.

It is still just as simple to make as the regular dhokla, but now has the added goodness of green peas. You can use either fresh or frozen peas, according to what you have available. 

The addition of peas gives it that lovely vibrant green colour and the slight sweetness of peas. 

Some people like to soak their dhoklas in a diluted syrup of sugar and lime juice, while some enjoy it with creamy yogurt. It tastes awesome with both.

Step-by-step Instructions:

Steamed Gujarati Green peas Snacks

1) Puree the green peas with a little water.

Steamed Gujarati Green peas Snacks

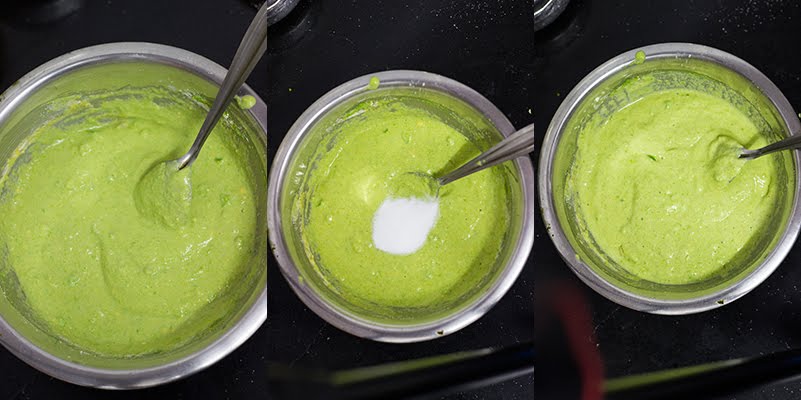
2) Mix together the chickpea flour, semolina, pea puree, salt, ginger- chilli paste, yogurt and salt into a smooth batter.
3) Now add the fruit salt or eno to  the batter. Pour the remaining water over it and mix well. It should start getting frothy.

Steamed Gujarati Green peas Snacks

4) Grease a shallow vessel that fits inside the steamer and add the batter to it.
5) Place the vessel in the steamer and steam on medium flame for 12-15 mins. Insert a knife in the middle and if it comes out clean, it is done.

Steamed Gujarati Green peas Snacks

6) Turn off the stove and allow it to rest for around 2-4 mins.
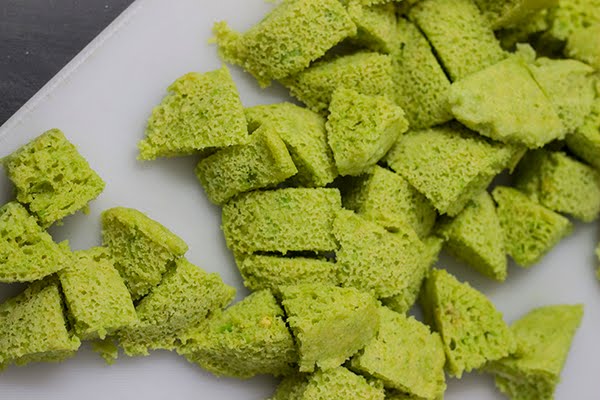
7) Then remove slowly and cut into desired shape.

Steamed Gujarati Green peas Snacks

8) Heat the oil in a pan and add the mustard seeds.
9) Once they splutter, add the curry leaves and chilli and fry for 20-30 seconds.
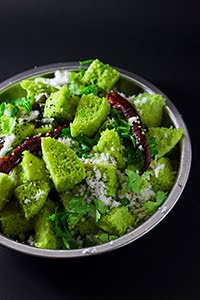
10) Pour over this tempering on the dhoklas. 
11) Garnish with the fresh coconut and the coriander leaves. I also sprinkled a few pomegranate seeds to add some freshness.


Matar Dhokla

Steamed Gujarati Green peas Snacks

Steamed savory cake made with green peas and chickpea flour.

Recipe Type:  Snacks
Cuisine:          Indian / Gujarati
Prep Time:     15 minutes
Cook time:     30 minutes
Yield:              Serves 3-4

Ingredients:

Dhokla


1 cup Fresh or Frozen Green Peas
1.5 cups of Chickpea Flour / Besan
4 Tbsp Fine Semoline / Chiroti Rava
1 tsp of Ginger-Green Chilli Paste
2 Tbsp of Yogurt / Dahi
1/2 cup of Water
1.5 tsp Fruit Salt (Eno)
2 tsp of Oil for greasing
Salt to taste

Tempering


4 tsp of Oil
½ tsp of Mustard Seeds
10-15 Curry Leaves
1-2 Slit Green / Red Chillies

Garnish


2-3 Tbsp of grated Fresh Coconut
2 Tbsp finely chopped Coriander Leaves

Method:


Puree the green peas with a little water.
Mix together the chickpea flour, semolina, pea puree, salt, ginger- chilli paste, yogurt and salt into a smooth batter.
Prepare the steamer. (see note)
Now add the fruit salt or eno to  the batter. Pour the remaining water over it and mix well. It should start getting frothy.
Grease a shallow vessel that fits inside the steamer and add the batter to it.
Place the vessel in the steamer and steam on medium flame for 12-15 mins. Insert a knife in the middle and if it comes out clean, it is done.
Turn off the stove and allow it to rest for around 2-4 mins.
Then remove slowly and cut into desired shape.
Heat the oil in a pan and add the mustard seeds.
Once they splutter, add the curry leaves and chilli and fry for 20-30 seconds.
Pour over this tempering on the dhoklas. 
Garnish with the fresh coconut and the coriander leaves.

Notes:


STEAMER - I used an idli steamer. You can use a pressure cooker without the whistle or any deep saucepan with a lid. 
1) To prepare it, add around 2-3 cups of water to the steamer and cover and cook on high flame until the water boils. 
2) Next place a small flat bottomed vessel or bowl upside down in the steamer. The top of this bowl should be above the level of water.
3) Place the plate / vessel with the dhokla over this upturned bowl. The purpose of the bowl is that the dhokla plate / vessel does not touch the boiling water directly and is slightly higher than the water level.
Read more ...

Creamy Vegan Pumpkin Sauce

This pumpkin sauce is AMAZING with not just pasta, but with lots of other  things too. Toss in some stir fried veggies and make it a delicious and vibrant orange CURRY to pair with rice. Or DRIZZLE it over some grilled vegetables to liven them up.

pasta creamy coconut gravy italian pumpkin salad dressing dip chips

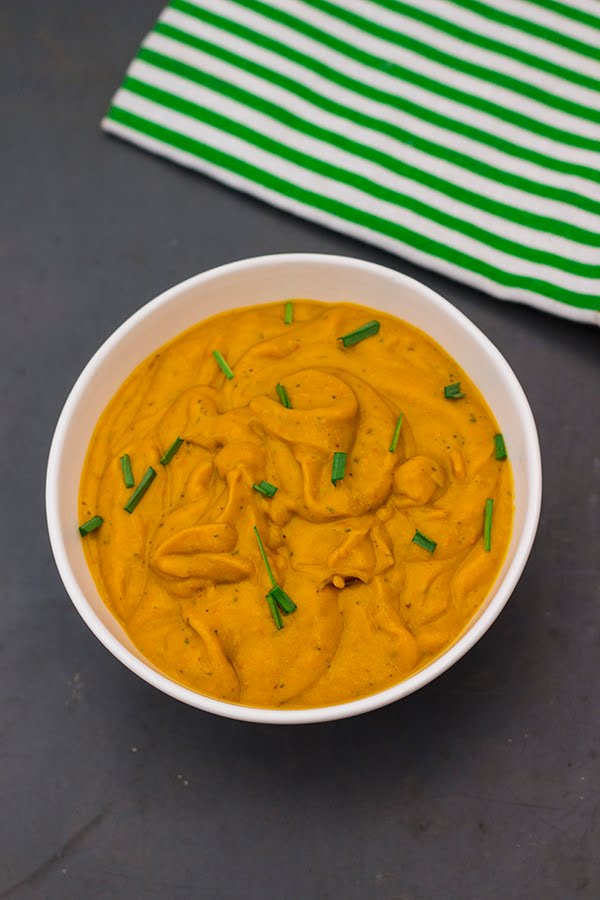
This creamy- silky smooth-delicious-orange sauce filled with the goodness of those freshly picked farm pumpkin is completely VEGAN. Yesss!!! I mean you can make your own non-vegan version by replacing the coconut milk with some cream, but according to me, the coconut milk adds a lovely taste to the regular pumpkin sauce.

Did I tell you how easy to make this was? Or how you could finish making this before your TV serial/sitcom reached its credits? Yup, it’s THAT simple!!!

What do you need, you ask? Just some olive oil, pumpkin, garlic, coconut milk, oregano and anything to add some heat to this baby. I used some dried red chillies, you can add hot sauce or green chillies or paprika or totally skip  it.  And of course, salt. 6 ingredients, including salt and oil. Nothing gets simpler than that.

After you assemble all your ingredients, it is just chop, saute and blend. 3 steps. So now 6 ingredients and 3 steps – no reason at all to not try this at all.

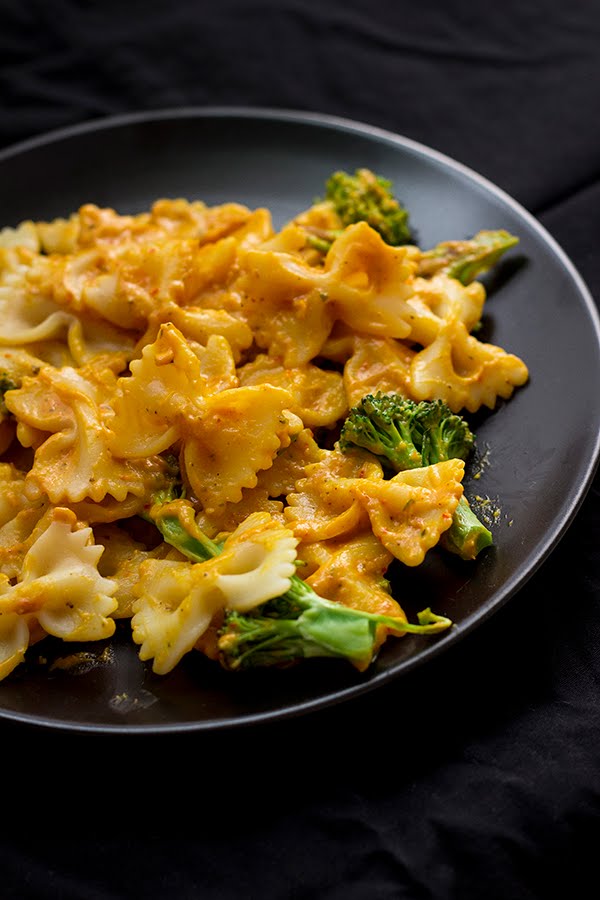
I added it over some cooked farfalle pasta and tossed in some stir fried vegetables like broccoli. I love broccoli. Feel free to add or not add anything at all. It doesn’t really demand anything, it is just as good being plain.

If you plan on drizzling this on veggies or using it as a dip, I suggest adding less of the coconut milk to keep it nice and thick. If it is curry you plan to make, you can add other spices – cumin and coriander go well with it.

Oh oh oh – This would make an interesting SALAD DRESSING too. Some zucchini ribbons, some julienne carrots and some fresh salad leaves with this slightly sweet pumpkin sauce – DELICIOUS and healthy!!!

Step by Step Instructions:

pasta creamy coconut gravy italian pumpkin salad dressing dip chips

1) Heat oil in a pan and add the minced garlic. Saute for 1 min. 
2) Add the diced pumpkin and cover and cover and cook on low heat until the pumpkin is done. Cut into smaller pieces to get it cooked sooner. 

pasta creamy coconut gravy italian pumpkin salad dressing dip chips

3) Add the oregano, chopped red chillies, coconut milk and salt.
4) Cook for around 2-3 mins on low heat.
5) Allow it to cool and then blend into a smooth sauce.

pasta creamy coconut gravy italian pumpkin salad dressing dip chips


Pumpkin Sauce [Vegan]


Versatile vegan pumpkin sauce that can be used for pasta, as a dip or as a base for curry.

pasta creamy coconut gravy italian pumpkin salad dressing dip chipsRecipe Type:  Sauce
Cuisine:          International
Prep Time:     10 minutes
Cook time:     20 minutes
Yield:              Serves 2-3

Ingredients:


For Pumpkin Sauce:


2.5 cups or 125gms of diced Pumpkin
1 Tbsp of finely minced Garlic
3/4 tsp of dried Oregano
3/4 cup of Coconut Milk
1.5 Tbsp of Olive Oil
1 tsp of dried Red Chillies
Salt to taste

Pasta:


250gms of Pasta
1 cup of assorted stir fried Vegetables (Broccoli, Peppers/Capsicums etc.)

Method:


Heat oil in a pan and add the minced garlic. Saute for 1 min.
Add the diced pumpkin and cover and cover and cook on low heat until the pumpkin is done. Cut into smaller pieces to get it cooked sooner.
Add the oregano, chopped red chillies, coconut milk and salt.
Cook for around 2-3 mins on low heat.
Allow it to cool and then blend into a smooth sauce.
Boil the pasta according to the packet instructions.
Toss with the sauce and the vegetables and enjoy it hot.
Read more ...