Showing posts with label Besan. Show all posts

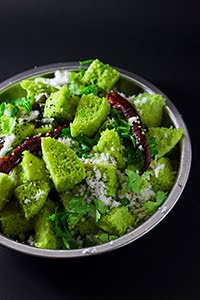
Instant Cucumber Dhokla | Cucumber Chickpea Steamed Cakes


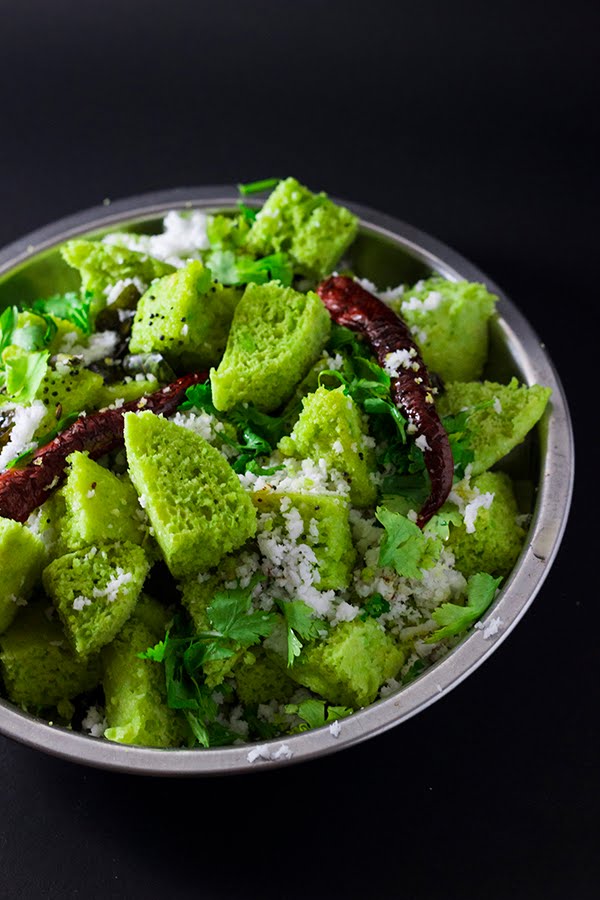
Cucumber Dhokla is a savory steamed chickpea flour and semolina cake with added cucumber that is perfect for breakfast or as a tea time healthy snack.

How to make instant khira dhokla recipe at www.oneteaspoonoflife.com


I've been missing around the blog for 2 weeks now. I've been busy cooking up an amazing spread that will soon appear here. Now that's what I would love to say. But that's not what I have been doing. Everyone at home has been under the weather and what I have been cooking has been just soup and regular dal rice. and my taste buds totally ditched me too. I could barely make out what the food tasted like. 

I can finally taste the food and I'm SOO happy about it. 

I've recently gotten obsessed with one particular fruit and one particular vegetable - the water melon and the cucumber. And today is all about the Cucumber. I've been adding cucumber to almost everything - Upma, Akki Rotti, Sambar etc. What I love about adding Cucumber to any dish is that it ends up giving it that moistness along with a very subtle flavor. That is exactly what it did to this Dhokla.

How to make instant khira dhokla recipe at www.oneteaspoonoflife.com


Cucumber Dhokla is my own concoction that is inspired from the traditional Dhokla. I recently had a cucumber pakoda (Seriously!!!) and it tasted good (Really!). I never would have guessed that cucumber that besan (chickpea flour or gram flour) would go so well together. So when I set out to make dhokla this time, I got a little creative, I added in a grated cucumber and a bit more. I also added in a little bit of grated carrot, a few frozen peas, and finely chopped capsicum. Although technically, I should be calling it a mix vegetable Dhokla. I prefer calling it the Cucumber Dhokla, cause that flavor it had in the end was all fresh Cucumber.

You can skip the remaining vegetables and just stick to the cucumber and it will taste just as good - I promise.


Instant Cucumber Dhokla | Cucumber Chickpea Steamed Cakes


How to make instant khira dhokla recipe at www.oneteaspoonoflife.comInstant Cucumber Dhokla is a savory steamed chickpea flour and semolina cake with added cucumber that is perfect for breakfast or as a tea time healthy snack.

Recipe Type:  Breakfast
Cuisine:            Indian
Prep Time:     15 minutes
Cook time:     20 minutes
Yield:                Serves 2-3

Ingredients:


For the Cucumber Dhokla:


3/4 cup Chickpea Flour or Besan
3/4 cup Semolina or Rava
1 grated Cucumber
1 tsp of Ginger- Garlic Paste
1 crushed Green Chilli
1 grated Carrot (Optional)
1 Tbsp Green Peas (Optional)
2 Tbsp chopped Capsicum
1.5 tsp Fruit Salt or Eno
1/4 tsp Asafoetida or Hing
2 Tbsp Yogurt or Curd
1 cup Water
Salt to taste
Oil to grease the steamer

For the Tempering:


3-4 tsp Oil
1 tsp Mustard Seeds
8-10 Curry Leaves
1-2 tsp of Lemon juice
1/2 tsp of Sugar or Jaggery

For Garnish:


2 Tbsp fresh grated Coconut
2 Tbsp finely chopped Coriander leaves

Method:


Preparing the Steamer:


1. You can steam in an Idli steamer or a pressure cooker or a large deep saucepan. If using a pressure cooker, remove the whistle.
2. Pour around 2-3 cups of water in it and cover it and allow the water to come to a boil.
3. Place a small upturned  flat bottomed bowl or vessel at the bottom of the steamer.

Preparing the Dhokla:


4. Mix together all the ingredients except the water, oil and the fruit salt.
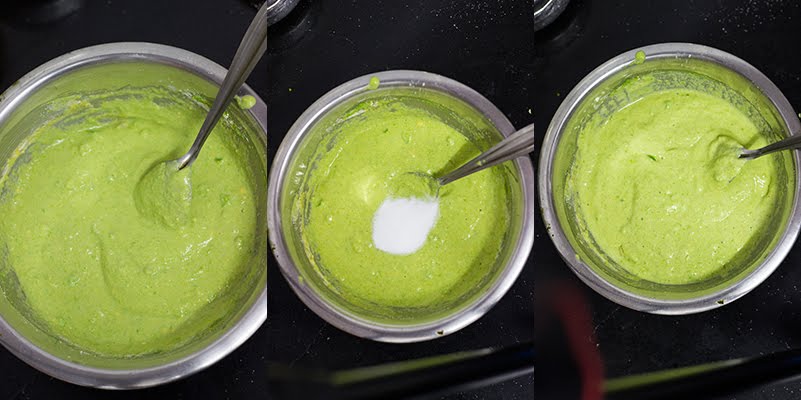
5. Add 3/4 cup of water and mix well. Add more water if required. The dough should be thick yet pourable. Almost like a cake or idli batter. The quantity of water depends on the type of rava and besan.
6. Once your steamer is ready, grease a flat vessel that will fit into your steamer with oil. 
7. Now add the fruit salt and the remaining water and mix well. The fruit salt should cause the batter to start foaming and become light.
8. Pour the batter into the greased vessel and place it in the steamer.
9. Allow it to steam for 10-15 minutes. Depending on the depth of your vessel, you may need to keep it in longer. The Cucumber Dhokla is ready when a skewer or knife comes out clean.
10. Allow it to cook and remove from the vessel. 

Preparing the Tempering:

11. Heat oil in a pan and add the mustard seeds.
12. Once the seeds splutter, add the curry leaves.
13. Remove it off the heat and add the sugar and the lemon juice.

Assembling the Cucumber Dhokla:

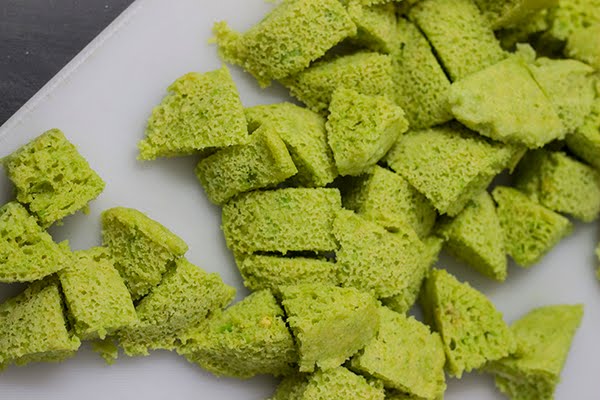
14. Cut into bite sized pieces.
15. Pour the tempering over the Cucumber Dhokla.
16. Garnish with the coconut and the coriander.
17. Serve warm with coriander chutney or sweet and spicy yogurt.



Read more ...

Matar Dhokla


Steamed Gujarati Green peas Snacks

Dhokla is a steamed savory cake that is a favorite of western India. They are usually made of semolina and chickpea flour. They are light and fluffy and taste delicious with a tangy green chutney.

I never knew there was so much variety in something this simple.

I was browsing through cookery books in the library when I glanced upon Tarla Dalal’s Non-Fried Snacks. I’m a big fan of non-fried snacks. The book has some good recipes, majorly it has different types of dhoklas and muthias. And this Matar Dhokla or Green Peas Dhokla was a featured recipe.

It is still just as simple to make as the regular dhokla, but now has the added goodness of green peas. You can use either fresh or frozen peas, according to what you have available. 

The addition of peas gives it that lovely vibrant green colour and the slight sweetness of peas. 

Some people like to soak their dhoklas in a diluted syrup of sugar and lime juice, while some enjoy it with creamy yogurt. It tastes awesome with both.

Step-by-step Instructions:

Steamed Gujarati Green peas Snacks

1) Puree the green peas with a little water.

Steamed Gujarati Green peas Snacks

2) Mix together the chickpea flour, semolina, pea puree, salt, ginger- chilli paste, yogurt and salt into a smooth batter.
3) Now add the fruit salt or eno to  the batter. Pour the remaining water over it and mix well. It should start getting frothy.

Steamed Gujarati Green peas Snacks

4) Grease a shallow vessel that fits inside the steamer and add the batter to it.
5) Place the vessel in the steamer and steam on medium flame for 12-15 mins. Insert a knife in the middle and if it comes out clean, it is done.

Steamed Gujarati Green peas Snacks

6) Turn off the stove and allow it to rest for around 2-4 mins.
7) Then remove slowly and cut into desired shape.

Steamed Gujarati Green peas Snacks

8) Heat the oil in a pan and add the mustard seeds.
9) Once they splutter, add the curry leaves and chilli and fry for 20-30 seconds.
10) Pour over this tempering on the dhoklas. 
11) Garnish with the fresh coconut and the coriander leaves. I also sprinkled a few pomegranate seeds to add some freshness.


Matar Dhokla

Steamed Gujarati Green peas Snacks

Steamed savory cake made with green peas and chickpea flour.

Recipe Type:  Snacks
Cuisine:          Indian / Gujarati
Prep Time:     15 minutes
Cook time:     30 minutes
Yield:              Serves 3-4

Ingredients:

Dhokla


1 cup Fresh or Frozen Green Peas
1.5 cups of Chickpea Flour / Besan
4 Tbsp Fine Semoline / Chiroti Rava
1 tsp of Ginger-Green Chilli Paste
2 Tbsp of Yogurt / Dahi
1/2 cup of Water
1.5 tsp Fruit Salt (Eno)
2 tsp of Oil for greasing
Salt to taste

Tempering


4 tsp of Oil
½ tsp of Mustard Seeds
10-15 Curry Leaves
1-2 Slit Green / Red Chillies

Garnish


2-3 Tbsp of grated Fresh Coconut
2 Tbsp finely chopped Coriander Leaves

Method:


Puree the green peas with a little water.
Mix together the chickpea flour, semolina, pea puree, salt, ginger- chilli paste, yogurt and salt into a smooth batter.
Prepare the steamer. (see note)
Now add the fruit salt or eno to  the batter. Pour the remaining water over it and mix well. It should start getting frothy.
Grease a shallow vessel that fits inside the steamer and add the batter to it.
Place the vessel in the steamer and steam on medium flame for 12-15 mins. Insert a knife in the middle and if it comes out clean, it is done.
Turn off the stove and allow it to rest for around 2-4 mins.
Then remove slowly and cut into desired shape.
Heat the oil in a pan and add the mustard seeds.
Once they splutter, add the curry leaves and chilli and fry for 20-30 seconds.
Pour over this tempering on the dhoklas. 
Garnish with the fresh coconut and the coriander leaves.

Notes:


STEAMER - I used an idli steamer. You can use a pressure cooker without the whistle or any deep saucepan with a lid. 
1) To prepare it, add around 2-3 cups of water to the steamer and cover and cook on high flame until the water boils. 
2) Next place a small flat bottomed vessel or bowl upside down in the steamer. The top of this bowl should be above the level of water.
3) Place the plate / vessel with the dhokla over this upturned bowl. The purpose of the bowl is that the dhokla plate / vessel does not touch the boiling water directly and is slightly higher than the water level.
Read more ...

Dahi Kebab Recipe | Yogurt Kabab Recipe [Video]


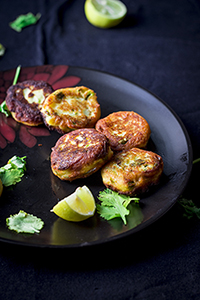
Dahi Kebab Recipe with step by step video instructions. Dahi Kebab is a pan fried appetizer / snack made from thick yogurt or hung curd, chickpea flour and nuts. The kebab is crispy on the outside and creamy and soft on the inside. Dahi Kebab is gluten free and fits a Jain diet.

In a hurry? Jump to Video or Jump to Recipe


Dahi Kebab Yogurt Kebab kabab kebob hung curd punjabi besan chickpeas snacks

Dahi  kebab… sounds interesting, doesn’t it? That’s the very reason I ordered it in a food court and I was pleasantly surprised. It actually tasted delicious. And as though fate meant for me to make it, the recipe was showed on TV before I could even google it. It is so simple to make, and it is crowd pleaser. Most people I’ve served it to, haven’t heard of it and eat it out of intrigue. But there is no stopping after one, believe me. It even turned a “dahi hater” around.


Dahi Kebab Yogurt Kebab kabab kebob hung curd punjabi besan chickpeas snacks

It actually tastes a lot like paneer, but it is creamier and has that tang of dahi. It is pan fried, so up goes the healthiness factor.

You can add spice powders like cinnamon, cardamom, clove etc and zing it up. I preferred to keep it as simple as possible to let the dahi shine through.

You can either buy already hung curd or make it yourself. I made it myself. Hung curd is just regular yogurt with all the whey drained out. To make it at home, tie the yogurt into a muslin cloth and leave it hanging for 6-8 hours. I left it overnight in the fridge.


If you made this recipe, let me know! Leave a comment here or on Facebook tag your tweet with @oneteaspoonlife on Twitter and don't forget to tag your photo @oneteaspoonoflife on Instagram. You can also email me at onetspoflife@gmail.com I'd love to see what you are up to.

If you like this recipe, do not forget to share it with your friends and family! 


You can follow One Teaspoon Of Life on FacebookTwitterInstagramPinterest or you can subscribe to One Teaspoon Of Life and receive all the latest updated via Email


Video Recipe


--------------------------------------------------------------------------------------------------------------------------

Dahi Kebab Recipe | Yogurt Kebab Recipe

Dahi Kebab Yogurt Kebab kabab kebob hung curd punjabi besan chickpeas snacks
Dahi Kebab is a popular gluten free North Indian appetizer. Dahi Kebabs are pan fried Kebabs made with thick yogurt and chickpea flour.
Recipe Type:  Snacks
Cuisine:          North Indian
Prep Time:     8 Hours
Cook time:     20 minutes
Total time:     8 Hours 20 Minutes
Yield:                12-15 kebabs
Author:                Anupama

Ingredients:


3 cups Yogurt (Curd/Dahi)
2-3 Tbsp Chickpea Flour (Besan)
1-2 Green Chillies
2 Tbsp chopped Nuts (almonds, cashews, pistachios) (Optional)
1 Tbsp Coriander leaves
Salt to taste
Oil to fry

Method:


1. To make hung curd, place a muslin cloth on a strainer and add the yogurt. Tie the cloth and either leave in the strainer for 4-6 hours or tie the cloth over the sink. You can also leave this in the fridge overnight.
2. 3 cups of yogurt will yield 1 cup of hung curd. Take the hung curd in a large bowl.
3. Add all the ingredients except the oil and mix well.
4. Heat oil in a frying pan for shallow frying.
5. Wet your hands and take a small ball of batter and shape it as a kebab.
6. Gently place the kebab in the frying pan. If you are unable to shape the kebabs, you can use two spoons and spoon the kebabs into the frying pan.
7. Cook on medium heat.
8. Flip when the first side browns.
9. Cook until the second side is cooked too.
10. Serve hot with mint coriander chutney or ketchup.


If you liked this, you may also like:

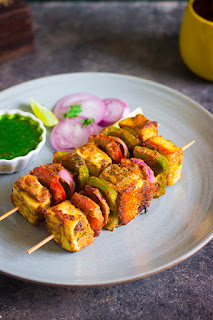
Paneer Tikka

vegan pan fried turnip chops
Shalgam ke Kebab
Sweet Potato Kebabs
Sweet Potato Kebabs
Read more ...

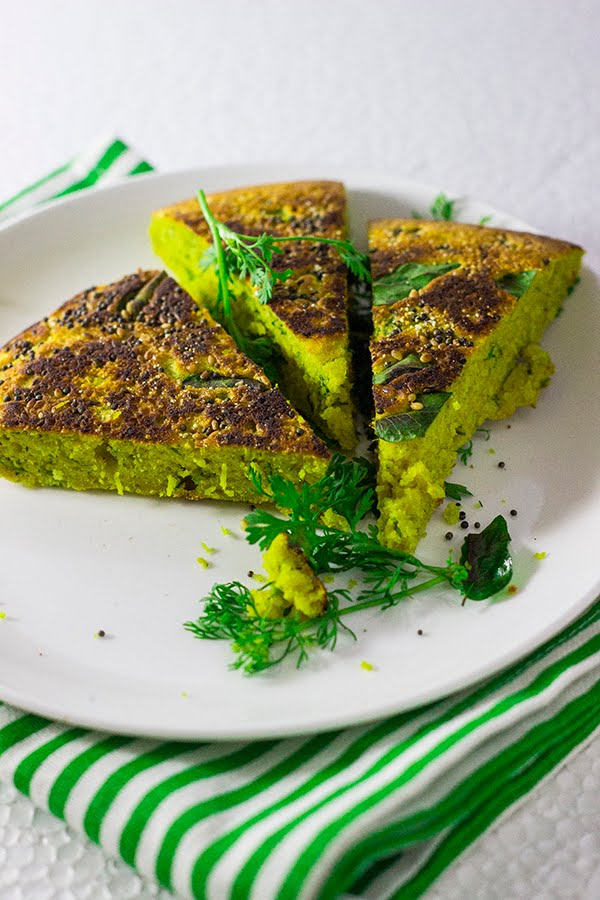
Kothimbir Vadi | Pan Fried Coriander and Chickpea Cake


Kothimbir Vadi Coriander Chickpea Cake cilantro garbanzo steamed baked savory maharastrian vada wada pancake vegan

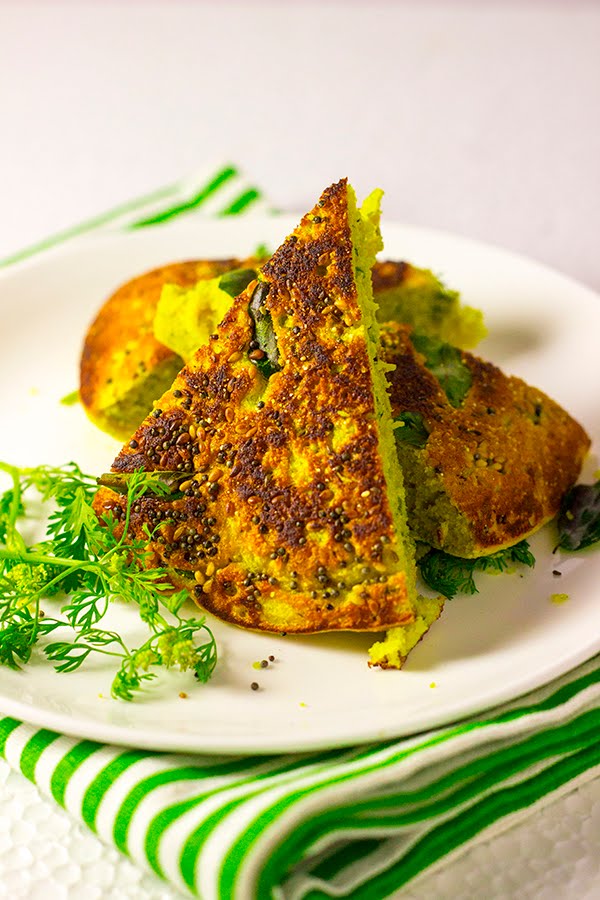
A lot of my food cravings are thanks to the magazines I read. Recently, in one of them, there was this delicious looking Kothimbir Vadi or Coriander Vada photo. It had the traditional recipe following the photo where the vadas are deep fried after being steamed. I love deep fried vadas but they are a big bane to my weight loss program, so I try to modify the recipe to make it healthier.

Kothimbir Vadi Coriander Chickpea Cake cilantro garbanzo steamed baked savory maharastrian vada wada pancake vegan

Recently, I had made the Gujrati Handvo which is a pan fried thick cake, very similar to the recipe in this post. Bells went off in my head! I could try the same with this kothimbir vadi. And to my delight, it turned out very well. Everyone loved it at home and they went missing in minutes.

It tastes the best with some coriander and mint chutney, but goes equally well with tomato ketchup. It is a very good option for a packed lunch as it carries well in boxes. It is versatile, you can have it for breakfast or as a tea time snack.

Step by Step recipe:

Kothimbir Vadi Coriander Chickpea Cake cilantro garbanzo steamed baked savory maharastrian vada wada pancake veganKothimbir Vadi Coriander Chickpea Cake cilantro garbanzo steamed baked savory maharastrian vada wada pancake veganKothimbir Vadi Coriander Chickpea Cake cilantro garbanzo steamed baked savory maharastrian vada wada pancake vegan

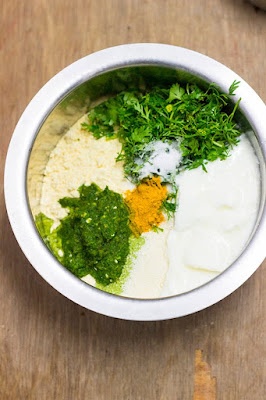
1) Blend the ginger, garlic,green chillies and half the coriander leaves into a paste along with a little water.
2) Add it to the chickpea flour along with the semolina, yogurt, coriander leaves, turmeric powder, salt and baking soda.
3) Add a little water to loosen the batter, I added around 1/4 cup.
4) Mix well and keep aside for 10-15

Kothimbir Vadi Coriander Chickpea Cake cilantro garbanzo steamed baked savory maharastrian vada wada pancake veganKothimbir Vadi Coriander Chickpea Cake cilantro garbanzo steamed baked savory maharastrian vada wada pancake vegan

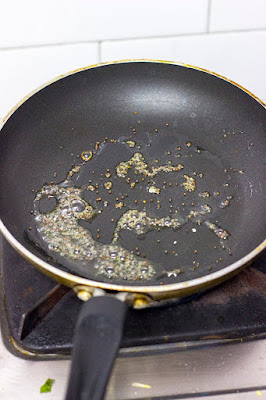
5) Heat a small non stick pan or a kadhai.
6) Add around 2 tsp of oil to it.
7) Once the oil is hot, add the half the mustard seeds.
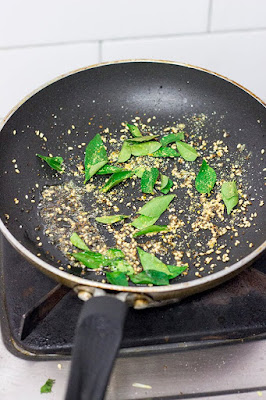
8) Once they splutter, add half the sesame seeds, half the carom seeds, half the asafoetida and half the curry leaves.

Kothimbir Vadi Coriander Chickpea Cake cilantro garbanzo steamed baked savory maharastrian vada wada pancake veganKothimbir Vadi Coriander Chickpea Cake cilantro garbanzo steamed baked savory maharastrian vada wada pancake vegan

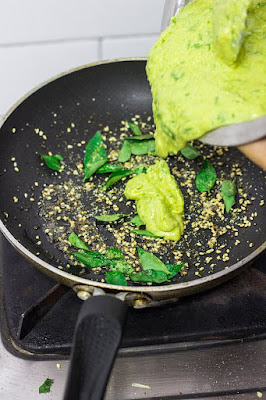
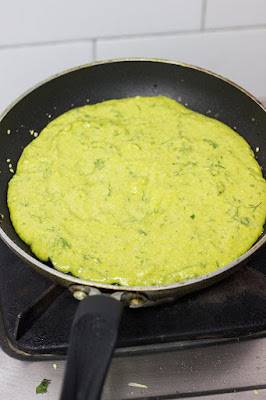
9) Now pour in half the batter.
10) Cover and cook on low heat for around 10-12 mins.

Kothimbir Vadi Coriander Chickpea Cake cilantro garbanzo steamed baked savory maharastrian vada wada pancake vegan

11) Now with the help of 2 spatulas, carefully flip the thick pancake.

Kothimbir Vadi Coriander Chickpea Cake cilantro garbanzo steamed baked savory maharastrian vada wada pancake vegan

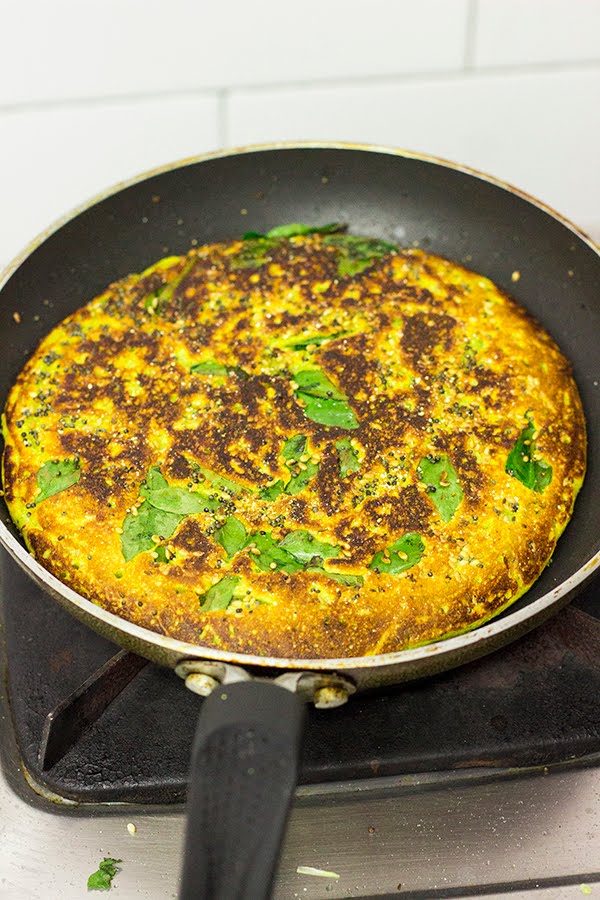
12) Allow it to cook until the second side browns.

Kothimbir Vadi Coriander Chickpea Cake cilantro garbanzo steamed baked savory maharastrian vada wada pancake vegan

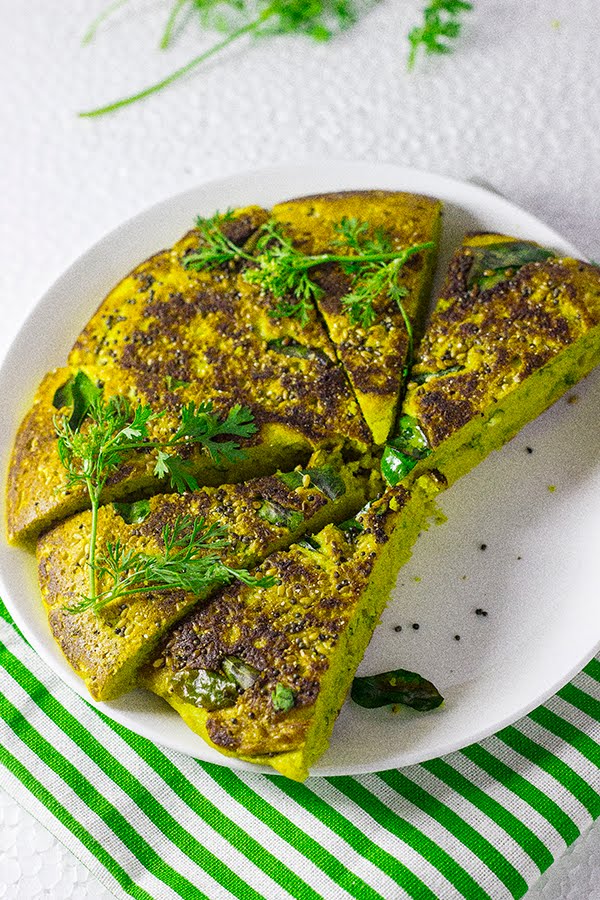
13) Remove from heat and cut into pieces. Serve hot with chutney or ketchup.


Kothimbir Vadi Coriander Chickpea Cake cilantro garbanzo steamed baked savory maharastrian vada wada pancake vegan

Kothimbir Vadi


Pan Fried Coriander and Chickpea Cake.

Recipe Type:  Snacks
Cuisine:          Indian
Prep Time:     30 minutes
Cook time:     45 minutes
Yield:              6-8 servings

Ingredients:


2 cups Besan / Chickpea Flour
1/2 cup Fine Semolina / Chiroti Rava
1/2 cup Yogurt / Curd
1 cup chopped Coriander Leaves
3-4 cloves of Garlic
1" piece of Ginger
2-3 Green Chillies
1/2 tsp of Baking Soda
1 tsp of Carom seeds / Ajwain
2 tsp of Sesame seeds / Til
1 tsp of Mustard seeds
1/2 tsp of Asafoetida/ Hing
1 tsp of Turmeric Powder
2 sprigs of Curry Leaves
4-5 tsp of Oil
Salt to taste
Water

Method:


Blend the ginger, garlic,green chillies and half the coriander leaves into a paste along with a little water.
Add it to the chickpea flour along with the semolina, yogurt, coriander leaves, turmeric powder, salt and baking soda.
Add a little water to loosen the batter, I added around 1/4 cup.
Mix well and keep aside for 10-15 mins.
Heat a small non stick pan or a kadhai.
Add around 2 tsp of oil to it.
Once the oil is hot, add the half the mustard seeds.
Once they splutter, add half the sesame seeds, half the carom seeds, half the asafoetida and half the curry leaves.
Now pour in half the batter.
Cover and cook on low heat for around 10-12 mins.
Now with the help of 2 spatulas, carefully flip the thick pancake.
Allow it to cook until the second side browns.
Remove from heat and cut into pieces.
Serve hot with chutney or ketchup.


Read more ...

Jhunka

Jhunka Bhakri is a simple but thoroughly enjoyed meal in North Karnataka. Jhunka takes hardly 10 mins to prepare and is a welcome substitute to the regular sabzi once in a while. So on Friday night, tired of cooking ,once again, and bored of eating out. once again. This was the quickest fix for dinner.


Jhunka


curry made with chickpea flour and tomatoesQuick Maharastrian curry made from chickpea flour/ besan and tomatoes.

Recipe Type:  Side
Cuisine:          Indian / Maharastrian
Prep Time:     10 minutes
Cook time:     20 minutes
Yield:              2-3 servings

Ingredients:

1/2 cup Besan / Gram Flour
1 cup Water
1 Tomato
4-5 Curry Leaves
2 Green Chillies
1 tsp Cumin Seeds / Jeera
2 tsp Oil
1 tsp Turmeric Powder / Haldi
Salt

Method:

Heat oil in a kadhai and add the cumin seeds
Once they brown slightly, add the curry leaves, chopped tomatoes and chopped chillies and fry for 2 mins
Add 1/2 a cup of water and cook until the tomatoes are soft
Add the turmeric powder
Mix the besan in the remaining water until it is a smooth paste
Add this to the kadhai and add salt
Heat on low flame until the raw taste of the besan disappears. Keep stirring to prevent the jhunka from burning
Add more water if desired
Eat with jowar rotti or phulka


Read more ...

Instant Khaman dhokla

Khaman dhokla is probably the most famous Gujrati snack across India. Easily available in some states and difficult to find in others. Somehow, I love this healthy steamed snack with tea in the evenings, but Bangalore disappoints me by not having it so readily available. I actually have to go in search of it and most times it is just so sweet that it turns me off. Since it is so easy to make, I often end up making it at home myself.

How to make instant khaman dhokla recipe at www.oneteaspoonoflife.com


How to make instant khaman dhokla recipe at www.oneteaspoonoflife.com


How to make instant khaman dhokla recipe at www.oneteaspoonoflife.com


How to make instant khaman dhokla recipe at www.oneteaspoonoflife.com


How to make instant khaman dhokla recipe at www.oneteaspoonoflife.com


Ingredients:

Besan  - 1 cup
Fine rava - 1/4 cup
Eno salt - 2 sachets
Green chillies - 4-5
Ginger - 1 small piece
Mustard seeds - 1 tsp
Coriander leaves - a handful
Fresh grated coconut - 2 tbsp
Salt
Water - 1/2 cup
Oil - 4-5 tsp

Method:

Mix the besan and rava. Using rava is optional, dhokla can be made with only besan also.
Crush the ginger and make a paste of the 2 green chillies and add to besan.
Add salt and water
Fill a steamer with water and keep on stove.
Grease a small vessel/ bowl. I used an idli steamer so I used the idli plates itself to steam the dhoklas.
Once the steamer is ready, mix the Eno salt into the besan and immediately transfer to the greased vessel and place in the steamer.
Allow it to steam for 7-10 minutes.
Remove from steamer and cut into 2" pieces.
Heat 3 tsp oil, add mustard seeds.
Once the mustard seeds splutter, slit the remaining chillies and add to te oil.
Pour the oil on the dhokla
Garnish with finely chopped coriander and freshly grated coconut
Enjoy with curd or chutney
Generally, when we buy dhokla outside, a very thin solution of water, sugar, lime juice is also poured on the dhokla to give it a sweet and sour taste. I am not a fan of the sweet dhokla, hence I skipped this step.
Read more ...

Baked thick sev

My husband is almost a professional junk food aka kuruklu eater. All he needs is a packet or bowl of his crunchy munchies and a TV remote in his hand to forget all about my existence. I'm sure he has some special abilities to be able to faze out my constant chatter, but he does manage to do it somehow. If he has to eat his munchies, I decided, it was time to make it as healthy as I can. Store bought ones are generally fried, hence, I decided to bake. I'm not sure about the calories saved in this one, but I can guarantee, it definitely is healthier.


Makes - 1 cup

Ingredients:

Besan (gram flour) - 1 cup
Lime juice - 1 tsp
Turmeric - 1/2 tsp
Chilli powder - 1/2 tsp
Hing (asafoetida) - a pinch
Salt - to taste
Water
Oil - 1 tsp

Method:

1) Mix all the ingredients and make a stiff dough with water.
2) Use a chakli press with a fine hole plate. I did not have this so I used a plastic bag with a small hole at one end (like a piping bag) and piped out the sev. It is a very tiring process to pipe the dough out, better to invest in a chakli press.
3) Use a non stick baking tray and place the sev on  it and bake at 180 deg Celsius for appx 10 minutes. Remove if they start browning before 10 minutes.
Read more ...

Tomato omelet or cheela

This is another easy to make breakfast or evening snack. It is filling and yummy. Not unhealthy at all. Unless of course you decide to eat it with butter like me :)...


Ingredients:

Besan or Gram flour or Kadle hittu - 1 cup
Tomato -1 large ( finely chopped)
Cumin seeds / Jeera - 1 tsp
Coriander leaves - 2 tbsp (chopped)
Green chilies - 2 (chopped)
Red chili powder - 1 tsp
Turmeric powder or haldi - 1/4 tsp
Oil
Water
Salt to taste

Method:

Add 1/2 cup water to besan and mix until there are no lumps. Add the tomato, cumin seeds, coriander, turmeric powder and mix well. Add salt and chili powder according to taste. You may also add chopped onion if you like, I generally don't.
You may add more water to achieve a pouring consistency.
Grease and heat the tava.
Pour the batter from a ladle.
Spoon a tsp of oil on the omelet.
You may cover it with a lid or leave it open.
Once the underside is brown, flip it over for 1-2 minutes and then remove from tava.
It can be served with butter or chutney or ketchup or pickle or just eaten plain.
A restaurant in Bangalore makes a sandwich out of it by placing the omelet between slices of buttered bread.
This recipe makes 3-4 small tomato omelets.
Read more ...