Showing posts with label Baked. Show all posts

Vegan Date and Walnut Cake Recipe [Video]


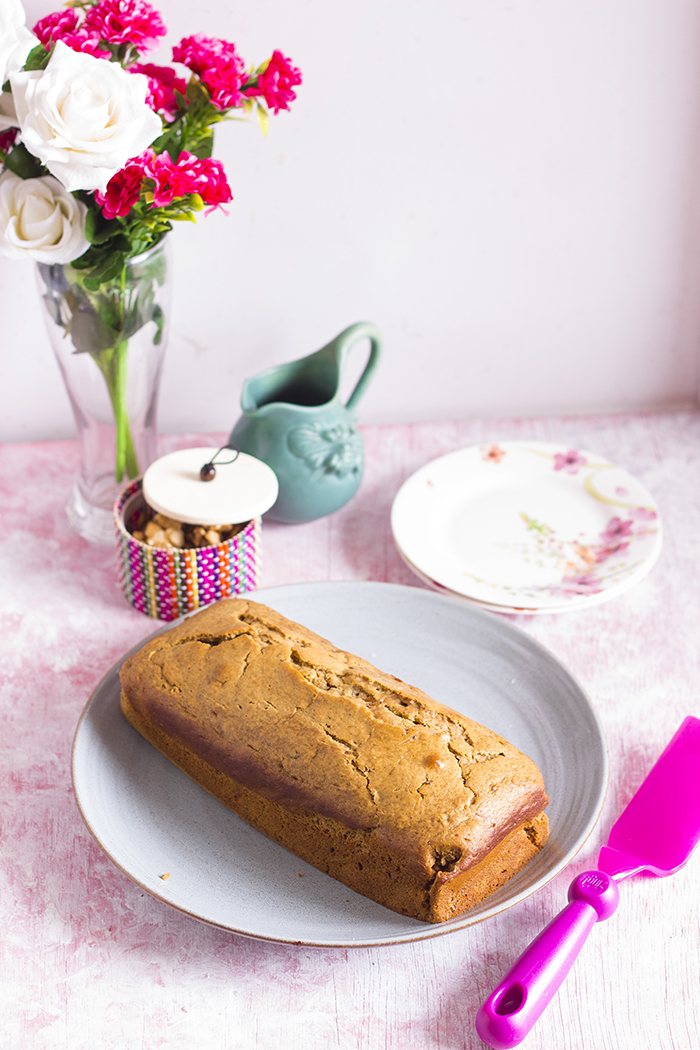
Vegan cake made with dates and walnuts!

Vegan cake made with dates and walnuts


A few weeks before my birthday, Gee asked me to help her bake a cake. She's only ever baked two cakes in her whole life - Banana Bread and one plain Vanilla, but both a long time ago. And both of those in my house. This time, she wanted to bake one in her house to test out her oven. I was all confident telling her what to buy and how much to buy, until I landed up in her house and realized, that the last cake I baked, not muffins or cheesecakes, but a loaf cake was actually 2 years ago!!! 

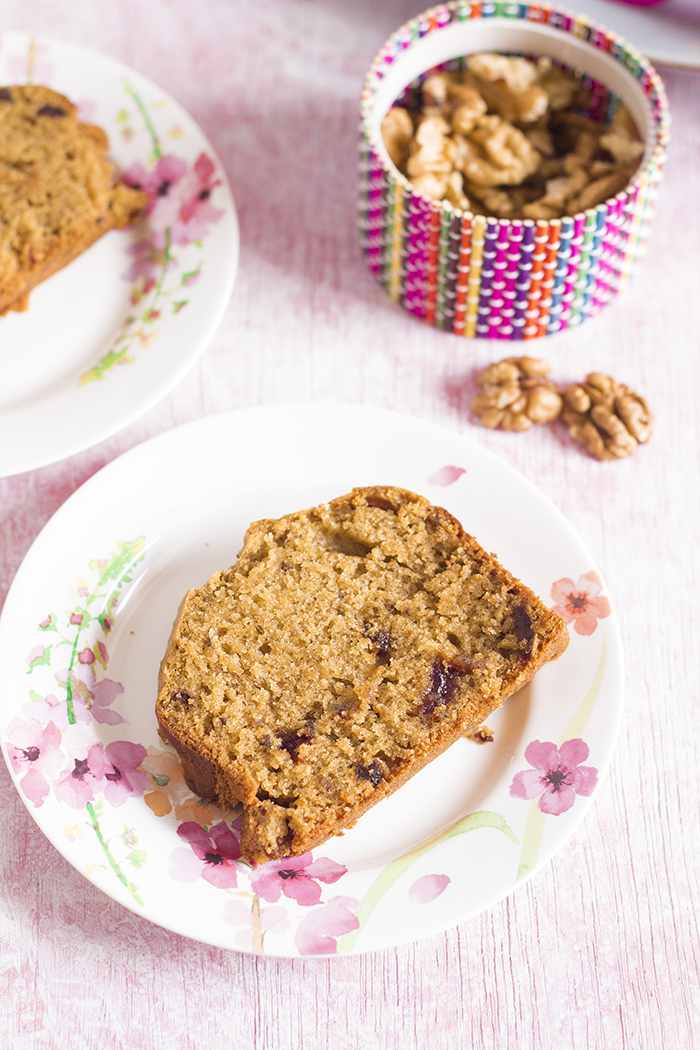
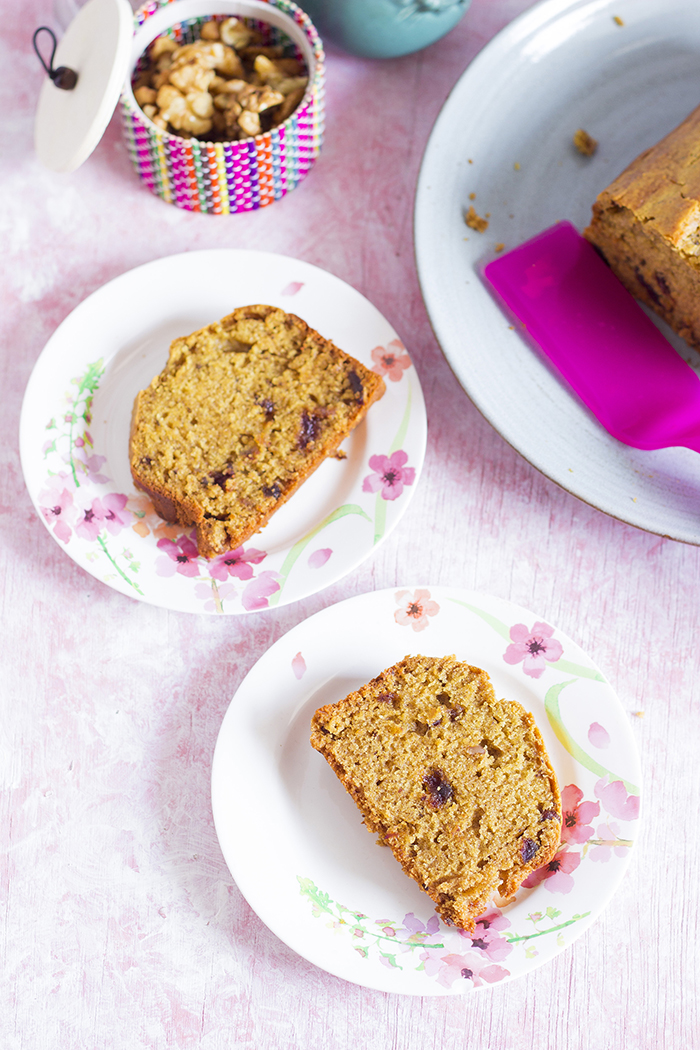
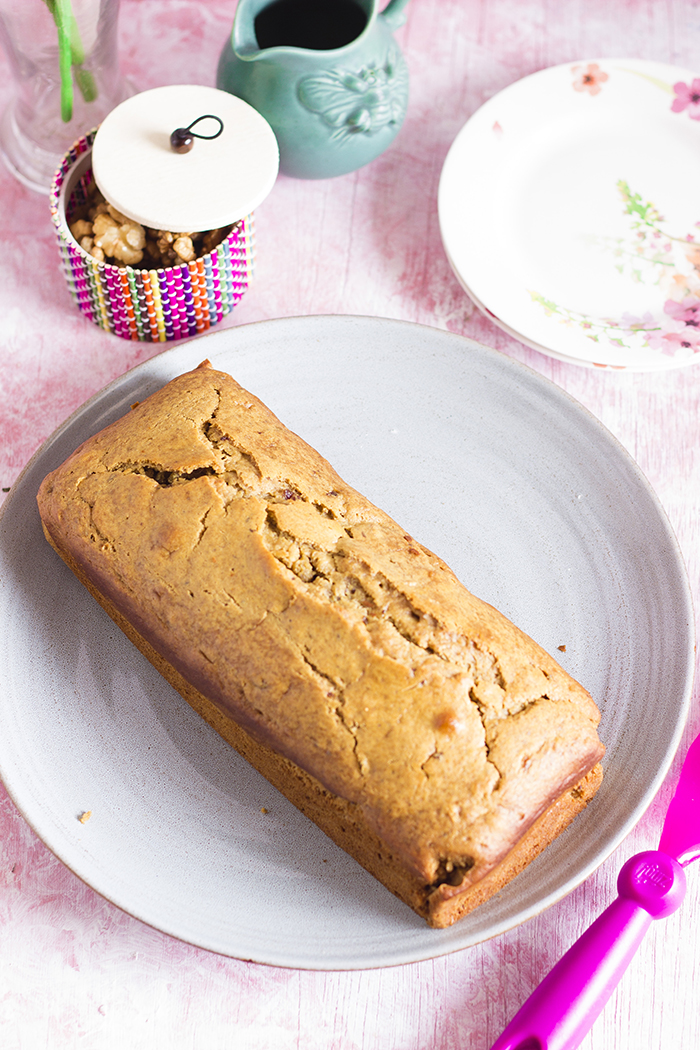
As a cook, it is never good to forget your skills, and here I was all lost and upset. So I decided I need to start baking more often. Lo and behold, this Date and Walnut Cake. I made it multiple times since I first did to just brush up my baking skills and dust out my recipes. And I can say with conviction, that I have loved it each time that I baked it. It has been a little difficult however, to stop sneaking in a piece - for me and for Raj. He'll even wipe out the crumbs (so will I !!). This cake is uber moist and slightly dense. It is rich and gooey to eat and when you find those little bits of walnuts and dates, it makes the bite, that much more special. I love the walnuts in the cake!!

If you like light airy cakes, then this may not fit the bill. 

Vegan cake made with dates and walnuts

The lucky recipients of my trials have been our friends. Lots of free cake going around from this household. 

Date and Walnut has always been a family favorite, only this time, I made it Vegan. It wasn't that I was looking for a vegan recipe, but this one just worked so perfect that I don't think I'll ever want to add dairy and change it. The cake uses Coconut Oil as the fat component, and I tell you, it tastes delicious. It imparts a slightly coconutty taste to the cake, that makes it so much more exotic in flavor. If you aren't such a coconut fan, use any neutral flavored oil like canola or sunflower. To enhance the coconut flavor (cause I'm a big coconut lover), I used coconut milk. Feel free to use almond or soy milk. If you have none, use water, however it may make the cake feel less rich in taste.

There are three sweeteners in here - Dates, Jaggery and Sugar. 

  • Dates - Use the best quality you can. The flavor does come through and you want it to be good. I usually buy dates with seed and deseed them while using. The dates are cooked along with jaggery and water until soft and then blended to a puree. This adds sweetness as well as flavor to the cake.
  • Jaggery - Jaggery is unrefined cane sugar.  With refined sugar off the list for many of us these day, jaggery is the perfect replacement. You can use palm sugar or coconut sugar or brown sugar if you cannot find jaggery. If you do have access to jaggery, buy the darkest, that is the least refined and has the best flavor profile. Sometimes, it even tastes like chocolate. 
  • Sugar - I used half a cup of jaggery, and later added refined sugar, because the cake wasn't sweet enough. To avoid using refined sugar, just increase the quantity of jaggery to 1 cup or use powdered sifted jaggery powder later if the sweetness is less. You could also replace all of the jaggery with powdered sugar.

Vegan cake made with dates and walnuts


I have used all purpose flour or maida in the cake. I generally opt for whole wheat, however, I did not want this cake to be any heavier than it already was with all the vegan liquid ingredients. I suggest, if you are looking to use whole wheat, keep it at 50% and the remaining 50%, use all purpose flour.

The best part of the cake is the walnuts. Be generous. However, let me warn you that the cake gets a little difficult to slice when those walnut bits come in the way and you may not get the perfect slice. But don't let that stop you from baking the cake. Your family won't mind the large chunky slices, I assure you.cThe cake is soft and moist, so only slice it once it has cooled completely. Slicing it when hot will lead to it breaking into chunks around the walnuts.

Serve it warm with tea/coffee. 

Vegan cake made with dates and walnuts

If you made this recipe, let me know! Leave a comment here or on Facebook tag your tweet with @oneteaspoonlife on Twitter and don't forget to tag your photo #oneteaspoonoflife on Instagram. You can also email me at onetspoflife@gmail.com I'd love to see what you are upto.


If you like this recipe, do not forget to share it with your friends and family! 


You can follow One Teaspoon Of Life on FacebookTwitterInstagramPinterest and Google+ or you can subscribe to One Teaspoon Of Life and receive all the latest updated via Email


Video Recipe


--------------------------------------------------------------------------------------------------------------------------


Vegan Date and Walnut Cake Recipe
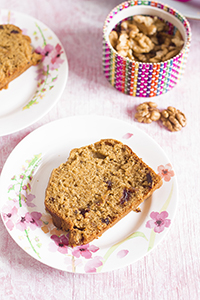

Vegan cake made with dates and walnutsVegan loaf cake made with dates and walnuts. Eggless and dairy free cake.

Recipe Type:  Dessert
Cuisine:            Indian
Prep Time:     20 minutes
Cook time:     50 minutes
Total time:     70 minutes
Yield:                Makes one 9 inch loaf

Ingredients:


30 Dates
10 Walnuts
2 cups Flour
200 ml Coconut Milk
0.5 Coconut Oil
0.5 cup powdered Jaggery
4 Tbsp powdered Sugar
1 tsp Baking Powder
0.5 tsp Baking Soda
1 tsp Vanilla Extract or Essence
Pinch of salt
0.5 cup Water

Method:


1. Boil together 20 chopped dates, water and the jaggery until the dates are soft or 5-6 minutes. If you want to make a refined sugar free cake, increase the quantity of jaggery to 1 cup.
2. Allow the mixture to cool, and then blend to a smooth puree. Add water if required.
3. Mix together the coconut oil and half the coconut milk until combined.
4. Add in the date puree and mix well.
5. Add the vanilla extract and mix well.
6. Sift in the flour, baking powder and baking soda. You can add a pinch of salt if you want.
7. Mix until combined. Use the remaining coconut milk to loosen the batter if it is very dry.
8. If the cake batter isn't sweet enough, add the powdered sugar until you get the desired sweetness.
9. Mix in chopped walnuts and the remaining dates.
10. Grease a cake tin (9") and line with parchment paper or butter paper.
11. Pour in the batter.
12. Bake for 35-40 minutes at 200 degree C or until done. An inserted toothpick or knife should come out clean.
13. Demould after 4-5 minutes.
14. Allow to cool before slicing.


If you liked this, you may also like:

Eggless Blueberry Muffins with streusel topping
Eggless Blueberry Muffins

how to make honey cake recipe,how to make bangalore honey cake recipe, how to make iyengar bakery honey cake recipe, eggless cake recipe, eggless baking at www.oneteaspoonoflife.com
Honey Cake
Persian love cake is an eggless rose and cardamom flavored cake made with almond flour and semolina. Brushed with an orange syrup and topped with chopped nuts.
Persian Love Cake


Read more ...

Bread Pizza Cups [Video]

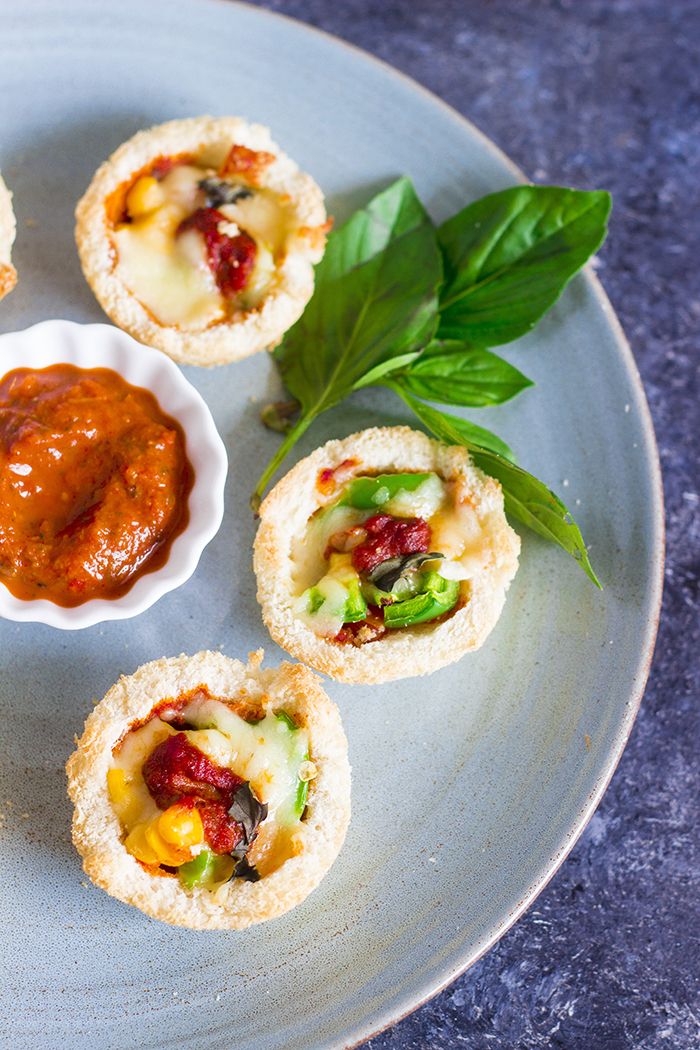
Pizza in a cup - cups made with bread, filled with your favorite pizza toppings and sauce, topped with cheese and baked until the bread is crisp and cheese is oozy.

cups made with bread, filled with pizza toppings,sauce and cheese and baked

Tell me, do you love Pizza? Did you just say yes??? Then you will LOVE this recipe.

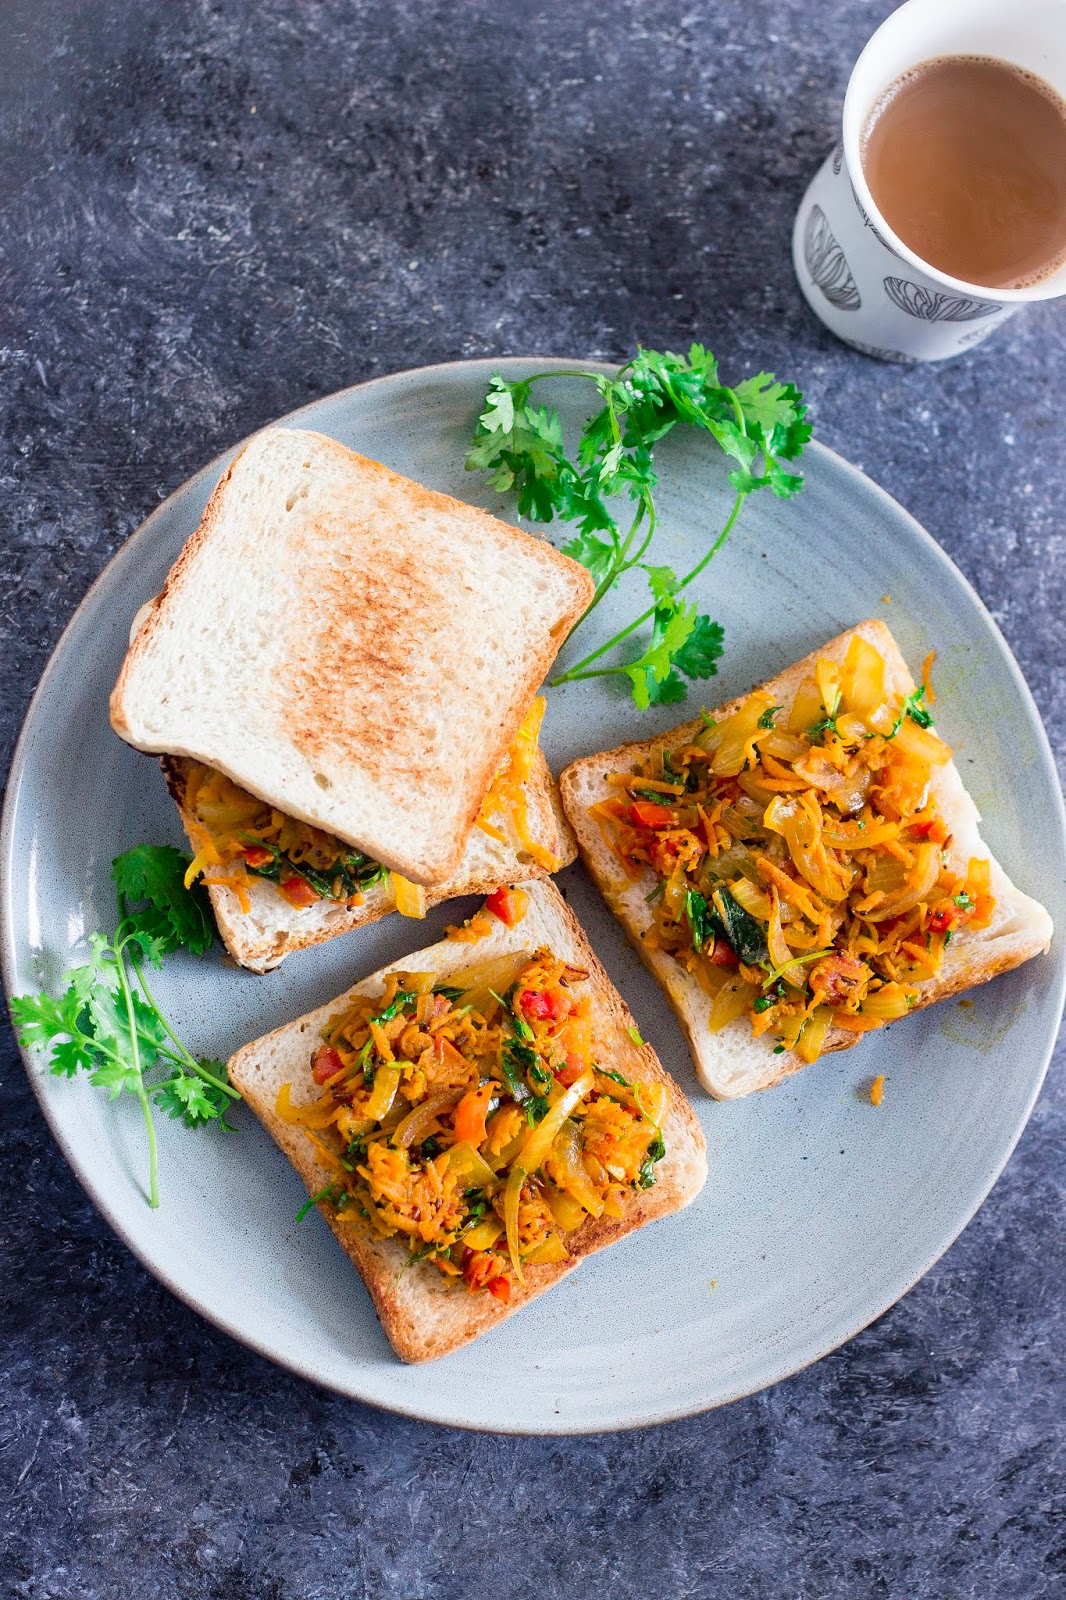
So, since you asked for more snacks, I've been sharing recipes for snacks here. Just early this week, I shared the recipe for Masala Bread Toast - a popular bakery item in Bangalore. And today, I bring to you Pizza in a cup. Cute, right?

These Pizza cups are straight out easy to make and they are highly customizable. All you need are fresh bread slices, your favorite pizza sauce, toppings - again just use what you love or you have leftover in the fridge, and cheese. Yes, lots of cheese. I say the cheese is never enough. 

Okay, so there is a reason I mentioned fresh bread slices up there. The fresher the bread, the softer and easier to work with. The bread won't crumble when you try to shape them. I had a few slices that just crumbled on touch, so bad for the pizza cups. Use wholewheat bread to make it healthier.

cups made with bread, filled with pizza toppings,sauce and cheese and baked

Next, the Pizza Sauce. I made my own sauce following an older recipe of Eggplant Pizza, and I think this Basil Almond Pesto will also go famously. You can get creative and use this Manchurian Sauce instead or you can just buy the Pizza Sauce. If you don't want to go through all the fuss, just use Ketchup and add some Italian seasoning or Oregano to it.

The best part of any Pizza is the toppings. I kept mine super simple - chopped tomatoes, capsicum and sweet corn. It tasted delicious. But this is where you want to get creative and add what you love or as I suggested before, just use up leftovers. Also, a brilliant way to sneak in those healthy veggies your family won't eat.

I topped my Pizza Cups with Mozzarella cause I love the way the cheese melts and gets all stringy. Use any cheese you love, but remember, for cheese, less is never more!! Add more cheese, always!

So where all can you show these Pizza Cups off, let see:

  • High Tea - These Pizza cups will perfectly complement those cute little pastries you have for high tea
  • Kid's birthday parties - What's more fun is you can make the kid's add their own toppings. 
  • Cocktail Parties - let's just agree, these are perfect for any party, really!
  • Snack boxes?? I wouldn't highly recommend this, cause the bread may get soggy, but if you have non-fussy family, I say go ahead. I actually kept aside a few for 2-3 hours and ate them later and they still held and were just as tasty.

cups made with bread, filled with pizza toppings,sauce and cheese and baked

If you made this recipe, let me know! Leave a comment here or on Facebook, tag your tweet with @oneteaspoonlife on Twitter and don't forget to tag your photo #oneteaspoonoflife on Instagram. You can also email me at onetspoflife@gmail.com. I'd love to see what you are upto. 

If you like this recipe, do not forget to share it with your friends and family! 

You can follow One Teaspoon Of Life on FacebookTwitterInstagramPinterest and Google+ or you can subscribe to One Teaspoon Of Life and receive all the latest updated via Email


Video Recipe


--------------------------------------------------------------------------------------------------------------------------


Bread Pizza Cups


cups made with bread, filled with pizza toppings,sauce and cheese and bakedCups made with bread, filled with your favorite pizza toppings and sauce, topped with cheese and baked until the bread is crisp and cheese is oozy.


Recipe Type:  Snack
Cuisine:            International
Prep Time:     15 minutes
Cook time:     15 minutes
Total time:     30 minutes
Yield:                Makes 6 Pizza cups

Ingredients:


6 slices Bread
6 tsp Pizza Sauce
2 Tbsp diced Tomato
2 Tbsp diced Capsicum
2 Tbsp Sweet Corn, boiled
6 Tbsp shredded Mozzarella Cheese
2 tsp Olive Oil
1-2 tsp Italian seasoning / Oregano (Optional)
1-2 fresh Basil leaves(Optional)
Water as required

Method:


1. Lightly sprinkle the bread slices with water and tap to wet the bread slightly.
2. Flatten the bread using a rolling pin.
3. Cut the bread into a circle using a bowl or a box cover.
4. Grease the muffin tray generously with olive oil.
5. Carefully place the bread into the muffin tray in the shape of a cup. See video above for reference.
6. Spoon in the pizza sauce.
7. Add the chopped tomatoes, capsicum and boiled sweet corn.
8. Sprinkle Italian seasoning or oregano if using.
9. Top each cup with 1 Tbsp of shredded cheese.
10. Top with a little bit of sauce and chopped basil leaves.
11. Bake in a preheated oven for 10 minutes at 200 degree Celsius.
12. Serve hot/warm.


If you liked this, you may also like:
Bangalore Iyengar Bakery Style bread toast topped with an onion-carrot masala
Masala Bread Toast

Indian street food, chaat, made with bread, yogurt, chutneys and spices
Dahi Bread Chaat
How to make chutney sandwich recipe, coriander chutney recipe, vegan sandwich, easy sandwich recipe
Coriander Chutney Sandwich


Read more ...

Vegan Zucchini Spaghetti and Lentil Meatballs in Roasted Pepper Sauce [Video Recipe]


Spaghetti made from zucchini tossed in a spicy roasted red pepper sauce with pan fried vegan lentil meatballs.


So Summer is pretty much out of here. The fruits are going off the shelves. And pretty soon, so will the veggies. So I wanted to use up some gorgeous summer zucchini before it goes out and this Zucchini Pasta definitely improved my mood, and let's hope, my health too.

I am a stress eater. I wish I was the other kinda of person who feel no hunger when stressed, aka Gee. But unfortunately, I am drawn to food when I am stressed. Just yesterday, I downed 2 aloo parathas with so much butter. I was in a buttery heaven but I definitely bid goodbye to my diet. 

Recently I have been under quite a bit of stress. I also read somewhere that STEM careers are in the top of careers that cause a burn out in women along with medicine and journalism. So it's an accepted piece of the job. But all that stress is making me crave carbs - bread, rice, pasta. Just give it to ME!

So today, I was very reasonable. I cheated my stressed inner foodie. I had Quinoa Tava Pulao for lunch where I took this recipe and replaced the white rice with quinoa. Just healthifying my lunch. But that wasn't enough and I did it again for dinner. But honestly, I'm very happy, cause I did not miss my carbs at all.


So my dinner today is this ah-mazing Vegan Pasta where the pasta is actually just fine strips of zucchini. I don't own a spiralizer, so I just use my potato peeler to make fine ribbons of zucchini and then I cut it into thin strips with a sharp knife. This pasta done not really need to be cooked, I just tossed it in hot sauce and let the heat from the sauce soften it slightly. I have been considering investing in a good spiralizer for some time, so if you have suggestions on which product is good, leave me a comment. It will be really appreciated. 

The sauce - well, you can use ANY sauce you want when it comes to Pasta. But I LOVED this roasted red pepper sauce. And it is so simple. I wouldn't say quick, unless your roasted pepper came out of a bottle. But roasting your own peppers is not difficult at all. I rubbed the gorgeous red peppers with some good olive oil and roasted them in the oven. Keep turning them once in a while so that it chars throughout. Once you remove them from the oven, cover the peppers and keep aside for some time. Covering makes it very easy to peel. I just removed the peel and the stalk and seeds. I left the char on the pepper as is, cause I love the smokiness it adds to the sauce.  Once you are done roasting all you do is cook it with some onions and garlic and blend it into a sauce. Add oregano or thyme for added taste. I kept it simple and just added red chilli flakes for heat. 

The star of this dish is really the vegan meatballs made from red lentils, chickpeas and walnuts. It is so delicious, I'd suggest you make a lot more than what the recipe calls for. The below recipe made around 10 and I can tell you they were not enough. I could eat them just like a snack with tea. So take my advice and make more. You won't hate it. This is the only part of the meal that needs some planning. Especially since you have to soak dried chickpeas. While you could use canned one, the soaked dried ones give more texture to the meatballs, much like falafels. The flax egg, is optional if you are frying the meatballs, but they definitely made it moist. So I'd recommend it. You can also bake the meatballs. 

Finally just toss everything together and enjoy guilt-free!


If you made this recipe, let me know! Leave a comment here or on Facebook, tag your tweet with @oneteaspoonlife on Twitter and don't forget to tag your photo #oneteaspoonoflife on Instagram. You can also email me at onetspoflife@gmail.com. I'd love to see what you are upto. 

If you like this recipe, do not forget to share it with your friends and family! 

You can follow One Teaspoon Of Life on FacebookTwitterInstagramPinterest and Google+ or you can subscribe to One Teaspoon Of Life and receive all the latest updated via Email


Video Recipe


--------------------------------------------------------------------------------------------------------------------------


Vegan Zucchini Spaghetti and Lentil Meatballs in Roasted Pepper Sauce


Spaghetti made from zucchini tossed in a spicy roasted red pepper sauce with pan fried vegan lentil meatballs. 

Recipe Type:  Main
Cuisine:            International
Prep Time:     30 minutes
Cook time:     1 Hour 30 minutes
Total time:     10 Hours
Yield:                Serves 2

Ingredients:


For the Lentil Meatballs


0.5 cup dried Red Lentils
0.5 cup dried Chickpeas
1 Tbsp Flax seeds
4 Walnuts
4 Garlic Cloves
1 small Onion
1 Tbsp Flour
0.5 tsp Paprika
0.5 tsp Garlic Powder
2 tsp Oil
Salt to taste
Water as required
Oil to fry the meatballs

For the Roasted Pepper Sauce


3 Red Peppers (capsicum)
1 small Onion
4-5 Garlic Cloves
1 Tbsp Red Chilli Flakes
1.5 Tbsp Olive Oil
1 tsp Sugar (Optional)
Salt to taste
Water as required

For the Zucchini Spaghetti


2 medium Zucchini (around 6")

Method:

To make the Lentil Meatballs:


1. Soak the dried chickpeas in water for 8 hours.
2. Wash the dried red lentils and soak them in water for 30 minutes.
3. Heat 4 cups of water in a pan and allow it to come to a rolling boil.
4. Drain the lentils and add to the boiling water.
5. Cover and cook until the lentils are cooked through. Drain out the excess water and keep the lentil aside to cool.
6. Coarsely grind the walnuts.
7. Drain the chickpeas and coarsely grind them.
8. Grind the flax seeds into a powder. Mix in 2 Tbsp of water and keep aside.
9. Saute finely chopped garlic and finely chopped onion in 2 tsp olive oil until the onions are translucent.
10. Once the lentils have cooled, add the walnuts, ground chickpeas, sauteed onions and garlic, garlic powder, paprika, flour and salt and mix well.
11. Chill for 2 hours or freeze for 30 minutes. If the batter is still very wet to form balls, add a spoonful of flour or breadcrumbs.
12. Divide the batter into 10 equal parts and roll into balls using your palms.
13. Take a shallow pan and add oil to it. Once the oil is hot, add the meatballs.
14. Keep turning the meatballs when one side browns. Continue to cook until the entire meatball is browned.
15. You can also bake the meatballs.

To make the Roasted Pepper Sauce:


1. Preheat the oven to 200 degree C.
2. Coat the red peppers with 0.5 tbsp of olive oil.
3. Bake in the oven for 30 minutes. Turn the peppers after every 10 minutes.
4. Remove the peppers from the oven and place in a bowl. Cover and keep aside.
5. Once the peppers have cooled, peel the peppers and remove the stalk and the seeds. Chop roughly and keep aside.
6. Heat the remaining oil in a pan.
7. Crush the garlic and chop them roughly. Add the garlic to the pan.
8. Once the garlic is fragrant, add finely chopped onion and fry until translucent.
9. Add the red pepper and mix well.
10. Add the red chilli flakes, salt and 0.5 cup of water.
11. Cook until the water reduces.
12. Remove from heat and allow to cool.
13. Grind into a smooth puree with little water.
14. Add the puree back to the pan and allow it to heat up.
15. Add more salt, paprika or sugar if required at this stage depending on your taste.
16. You can store this sauce in a clean glass jar in the fridge for 2-3 days after it cools.

To make the Zucchini Spaghetti and assembling:


1. Use a spiralizer to make zucchini spaghetti or slice the zucchini into fine strips.
2. Heat up the roasted red pepper sauce.
3. Add the zucchini to the sauce and mix well. Leave it on the heat for 2-3 minutes until the zucchini is cooked to your liking.
4. Add the meatballs and mix well.
5. You can top the pasta with parmesan.
6. Serve hot with crusty bread.


If you liked this, you may also like:
Roasted vegetable torte is a baked vegetarian pie made by layering thinly sliced vegetables, spices, herbs and cheese
Roasted Vegetable Torte

How to make vegan gluten free lasagna pasta recipe at www.oneteaspoonoflife.com How to make zucchini pasta recipe at One Teaspoon Of Life
Vegan Zucchini Kale Lasagna
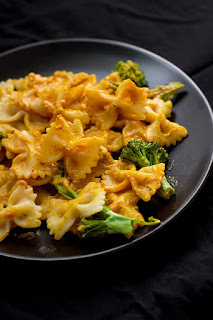
pasta creamy coconut gravy italian pumpkin salad dressing dip chips
Vegan Pumpkin Sauce


Read more ...

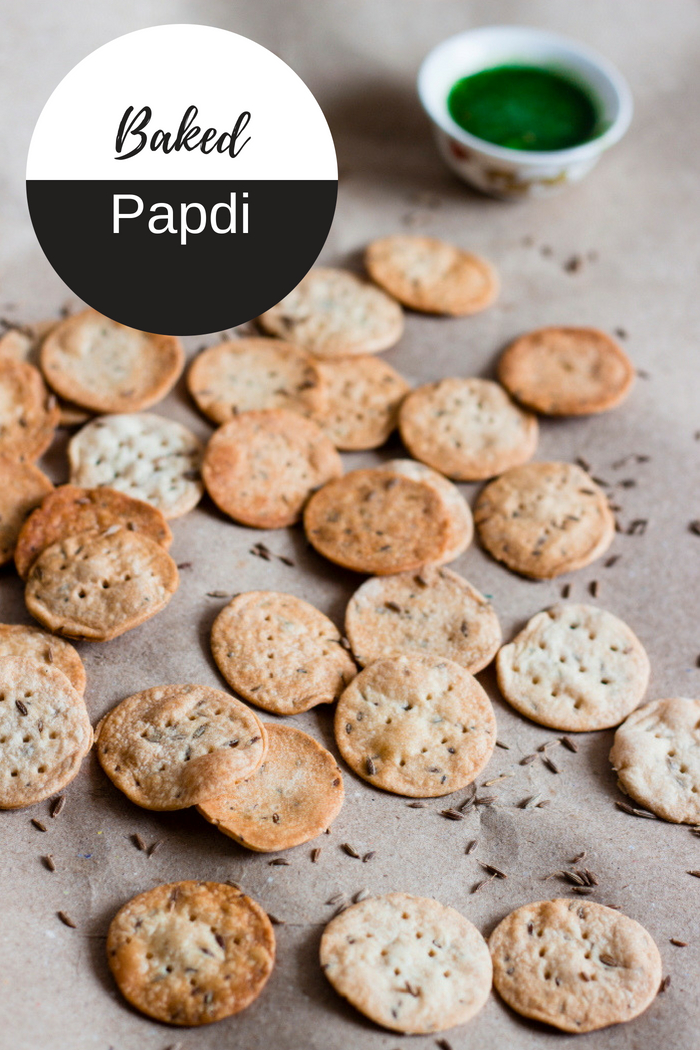
Baked Papdi | Carom and Cumin Crackers


Guilt free baked popular Indian snack made from wholewheat flour and spices...

popular Indian snack - baked flat discs made of four and spices

Hiya folks!!

This is my first outstation post in a long time. As you must have read here, I am not in Bangalore, but at my in-laws place near Mangalore on the West Coast. I've been enjoying my time off but definitely not the heat. We can feel the full effect of summer out here. I'm just thankful for the bursts of rain at night which make it cool enough for me to sleep.

And of course, the ice creams!! If you have come to Mangalore and missed the ice creams here, you have missed out on a lot of deliciousness. From when I can remember, Mangalore had the best ice creams ever!! I never miss a chance to hog on those when I'm out here.

While the ice creams are tempting, this post is not even remotely related to ice creams, but I could really not get them out of my head. This post is about a much healthier snack - Papdis, that have been baked. Papdi are just flat discs made from wholewheat flour and flavored with some spices. Traditionally these are deep fried, but I baked them, just to keep them guilt free. And they tasted just as delicious, but now I can eat a lot more without worrying.

popular Indian snack - baked flat discs made of four and spices


Papdis can either be eaten as a tea time or mid day snack or can be added to other dishes, most popularly - Chaats. Chaat is a collection of Indian street food and many of them use papdis as the building blocks for them. They are the crunch element of the dish. They are added to Masala Puri, Papdi Chaat, Sev Puri etc. You can either make plain papdi, where you don't add any spices but personally I like ajwain (carrom) and jeera (cumin) a lot, so I never skip them out.

Also, I suggest get on to making papdis fast and log onto the blog soon. I have a new recipe planned that uses these crunchy papdis in a simple yet fabulously delicious dish.

Until then, goodbye from the West Coast!


popular Indian snack - baked flat discs made of four and spices

popular Indian snack - baked flat discs made of four and spices


popular Indian snack - baked flat discs made of four and spices

popular Indian snack - baked flat discs made of four and spices


popular Indian snack - baked flat discs made of four and spices

popular Indian snack - baked flat discs made of four and spices


If you made this recipe, let me know! Leave a comment here or on Facebook, tag your tweet with @oneteaspoonlife on Twitter and don't forget to tag your photo #oneteaspoonoflife on Instagram. You can also email me at onetspoflife@gmail.com. I'd love to see what you are upto. 

If you like this recipe, do not forget to share it with your friends and family! 


You can follow One Teaspoon Of Life on Facebook, Twitter, Instagram, Pinterest and Google+ or you can subscribe to One Teaspoon Of Life and receive all the latest updated via Email


---------------------------------------------------------------------------------------------------------------------------


Baked Papdi


popular Indian snack - baked flat discs made of four and spicesFlat round discs made with flour and spices, a popular vegan Indian snack.

Recipe Type:  Snacks
Cuisine:            Indian
Prep Time:     60 minutes
Cook time:     20 minutes
Total time:     80 minutes
Yield:                75 papdi


Ingredients:


0.5 cup Wholewheat Flour (50 gms)
0.5 cup All Purpose Flour (50 gms)
0.5 tsp Carrom seeds
0.5 tsp Cumin seeds
3 tsp Oil
0.5 tsp Salt
0.75 cup Water
Oil for brushing
Wholewheat flour for dusting

Method:


1. Take wholewheat flour, all purpose flour, carrom seeds and cumin seeds in a large bowl.
2. Add the oil and salt. You may need less/more salt, so add it little by little.
3. Start by adding half the water and knead the dough. Add more water by the spoonful as required.
4. The dough should have a stiff consistency.
5. Cover and rest the dough for 20-30 minutes.
6. Divide the dough into 2 balls and roll one of them out until it is 1 millimeter thick.
7. Use a cookie cutter to cut the dough into papdis. You can also use a bottle /box cover to do the same. 
8. Do the same with the second ball of dough.
9. Preheat the oven to 180 degree Celsius.
10. Grease a baking sheet and place the papdis on it in one layer. They should not overlap.
11. Using a fork, prick holes into the papdis.
12. Brush oil over them and bake until golden.
13. Mine took 14-15 minutes to bake. If the papdis are rolled out thin they will start burning, so I suggest checking on them after 12 minutes.
14. Allow the papdis to cool completely before storing in an air tight box.


popular Indian snack - baked flat discs made of four and spices


If you liked this, you may also like:
Baked whole wheat nachos
Baked Chapati Chips

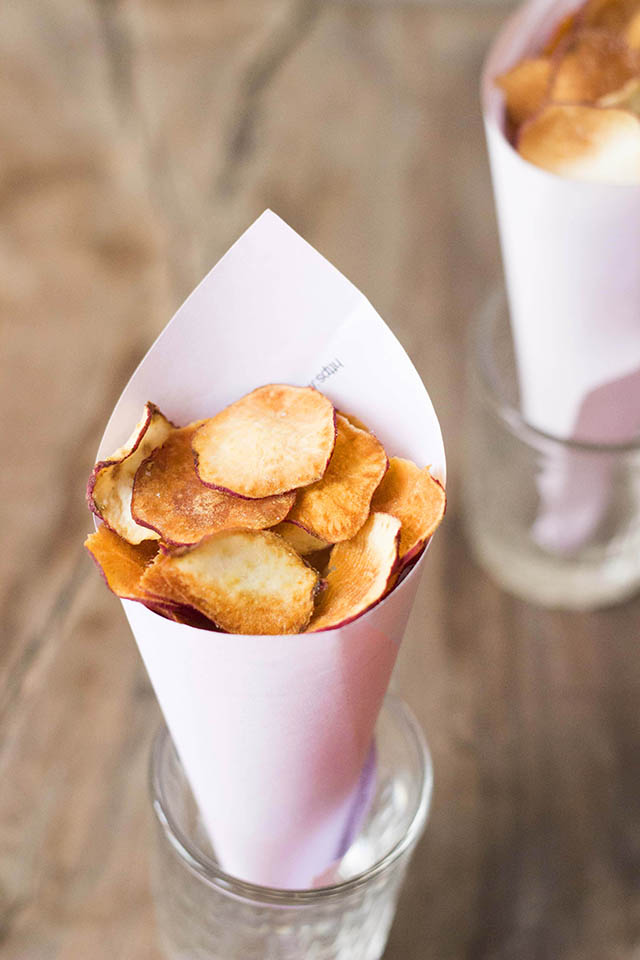
baked chips sweetpotato
Baked Sweetpotato Chips
How to make sun dried potato chips recipe, batate sandige recipe, aloogadde sandige recipe, aloo chips, aloo sandge recipe, how to make aloo papad recipe, potato chips recipe at www.oneteaspoonoflife.com
Sun dried Potato Chips
Read more ...

Eggless Blueberry Muffin Recipe [Video Recipe]


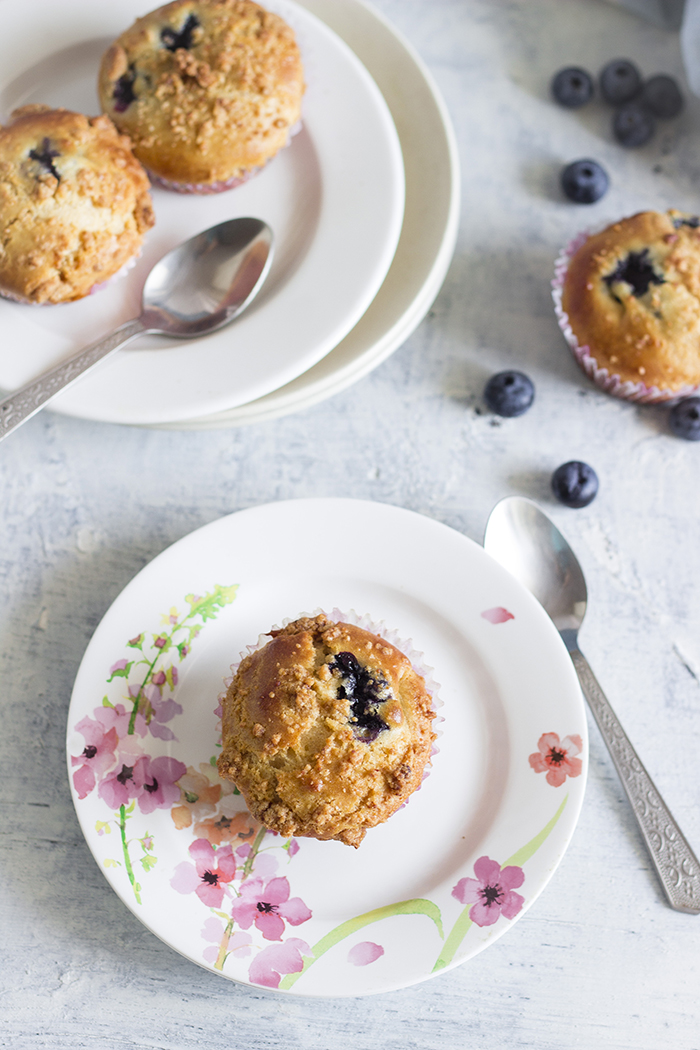
This is the ONLY recipe you will ever need for Eggless Blueberry Muffins! Moist, dense and basically just perfect, these Blueberry muffins will win over your loved ones.


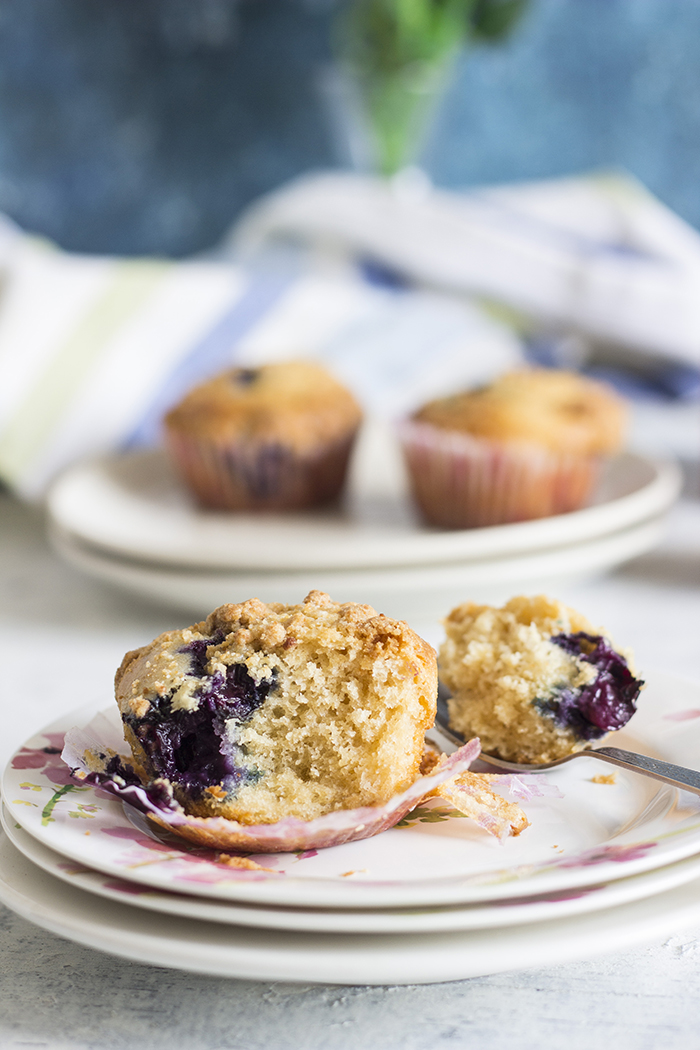
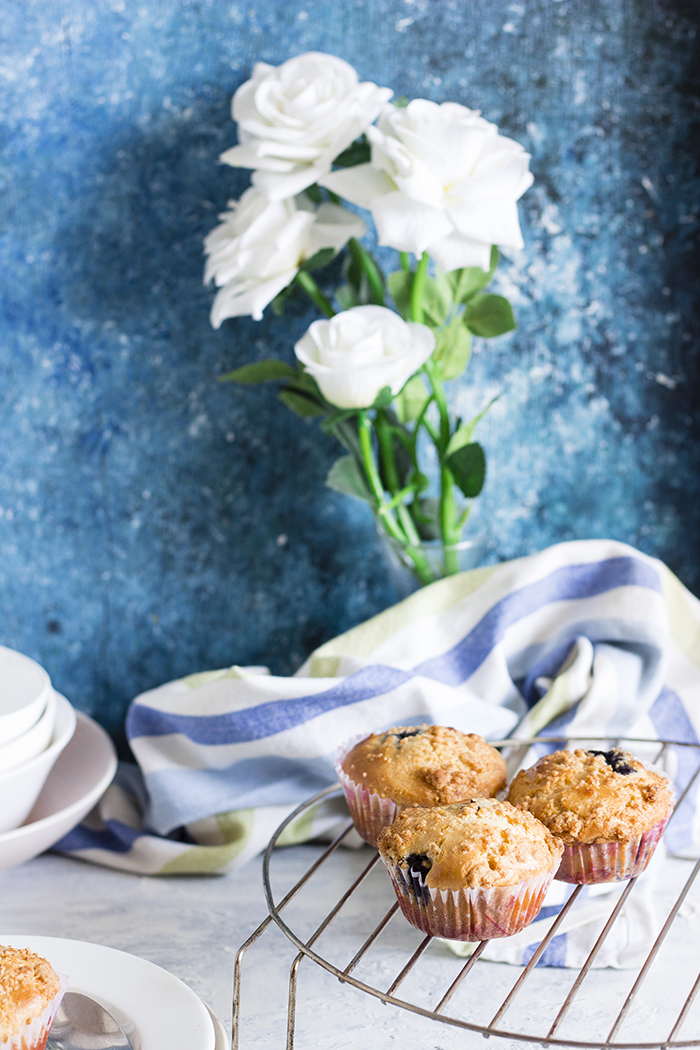
Eggless Blueberry Muffins with streusel topping


Eggless Blueberry Muffins with streusel topping


These Blueberry Muffins got voted Number 1!!! Seriously!! By my biggest food critic, my sister.

I've got a perfect sister. Don't get me wrong, I'm not calling her perfect (after all only one of us can be perfect, and I'm the "one"), but that she plays her part of being the older sister perfectly. When we were younger, the 5 year age gap between us seemed so wide. I annoyed her incessantly -  I followed her around, I copied her all the time. I had to have the exact same dress she bought. I loved using her stuff. I basically just wanted to be her. Then we moved to a phase where I think neither could stand the other very long - we had millions of wars, some could pass off as world wars. And then overnight, we became the best of friends. Just like that. We knew what the other was thinking, we did not even have to finish our sentences. The age gap seems non existent now. 

Back to the perfect sister bit - she smothers me with love, she's always been protective but she's also annoyingly critical. So when she ate these Blueberry Muffins and she ranked number 1 on her list of favorite baked desserts, I was super excited. And I knew I had to share it with you guys. Wouldn't you want to try my number ONE Blueberry Muffins?

Eggless Blueberry Muffins with streusel topping


And it is the perfect season for these muffins. Spring is in the air, the freshest and plumpest of the berries are making their way to the markets.

This isn't really a new recipe. I actually made these muffins for the first time 5 years ago and then for some reason, never made it again. I've had it on the blog for the past 5 years with sad little photos that did not make justice to the deliciousness of these Blueberry Muffins. Back then I had used canned blueberries as I could not find fresh ones. But this time it was all fresh fruit in my muffins. I have to say, the fresh ones triumph over the canned ones any day. I got these wonderful berries for a steal at Namdhari's Fresh. They were on sale for almost half the price. So if you are based in Bangalore, check out your closest outlet and they may still be available at that price. 


Eggless Blueberry Muffins with streusel topping

These muffins are vegetarian and are baked without using egg or egg replacer, yet they were moist and perfectly dense, just as muffins are meant to be. I topped these muffins with a simple streusel made from butter, vanilla, white and brown sugar which is totally optional but definitely recommended. 

Also, in the video recipe, you will see a small difference in color in the wet ingredient mix, this is because I made these muffins twice, once with melted butter and once with oil. And I kinda messed up a part of my video when I made them with butter, so I had to re-shoot that part of the video when I remade the muffins with oil. You can use either butter or oil, but I highly recommend butter, as it adds more richness to the muffins.

Psst... Want to know what else made it to Gee's list? This Persian Love Cake and then the Almond brownies.

Eggless Blueberry Muffins with streusel topping


One of my pics from 5 years ago

If you made this recipe, let me know! Leave a comment here or on Facebook, tag your tweet with @oneteaspoonlife on Twitter and don't forget to tag your photo #oneteaspoonoflife on Instagram. You can also email me at onetspoflife@gmail.com. I'd love to see what you are upto. 

If you like this recipe, do not forget to share it with your friends and family! 

You can follow One Teaspoon Of Life on Facebook, Twitter, Instagram, Pinterest and Google+ or you can subscribe to One Teaspoon Of Life and receive all the latest updated via Email


Video Recipe


---------------------------------------------------------------------------------------------------------------------------

Blueberry Muffin


Eggless Blueberry Muffins with streusel toppingEggless Blueberry muffins made using fresh blueberries and wholewheat flour. Streusel topped Blueberry muffins.

Recipe Type:  Dessert / Breakfast
Cuisine:          International
Prep Time:     20 minutes
Cook time:     25 minutes
Yield:              12


Ingredients:


0.75 cup Blueberries (about 80 gms)
0.75 cup All Purpose Flour (about 100 gms)
0.75 cup Whole wheat flour (about 100 gms)
0.75 cup Milk powder or Dairy whitener (about 80 gms)
0.75 cup Powdered sugar (about 100 gms)
75 gms Butter
1.25 cups Milk (about 125-150 ml)
2 tsp Baking powder (about 8 gms)
0.5 tsp Baking soda
1 tsp Vanilla extract
1 tbsp Apple Cider Vinegar
0.25 tsp Salt 
3-4 tbsp Streusal topping


To make Streusal Topping:


2 tbsp Cold Butter
1.5 tbsp All purpose Flour
2 tsp Jaggery powder or Brown Sugar
1 tsp Powdered Sugar

Method:


1. Mix together all purpose flour, whole wheat flour, milk powder, salt, baking powder and baking soda until combined. You can sift these too.
2. Whisk together melted butter, vanilla extract and 0.5 cups milk until combined. Add the apple cider vinegar and mix well.
3. Add in half the dry ingredients and whisk until combined without any lumps.
4. Add in the remaining flour and milk and mix until you have a smooth batter.
5. Fold in the blueberries.
6. Line a muffin tray with paper liners.
7. Spoon the batter into the liners until they are 3/4th full.
8. If making the streusal, mix together cold butter, flour, brown sugar and powdered sugar with your fingers until it forms a coarse mixture like powdered cookies.
9. Sprinkle the muffins with about 0.5 tsp each.
10. Bake for 22-25 minutes in a preheated oven at 180 degree C
11. Serve warm.


P.S: This is a winner everywhere. It is a top post on IndiBlogger :)
Top post on IndiBlogger, the biggest community of Indian Bloggers

Eggless Blueberry Muffins with streusel topping


If you liked this, you may also like:

rose flavored almond ans semolina cake
Persian Love Cake

How to make eggless almond chocolate brownie recipe at www.oneteaspoonoflife.com
Almond Chocolate Brownies
Bangalore Iyengar bakery style honey cake
Honey Cake
Read more ...

Baked Falafel Beetroot Wraps


Baked chickpea falafels and hummus in a beetroot flatbread!


Baked chickpea falafels and hummus in a beetroot flatbread

Mediterranean food has so much to offer to vegetarians - dips, salads and of course, the ever so loved Falafels. The falafel is a great meat free option for anyone eating Mediterranean food, it is full of protein and fiber. While traditionally falafels are made with fava beans and are deep fried, I chose to make them with the easily available chickpeas and to bake them. I love fried falafels, but when one moves to eating healthy, one has to find the alternative to balance both health and flavor. And I can tell you for sure, there was no loss of flavor here!

Falafels are served in so many different ways - as an appetizer with dips, stuffed inside a pita pocket to make a sandwich or as a part of a bowl meal. I chose to serve it inside a vibrant pink beetroot wrap. 

Baked chickpea falafels and hummus in a beetroot flatbread


I have an obsession for wraps and rolls. I simply love them, they are so easy to eat and not so messy. And they are usually healthier than the sandwiches made with leavened white bread. When it comes to wraps, I always go for whole wheat. 

You will love this because:
  • Easy to eat, not messy
  • Healthy
  • Vibrant
  • You can customize it to your liking
  • Vegan
  • Delicious
To make the Baked Falafel Beetroot Wraps, I soaked dried chickpeas overnight. If you are using canned ones, you can start right away. I boiled a third of them to make hummus and used the remaining to make the falafels. I made my own hummus, just because it is so easy to make and I love the taste of fresh hummus, but you can save yourself the trouble and buy your favorite hummus.


Baked chickpea falafels and hummus in a beetroot flatbread

Baked chickpea falafels and hummus in a beetroot flatbread


For the falafels, I coarsely ground together uncooked chickpeas, fresh coriander leaves, green chillies, garlic along with coriander powder and cumin powder. Season as per taste. Add in a little flour or corn starch to help it bind better if the batter is too wet. While falafels are usually spherical, while baked it is preferred to flatten them, to increase the surface area that touches the baking sheet. The area that touches the sheet tends to crisp up, so lets increase that! If you don't have an oven, you can pan fry it with little oil. I suggest you make more than what is required, cause these taste delicious and make a great healthy snack!

For the wrap, I boiled beetroots and pureed them, then I added salt and wholewheat flour and kneaded a smooth dough with a little water. Rolled the wraps out and cooked them on a tava or griddle with a little oil. If you are too lazy to make the wrap, you can buy frozen chapatis or even use tortillas that only need to be heated up. But I definitely recommend making them fresh. They are soft and slightly sweet due to the natural sweetness of the beets. Plus they look so beautiful. You can add spice powders to the dough while kneading to jazz it up a little, just don't overpower it with a lot of them.

Finally to assemble, just spread the hummus on the flatbread, add the falafels and a simple salad of colorful peppers, cabbage or lettuce and onions. Toss in some olives or pickle if you would like. Roll it up and eat.

Baked chickpea falafels and hummus in a beetroot flatbread

If you made this recipe, let me know! Leave a comment here or on Facebook, tag your tweet with @oneteaspoonlife on Twitter and don't forget to tag your photo #oneteaspoonoflife on Instagram. You can also email me at onetspoflife@gmail.com. I'd love to see what you are upto. 

If you like this recipe, do not forget to share it with your friends and family! 

You can follow One Teaspoon Of Life on Facebook, Twitter, Instagram, Pinterest and Google+ or you can subscribe to One Teaspoon Of Life and receive all the latest updated via Email

If you liked this, you may also like:


---------------------------------------------------------------------------------------------------------------------------


Baked Falafel Beetroot Wraps


Baked chickpea falafels and hummus in a beetroot flatbreadBaked chickpea falafels with hummus and vegetables rolled in a whole wheat beetroot flatbread.

Recipe Type:  Main
Cuisine:            Mediterranean Indian Fusion
Prep Time:     8 hours (includes soaking time)
Cook time:     60 minutes
Yield:                Makes 6 wraps

Ingredients:

To make the Baked Falafels:


200 gms Chickpeas
1 Onion
2-3 Garlic Cloves
0.5 cup Coriander leaves (tightly packed)
2 Green Chillies
1 tsp Cumin powder
0.5 tsp Coriander Powder
0.5 Lime
0.5 tsp Baking Soda
1 Tbsp Corn Starch or Flour (Optional)
3 Tbsp Vegetable Oil
Salt to taste

To make the Beetroot Wrap:


2 cup Wholewheat Flour (atta)
1 large Beet root
0.5 tsp Red Chilli Powder
6 tsp Oil
Salt to taste
Water as required

To assemble the Wrap:


6 Beetroot Wraps
12 Falafels
6 Tbsp Hummus
4-5 leaves of Ice berg lettuce or Cabbage
0.5 cup julienne Capsicum
1 small Onion, sliced

Method:


To make the Baked Falafels:


Soak the chickpeas overnight or for 8-10 hours if using dried chickpeas. If using canned chickpeas, skip the soaking.
Drain out all the water and transfer the chickpeas to a food processor or a mixer.
Add the garlic, chopped onion, coriander leaves, chopped green chillies, lime juice, baking soda, cumin powder and coriander powder to the blender along with salt.
Pulse the food processor until everything is combined. Do not over process it and make it smooth and mushy. The batter has to just sticky enough to hold when pressed together.
Add corn starch or flour if the dough is too wet.
Refrigerate for 20-30 minutes.
Preheat the oven to 180 degree C.
Divide the mix into 12 equal portions.
Roll them into balls and flatten them.
Brush a baking sheet with oil. Place the falafels on the baking sheet.
Brush the falafels with oil.
Bake for 10 minutes, then flip them over and bake for another 10-12 minutes, until the falafels have browned.
Remove from the oven and keep aside.

To make the Beetroot Wraps:


Boil and peel the beetroot.
Allow it to cool and then puree it until smooth. Run through a sieve to get a smoother puree.
Transfer the uree to a large plate or bowl. Add 0.5 tsp of salt and red chilli powder and mix well.
Add in the whole wheat flour and start kneading. Add water as required.
Knead until the dough comes together.
This can be done while the falafel batter is resting in the fridge.
Divide the dough into 6 equal portions and roll them into balls.
Using a rolling pin, roll out the dough as thin as possible. Use wholewheat flour for dusting.
Heat a tava or a griddle and brush it with oil.
Cook the wrap on medium-high heat. Brush the wrap with a little oil and flip over.
When the wrap has a few brown spots, remove from heat and keep aside.
Do the same for all 6 portions.

To assemble the Baked Falafel Beetroot Wraps:


Spread hummus on the wrap.
Place the julienne capsicum, sliced onion and lettuce on the hummus.
Place 2 falafels on each wrap.
Roll and serve.


Read more ...