Pani Puri Recipe| Golgappa Recipe | Puchka Recipe [Video]


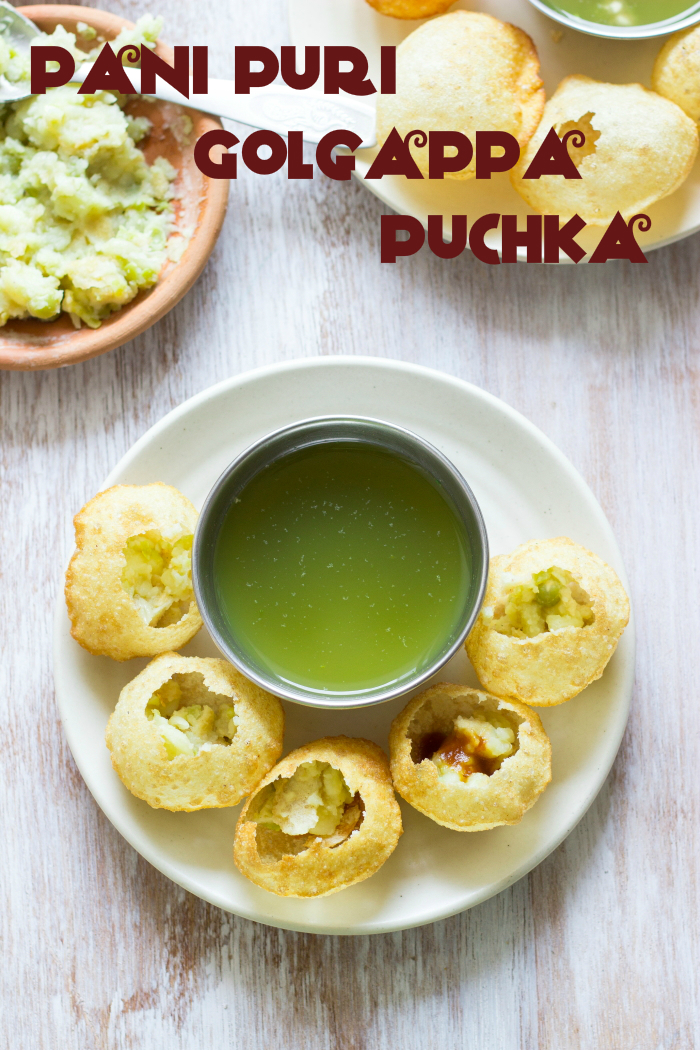
Pani Puri recipe with step by step Video instructions. The KING of Indian Street food - Pani Puri or Golgappa or Puchka. Crispy fried dough balls stuffed with a potato pea mash, sweet tamarind chutney and a chilled spicy coriander-mint water.


In a hurry? Jump to Video or Jump to Recipe


How to make pani puri recipe, how to make puchka recipe, how to make golgappa recipe, pani puri ka pani recipe at www.oneteaspoonoflife.com

What kind of a place would the world be if there was no street food? Boring???

I think Street Food talks a lot more than Restaurant food. Street food is like the soul of the place. You learn so much more about the culture and people just by looking at the street food being sold. While restaurant food is usually mellowed down and modified to suit the palate of the customers it serves, street food is bold and original. If you haven't eaten street food, you probably haven't tasted the city yet.

India wouldn't be India if it were not for its "Chaat". Chaat refers to a variety of savory sweet tangy food sold on the roadsides from either small stalls or little food carts. And according to me, the most popular Chaat has always been - Pani Puri, also known as Golgappa in the North and Puchka towards the East. Names may vary, but the love for this dish does not. You can find Pani Puri being sold in every nook and corner of any city in India. But each one has their own favorite stall that they are extremely loyal to. Our favorite, is the Bihari guy outside a supermarket in Jayanagar 4th Block. He makes the crispest puri there is. I have never made my own Puris, that is an experiment for some other day. Buying is a lot easier.

How to make pani puri recipe, how to make puchka recipe, how to make golgappa recipe, pani puri ka pani recipe at www.oneteaspoonoflife.com

How to make pani puri recipe, how to make puchka recipe, how to make golgappa recipe, pani puri ka pani recipe at www.oneteaspoonoflife.com

Puris are crispy hollow balls made of deep fried dough. These balls are gently tapped with fingers to make a hole on one side. Then comes the stuffing, the stuffing varies according to the region you are in. It can be a potato mash, potato-green pea mash, sprouts, black chana, chickpeas etc. A little bit of this stuffed is stuffed into the puri. Then comes the celebration - the Pani or water. The Pani awakens every teeny weeny taste bud in your mouth. It is sour, it is spicy, it is salty. Made of mint, coriander, tamarind, chillies and spices, it is a flavor bomb. One of the essential ingredients for making the perfect pani is Black Salt or Kala Namak. A funky smelling salt that has its origin in the Himalayas. The pani is stirred before dipping the puri in it to fill up the puri with this wonderful Pani. Now if you want, you can add jaggery or sugar to the Pani to make it slightly sweet, or you can make the Date Tamarind Chutney like it is traditionally done and spoon in a little of it along with the Pani to get a slightly sweet Pani Puri. Keeping the sweet chutney separate from the Pani allows you to adjust the sweetness according to each individual's taste.

How to make pani puri recipe, how to make puchka recipe, how to make golgappa recipe, pani puri ka pani recipe at www.oneteaspoonoflife.com

How to make pani puri recipe, how to make puchka recipe, how to make golgappa recipe, pani puri ka pani recipe at www.oneteaspoonoflife.com

Once the puri is filled with the pani, it has to be eaten immediately. Eating a Pani Puri can be tricky if you have never had it. You have to eat the puri in one go. It is like a filled water balloon, you try to cut it in half and all the water will be out and you will be left with a soggy puri. 

My love for Pani Puri comes from my Dad. He never missed a chance to eat a plate of pani puri, neither does Raj. When I am shopping for weekly groceries at the super market, he's outside sneaking a plate of pani puri. In this one matter, we are definitely made for each other. We are 2 bottomless holes when it comes to pani puris. We can just keep on going!!

How to make pani puri recipe, how to make puchka recipe, how to make golgappa recipe, pani puri ka pani recipe at www.oneteaspoonoflife.com


If you made this recipe, let me know! Leave a comment here or on Facebook, tag your tweet with @oneteaspoonlife on Twitter and don't forget to tag your photo #oneteaspoonoflife on Instagram. You can also email me at onetspoflife@gmail.com. I'd love to see what you are upto. 

If you like this recipe, do not forget to share it with your friends and family! 

You can follow One Teaspoon Of Life is there on Facebook, Twitter, Instagram, Pinterest and Google+ or you can subscribe to One Teaspoon Of Life and receive all the latest updated via Email (How convenient!!)


Video Recipe


--------------------------------------------------------------------------------------------------------------------------

Pani Puri | Golgappa | Puchka Recipe


How to make pani puri recipe, how to make puchka recipe, how to make golgappa recipe, pani puri ka pani recipe at www.oneteaspoonoflife.comPani Puri | Golgappa | Puchka is an Indian Street food or Chaat item in which crispy fried dough balls are stuffed with mashed potatoes, spicy coriander-mint water and a sweet tamarind chutney.

Recipe Type:  Snacks
Cuisine:            Indian
Prep Time:     8 hours (includes soaking time for peas)
Cook time:     45 minutes
Yield:                Makes 100

Ingredients:


To make the Pani:


0.75 -1 cup chopped Coriander leaves
0.75 -1 cup chopped Mint leaves
1 litre cold Water
Lemon sized piece of Tamarind
2-3 green Chillies
1 tsp Cumin Powder
2 tsp Chaat Masala
Black Salt to taste

To make the Potato-Pea Stuffing:


5-6 Potatoes
3/4 cup dried Green Peas
1 tsp Chaat Masala
Salt to taste
Water as required

To Assemble the Pani Puri:


100 Puris
1 bowl Date Tamarind Chutney

Method:


To make the Potato-Pea Stuffing:


1. Soak the dried green peas overnight or for 6-8 hours.
2. Drain and boil them until done. I usually pressure cook them for 2-3 whistles.
3. Boil and peel the potatoes.
4. Mash together the potatoes and the green peas.
5. Add in salt and chaat masala and mix well. Keep it slightly under seasoned as the pani is already salty.

To make the Pani:


6. Soak the tamarind in a cup of water for 15 minutes and squeeze out the liquid. Remove the pulp and keep the tamarind juice aside.
7. Blend together the coriander leaves, mint leaves and green chilli with a little water into a smooth puree.
8. Add the puree to 1 litre of water , preferably cold.
9. Add the cumin powder, tamarind juice, black salt and chaat masala to taste.
Chill the green pani in the fridge until serving. Alternately, you can add ice to the pani to serve immediately.
10. Strain the water before serving.

To Assemble the Pani Puri:


11. Gently tap a hole in the puri using your finger.
12. Spoon in the potato stuffing into the puri.
13. Now pour in the date tamarind chutney if you like the pani puri to be slightly sweet.
14. Spoon in the green pani and eat immediately.


How to make pani puri recipe, how to make puchka recipe, how to make golgappa recipe, pani puri ka pani recipe at www.oneteaspoonoflife.com


If you liked this, you may also like:
bangalore street food masala puri chat
Masala Puri

Masala Pav, Indian street food
Masala Pav
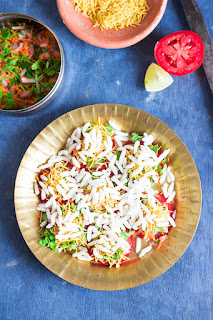
Bangalore Street food made by topping tomato slices with a mix of sweet and spicy chutneys and topped off with salted puffed rice
Tomato Puri


Read more ...

Jamun Ice Candy | Jambul Ice Candy | Black Plum Popsicle


SUMMER has arrived!! Cool down with this Summer with this Jamun Ice Candy / Black Plum Popsicle!


Summer isn't SUMMER, until you've had a brain freeze from all those ice candies. I had a few ones with this Jamun Ice Candy already, not enough though. But hey, summer has just begun. I'm looking at my calendar as I write this and I realise Summer has not "just begun", we are already mid way through it. One more week to go and we are officially mid way in Mango Season. Now that I think, I've barely had mangoes this season. Need to rectify that immediately!!

Anyway back to ice candies. I'm sure all of us have fond memories of buying Rs.1 ice candies from the street vendors who came about pushing their little carts when we were kids, waaaay back in the 80s and 90s (I feel old now :( ). Fun days!! For me summer as a kid meant all play and no work, pigging out on Mangoes, climbing trees to pluck out Guavas, eating loads of ice candies and dreading that report card that was sent home somewhere around this time in April. And of course Rasna!! That concentrated sweet drink that pretty much every house hold made together at the start of summer. I know lots of kids who made ice candies by freezing Rasna in bowls. Each of us had our very own favorite Rasna flavor, I personally loved the Mango. I think I can eat anything that is mango flavored.

Hey, I've been talking of a complete different fruit here. This post is not about Mangoes, not even close to Mangoes. If mangoes is what you are looking for today, you may want to check out these recipes.

Today is all about that purple king of fruits - Jamun or Jambul. While the Mango was termed the king, this extremely healthy wild fruit was very much ignored. Nobody ever spent money to buy them, they were plucked from trees when we all went to our native places and ancestral houses for the summer. The fun part of eating Jamun has always been the purple stain it leaves on your tongue when you eat them. We always had a competition to see whose was the darkest (gross, right?, eh, what can I say, we were kids). It took a long time for people to realise the health benefits of Jamun -the most popular one being the role it plays in controlling diabetes. This increased popularity in recent times has brought the fruit to markets, albeit at an expensive price.


Apart from the health benefits and the purple tongues, there is another reason why I decided to start my ice candy season with a Jamun Ice Candy - it is not commercially available!! There is no popular ice cream brand that actually sells a Jamun Ice Candy, the only place I've ever eaten one is at a small home ice cream parlor in Karkala. I loved it so much, that this season I decided to make them.

Making Ice Candies is a child's play. Literally!! All you need to do is mix sugar, water and the fruit. I blended a part of the fruit into a puree - this is what gives that nice purple color, and I chopped the remaining into small pieces roughly. If you have moulds to make ice candies, then pour the liquid into them and place the wooden stick in the center. But if you (like me) do not have a mould, then just use any small steel glass or paper cups or even ice cube trays to make the ice candies. To get the stick to stand vertically right in the center, just cover the glass with aluminium foil or with plastic cling wrap and in the center of that make a small slit. Insert the stick in the small slit all the way through.
Freeze until completely solid and enjoy your brain freeze.


If you made this recipe, let me know! Leave a comment here or on Facebook, tag your tweet with @oneteaspoonlife on Twitter and don't forget to tag your photo #oneteaspoonoflife on Instagram. You can also email me at onetspoflife@gmail.com. I'd love to see what you are upto. 

If you like this recipe, do not forget to share it with your friends and family! 

You can follow One Teaspoon Of Life is there on Facebook, Twitter, Instagram, Pinterest and Google+ or you can subscribe to One Teaspoon Of Life and receive all the latest updated via Email (How convenient!!)


If you liked this, you may also like:


Jamun Ice Candy | Jambul Ice Candy | Black Plum Popsicle


Jamun Ice Candy | Jambul Ice Candy | Black Plum Popsicle is a 3 ingredient frozen fruit dessert made with jamun (jambul) or black plums.

Recipe Type:  Dessert
Cuisine:            Indian
Total Time:     3-4 Hours
Yield:                Makes 7-8 ice candies


Ingredients:


250 gms Jamun / Jambul / Black Plum
6 cups Water
5-6 Tbsp Sugar

Method:


Deseed all the jamuns.
Keep aside a quarter of the jamuns, and blend the rest with a little water until smooth.
Roughly chop the jamuns that were kept aside and add it to the puree.
Add water to the puree.
Add sugar by the spoonful. Stir until sugar dissolves.
Depending on the sweetness or sourness of the jamuns, the quantity of sugar required may vary.
Pour the ice candy mix into the moulds. Place the ice candy stick in the center. Freeze for 3-4 hours or until frozen completely.
If you do not have a popsicle or ice candy or a kulfi mould, you can freeze the ice candy in steel glasses or paper cups. Cover the glass with aluminium foil or plastic wrap. Make a small slit in the center and push the ice candy stick through it.
To remove the ice candy or popsicle, just run the mould or the glass under water.


Read more ...

Grilled Cauliflower Summer Bowl


Summer in a bowl - Spicy grilled Cauliflower, chewy Black Rice, fresh vibrant summer salad all tossed with a mint coriander oil. What are you waiting for? Dig in!!

How to make grilled cauliflower recipe, spicy grilled cauliflower recipe, roasted cauliflower recipe, how to make black rice recipe, summer recipes, one bowl recipes at www.oneteaspoonoflife.com

I love one bowl meals, so convenient. You spoon all that you want in one large bowl and then you mix together all the bits and pieces as you eat. Bowl meals are popular in so many cultures - Asians have bibimbaps and a variety of other bowl meals (I'm not sure what they are really called), there are Mexican Rice Bowls - I really really love this, I can never have enough of it. And I'm sure there are thousands more that I've never even heard of. What's your favorite bowl meal?

So while Summer hit its high notes, the weather had mercy and a few drops of rain in patches brought down the temperature a few degrees. Yay! Now I at least don't drag my feet to the kitchen. It was beginning to get so hot that I had almost wanted to give up cooking. Standing in front of a hot stove when the air around you is so hot, was definitely more unappetizing than take away food. 

How to make grilled cauliflower recipe, spicy grilled cauliflower recipe, roasted cauliflower recipe, how to make black rice recipe, summer recipes, one bowl recipes at www.oneteaspoonoflife.com

Being a food blogger, I cannot "not" cook food. What will I write about? Life of a food blogger, especially a part time one like me is not at all rosy. Full time office job that pays me a salary takes up all of my day and a good part of my evenings and nights. I'm either travelling or in meetings or on a call. It's not that I hate it, in fact I enjoy a lot of it, but all that leaves me with very little time for cooking. So most of my kitchen experiments or as I call it "Delicious Exotic Cooking" happens only on the weekends. Weekdays are for simple non spicy dinners like this Tendle Bibbe Upkari with chapati. 

Today was a relaxing Saturday. I had planned to not cook anything. Breakfast was at Gee's place where she made this awesome Sabudana Khichdi. And when Sabudana Khichdi is there, I always over-eat. So we were in no mood for a regular heavy lunch. Binged watched movies on TV all day. All that lazing is doing wonders for me!! I finally feel like cooking.

But today we were in no mood for regular heavy spicy weekend lunch. We both wanted something fresh yet filling. Not so sure if he wanted filling, but I definitely am not cooking any snacks with evening tea, so lunch had to keep us full till dinner. So presenting, my Saturday kitchen experiment, *drum rolls* - Grilled Cauliflower Summer Bowl!!

How to make grilled cauliflower recipe, spicy grilled cauliflower recipe, roasted cauliflower recipe, how to make black rice recipe, summer recipes, one bowl recipes at www.oneteaspoonoflife.com

This Grilled Cauliflower Summer Bowl has 4 main components - the spicy grilled cauliflower ( of course), black rice (I told you I cook exotic food), mint coriander oil (ah! so easy) and a fresh summer salad (so refreshing). 

Start by making the mint coriander oil. It is the simplest part of the entire bowl, but also the thing that ties it all together. The mint and coriander need time to infuse into the oil. So I'd start with this. 

Then comes the black rice. Why black rice, you ask? Because I had it!! You can use brown rice or even regular white rice. I loved the play of black and the other colors, plus I had to use the rice, so I used the sexy black rice. Black rice is very similar to traditional brown rice, it needs quite a bit of soaking and it takes time to cook. It also has that bite to it that's generally missing in white rice. Cook the rice you have just the way you want it and it should be good. 

The Cauliflower - marinate it with olive oil, red chilli powder, cumin powder, garlic, lime juice, turmeric powder and salt. I love this marinade, and I use it for all sorts of things - Paneer, Tofu, Chickpeas etc. Let the marinade soak in, then grill the cauliflower until it is done. I did mine in the oven. 

The salad is just a basic salad of raw vegetables with a light dressing of lime juice, olive oil, salt and pepper. I just mixed together colorful peppers / capsicum to brighten up the whole dish. Use whatever you feel like adding to the salad.

Finally just spoon everything in a bowl and enjoy!! I preferred eating it at room temperature as it was a warm day. You can serve it at any temperature you like.

How to make grilled cauliflower recipe, spicy grilled cauliflower recipe, roasted cauliflower recipe, how to make black rice recipe, summer recipes, one bowl recipes at www.oneteaspoonoflife.com


If you made this recipe, let me know! Leave a comment here or on Facebook, tag your tweet with @oneteaspoonlife on Twitter and don't forget to tag your photo #oneteaspoonoflife on Instagram. You can also email me at onetspoflife@gmail.com. I'd love to see what you are upto. 

If you like this recipe, do not forget to share it with your friends and family! 

You can follow One Teaspoon Of Life is there on Facebook, Twitter, Instagram, Pinterest and Google+ or you can subscribe to One Teaspoon Of Life and receive all the latest updated via Email (How convenient!!)


If you liked this, you may also like:


Grilled Cauliflower Summer Bowl


How to make grilled cauliflower recipe, spicy grilled cauliflower recipe, roasted cauliflower recipe, how to make black rice recipe, summer recipes, one bowl recipes at www.oneteaspoonoflife.comGrilled Cauliflower Summer Bowl is a fresh summer bowl made with spicy grilled cauliflower, a fresh salad, black rice tossed with a refreshing mint coriander oil.

Recipe Type:  Main
Cuisine:            International
Prep Time:     60 minutes
Cook time:     45 minutes
Yield:                Serves 2

Ingredients:


For the Grilled Cauliflower:


2 cups Cauliflower Florets
1.5 Tbsp Olive Oil
1 tsp Red Chilli Powder
0.5 tsp Turmeric Powder
1.5 tsp Cumin Powder
1 tsp Garlic paste
1 tsp Lime Juice
Salt to taste

For the Summer Salad:


1 Cucumber
1 small Onion
1 large Tomato
1/2 cup diced Capsicum (mixed colors)
1.5 Tbsp Olive Oil
1 Tbsp Lime Juice
Salt to taste
Pepper to taste

For the Mint Coriander Oil:


2 tbsp finely chopped Coriander leaves
2 tbsp finely chopped Mint leaves
3-4 Tbsp Olive Oil
1/2 tsp Sugar
Salt to taste
Pepper to taste

For the Black Rice:


1 cup Black Rice
2 cups Water
1/2 tsp Salt

Method:


To make the Mint Coriander Oil: 


Mix together all the ingredients and keep aside until assembling.

To make the Black Rice: 


Wash and drain the black rice.
Add water until covered and soak for 1 hour.
Drain the water.
Pressure cook the rice with 2 cups of water and salt until done but not mushy. You can cook it in a deep pot as well. Black rice takes longer to cook just like brown rice.
Fluff the rice with a fork and keep aside.

To make the Grilled Cauliflower: 


Mix together all the ingredients except the cauliflower to make a marinade.
Add in the cauliflower and rub the marinade. Keep aside for half hour.
Lay out on a baking sheet and grill in the oven for 12-15 minutes until the cauliflower is done.

To make the Summer Salad: 


Roughly dice the cucumber, onion and tomato.
Add the lime juice, olive oil, salt and pepper. Mix well.

To Assemble the Summer Bowl: 


Spoon the rice equally into bowls. Pour the mint coriander oil over the rice.
Place the roasted cauliflower and the salad over the rice.
Serve at room temperature or warm.

How to make grilled cauliflower recipe, spicy grilled cauliflower recipe, roasted cauliflower recipe, how to make black rice recipe, summer recipes, one bowl recipes at www.oneteaspoonoflife.com

Read more ...

Tendle Bibbe Upkari


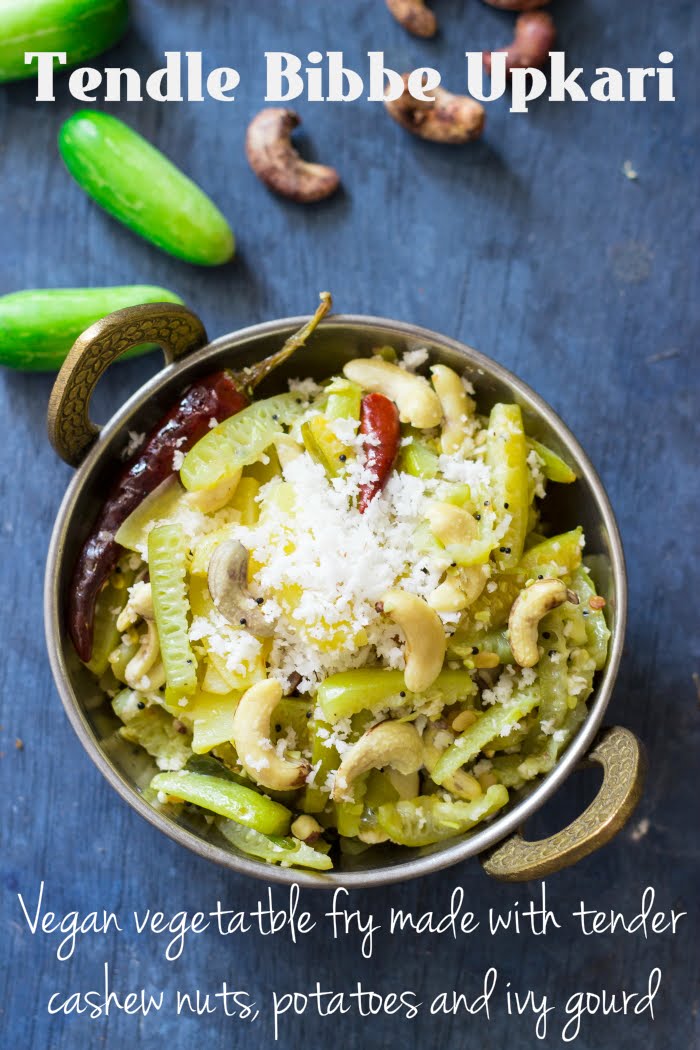
Fresh tender Cashew Nuts!!! This Konkani new year dish lets you enjoy the creamy tender nuts in a mild fry with ivy gourds and potatoes.

Konkani Recipes, how to make bibbe upkari recipe, how to cook tender cashew nuts, how to make tondekayee palya with cashew nuts recipe at www.oneteaspoonoflife.com

Konkani Recipes, how to make bibbe upkari recipe, how to cook tender cashew nuts, how to make tondekayee palya with cashew nuts recipe at www.oneteaspoonoflife.com

Fresh Cashew Nuts!! I cannot believe I was oblivious to their existence. Being Goan, my love for cashew nuts is obvious. But until today, all I had was dried cashew nuts, sometimes salted, mostly plain, sometimes flavored and once or twice, I have mustered courage to eat the fruit that causes throats to itch. Somehow, I totally missed getting on the fresh tender cashew nuts wagon, until now, of course. My friend Vindhya of A Million Morsels, introduced me to this tender creamy crunchy delicacy. 

So when Raj went to Karkala for an extended vacation for Ugadi (Hindu New Year), he got me these tender cashew nuts or bibbo/ bibbe. They are sold in packets of 50 or 100 and are very seasonal. They are usually sold around Ugadi as this Tendle Bibbe Upkari is a specialty for Ugadi in a Konkani household. If you cannot find tender cashew nuts, you can replace them with dried cashew nuts that have been soaked in water overnight or for 4-5 hours until they are nice and soft.

Konkani Recipes, how to make bibbe upkari recipe, how to cook tender cashew nuts, how to make tondekayee palya with cashew nuts recipe at www.oneteaspoonoflife.com

Upkari is a simple palya or a dry vegetable curry. It is also super healthy, low on oil, high on seasonal ingredients, barely any spices. It is a refreshing fresh dish fit for Summer.
Tendle or Tendli / Tondekayee or Ivy gourds is the fruit of a creeper. Tastes best when harvested when they are raw and tender and green. As they ripen, they become red and soft. Ripe tendle can be used to make Tondekayee Chutney. My luck shined when Raj got me home grown fresh tendle from Karkala. I am a big fan of anything home grown and organic. The tendle he got me were so tender and cooked so quickly. They were delicate and crisp, just the way I love them.

Potatoes, you can add them or you can leave them. Sometimes, if one cannot find tender cashews or not enough of them, the quantity of the upkari is increased by adding more potato. I put them in as everyone loves potatoes. 

Coconut, another homegrown ingredient in my cooking. I feel so lucky to get homegrown coconut. I don't grow them in Bangalore, but every time someone comes from Karkala, my mother in law makes it a point to send me coconuts grown at home. They are huge, sweet and juicy.. YUM!! The coconut here is much more than just a garnish, it is almost the heart of the dish that brings everything together. 

This Tendle Bibbe Upkari has very little in the way of spices, just mustard seeds, urad dal and red chillies with a sprig of curry leaves. It uses very little oil, it is mostly cooked in water. As I said, it is very healthy. Tendle Bibbe Upkari is eaten as a side along with rice and dal or with chapati.

Konkani Recipes, how to make bibbe upkari recipe, how to cook tender cashew nuts, how to make tondekayee palya with cashew nuts recipe at www.oneteaspoonoflife.com

Konkani Recipes, how to make bibbe upkari recipe, how to cook tender cashew nuts, how to make tondekayee palya with cashew nuts recipe at www.oneteaspoonoflife.com


If you made this recipe, let me know! Leave a comment here or on Facebook, tag your tweet with @oneteaspoonlife on Twitter and don't forget to tag your photo #oneteaspoonoflife on Instagram. You can also email me at onetspoflife@gmail.com. I'd love to see what you are upto. 

If you like this recipe, do not forget to share it with your friends and family! 

You can follow One Teaspoon Of Life is there on Facebook, Twitter, Instagram, Pinterest and Google+ or you can subscribe to One Teaspoon Of Life and receive all the latest updated via Email (How convenient!!)


If you liked this, you may also like:


Tendle Bibbe Upkari


Konkani Recipes, how to make bibbe upkari recipe, how to cook tender cashew nuts, how to make tondekayee palya with cashew nuts recipe at www.oneteaspoonoflife.comTendle Bibbe Upkari is a Konkani vegatable dish made with fresh tender cashew nuts, tendle or ivy gourd and potatoes. It is usually made during Ugadi.

Recipe Type:  Side
Cuisine:            Mangalore
Prep Time:     1 Hour
Cook time:     40 minutes
Yield:                Serves 3-4


Ingredients:


20-25 Tendle (Tondekayee or Ivy Gourd)
1 cup Bibbe or tender Cashew Nuts
1-2 Potatoes
3 tsp Oil
1/2 tsp Mustard Seeds
1/2 tsp Urad Dal
3-4 dry Red Chillies
2 Tbsp grated fresh Coconut
8-10 Curry leaves
Water as required
Salt to taste

Method:


Boil 2 cups of water. Remove from heat once it comes to a rolling boil.
Soak the cashew nuts (bibbe) in the hot water for 1 hour. This will help loosen the skin.
Peel the thin brown skin of the tender cashew nuts.
Wash the cashew nuts thoroughly and split them into halves.
Cut the tips of the tendle and slice it into thin slices.
Peel the potato and slice them to the same size as the tendle
Heat oil in a kadhai and add the mustard seeds.
Once the mustard seeds splutter, add the urad dal, curry leaves and the dry red chillies.
Fry until the urad dal changes colour.
Add the sliced tendle and 0.5 cup of water.
Cover and cook until the tendle are half done.
Add the sliced potato and the tender cashew nuts.
Cover and cook until the potato and tendle are done.
Add salt and mix well.
Garnish with grated coconut.
Serve hot with chapati.


Konkani Recipes, how to make bibbe upkari recipe, how to cook tender cashew nuts, how to make tondekayee palya with cashew nuts recipe at www.oneteaspoonoflife.com


Read more ...

Dill and Caramelized Onion Bread Rolls [Video]


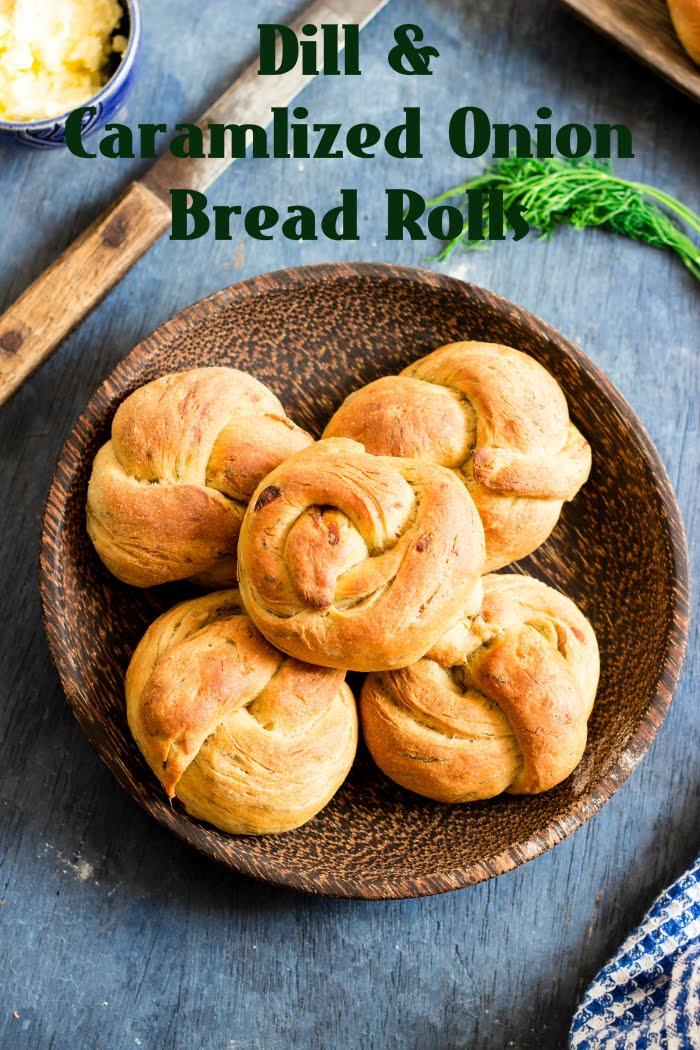
These Dill and Caramelized Onion Bread Rolls are sooo good, this is the ONLY recipe you will ever need for flavored bread rolls

How to make dill bread recipe, dill and onion bread recipe, eggless dill and onion bread recipe, how to bake bread rolls recipe, how to bake bread at www.OneTeaspoonOfLife.com


How to make dill bread recipe, dill and onion bread recipe, eggless dill and onion bread recipe, how to bake bread rolls recipe, how to bake bread at www.OneTeaspoonOfLife.com

Happy Sunday Guys!!

These Bread Rolls... YUMMMMMM....

If you take it from me, these Dill and Caramelized Onion Bread Rolls are the ONLY flavored bread rolls recipe you will ever need. I made this twice in one week. TWICE!!

I first made them on Sunday, last Sunday, and it was more of a trial batch. And then again on Wednesday. Never done that before. I'm more of a buy-bread-from-store types than bake bread from scratch person. I surprised myself by making it twice in a week. See, the thing was, Raj did not get to eat any on Sunday as he wasn't around. I had nice fresh warm bread from the oven and I had just made butter at home. Yes, I make butter at home almost every week, I just love fresh homemade butter so much. And among Gee and I, we wiped off the entire lot of 7 bread rolls. It was soooo GOOD!! Then I just felt bad that he did not get to even taste one, so I made it again in the week.

How to make dill bread recipe, dill and onion bread recipe, eggless dill and onion bread recipe, how to bake bread rolls recipe, how to bake bread at www.OneTeaspoonOfLife.com

I'd first seen a Dill and Onion bread roll recipe in an airline magazine. It used dill seeds and raw onions. Fresh Dill is so much easier to find than dill seeds here in Bangalore, so I swapped that. I love caramelized onions. They are soft, and brown and sweet. Yum! I never miss a chance to use them in a recipe and I always make extra to eat along in the week. This week, I stuffed some flatbread rolls with them. But if you are short of time, just saute the onions for 2-3 minutes and add them in the bread. I don't want you to miss out on eating this bread just because caramelizing onions takes time.
Or like me, you can make them in advance and keep them in the fridge, they stay good for one week in there.

There is one more cheat to save time here - Buy Paneer or Cottage cheese from the store. If buying frozen, let it thaw completely before using. Making Paneer at home can seem daunting, but it is the easiest cheese you can make at home. This recipe does not require you to make paneer completely, just the curds. Drain the curds and blend them into a smooth puree for this recipe. You can also replace with cream cheese.

How to make dill bread recipe, dill and onion bread recipe, eggless dill and onion bread recipe, how to bake bread rolls recipe, how to bake bread at www.OneTeaspoonOfLife.com

You know what's the best thing about these rolls? Taste, of course, but the aroma that fills your house when a fragrant herb like Dill is cooking is so heavenly. I just love Dill, and its sharp earthiness, it is my favorite green, right from childhood. 

Now that I've made these twice is such quick succession, I'm confident that this is my go to recipe for dinner rolls. They taste great with any gravy, but they taste BEST just by themselves. Slather on some butter and that's IT!! Soft, buttery, fragrant, salty rolls with that little hint of sweetness when you bite into a caramelized onion slice. What more do you really need?

How to make dill bread recipe, dill and onion bread recipe, eggless dill and onion bread recipe, how to bake bread rolls recipe, how to bake bread at www.OneTeaspoonOfLife.com

P.S - I have a bonus for you, a VIDEO recipe!!

Video Recipe


If you made this recipe, let me know! Leave a comment here or on Facebook, tag your tweet with @oneteaspoonlife on Twitter and don't forget to tag your photo #oneteaspoonoflife on Instagram. You can also email me at onetspoflife@gmail.com. I'd love to see what you are upto. 

If you like this recipe, do not forget to share it with your friends and family! 

You can follow One Teaspoon Of Life is there on Facebook, Twitter, Instagram, Pinterest and Google+ or you can subscribe to One Teaspoon Of Life and receive all the latest updated via Email (How convenient!!)


If you liked this, you may also like:


Dill and Caramelized Onion Bread Rolls


How to make dill bread recipe, dill and onion bread recipe, eggless dill and onion bread recipe, how to bake bread rolls recipe, how to bake bread at www.OneTeaspoonOfLife.comDill and Caramelized Onion Bread Rolls are fragrant flavorful bread rolls made with fresh cottage cheese, dill leaves and sweet caramelized onions.

Recipe Type:  Bread
Cuisine:            International
Prep Time:     3 Hours
Cook time:     1 Hour
Yield:                Makes 14 rolls

Ingredients:


For Caramelized Onions:


3 Onions
2 Tbsp Olive Oil
1 tsp Sugar or Jaggery
1-2 tsp Balsamic Vinegar
1 Tbsp Water
Pinch of salt

For Cottage Cheese / Paneer:


1 litre Milk
2 Tbsp Lime Juie
3-4 Tbsp Water

For the Dill and Caramelized Onion Bread Rolls:


2 cups Wholewheat flour (Atta)
1 cup All purpose flour (Maida)
1.25 cups Water
3-4 Tbsp chopped Dill leaves
2 tsp Active Dry Yeast
2 Tbsp Oil
Salt to taste

Method:


To make Caramelized Onions:


Heat oil in a pan and add sliced onions.
Sprinkle a pinch of salt and mix well.
Allow the onions to cook on medium to low heat until they are slightly brown.
Add sugar or jaggery and balsamic vinegar.
Add little water to prevent the onions from sticking to the pan.
Remove from heat once the onions are dark brown and sweet. This takes around 30-40 minutes.

To make Cottage Cheese / Paneer:


Boil the milk until it comes to a rolling boil.
Turn off the heat and immediately add the lime juice and mix well.
Once the milk curdles, strain it and keep aside for 15 minutes allowing the water to drain from the cheese curds.
Once the cheese cools, blend it along with a little water to a smooth puree.

To make the Dill and Caramelized Onion Bread Rolls:


Heat 1.5 Tbsp Oil in a pan and add 1/4 cup water.
Add the cheese puree, chopped dill and caramelized onions. Mix well.
Simmer on low heat for 3-4 minutes. Remove from heat and keep aside to cool.
Heat 3/4 cup of water until lukewarm. Add the active dry yeast to it and allow the yeast to bloom.
Once the cheese mixture is cool, pour it into a clean bowl and add the yeast.
Add salt, 1.5 cups whole wheat flour and the all purpose flour.
Knead until combined. Add more whole wheat flour if the dough is very sticky.
Take another large clean bowl and grease it slightly. Move the dough to it. Rub the dough with oil. Cover and allow it to rise for 1-2 hours until doubled.
Once the dough has risen, divide the dough into 14 equal balls.
Grease a baking tray. Shape the rolls and place on the baking tray leaving at least 1" gap between rolls.
Cover and allow it to rise a second time for around 45 mins to 1 hour.
Preheat the oven to 250 degree C.
Bake the rolls for 12-15 minutes until browned.


How to make dill bread recipe, dill and onion bread recipe, eggless dill and onion bread recipe, how to bake bread rolls recipe, how to bake bread at www.OneTeaspoonOfLife.com
Read more ...